2021 FORD F-350 instrument panel
[x] Cancel search: instrument panelPage 173 of 666
WARNING: Changes or
modifications not expressively approved
by the party responsible for compliance
could void the user's authority to operate
the equipment. The term "IC:" before the
radio certification number only signifies
that Industry Canada technical
specifications were met.
This device complies with Industry Canada
licence-exempt RSS standard(s).
Operation is subject to:
• This device may not cause interference.
• This device must accept any
interference, including interference that
may cause undesired operation of the
device.
Note: The charging performance may be
affected if your device is in a case. It may be
necessary to remove the case to wirelessly
charge your device.
The system supports one Qi wireless
charging compatible device on the
charging area.
Keep the charging area clean and remove
foreign objects prior to charging a device.
Do not place items with a magnetic strip,
for example passports, parking tickets or
credit cards, near the charging area when
charging a device. Damage may occur to
the magnetic strip. Do not place metal objects, for example
remote controls, coins and candy
wrappers, on or near the charging area
when charging a device. Metal objects may
heat up and degrade the charging
performance.
Note:
The rate of charge, or charging power,
is controlled by the device. During charging,
the device and the charger may heat up, this
is normal. If the battery gets hotter than
usual, the charger may stop charging. The charging area is on the
center console or lower
instrument panel.
See Center
Console (page 171).
You can charge a device if the vehicle is
on, when in accessory mode, or anytime
SYNC is on.
To begin charging, place the device on the
center of the charging surface with the
charging side down. The charging stops
after your device reaches a full charge.
Note: If the system detects a foreign object
or if the device is misaligned on the charging
area, a message appears in the display.
Note: Software and firmware updates may
affect device compatibility, including the
use of unofficial software or firmware. You
should verify charging functionality with your
specific devices when in your vehicle. Description
Behavior
Message
This message appears whenwireless charging begins.
Message on screen display
or pop-up window.
Wireless Charger Active
The system stops chargingyour device if the system detects the phone is
misaligned, or a foreign
metal object is on the char- ging surface.
Pop-up window.
Phone misaligned or object
between phone and charger
detected. Correct the condi- tion to resume charging.
170
Super Duty (TFE) Canada/United States of America, enUSA, Edition date: 202008, Third-Printing- Auxiliary Power PointsE297549
Page 216 of 666
USING FOUR-WHEEL DRIVE
Note:
For important information regarding
the safe operation of this type of vehicle,
see General Information in the Wheels and
Tires chapter.
Note: Do not use 4H or 4L mode on dry,
hard surfaced roads. Doing so can produce
excessive noise, increase tire wear and may
damage drive components. 4X4 mode is
only intended for consistently slippery or
loose surfaces. Use of 4L mode on these
surfaces may produce some noise, such as
occasional clunks, but will not damage drive
components.
Note: If 4X4 low is selected while the
vehicle is moving above 3 mph (5 km/h),
the 4WD system will not perform a shift.
This is normal and should be no reason for
concern. Refer to Shifting to or from 4L (4X4
Low) for proper operation.
Note: You can switch on and switch off the
electronic locking differential by pulling the
4WD control (4WD vehicles) or turning the
electronic locking differential control (2WD
vehicles). See
Electronic Locking
Differential (page 221).
Electronic Shift-On-the-Fly
(ESOF) 4WD system
(If Equipped)
Note: If 4X4 Low is selected while the
vehicle is moving above
3 mph (5 km/h),
the 4WD system will not perform a shift.
This is normal and should be no reason for
concern. Refer to Shifting to or from 4L (4X4
Low) for proper system operation.
Note: Auto-manual hub locks can be
manually locked by rotating the hub lock
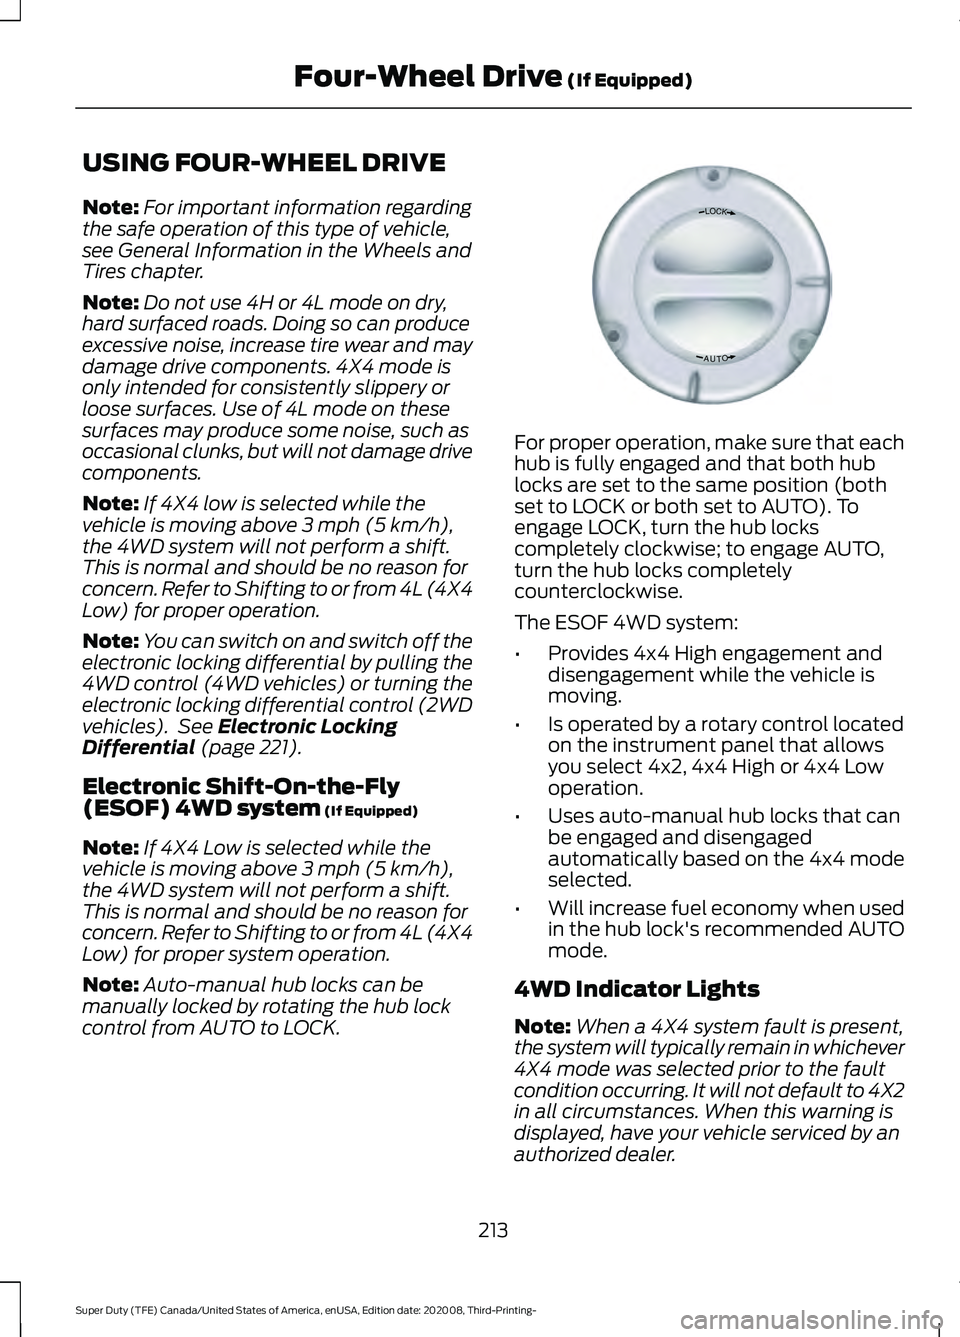
control from AUTO to LOCK. For proper operation, make sure that each
hub is fully engaged and that both hub
locks are set to the same position (both
set to LOCK or both set to AUTO). To
engage LOCK, turn the hub locks
completely clockwise; to engage AUTO,
turn the hub locks completely
counterclockwise.
The ESOF 4WD system:
•
Provides 4x4 High engagement and
disengagement while the vehicle is
moving.
• Is operated by a rotary control located
on the instrument panel that allows
you select 4x2, 4x4 High or 4x4 Low
operation.
• Uses auto-manual hub locks that can
be engaged and disengaged
automatically based on the 4x4 mode
selected.
• Will increase fuel economy when used
in the hub lock's recommended AUTO
mode.
4WD Indicator Lights
Note: When a 4X4 system fault is present,
the system will typically remain in whichever
4X4 mode was selected prior to the fault
condition occurring. It will not default to 4X2
in all circumstances. When this warning is
displayed, have your vehicle serviced by an
authorized dealer.
213
Super Duty (TFE) Canada/United States of America, enUSA, Edition date: 202008, Third-Printing- Four-Wheel Drive
(If Equipped)LOC K
OTUAE339076
Page 228 of 666
You can use this feature with tow/haul or
progressive range selection to provide
further increased engine braking. The
transmission automatically upshifts to
prevent the engine from entering the red
zone on the tachometer. See Automatic
Transmission (page 207).
HINTS ON DRIVING WITH
ANTI-LOCK BRAKES
The anti-lock brake system does not
eliminate the risks when:
• You drive too closely to the vehicle in
front of you.
• Your vehicle is hydroplaning.
• You take corners too fast.
• The road surface is poor.
Note: If the system activates, the brake
pedal could pulse and may travel further.
Maintain pressure on the brake pedal. You
may also hear a noise from the system. This
is normal.
PARKING BRAKE WARNING:
Always set the parking
brake fully and make sure the
transmission is placed in park (P). Failure
to set the parking brake and engage park
could result in vehicle roll-away, property
damage or bodily injury. Turn the ignition
to the lock position and remove the key
whenever you leave your vehicle.
Apply the parking brake whenever your
vehicle is parked. Press the pedal
downward to set the parking brake. The
brake warning lamp in the instrument
cluster will illuminate and remains
illuminated until the parking brake is
released. To release, pull the brake release lever
located at the lower left side of the
instrument panel.
If you are parking your vehicle on a grade
or with a trailer, press and hold the brake
pedal down, then set the parking brake.
There may be a little vehicle movement as
the parking brake sets to hold the vehicle's
weight. This is normal and should be no
reason for concern. If needed, press and
hold the service brake pedal down, then
try reapplying the parking brake. Chock the
wheels if required. If the parking brake
cannot hold the weight of the vehicle, the
parking brake may need to be serviced or
the vehicle may be overloaded.
HILL START ASSIST
WARNING:
The system does not
replace the parking brake. When you
leave your vehicle, always apply the
parking brake. WARNING:
You must remain in
your vehicle when the system turns on.
At all times, you are responsible for
controlling your vehicle, supervising the
system and intervening, if required.
Failure to take care may result in the loss
of control of your vehicle, serious
personal injury or death. WARNING:
The system will turn
off if a malfunction is apparent or if you
rev the engine excessively. Failure to take
care may result in the loss of control of
your vehicle, serious personal injury or
death.
The system makes it easier to pull away
when your vehicle is on a slope without the
need to use the parking brake.
225
Super Duty (TFE) Canada/United States of America, enUSA, Edition date: 202008, Third-Printing- Brakes
Page 230 of 666
PRINCIPLE OF OPERATION
The traction control system helps avoid
drive wheel spin and loss of traction.
If your vehicle begins to slide, the system
applies the brakes to individual wheels
and, when needed, reduces engine power
at the same time. If the wheels spin when
accelerating on slippery or loose surfaces,
the system reduces engine power in order
to increase traction.
USING TRACTION CONTROL
WARNING: The stability and
traction control light illuminates steadily
if the system detects a failure. Make sure
you did not manually disable the traction
control system using the information
display controls or the switch. If the
stability control and traction control light
is still illuminating steadily, have the
system serviced by an authorized dealer
immediately. Operating your vehicle with
the traction control disabled could lead
to an increased risk of loss of vehicle
control, vehicle rollover, personal injury
and death.
The system automatically turns on each
time you switch the ignition on.
If your vehicle is stuck in mud or snow,
switching traction control off may be
beneficial as this allows the wheels to spin.
Note: When you switch traction control off,
stability control remains fully active.
Note: For additional information on the
traction and stability control systems. See
Using Stability Control
(page 229). Switching the System Off
When you switch the system off or on, a
message appears in the information
display showing system status.
Use the traction and stability control
switch on the instrument panel to switch
the system off or on.
The switch illuminates when traction
control is off.
When you place your vehicle into
four-wheel drive low mode the traction
control disables. Traction control resumes
full operation when you put your vehicle
back into two-wheel drive mode.
System Indicator Lights and
Messages
The stability and traction control
light:
• Temporarily illuminates on engine
start-up.
• Flashes when a driving condition
activates either of the systems.
• Illuminates if a problem occurs in either
of the systems. The stability and traction control
off light temporarily illuminates
on engine start-up and stays on
when you switch the traction control
system off.
227
Super Duty (TFE) Canada/United States of America, enUSA, Edition date: 202008, Third-Printing- Traction ControlE225465 E225466
Page 232 of 666
Roll Stability Control
The system enhances your vehicle
’s ability
to prevent rollovers by detecting your
vehicle ’s roll motion and the rate at which
it changes by applying the brakes to one
or more wheels individually.
Traction Control
The system enhances your vehicle ’s ability
to maintain traction of the wheels by
detecting and controlling wheel spin. See
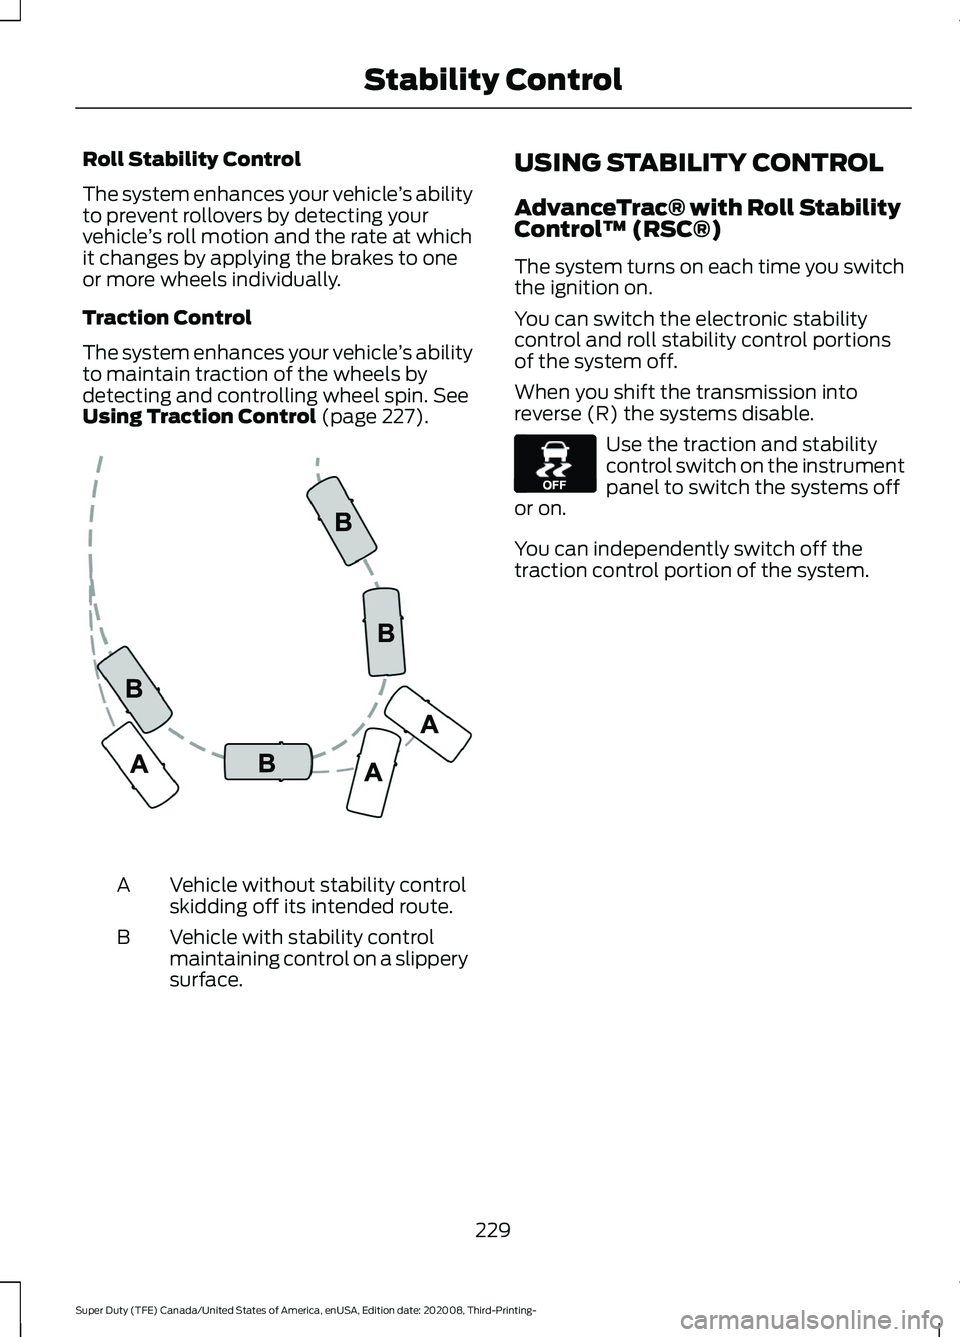
Using Traction Control (page 227). Vehicle without stability control
skidding off its intended route.
A
Vehicle with stability control
maintaining control on a slippery
surface.
B USING STABILITY CONTROL
AdvanceTrac® with Roll Stability
Control
™ (RSC®)
The system turns on each time you switch
the ignition on.
You can switch the electronic stability
control and roll stability control portions
of the system off.
When you shift the transmission into
reverse (R) the systems disable. Use the traction and stability
control switch on the instrument
panel to switch the systems off
or on.
You can independently switch off the
traction control portion of the system.
229
Super Duty (TFE) Canada/United States of America, enUSA, Edition date: 202008, Third-Printing- Stability ControlE72903 E130458
Page 235 of 666
PRINCIPLE OF OPERATION
WARNING: Hill descent control
cannot control descent in all surface
conditions and circumstances, such as
ice or extremely steep grades. Hill
descent control is a driver assist system
and cannot substitute for good judgment
by the driver. Failure to do so may result
in loss of vehicle control, crash or serious
injury. WARNING:
The system does not
replace the parking brake. When you
leave your vehicle, always apply the
parking brake and shift the transmission
into park (P) for automatic transmission
or first gear for manual transmission.
Hill descent control allows the driver to set
and maintain vehicle speed while
descending steep grades in various surface
conditions.
Hill descent control can maintain vehicle
speeds on downhill grades between 2 mph
(3 km/h)
and 12 mph (20 km/h). Above
20 mph (32 km/h), the system remains
armed, but descent speed cannot be set
or maintained.
Hill descent control requires a cooling
down interval after a period of sustained
use. The amount of time that the feature
can remain active before cooling varies
with conditions. The system will provide
a warning in the message center and a
chime will sound when the system is about
to disengage for cooling. At this time,
manually apply the brakes as needed to
maintain descent speed. USING HILL DESCENT
CONTROL Press and release the hill
descent button on the
instrument panel. A light in the
cluster illuminates and a tone sounds
when this feature is activated.
To increase descent speed, press the
accelerator pedal until the desired speed
is reached. To decrease descent speed,
press the brake pedal until the desired
speed is reached.
Whether accelerating or decelerating, once
the desired descent speed is reached,
remove your feet from the pedals and the
chosen vehicle speed is maintained.
Note: Noise from the ABS pump motor may
be observed during hill descent control
operation. This is a normal characteristic of
the ABS and should be no reason for
concern.
Hill Descent Modes
• At speeds below
20 mph (32 km/h):
When the hill descent control switch is
pressed and hill descent control is
active, the hill descent control telltale
flashes.
• At speeds below
20 mph (32 km/h):
When the hill descent control switch is
pressed and conditions are not correct
for hill descent activation, the hill
descent control system is enabled and
the hill descent control telltale is solid.
A message displays in the information
display.
• At speeds above
20 mph (32 km/h):
When the hill descent control switch is
pressed, the hill descent control
system is enabled, the telltale in the
cluster is not illuminated and a
message is displayed in the information
display.
232
Super Duty (TFE) Canada/United States of America, enUSA, Edition date: 202008, Third-Printing- Terrain Control
(If Equipped)E163957
Page 241 of 666
When shifting the transmission out of
reverse (R) and into any gear other than
park (P), the camera image remains in the
display until:
•
Your vehicle speed sufficiently
increases.
• You shift your vehicle into park (P).
• You apply the parking brake on vehicles
with a manual transmission.
360 DEGREE CAMERA (IF
EQUIPPED) WARNING:
The 360 degree
camera system still requires the driver
to use it in conjunction with looking out
of the windows, and checking the interior
and exterior mirrors for maximum
coverage. WARNING:
Objects that are close
to either corner of the bumper or under
the bumper, might not be seen on the
screen due to the limited coverage of the
camera system. WARNING:
Use caution when
turning camera features on or off when
the transmission is not in park (P). Make
sure your vehicle is not moving.
Note: The 360 degree camera system turns
off when your vehicle is in motion at low
speed, except when in reverse (R).
The 360 degree camera system consists
of front, side and rear cameras. The
system:
• Allows you to see what is directly in
front or behind your vehicle.
• Provides cross traffic view in front and
behind your vehicle. •
Allows you to see a top-down view of
the area outside your vehicle, including
the blind spots.
• Provides visibility around your vehicle
to you in parking maneuvers such as:
•Centering in a parking space.
• Obstacles near vehicle.
• Parallel parking.
Camera Views The camera button is located on
the instrument panel. Pressing
the camera button activates the
system.
When in park (P), neutral (N) or drive (D),
only images from the front cameras are
displayed. Press the camera button to
display the front camera image on the
display screen.
When in drive (D) at speeds greater than
6 mph (10 km/h)
, properly equipped
vehicles can access two camera views. By
pressing the camera button on the
instrument panel, the rear high view
camera and auxiliary camera can be
viewed.
When in reverse (R), only images from the
rear cameras are displayed. When you shift
into reverse (R), the rear view camera
image automatically shows on the display
screen.
Advanced Camera Views
(If Equipped) Additional camera views may be
available for vehicles with
specific features. Press the small
camera icon shown on the top left corner
of the display screen to open the camera
view menu.
238
Super Duty (TFE) Canada/United States of America, enUSA, Edition date: 202008, Third-Printing- Parking AidsE205884 E233726
Page 329 of 666
Vehicles Sold in Canada: Getting
Roadside Assistance
To fully assist you should you have a
vehicle concern, Ford Motor Company of
Canada, Limited offers a complimentary
roadside assistance program. This program
is eligible within Canada or the continental
United States.
The service is available 24 hours a day,
seven days a week.
This program is separate from the New
Vehicle Limited Warranty, but the coverage
is concurrent with the powertrain coverage
period of your vehicle. Canadian roadside
coverage and benefits may differ from the
U.S. coverage.
If you require more information, please call
us in Canada at 1-800-665-2006, or visit
our website at www.ford.ca.
HAZARD FLASHERS
Note:
The hazard flashers operate when
the ignition is in any position, or if the key is
not in the ignition. If used when the vehicle
is not running, the battery loses charge. As
a result, there may be insufficient power to
restart your vehicle. The flasher control is on the
instrument panel. Use your
hazard flashers when your
vehicle is creating a safety hazard for other
motorists.
• Press the flasher control and all front
and rear direction indicators flash.
• Press the button again to switch them
off. FUEL SHUTOFF WARNING: If your vehicle has been
involved in a crash, have the fuel system
checked. Failure to follow this instruction
could result in fire, personal injury or
death.
Note: When you try to restart your vehicle
after a fuel shutoff, the vehicle makes sure
that various systems are safe to restart.
Once the vehicle determines the systems
are safe, then the vehicle allows you to
restart.
Note: In the event that your vehicle does
not restart after your third attempt, contact
a qualified technician.
The fuel pump shutoff stops the flow of
fuel to the engine in the event of a
moderate to severe crash. Not every
impact causes a shutoff.
Should your vehicle shut off after a crash,
you may restart your vehicle.
If your vehicle has a key system:
1. Switch off the ignition.
2. Switch to start position.
3. Switch off the ignition.
4. Switch on the ignition to re-enable the
fuel pump.
5. If the vehicle does not start, repeat steps 1 through 4.
If your vehicle has a push button start
system:
1. Press START/STOP to switch off your
vehicle.
2. Press the brake pedal and START/STOP
to switch on your
vehicle.
3. Remove your foot from the brake pedal
and press
START/STOP to switch off
your vehicle.
326
Super Duty (TFE) Canada/United States of America, enUSA, Edition date: 202008, Third-Printing- Roadside Emergencies