2021 FORD BRONCO SPORT stop start
[x] Cancel search: stop startPage 172 of 471
Manual Park Release
WARNING: When doing this
procedure, you need to take the
transmission out of park (P) which
means your vehicle can roll freely. To
avoid unwanted vehicle movement,
always fully apply the parking brake prior
to doing this procedure. Use wheel
chocks if appropriate. WARNING:
If the parking brake is
fully released, but the brake warning
lamp remains illuminated, the brakes
may not be working properly. Have your
vehicle checked as soon as possible. WARNING:
Do not drive your
vehicle until you verify that the
stoplamps are working.
Use the manual park release to move your
transmission from the park (P) position in
the event of an electrical malfunction or
emergency.
Activating the Manual Park Release
Cable
1. Apply the parking brake. See Electric
Parking Brake
(page 177).
Note: If the vehicle battery is dead, for
example, no electrical power is available,
you could use an external power source to
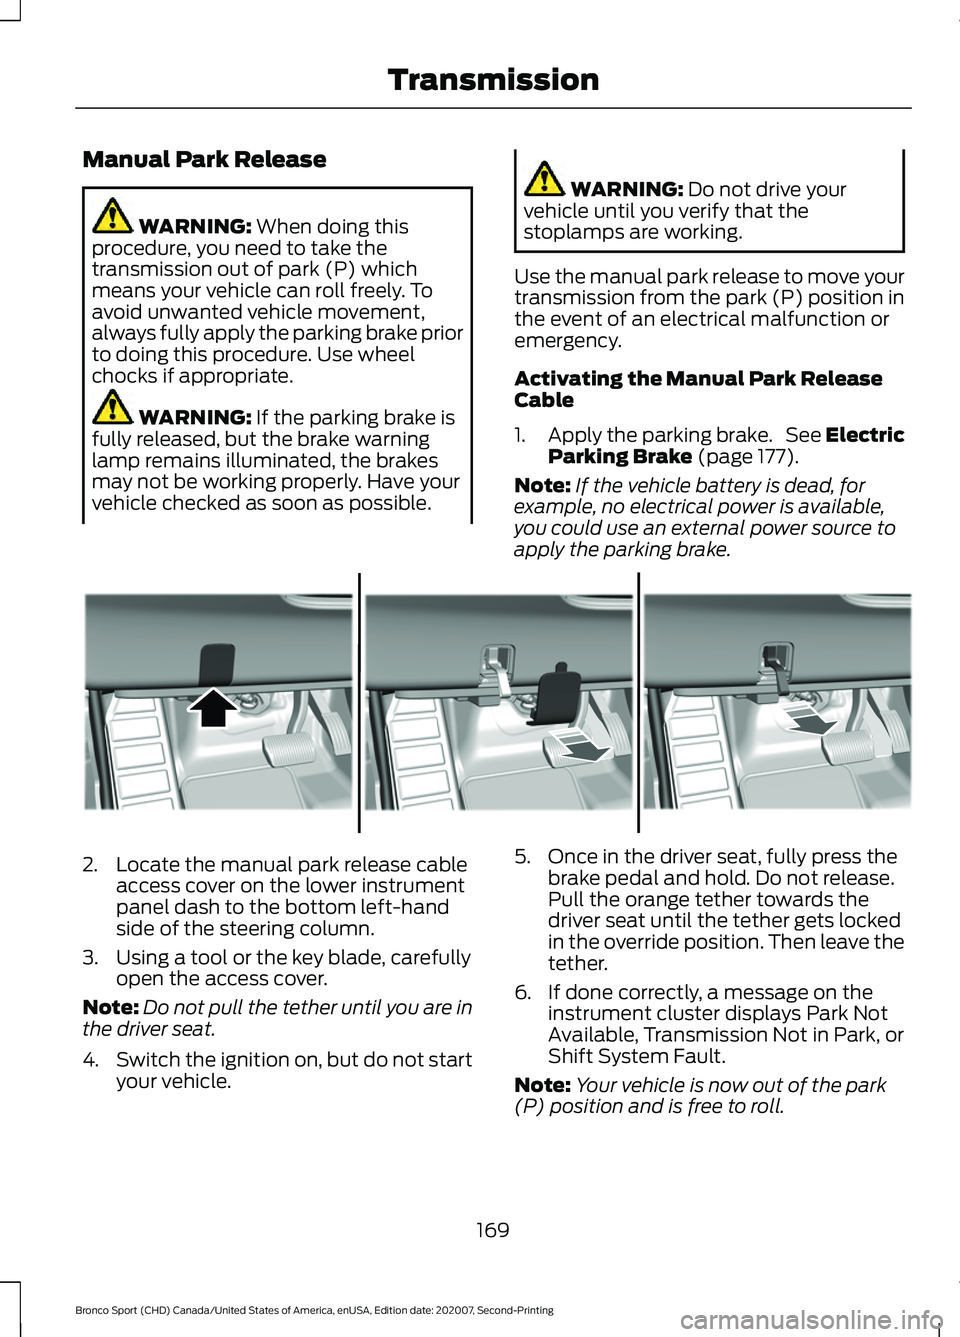
apply the parking brake. 2. Locate the manual park release cable
access cover on the lower instrument
panel dash to the bottom left-hand
side of the steering column.
3. Using a tool or the key blade, carefully open the access cover.
Note: Do not pull the tether until you are in
the driver seat.
4. Switch the ignition on, but do not start
your vehicle. 5. Once in the driver seat, fully press the
brake pedal and hold. Do not release.
Pull the orange tether towards the
driver seat until the tether gets locked
in the override position. Then leave the
tether.
6. If done correctly, a message on the instrument cluster displays Park Not
Available, Transmission Not in Park, or
Shift System Fault.
Note: Your vehicle is now out of the park
(P) position and is free to roll.
169
Bronco Sport (CHD) Canada/United States of America, enUSA, Edition date: 202007, Second-Printing TransmissionE307867
Page 182 of 471
developed sufficient torque to prevent your
vehicle from rolling down the slope. This
is an advantage when pulling away on a
slope, for example from a car park ramp,
traffic lights or when reversing uphill into
a parking space.
The system activates on any slope that
causes your vehicle to roll.
Note:
There is no warning light to indicate
the system is either on or off.
Using Hill Start Assist
1. Press the brake pedal to bring your vehicle to a complete standstill. Keep
the brake pedal pressed and shift into
first gear when facing uphill or reverse
(R) when facing downhill.
2. If the sensors detect that your vehicle is on a slope, the system activates
automatically.
3. When you remove your foot from the brake pedal, your vehicle remains on
the slope without rolling away for
about two to three seconds. This hold
time automatically extends if you are
in the process of driving off.
4. Drive off in the normal manner. The system releases the brakes
automatically.
Note: When you remove your foot from the
brake pedal and press the pedal again when
the system is active, you will experience
significantly reduced brake pedal travel. This
is normal.
Switching the System On and Off
When you switch the ignition on, the
system automatically turns on. You cannot
turn the system on or off. AUTO HOLD WARNING: The system does not
replace the parking brake. When you
leave your vehicle, always apply the
parking brake. WARNING:
You must remain in
your vehicle when the system turns on.
At all times, you are responsible for
controlling your vehicle, supervising the
system and intervening, if required.
Failure to take care may result in the loss
of control of your vehicle, serious
personal injury or death. WARNING:
The system turns off if
there is a malfunction or if you
excessively rev the engine.
The system applies the brakes to hold your
vehicle at a standstill after you stop your
vehicle and release the brake pedal. This
could be beneficial in certain situations, for
example when waiting on a hill or in traffic.
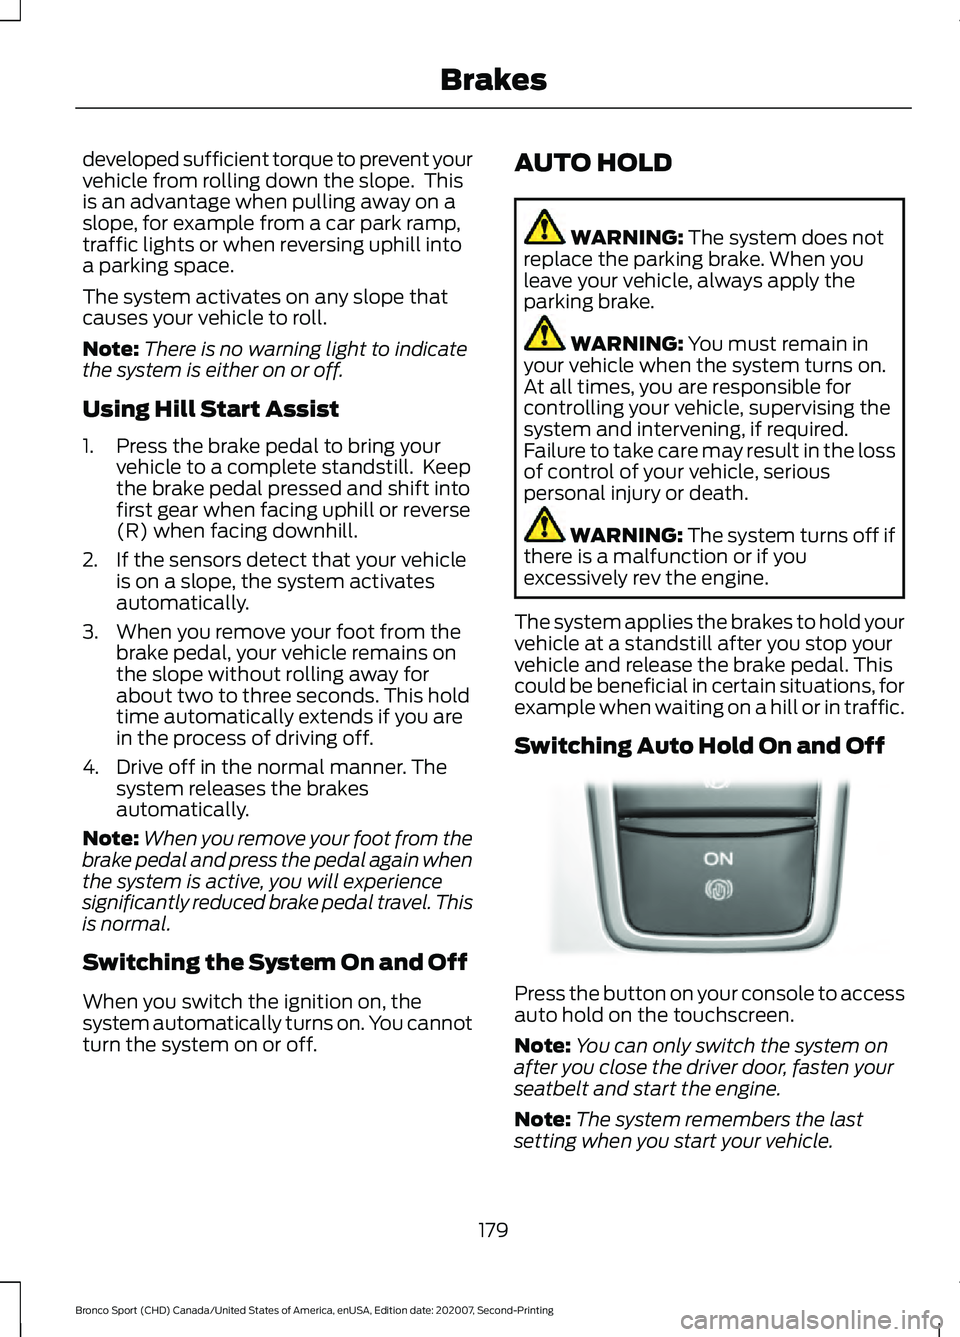
Switching Auto Hold On and Off Press the button on your console to access
auto hold on the touchscreen.
Note:
You can only switch the system on
after you close the driver door, fasten your
seatbelt and start the engine.
Note: The system remembers the last
setting when you start your vehicle.
179
Bronco Sport (CHD) Canada/United States of America, enUSA, Edition date: 202007, Second-Printing BrakesE319161
Page 183 of 471
Make sure you switch the system off before
towing with your vehicle or before using an
automatic car wash.
Using Auto Hold
1. Use the brakes to bring your vehicle to
a complete stop. The auto hold active
indicator illuminates in the information
display.
2. Release the brake pedal. The system holds your vehicle at a standstill. The
auto hold active indicator remains
illuminated in the information display.
Note: The system only activates if you
apply enough brake pressure. If your vehicle
is on a steep slope, you need to press the
brake pedal harder before the system
activates.
Note: Under certain conditions, the system
could apply the electric parking brake. The
brake system warning lamp illuminates. The
electric parking brake releases when you
press the accelerator pedal. See Electric
Parking Brake (page 177).
Note: If auto-start-stop turns off the
engine, auto hold remains active.
Note: The system deactivates if you shift
into reverse (R) and press the brake pedal.
3. Pull away in the normal manner. The system releases the brakes and the
auto hold active indicator turns off.
Auto Hold Indicator The auto hold indicator
illuminates in the information
display when the system is on
and is either active or
unavailable.
Illuminates when the system is active. Your
vehicle remains stationary after you
release the brake pedal. Illuminates when the system is on but
unavailable to hold your vehicle at a
standstill.
The system could be unavailable when any
of the following occur:
•
During an active park assist maneuver.
• Your vehicle is in stay in neutral mode.
• The driver door is open.
• You do not fasten your seatbelt.
• You shift into reverse (R) before the
system is active.
180
Bronco Sport (CHD) Canada/United States of America, enUSA, Edition date: 202007, Second-Printing Brakes
Page 206 of 471

Activating Lane Centering
The system only activates when all of the
following occur:
•
You have adaptive cruise control with
stop-and-go on.
• Your hands are on the steering wheel.
• The system detects both lane
markings.
Note: If it does not detect valid lane
markings, the system stays inactive until
valid markings are available.
You can override the system at any time
by steering your vehicle.
If you drive off-center within the lane, the
system sets and maintains that preferred
lane position. The system provides
continuous assistance steering torque
input toward the preferred position.
Note: The system can only set preferred
lane positions within the lane.
Note: If the system cancels, the preferred
position erases. On the next activation, the
system provides continuous assistance
steering torque input toward the lane center.
System Alerts and Automatic
Cancellation
You must keep your hands on the steering
wheel at all times.
When the system is active and detects no
steering activity for a certain period of time,
the system alerts you to put your hands on
the steering wheel. If you do not react to
the warnings the system cancels and slows
your vehicle down to idle speeds while
maintaining steering control.
The system also alerts you if your vehicle
crosses lane markings without detected
steering activity.
Note: The system may detect a light grip
or touch on the steering wheel as hands-off
driving. When an external condition cancels the
system, for example, no lane markings
available, a tone sounds and a message
appears in the information display. If your vehicle starts to slow
down, you must contribute to
the steering control and press
and release the button to regain full
system performance.
Automatic cancellation can also occur if:
• The lane becomes too wide or too
narrow.
• The system cannot detect valid lane
markings.
• Lane markings are crossed.
Note: The system disables until the next
key cycle if your vehicle slows down due to
driver inactivity twice within a key cycle.
SWITCHING INTELLIGENT
MODE ON AND OFF (IF EQUIPPED) WARNING: You are responsible for
controlling your vehicle at all times. The
system is designed to be an aid and does
not relieve you of your responsibility to
drive with due care and attention. Failure
to follow this instruction could result in
the loss of control of your vehicle,
personal injury or death.
Use the touchscreen to select the
following:
1. Select
Settings. See Settings (page
378).
2. Select
Driver Assist..
3. Select
Cruise Control.
203
Bronco Sport (CHD) Canada/United States of America, enUSA, Edition date: 202007, Second-Printing Adaptive Cruise Control
(If Equipped)
Page 242 of 471
Trailer Lamps
WARNING: Never connect any
trailer lamp wiring to the vehicle's tail
lamp wiring; this may damage the
electrical system resulting in fire. Contact
your authorized dealer as soon as
possible for assistance in proper trailer
tow wiring installation. Additional
electrical equipment may be required.
Trailer lamps are required on most towed
vehicles. Make sure all running lights, brake
lights, turn signals and hazard lights are
working.
Before Towing a Trailer
Practice turning, stopping and backing up
to get the feel of your vehicle-trailer
combination before starting on a trip.
When turning, make wider turns so the
trailer wheels clear curbs and other
obstacles.
When Towing a Trailer
• Do not drive faster than
70 mph
(113 km/h) during the first 500 mi
(800 km).
• Do not make full-throttle starts.
• Check your hitch, electrical connections
and trailer wheel lug nuts thoroughly
after you have traveled 50 mi (80 km).
• When stopped in congested or heavy
traffic during hot weather, place the
transmission in park (P) to aid engine
and transmission cooling and to help
A/C performance.
• Turn off the speed control with heavy
loads or in hilly terrain. The speed
control may turn off automatically
when you are towing on long, steep
grades. •
Shift to a lower gear when driving down
a long or steep hill. Do not apply the
brakes continuously, as they may
overheat and become less effective.
• If your transmission is equipped with a
Grade Assist or Tow/Haul feature, use
this feature when towing. This provides
engine braking and helps eliminate
excessive transmission shifting for
optimum fuel economy and
transmission cooling.
• Allow more distance for stopping with
a trailer attached. Anticipate stops and
brake gradually.
• Avoid parking on a grade. However, if
you must park on a grade:
1. Turn the steering wheel to point your vehicle tires away from traffic flow.
2. Set your vehicle parking brake.
3. Place the automatic transmission in park (P).
4. Place wheel chocks in front and back of the trailer wheels. Chocks are not
included with your vehicle.
Launching or Retrieving a Boat or
Personal Watercraft (PWC)
Note: Disconnect the wiring to the trailer
before
backing the trailer into the water.
Note: Reconnect the wiring to the trailer
after
removing the trailer from the water.
When backing down a ramp during boat
launching or retrieval:
• Do not allow the static water level to
rise above the bottom edge of the rear
bumper.
• Do not allow waves to break higher
than
6 in (15 cm) above the bottom
edge of the rear bumper.
239
Bronco Sport (CHD) Canada/United States of America, enUSA, Edition date: 202007, Second-Printing Towing
Page 245 of 471
Look ahead on your route noting upcoming
obstacles, surface texture or color changes
or any other factors which may indicate a
change in available traction. Adjust the
vehicle speed and route to avoid a loss in
traction. Conditions can change causing
the course to vary day to day. Mark
obstacles with GPS markers to avoid
potential vehicle damage. Where
necessary, get out of your vehicle and
check the terrain.
When driving off-road, if the front or rear
suspension is bottoming-out or excessive
contact with the skid-plates is happening,
reduce the vehicle's speed to avoid
potential damage to your vehicle.
If you are driving in a dusty area, be sure to
leave ample distance between your vehicle
and any other vehicles to allow for
adequate vision.
When driving off-road verify that your
wipers and washers are working properly
and reduce your speed for better visibility.
When driving in desert conditions, we
recommend driving with your headlamps
on to help other drivers easily see you.
When convoying with other vehicles, we
recommend that communication is used,
and the lead vehicle notify other vehicles
of upcoming obstacles.
Keep available ground clearance in mind
and pick a route that minimizes the risk of
catching the underside of the vehicle on
an obstacle.
When negotiating low speed obstacles,
applying light brake pressure in conjunction
with the throttle allows you to negotiate
the obstacle in a more controlled manner.
Driving off-road requires a high amount of
concentration. Even if your local law does
not prohibit drinking alcohol when driving
off-road we do not recommend it.
Driving Off-Road
Driving In Snow and Ice WARNING: If you are driving in
slippery conditions that require tire
chains or cables, then it is critical that
you drive cautiously. Keep speeds down,
allow for longer stopping distances and
avoid aggressive steering to reduce the
chances of a loss of vehicle control
which can lead to serious injury or death.
If the rear end of your vehicle slides while
cornering, steer in the direction of the
slide until you regain control of your
vehicle.
Four-wheel drive vehicles have advantages
over two-wheel drive vehicles in snow and
ice but can skid like any other vehicle. If
your vehicle slides when driving on snowy
or icy roads, turn the steering wheel in the
direction of the slide until you regain
control. Avoid sudden applications of
power and quick changes of direction on
snow and ice. Slowly and steadily apply
the accelerator when starting from a full
stop. Avoid sudden braking. WARNING:
Do not become
overconfident in the ability of four-wheel
drive vehicles. Although a four-wheel
drive vehicle may accelerate better than
a two-wheel drive vehicle in low traction
situations, it won't stop any faster than
two-wheel drive vehicles. Always drive
at a safe speed.
Make sure you allow sufficient distance
between your vehicle and other vehicles
for stopping.
In emergency stopping situations, do not
pump the brake pedal, apply the brake
firmly.
242
Bronco Sport (CHD) Canada/United States of America, enUSA, Edition date: 202007, Second-Printing Driving Hints
Page 247 of 471
When climbing a steep slope or hill, start
in a lower gear rather than downshifting to
a lower gear from a higher gear. This
reduces strain on the engine and the
possibility of stalling.
If your vehicle stalls, do not try to turn
around because this could cause your
vehicle to roll over. It is better to reverse
back to a safe location.
Do not drive over the crest of a hill without
seeing what conditions are on the other
side. Do not drive in reverse over a hill
without the aid of an observer.
If the vehicle is unable to make it up the
hill, do not attempt to turn back down the
slope.
Apply the accelerator just enough for the
wheels to climb the hill.
Note:
Too much acceleration can cause
the tires to slip, spin or lose traction,
resulting in loss of vehicle control.
Descending A Hill:
• Use the same gear you would use to
climb the hill.
• Do not descend in neutral.
• Disengage overdrive.
• Avoid sudden and excessive braking.
Note: The front wheels have to be turning
in order to steer your vehicle.
When descending a steep hill in a manual
transmission vehicle do not leave the
vehicle in gear with the clutch depressed.
This could cause damage to your driveline.
Driving Through Water WARNING: Do not attempt to
cross a deep, fast flowing body of water.
Failure to follow this instruction could
result in the loss of control of your
vehicle, personal injury or death. As the water depth increases, you must
reduce your vehicle speed to avoid
potential vehicle damage.
The key to a safe crossing is the water
depth, current and bottom of the water's
condition. On soft bottoms, the vehicle
sinks in, effectively increasing the water
level on the vehicle. Make sure to consider
this when determining the depth of water.
Determine the depth and speed of the
current before attempting a water crossing.
Be aware that obstacles and debris may
be beneath the water
’s surface.
Note: Cross flowing water at an angle
heading slightly upstream.
Note: You should tread lightly and avoid
damage to the environment.
Drive slow when crossing water. Proceed
with a constant slow speed lightly pressing
on the accelerator.
Drive through the water very slowly when
entering, then build up momentum. Keep
your vehicle moving at a steady pace.
Note: Do not try to accelerate through the
water crossing.
When driving too fast in water or through
deep water, the engine, transmission,
transfer case, axles, electrical components
or vehicle interior could ingest water. Water
can cause permanent damage that may
not be covered by your vehicle warranty.
See
Driving Through Water Limitations
(page 246).
Note: Failure to follow the recommended
speeds can result in vehicle damage.
Never stop or shut a vehicle off when
crossing deep water unless your vehicle
ingested water into the engine air intake.
If the engine stalls, do not attempt to
restart it.
244
Bronco Sport (CHD) Canada/United States of America, enUSA, Edition date: 202007, Second-Printing Driving Hints
Page 254 of 471
Vehicles Sold in Canada: Getting
Roadside Assistance
To fully assist you should you have a
vehicle concern, Ford Motor Company of
Canada, Limited offers a complimentary
roadside assistance program. This program
is eligible within Canada or the continental
United States.
The service is available 24 hours a day,
seven days a week.
This program is separate from the New
Vehicle Limited Warranty, but the coverage
is concurrent with the powertrain coverage
period of your vehicle. Canadian roadside
coverage and benefits may differ from the
U.S. coverage.
If you require more information, please call
us in Canada at 1-800-665-2006, or visit
our website at www.ford.ca.
HAZARD FLASHERS
Note:
The hazard flashers operate when
the ignition is in any position, or if the key is
not in the ignition. If used when the vehicle
is not running, the battery loses charge. As
a result, there may be insufficient power to
restart your vehicle. The flasher control is on the
instrument panel. Use your
hazard flashers when your
vehicle is creating a safety hazard for other
motorists.
• Press the flasher control and all front
and rear direction indicators flash.
• Press the button again to switch them
off. FUEL SHUTOFF WARNING: If your vehicle has been
involved in a crash, have the fuel system
checked. Failure to follow this instruction
could result in fire, personal injury or
death.
Note: When you try to restart your vehicle
after a fuel shutoff, the vehicle makes sure
that various systems are safe to restart.
Once the vehicle determines the systems
are safe, then the vehicle allows you to
restart.
Note: In the event that your vehicle does
not restart after your third attempt, contact
a qualified technician.
The fuel pump shutoff stops the flow of
fuel to the engine in the event of a
moderate to severe crash. Not every
impact causes a shutoff.
Should your vehicle shut off after a crash,
you may restart your vehicle.
If your vehicle has a key system:
1. Switch off the ignition.
2. Switch to start position.
3. Switch off the ignition.
4. Switch on the ignition to re-enable the
fuel pump.
5. If the vehicle does not start, repeat steps 1 through 4.
If your vehicle has a push button start
system:
1. Press START/STOP to switch off your
vehicle.
2. Press the brake pedal and START/STOP
to switch on your
vehicle.
3. Remove your foot from the brake pedal
and press
START/STOP to switch off
your vehicle.
251
Bronco Sport (CHD) Canada/United States of America, enUSA, Edition date: 202007, Second-Printing Roadside Emergencies