2021 FORD BRONCO SPORT spare tire
[x] Cancel search: spare tirePage 320 of 471
A dissimilar spare wheel and tire assembly
is defined as a spare wheel and tire
assembly that is different in brand, size or
appearance from the road tires and wheels
and can be one of three types:
1.
T-type mini-spare: This spare tire
begins with the letter T for tire size and
may have Temporary Use Only molded in
the sidewall.
2. Full-size dissimilar spare with label
on wheel:
This spare tire has a label on
the wheel that states: THIS WHEEL AND
TIRE ASSEMBLY FOR TEMPORARY USE
ONLY.
When driving with one of the dissimilar
spare tires listed above, do not:
• Exceed
50 mph (80 km/h).
• Load the vehicle beyond maximum
vehicle load rating listed on the Safety
Compliance Label.
• Tow a trailer.
• Use snow chains on the end of the
vehicle with the dissimilar spare tire.
• Use more than one dissimilar spare tire
at a time.
• Use commercial car washing
equipment.
• Try to repair the dissimilar spare tire.
Use of one of the dissimilar spare tires
listed above at any one wheel location can
lead to impairment of the following:
• Handling, stability and braking
performance.
• Comfort and noise.
• Ground clearance and parking at curbs.
• Winter weather driving capability.
• Wet weather driving capability.
• All-wheel driving capability
3. Full-size dissimilar spare without
label on wheel When driving with the full-size dissimilar
spare wheel and tire assembly, do not:
•
Exceed
70 mph (113 km/h).
• Use more than one dissimilar spare
wheel and tire assembly at a time.
• Use commercial car washing
equipment.
• Use snow chains on the end of the
vehicle with the dissimilar spare wheel
and tire assembly.
The usage of a full-size dissimilar spare
wheel and tire assembly can lead to
impairment of the following:
• Handling, stability and braking
performance.
• Comfort and noise.
• Ground clearance and parking at curbs.
• Winter weather driving capability.
• Wet weather driving capability.
• Four-wheel driving capability.
When driving with the full-size dissimilar
spare wheel and tire assembly additional
caution should be given to:
• Towing a trailer.
• Driving vehicles equipped with a
camper body.
• Driving vehicles with a load on the
cargo rack.
Drive cautiously when using a full-size
dissimilar spare wheel and tire assembly
and seek service as soon as possible.
Tire Change Procedure WARNING:
The jack supplied with
this vehicle is only intended for changing
wheels. Do not use the vehicle jack other
than when you are changing a wheel in
an emergency.
317
Bronco Sport (CHD) Canada/United States of America, enUSA, Edition date: 202007, Second-Printing Wheels and Tires
Page 321 of 471
WARNING: Check that the vehicle
jack is not damaged or deformed and
the thread is lubricated and clean. WARNING: To help prevent your
vehicle from moving when changing a
wheel, shift the transmission into park
(P), set the parking brake and use an
appropriate block or wheel chock to
secure the wheel diagonally opposite to
the wheel being changed. For example,
when changing the front left wheel,
place an appropriate block or wheel
chock on the right rear wheel. WARNING:
Always use the jack
provided as original equipment with your
vehicle. If using a jack other than the one
provided, make sure the jack capacity is
adequate for the vehicle weight,
including any vehicle cargo or
modifications. If you are unsure if the jack
capacity is adequate, contact the
authorized dealer. WARNING:
Do not work on your
vehicle when the jack is the only support
as your vehicle could slip off the jack.
Failure to follow this instruction could
result in personal injury or death. WARNING:
Use only the specified
jacking points. If you use other positions,
you may damage the body, steering,
suspension, engine, braking system or
the fuel lines. WARNING:
Never place anything
between the vehicle jack and your
vehicle. WARNING:
Never place anything
between the vehicle jack and the ground. WARNING:
Park your vehicle so
that you do not obstruct the flow of
traffic or place yourself in any danger and
set up a warning triangle. WARNING:
Do not attempt to
change a tire on the side of the vehicle
close to moving traffic. Pull far enough
off the road to avoid the danger of being
hit when operating the jack or changing
the wheel. WARNING:
The jack should be
used on level firm ground wherever
possible. WARNING:
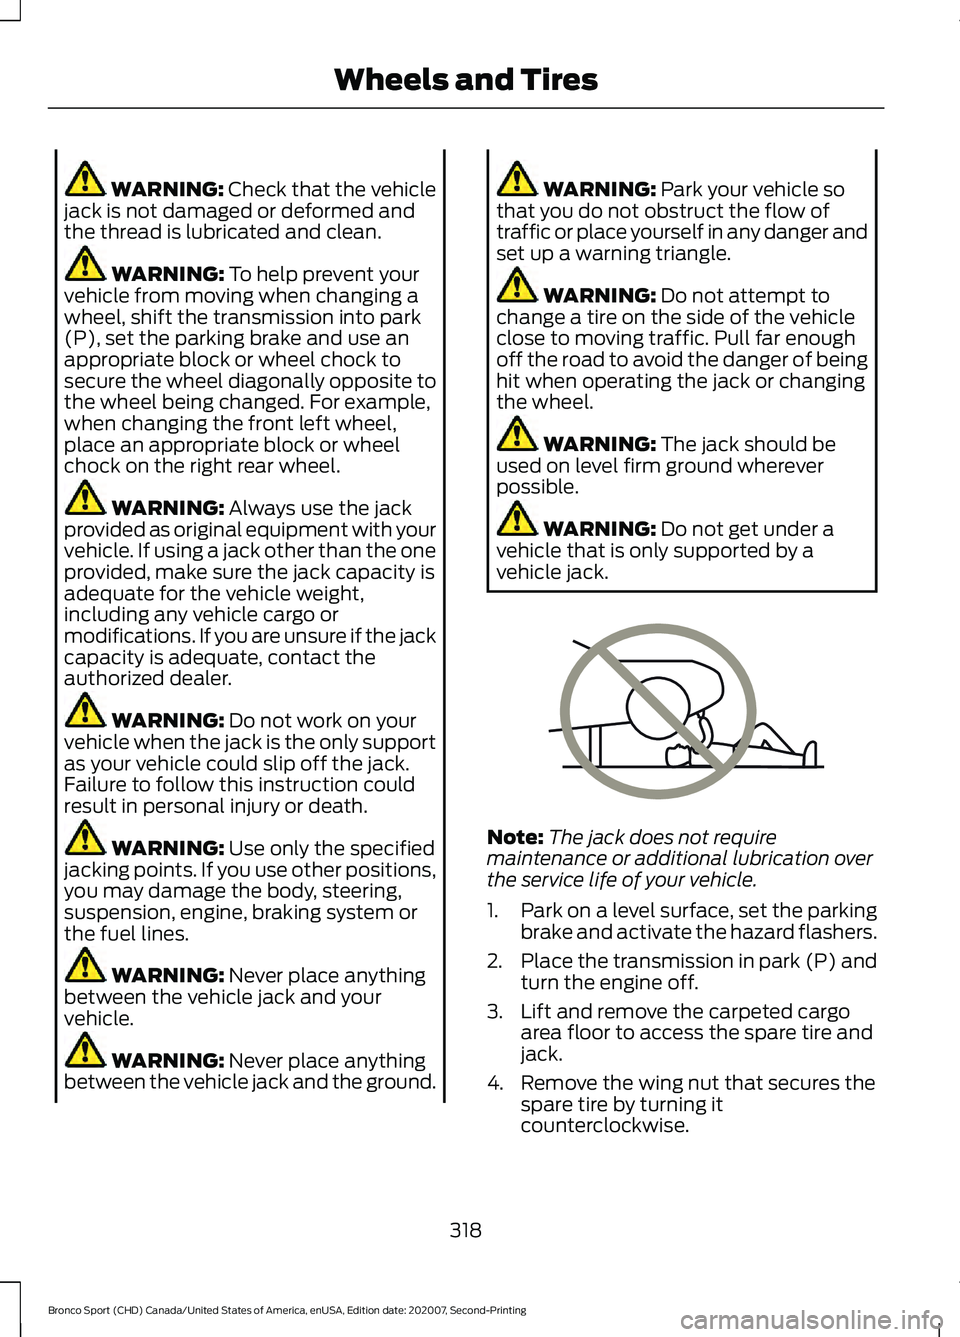
Do not get under a
vehicle that is only supported by a
vehicle jack. Note:
The jack does not require
maintenance or additional lubrication over
the service life of your vehicle.
1. Park on a level surface, set the parking
brake and activate the hazard flashers.
2. Place the transmission in park (P) and
turn the engine off.
3. Lift and remove the carpeted cargo area floor to access the spare tire and
jack.
4. Remove the wing nut that secures the spare tire by turning it
counterclockwise.
318
Bronco Sport (CHD) Canada/United States of America, enUSA, Edition date: 202007, Second-Printing Wheels and TiresE166722
Page 322 of 471
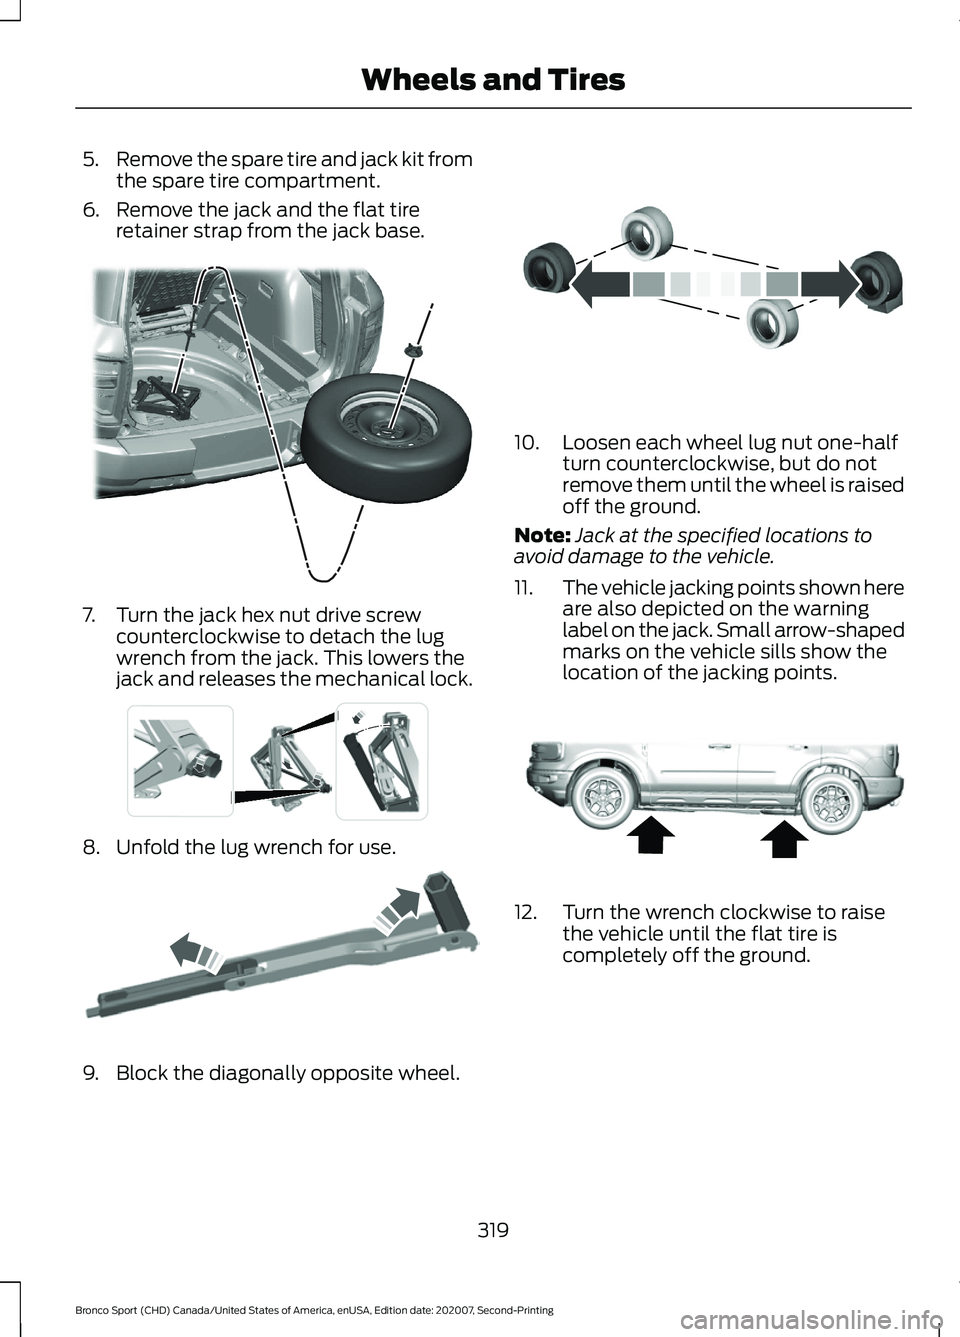
5.
Remove the spare tire and jack kit from
the spare tire compartment.
6. Remove the jack and the flat tire retainer strap from the jack base. 7. Turn the jack hex nut drive screw
counterclockwise to detach the lug
wrench from the jack. This lowers the
jack and releases the mechanical lock. 8. Unfold the lug wrench for use.
9. Block the diagonally opposite wheel. 10. Loosen each wheel lug nut one-half
turn counterclockwise, but do not
remove them until the wheel is raised
off the ground.
Note: Jack at the specified locations to
avoid damage to the vehicle.
11. The vehicle jacking points shown here
are also depicted on the warning
label on the jack. Small arrow-shaped
marks on the vehicle sills show the
location of the jacking points. 12. Turn the wrench clockwise to raise
the vehicle until the flat tire is
completely off the ground.
319
Bronco Sport (CHD) Canada/United States of America, enUSA, Edition date: 202007, Second-Printing Wheels and TiresE323462 E337330 E181744 E142551 E322803
Page 323 of 471
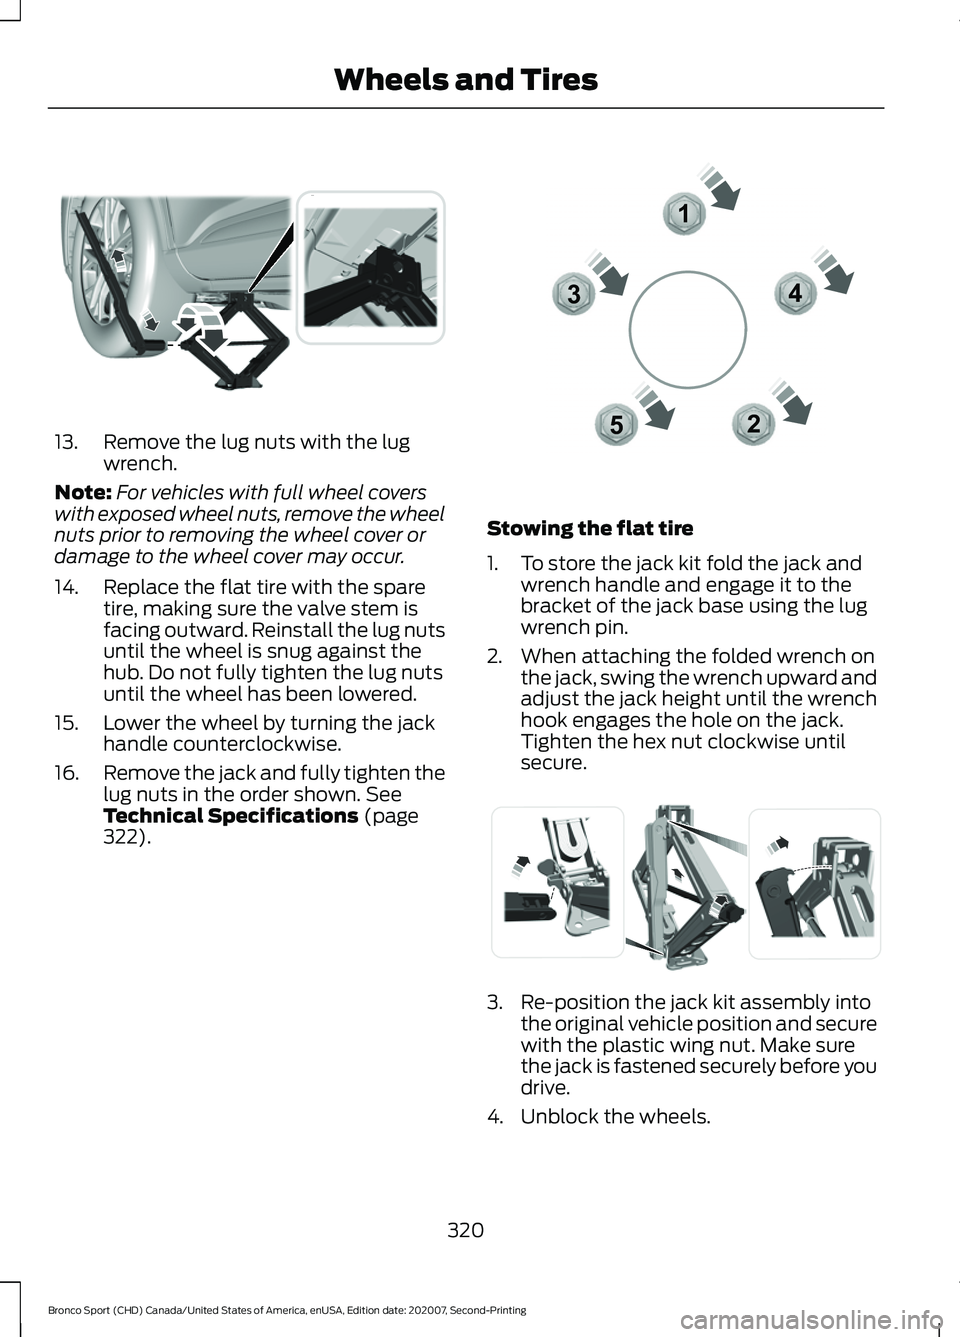
13. Remove the lug nuts with the lug
wrench.
Note: For vehicles with full wheel covers
with exposed wheel nuts, remove the wheel
nuts prior to removing the wheel cover or
damage to the wheel cover may occur.
14. Replace the flat tire with the spare tire, making sure the valve stem is
facing outward. Reinstall the lug nuts
until the wheel is snug against the
hub. Do not fully tighten the lug nuts
until the wheel has been lowered.
15. Lower the wheel by turning the jack handle counterclockwise.
16. Remove the jack and fully tighten the
lug nuts in the order shown. See
Technical Specifications (page
322). Stowing the flat tire
1. To store the jack kit fold the jack and
wrench handle and engage it to the
bracket of the jack base using the lug
wrench pin.
2. When attaching the folded wrench on the jack, swing the wrench upward and
adjust the jack height until the wrench
hook engages the hole on the jack.
Tighten the hex nut clockwise until
secure. 3. Re-position the jack kit assembly into
the original vehicle position and secure
with the plastic wing nut. Make sure
the jack is fastened securely before you
drive.
4. Unblock the wheels.
320
Bronco Sport (CHD) Canada/United States of America, enUSA, Edition date: 202007, Second-Printing Wheels and TiresE294119 12
3
4
5E306781 E294121
Page 400 of 471
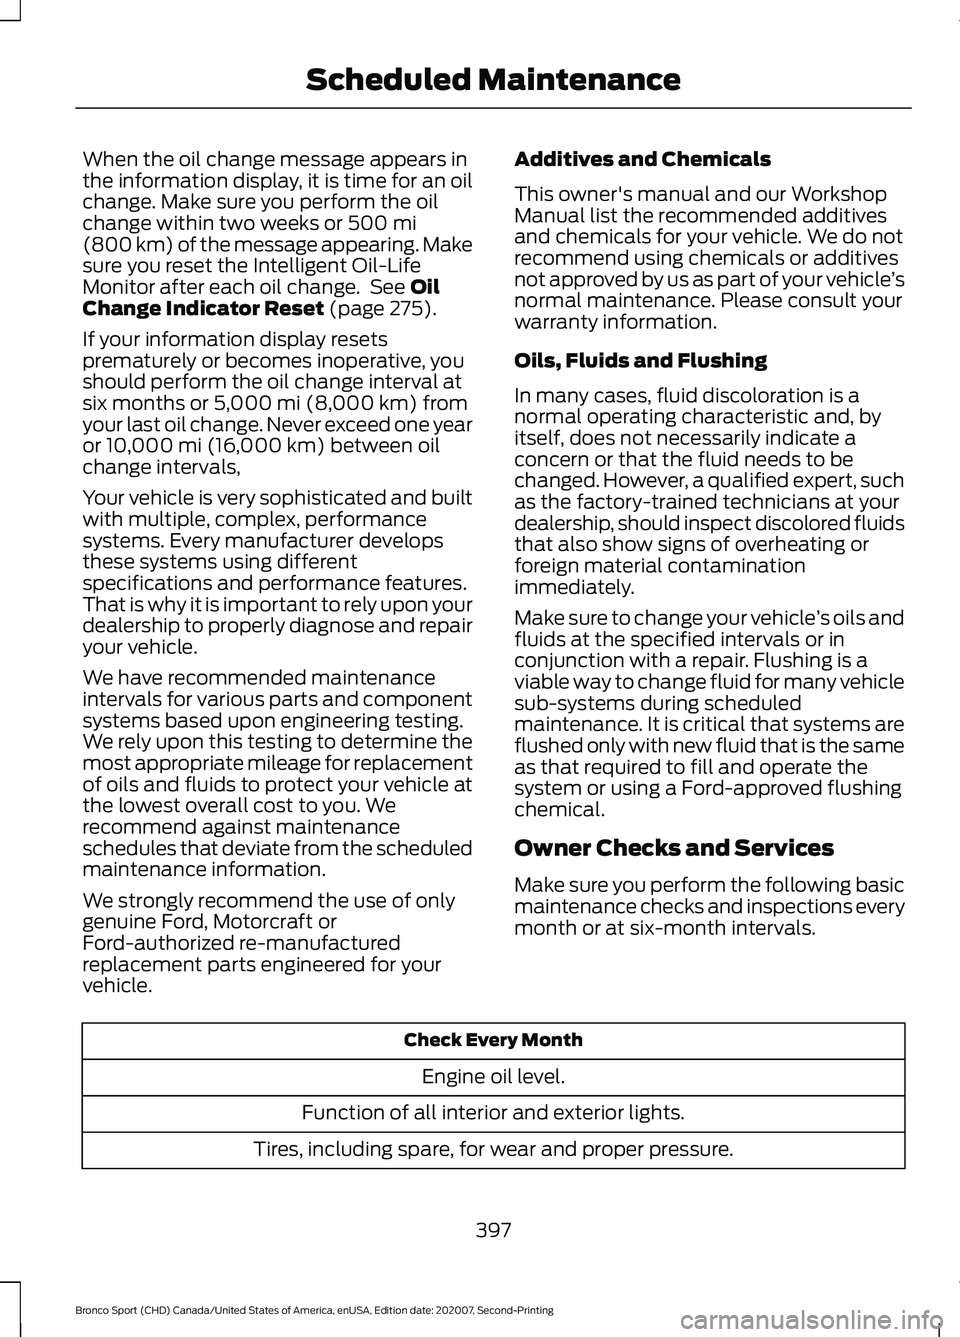
When the oil change message appears in
the information display, it is time for an oil
change. Make sure you perform the oil
change within two weeks or 500 mi
(800 km) of the message appearing. Make
sure you reset the Intelligent Oil-Life
Monitor after each oil change. See
Oil
Change Indicator Reset (page 275).
If your information display resets
prematurely or becomes inoperative, you
should perform the oil change interval at
six months or
5,000 mi (8,000 km) from
your last oil change. Never exceed one year
or
10,000 mi (16,000 km) between oil
change intervals,
Your vehicle is very sophisticated and built
with multiple, complex, performance
systems. Every manufacturer develops
these systems using different
specifications and performance features.
That is why it is important to rely upon your
dealership to properly diagnose and repair
your vehicle.
We have recommended maintenance
intervals for various parts and component
systems based upon engineering testing.
We rely upon this testing to determine the
most appropriate mileage for replacement
of oils and fluids to protect your vehicle at
the lowest overall cost to you. We
recommend against maintenance
schedules that deviate from the scheduled
maintenance information.
We strongly recommend the use of only
genuine Ford, Motorcraft or
Ford-authorized re-manufactured
replacement parts engineered for your
vehicle. Additives and Chemicals
This owner's manual and our Workshop
Manual list the recommended additives
and chemicals for your vehicle. We do not
recommend using chemicals or additives
not approved by us as part of your vehicle
’s
normal maintenance. Please consult your
warranty information.
Oils, Fluids and Flushing
In many cases, fluid discoloration is a
normal operating characteristic and, by
itself, does not necessarily indicate a
concern or that the fluid needs to be
changed. However, a qualified expert, such
as the factory-trained technicians at your
dealership, should inspect discolored fluids
that also show signs of overheating or
foreign material contamination
immediately.
Make sure to change your vehicle ’s oils and
fluids at the specified intervals or in
conjunction with a repair. Flushing is a
viable way to change fluid for many vehicle
sub-systems during scheduled
maintenance. It is critical that systems are
flushed only with new fluid that is the same
as that required to fill and operate the
system or using a Ford-approved flushing
chemical.
Owner Checks and Services
Make sure you perform the following basic
maintenance checks and inspections every
month or at six-month intervals. Check Every Month
Engine oil level.
Function of all interior and exterior lights.
Tires, including spare, for wear and proper pressure.
397
Bronco Sport (CHD) Canada/United States of America, enUSA, Edition date: 202007, Second-Printing Scheduled Maintenance
Page 402 of 471
Multi-Point Inspection
Suspension components for leaks ordamage
Exhaust system
Steering and linkage
Exterior lamps operation
Tires, including spare, for wear and properpressure2
Fluid levels 1
; fill if necessary
Windshield for cracks, chips or pits
For oil and fluid leaks
Washer spray and wiper operation
Half-shaft dust boots
1 Brake, coolant recovery reservoir, automatic transmission and window washer.
2 If your vehicle has a temporary mobility kit, check the tire sealant expiration Use By date
on the canister. Replace as needed.
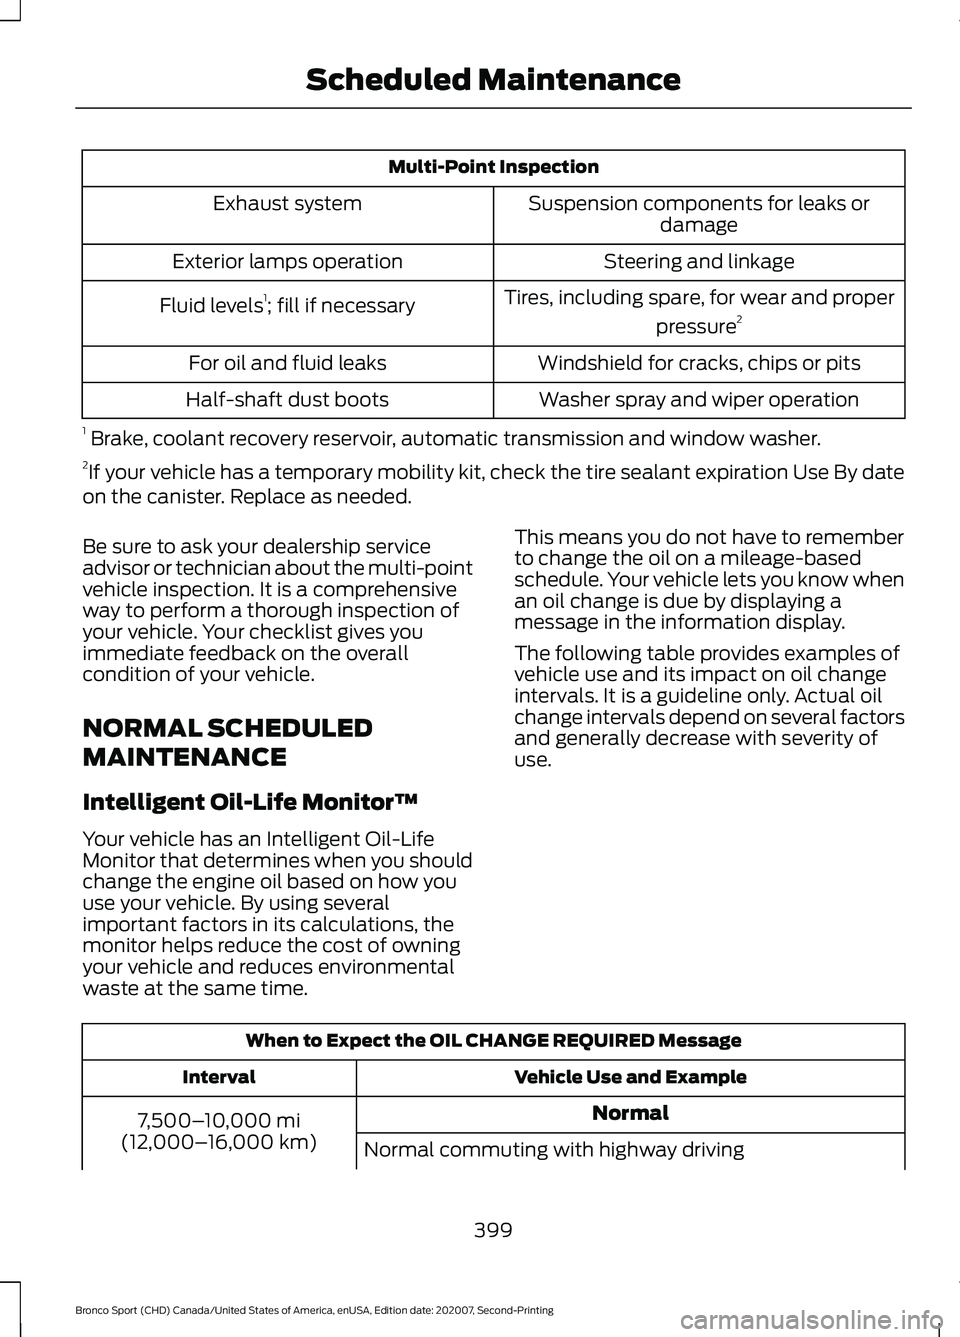
Be sure to ask your dealership service
advisor or technician about the multi-point
vehicle inspection. It is a comprehensive
way to perform a thorough inspection of
your vehicle. Your checklist gives you
immediate feedback on the overall
condition of your vehicle.
NORMAL SCHEDULED
MAINTENANCE
Intelligent Oil-Life Monitor™
Your vehicle has an Intelligent Oil-Life
Monitor that determines when you should
change the engine oil based on how you
use your vehicle. By using several
important factors in its calculations, the
monitor helps reduce the cost of owning
your vehicle and reduces environmental
waste at the same time. This means you do not have to remember
to change the oil on a mileage-based
schedule. Your vehicle lets you know when
an oil change is due by displaying a
message in the information display.
The following table provides examples of
vehicle use and its impact on oil change
intervals. It is a guideline only. Actual oil
change intervals depend on several factors
and generally decrease with severity of
use.
When to Expect the OIL CHANGE REQUIRED Message
Vehicle Use and Example
Interval
Normal
7,500– 10,000 mi
(12,000– 16,000 km)
Normal commuting with highway driving
399
Bronco Sport (CHD) Canada/United States of America, enUSA, Edition date: 202007, Second-Printing Scheduled Maintenance
Page 458 of 471
C
Canceling the Set Speed...........................185
Capacities and Specifications................323
Car Wash
See: Cleaning the Exterior.............................. 290
Catalytic Converter......................................163 On-Board Diagnostics (OBD-II)................... 164
Readiness for Inspection and Maintenance (I/M) Testing................................................... 164
Changing a Bulb...........................................287 Replacing Fog Lamp Bulbs............................ 287
Replacing Headlamp Bulbs........................... 287
Replacing High Mount Brake Lamp Bulbs................................................................. 288
Replacing License Plate Lamp Bulbs........288
Replacing Reverse Lamp Assembly Bulbs................................................................. 288
Replacing the Side Marker Bulbs.................287
Replacing Turn Signal Lamps....................... 287
Changing a Fuse..........................................269
Engine Compartment Fuse Box................... 269
Fuse Types............................................................ 270
General Information......................................... 269
Changing a Road Wheel............................316 Dissimilar Spare Wheel and Tire Assembly
Information...................................................... 316
Tire Change Procedure...................................... 317
Changing the 12V Battery.........................282 Remove and Reinstall the Battery..............283
Changing the Engine Air Filter
.................276
Changing the Front Wiper Blades.........286
Changing the Rear Wiper Blades..........286
Changing the Vehicle Wi-Fi Hotspot Name or Password
....................................341
Charging a Wireless Device......................144
Checking MyKey System Status................61 MyKey Distance..................................................... 61
Number of Admin Keys...................................... 62
Number of MyKeys.............................................. 62
Checking the Wiper Blades.....................286
Child Restraint and Seatbelt Maintenance.................................................40
Child Restraint Positioning
.........................30
Child Safety.......................................................21
General Information............................................. 21
Child Safety Locks..........................................32 Left-Hand Side...................................................... 33Right-Hand Side...................................................
33
Cleaning Products
.......................................289
Materials............................................................... 289
Cleaning the Engine
.....................................291
Cleaning the Exterior.................................290 Cleaning the Exterior Lamps......................... 290
Cleaning the Exterior Precautions..............290
Exterior Chrome Parts..................................... 290
Exterior Plastic Parts........................................ 290
Stripes or Graphics........................................... 290
Underbody............................................................ 291
Under Hood.......................................................... 291
Cleaning the Instrument Panel and Instrument Cluster Lens.........................293
Cleaning the Interior...................................292 Mirrors.................................................................... 293
Cleaning the Wheels..................................294
Cleaning the Windows and Wiper Blades...........................................................292
Clearing All MyKeys
........................................61
Climate Control..............................................121
Auto Mode............................................................. 123
Climate Control – Troubleshooting.............124
Climate Control – Troubleshooting
.......124
Climate Control – Frequently Asked
Questions.......................................................... 124
Closing the Liftgate
.......................................70
Closing the Liftgate From Outside Your
Vehicle................................................................. 70
Connected Vehicle
.......................................337
Connecting the Vehicle to a Mobile Network
- Vehicles With: Modem............................. 337
Connected Vehicle Limitations
...............337
Connected Vehicle Requirements.........337
Connected Vehicle – Troubleshooting - Vehicles With: Modem............................338
Connected Vehicle – Troubleshooting - Vehicles With: SYNC 3............................339
Connecting the Vehicle to a Mobile Network - Vehicles With: Modem.......337
Connecting FordPass to the Modem..........337
Enabling and Disabling the Modem............337
What Is the Modem........................................... 337
Connecting the Vehicle to a Wi-Fi Network - Vehicles With: SYNC 3
.......337
Coolant Check See: Engine Coolant Check............................. 277
455
Bronco Sport (CHD) Canada/United States of America, enUSA, Edition date: 202007, Second-Printing Index