2021 DODGE CHALLENGER center console
[x] Cancel search: center consolePage 40 of 328
38GETTING TO KNOW YOUR VEHICLE
HEATED MIRRORS — IF EQUIPPED
These mirrors are heated to melt frost or
ice. This feature will be activated
whenever you turn on the rear window
defroster (if equipped) Úpage 48.
UNIVERSAL GARAGE DOOR OPENER
(HOMELINK®)
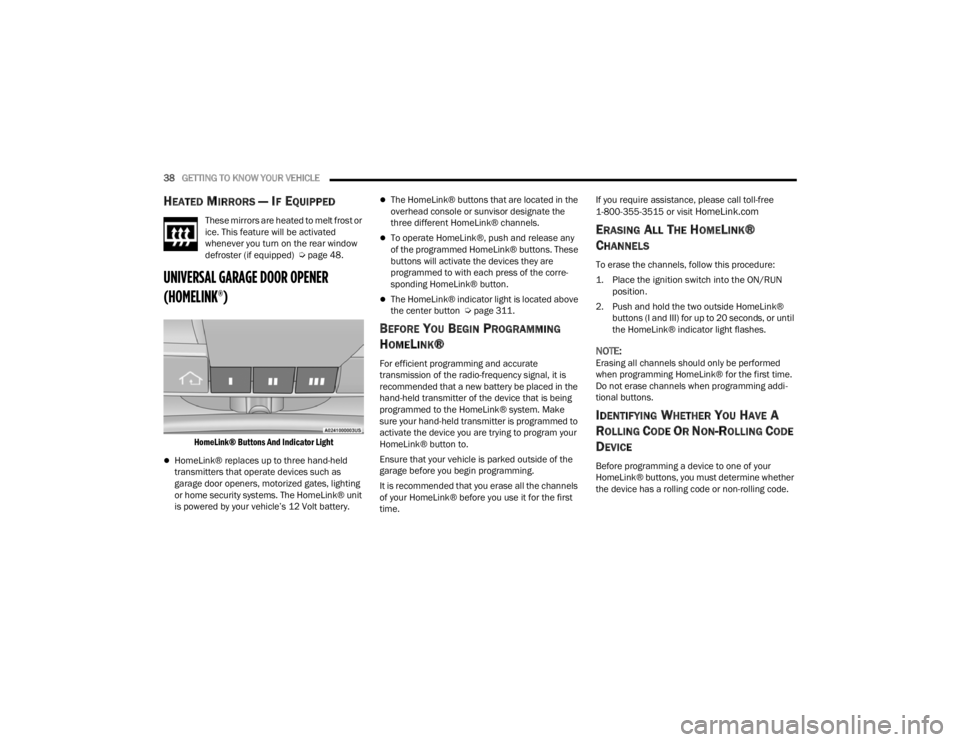
HomeLink® Buttons And Indicator Light
HomeLink® replaces up to three hand-held
transmitters that operate devices such as
garage door openers, motorized gates, lighting
or home security systems. The HomeLink® unit
is powered by your vehicle’s 12 Volt battery.
The HomeLink® buttons that are located in the
overhead console or sunvisor designate the
three different HomeLink® channels.
To operate HomeLink®, push and release any
of the programmed HomeLink® buttons. These
buttons will activate the devices they are
programmed to with each press of the corre -
sponding HomeLink® button.
The HomeLink® indicator light is located above
the center button Ú page 311.
BEFORE YOU BEGIN PROGRAMMING
H
OMELINK®
For efficient programming and accurate
transmission of the radio-frequency signal, it is
recommended that a new battery be placed in the
hand-held transmitter of the device that is being
programmed to the HomeLink® system. Make
sure your hand-held transmitter is programmed to
activate the device you are trying to program your
HomeLink® button to.
Ensure that your vehicle is parked outside of the
garage before you begin programming.
It is recommended that you erase all the channels
of your HomeLink® before you use it for the first
time. If you require assistance, please call toll-free
1-800-355-3515 or visit
HomeLink.com
ERASING ALL THE HOMELINK®
C
HANNELS
To erase the channels, follow this procedure:
1. Place the ignition switch into the ON/RUN
position.
2. Push and hold the two outside HomeLink® buttons (I and III) for up to 20 seconds, or until
the HomeLink® indicator light flashes.
NOTE:Erasing all channels should only be performed
when programming HomeLink® for the first time.
Do not erase channels when programming addi -
tional buttons.
IDENTIFYING WHETHER YOU HAVE A
R
OLLING CODE OR NON-ROLLING CODE
D
EVICE
Before programming a device to one of your
HomeLink® buttons, you must determine whether
the device has a rolling code or non-rolling code.
21_LA_OM_EN_USC_t.book Page 38
Page 47 of 328
GETTING TO KNOW YOUR VEHICLE45
FRONT MAP/READING LIGHTS
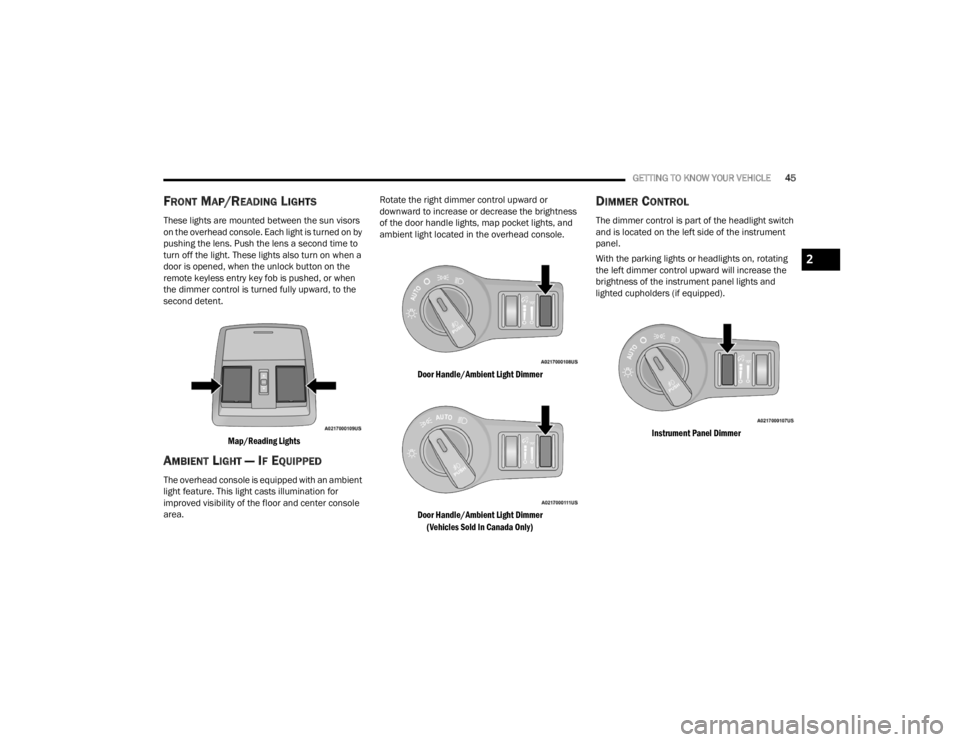
These lights are mounted between the sun visors
on the overhead console. Each light is turned on by
pushing the lens. Push the lens a second time to
turn off the light. These lights also turn on when a
door is opened, when the unlock button on the
remote keyless entry key fob is pushed, or when
the dimmer control is turned fully upward, to the
second detent.
Map/Reading Lights
AMBIENT LIGHT — IF EQUIPPED
The overhead console is equipped with an ambient
light feature. This light casts illumination for
improved visibility of the floor and center console
area. Rotate the right dimmer control upward or
downward to increase or decrease the brightness
of the door handle lights, map pocket lights, and
ambient light located in the overhead console.
Door Handle/Ambient Light Dimmer
Door Handle/Ambient Light Dimmer (Vehicles Sold In Canada Only)
DIMMER CONTROL
The dimmer control is part of the headlight switch
and is located on the left side of the instrument
panel.
With the parking lights or headlights on, rotating
the left dimmer control upward will increase the
brightness of the instrument panel lights and
lighted cupholders (if equipped).
Instrument Panel Dimmer
2
21_LA_OM_EN_USC_t.book Page 45
Page 55 of 328
GETTING TO KNOW YOUR VEHICLE53
INTERIOR STORAGE AND EQUIPMENT
STORAGE
Glove Compartment
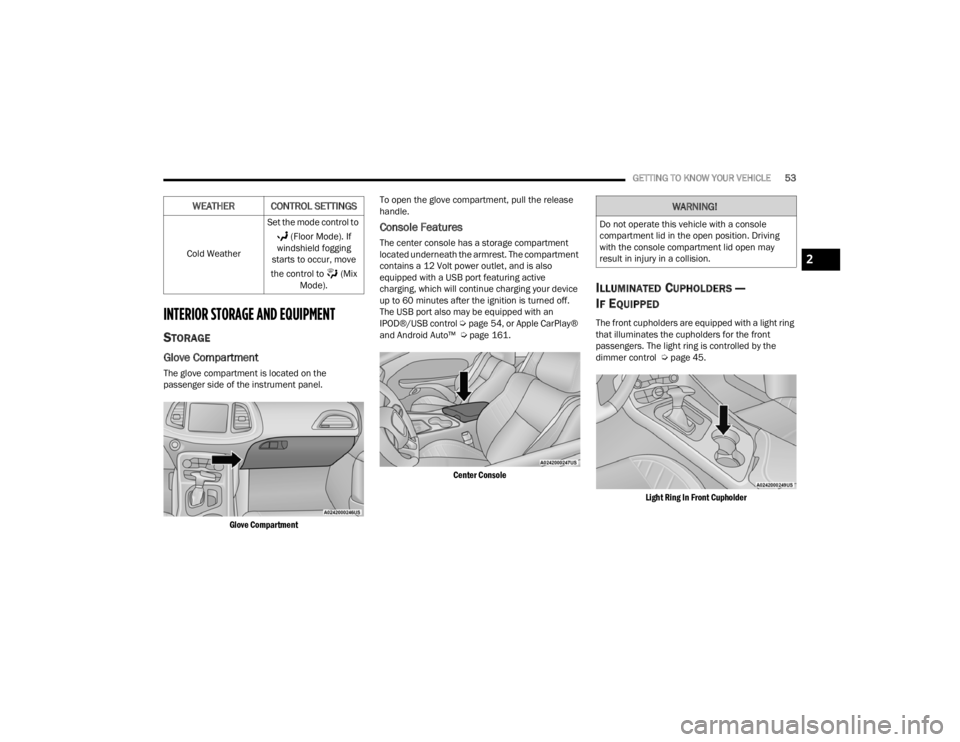
The glove compartment is located on the
passenger side of the instrument panel.
Glove Compartment
To open the glove compartment, pull the release
handle.
Console Features
The center console has a storage compartment
located underneath the armrest. The compartment
contains a 12 Volt power outlet, and is also
equipped with a USB port featuring active
charging, which will continue charging your device
up to 60 minutes after the ignition is turned off.
The USB port also may be equipped with an
IPOD®/USB control
Úpage 54, or Apple CarPlay®
and Android Auto™ Ú page 161.
Center Console
ILLUMINATED CUPHOLDERS —
I
F EQUIPPED
The front cupholders are equipped with a light ring
that illuminates the cupholders for the front
passengers. The light ring is controlled by the
dimmer control Ú page 45.
Light Ring In Front Cupholder
Cold Weather
Set the mode control to
(Floor Mode). If
windshield fogging
starts to occur, move
the control to (Mix Mode).
WEATHER CONTROL SETTINGSWARNING!
Do not operate this vehicle with a console
compartment lid in the open position. Driving
with the console compartment lid open may
result in injury in a collision.
2
21_LA_OM_EN_USC_t.book Page 53
Page 56 of 328

54GETTING TO KNOW YOUR VEHICLE
USB/AUX CONTROL
Located in the front storage area of the center
console, this feature allows an external USB device
to be connected to the audio system.
Plugging in a smartphone device to a USB port may
activate Android Auto™ or Apple CarPlay®
features, if equipped
USB/AUX Ports
POWER OUTLETS
Your vehicle is equipped with 12 Volt (13 Amp)
power outlets that can be used to power cellular
phones, small electronics and other low powered
electrical accessories. The power outlets are
labeled with either a “key” or a “battery” symbol to
indicate how the outlet is powered. Power outlets
labeled with a key symbol can be powered when
the ignition is in the ACC or ON/RUN position, while
the outlets labeled with a battery symbol are
connected directly to the battery and powered at
all times.
These power outlets can also operate a
conventional cigar lighter unit.
The front power outlet is located next to the
storage area on the integrated center stack of the
instrument panel.
Power Outlet — Integrated Center Stack Front
NOTE:The front integrated center stack power outlet can
be changed to battery powered at all times by
moving the integrated center stack fuse #12 in the
Rear Power Distribution Center from fuse location
“IGN” to “B+” Ú page 267.
Power Outlet Fuse Locations
1 — USB 1 Port
2 — AUX Jack
3 — USB 2 Port
1 — #12 Fuse 20A Yellow Power Outlet Integrated
Center Stack
2 — #38 Fuse 20A Yellow Power Outlet Center
Console
21_LA_OM_EN_USC_t.book Page 54
Page 57 of 328
GETTING TO KNOW YOUR VEHICLE55
(Continued)
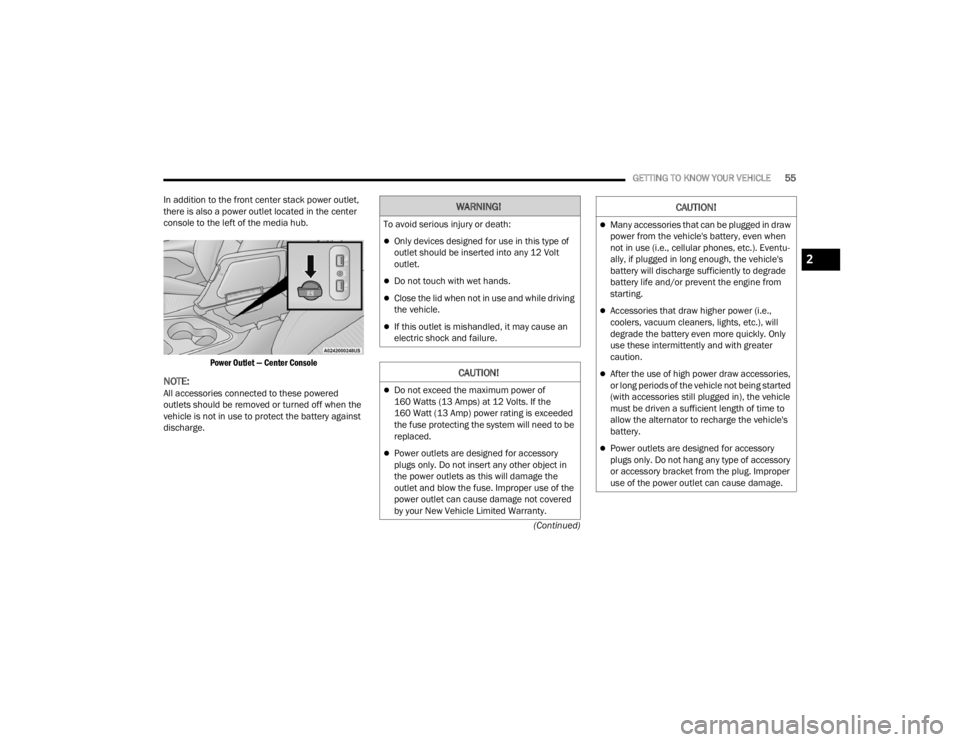
In addition to the front center stack power outlet,
there is also a power outlet located in the center
console to the left of the media hub.
Power Outlet — Center Console
NOTE:All accessories connected to these powered
outlets should be removed or turned off when the
vehicle is not in use to protect the battery against
discharge.
WARNING!
To avoid serious injury or death:
Only devices designed for use in this type of
outlet should be inserted into any 12 Volt
outlet.
Do not touch with wet hands.
Close the lid when not in use and while driving
the vehicle.
If this outlet is mishandled, it may cause an
electric shock and failure.
CAUTION!
Do not exceed the maximum power of
160 Watts (13 Amps) at 12 Volts. If the
160 Watt (13 Amp) power rating is exceeded
the fuse protecting the system will need to be
replaced.
Power outlets are designed for accessory
plugs only. Do not insert any other object in
the power outlets as this will damage the
outlet and blow the fuse. Improper use of the
power outlet can cause damage not covered
by your New Vehicle Limited Warranty.
Many accessories that can be plugged in draw
power from the vehicle's battery, even when
not in use (i.e., cellular phones, etc.). Eventu -
ally, if plugged in long enough, the vehicle's
battery will discharge sufficiently to degrade
battery life and/or prevent the engine from
starting.
Accessories that draw higher power (i.e.,
coolers, vacuum cleaners, lights, etc.), will
degrade the battery even more quickly. Only
use these intermittently and with greater
caution.
After the use of high power draw accessories,
or long periods of the vehicle not being started
(with accessories still plugged in), the vehicle
must be driven a sufficient length of time to
allow the alternator to recharge the vehicle's
battery.
Power outlets are designed for accessory
plugs only. Do not hang any type of accessory
or accessory bracket from the plug. Improper
use of the power outlet can cause damage.
CAUTION!
2
21_LA_OM_EN_USC_t.book Page 55
Page 167 of 328
MULTIMEDIA165
NOTE:Apple CarPlay® is a trademark of Apple® Inc.
iPhone® is a trademark of Apple® Inc., registered
in the US and other countries. Apple® terms of use
and privacy statements apply.
ANDROID AUTO™ AND APPLE
C
ARPLAY® TIPS AND TRICKS
Android Auto™ And Apple CarPlay® Automatic
Bluetooth® Pairing
After connecting to Android Auto™ or Apple
CarPlay® for the first time and undergoing the
setup procedure, the smartphone pairs to the
Uconnect system via Bluetooth® without any setup
required every time it is within range, if Bluetooth®
is turned on.
NOTE:Apple CarPlay® uses a USB connection while
Android Auto™ uses both USB and Bluetooth®
connections to function. The connected device is
unavailable to other devices when connected
using Android Auto™ or Apple CarPlay®. Multiple Devices Connecting To The Uconnect
System — If Equipped
It is possible to have multiple devices connected to
the Uconnect system. For example, if using Android
Auto™/Apple CarPlay®, the connected device will
be used to place hands-free phone calls or send
hands-free text messages. However, another
device can also be paired to the Uconnect system,
via Bluetooth®, as an audio source, so the
passenger can stream music.
NOTE:Apple CarPlay® and Android Auto™ can only be
launched from the front and center console USB
ports.
PERFORMANCE PAGES
Performance Pages is an application that provides
a display for performance indicators, as received
from the instrument cluster, that will help you gain
familiarity with the capabilities of your vehicle in
real-time.
To access the Performance Pages, press the Apps
button on the touchscreen then press the
Performance Pages button on the touchscreen.
Press the desired button on the touchscreen to
access that specific Performance Page.
WARNING!
Measurement of vehicle statistics with the
Performance Pages is intended for off-highway
or off-road use only and should not be done on
any public roadways. It is recommended that
these features be used in a controlled
environment and within the limits of the law. The
capabilities of the vehicle as measured by the
Performance Pages must never be exploited in a
reckless or dangerous manner, which can
jeopardize the user’s safety or the safety of
others. Only a safe, attentive, and skillful driver
can prevent accidents.
5
21_LA_OM_EN_USC_t.book Page 165
Page 244 of 328
242IN CASE OF EMERGENCY
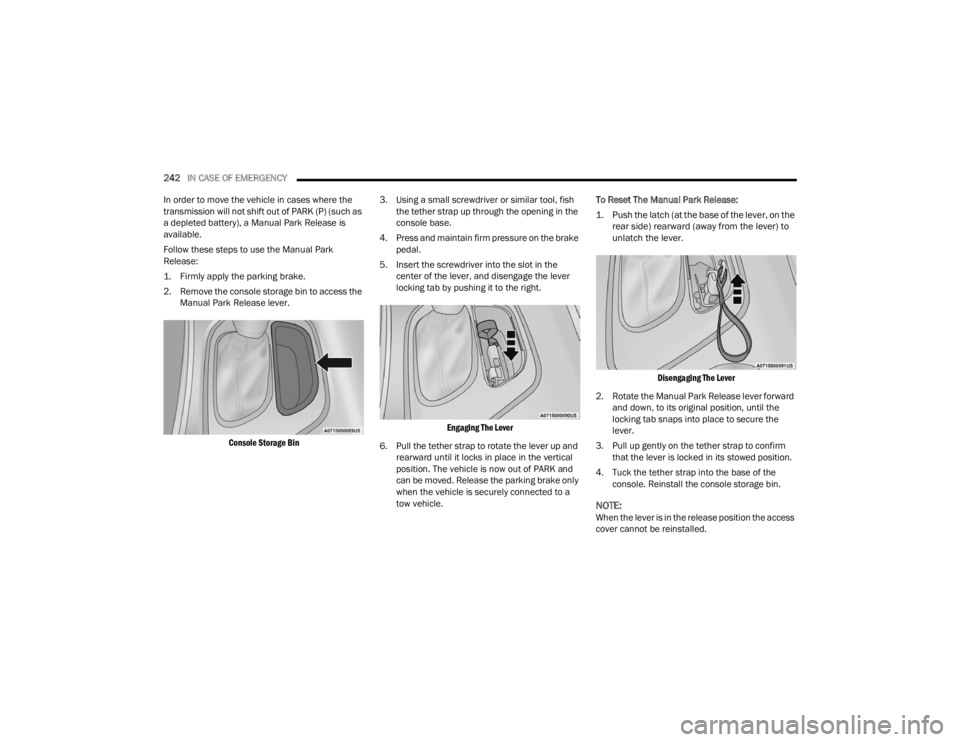
In order to move the vehicle in cases where the
transmission will not shift out of PARK (P) (such as
a depleted battery), a Manual Park Release is
available.
Follow these steps to use the Manual Park
Release:
1. Firmly apply the parking brake.
2. Remove the console storage bin to access the Manual Park Release lever.
Console Storage Bin
3. Using a small screwdriver or similar tool, fish
the tether strap up through the opening in the
console base.
4. Press and maintain firm pressure on the brake pedal.
5. Insert the screwdriver into the slot in the center of the lever, and disengage the lever
locking tab by pushing it to the right.
Engaging The Lever
6. Pull the tether strap to rotate the lever up and rearward until it locks in place in the vertical
position. The vehicle is now out of PARK and
can be moved. Release the parking brake only
when the vehicle is securely connected to a
tow vehicle. To Reset The Manual Park Release:
1. Push the latch (at the base of the lever, on the
rear side) rearward (away from the lever) to
unlatch the lever.
Disengaging The Lever
2. Rotate the Manual Park Release lever forward and down, to its original position, until the
locking tab snaps into place to secure the
lever.
3. Pull up gently on the tether strap to confirm that the lever is locked in its stowed position.
4. Tuck the tether strap into the base of the console. Reinstall the console storage bin.
NOTE:When the lever is in the release position the access
cover cannot be reinstalled.
21_LA_OM_EN_USC_t.book Page 242