2021 DODGE CHALLENGER remote start
[x] Cancel search: remote startPage 34 of 328

32GETTING TO KNOW YOUR VEHICLE
Easy Entry/Exit Seat — If Equipped
This feature provides automatic driver seat
positioning to enhance driver mobility when
entering and exiting the vehicle.
The distance the driver seat moves depends on
where you have the driver seat positioned when
you place the vehicle’s ignition in the OFF position.
When you place the vehicle’s ignition in the OFF
position, the driver seat will move about
2.4 inches (6.1 cm) rearward if the driver seat
position is greater than or equal to 2.7 inches
(6.8 cm) forward of the rear stop. The seat will
return to its previously set position when you
place the vehicle’s ignition in the ACC or RUN
position.
The Easy Entry/Easy Exit feature is disabled
when the driver seat position is less than 0.9 of
an inch (2.3 cm) forward of the rear stop. At this
position, there is no benefit to the driver by
moving the seat for Easy Exit or Easy Entry.
When enabled in Uconnect Settings, Easy Entry
and Easy Exit positions are stored in each memory
setting profile Ú page 27.
NOTE:The Easy Entry/Exit feature is enabled or disabled
through the programmable features in the
Uconnect system Ú page 120.
HEATED SEATS — IF EQUIPPED
On some models, the front seats may be equipped
with heaters located in the seat cushions and
seatbacks.
Front Heated Seats
The front heated seats control buttons are located
within the Uconnect system. You can gain access
to the control buttons through the climate screen
and the controls screen. You can choose from HI, LO, or OFF heat settings.
The indicator arrows in touchscreen buttons
indicate the level of heat in use. Two indicator
arrows will illuminate for HI, and one for LO.
Turning the heating elements off will return the
user to the radio screen.
Press the heated seat button once to turn
the HI setting on.
Press the heated seat button a second time
to turn the LO setting on.
Press the heated seat button a third time to
turn the heating elements off.
NOTE:
Once a heat setting is selected, heat will be felt
within two to five minutes.
The engine must be running for the heated
seats to operate.
If the HI-level setting is selected, the system will
automatically switch to LO-level after approxi-
mately 60 minutes of continuous operation. At
that time, the display will change from HI to LO,
indicating the change. The LO-level setting will
turn off automatically after approximately
45 minutes.
For information on use with the Remote Start
system, see Ú page 19.
WARNING!
Persons who are unable to feel pain to the
skin because of advanced age, chronic illness,
diabetes, spinal cord injury, medication,
alcohol use, exhaustion or other physical
condition must exercise care when using the
seat heater. It may cause burns even at low
temperatures, especially if used for long
periods of time.
Do not place anything on the seat or seatback
that insulates against heat, such as a blanket
or cushion. This may cause the seat heater to
overheat. Sitting in a seat that has been over -
heated could cause serious burns due to the
increased surface temperature of the seat.
21_LA_OM_EN_USC_t.book Page 32
Page 35 of 328

GETTING TO KNOW YOUR VEHICLE33
(Continued)
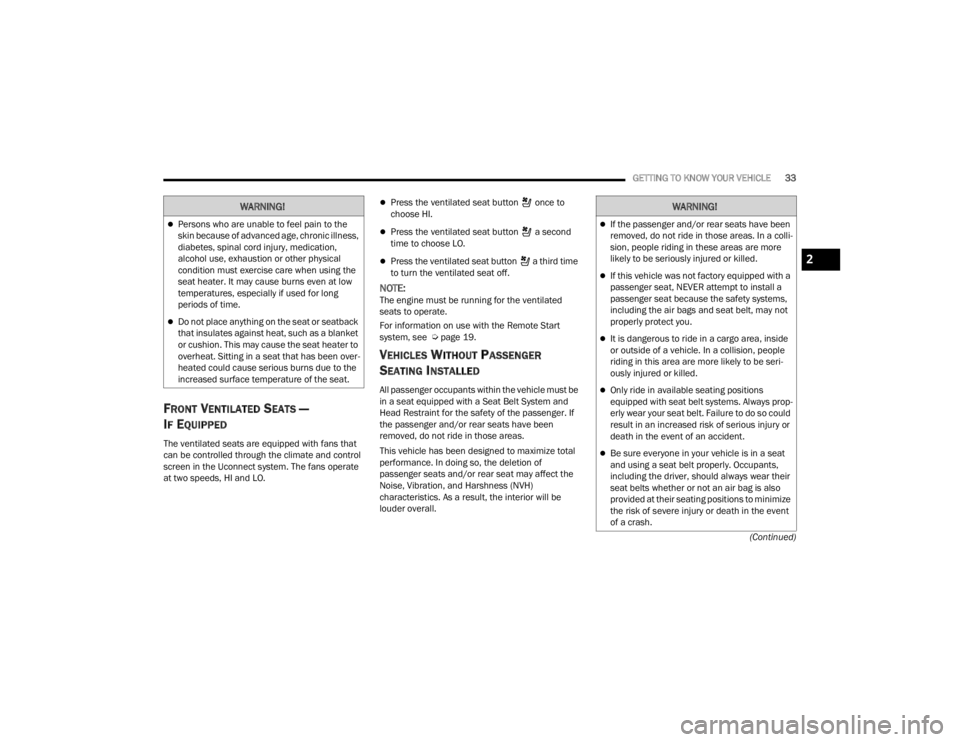
FRONT VENTILATED SEATS —
I
F EQUIPPED
The ventilated seats are equipped with fans that
can be controlled through the climate and control
screen in the Uconnect system. The fans operate
at two speeds, HI and LO.
Press the ventilated seat button once to
choose HI.
Press the ventilated seat button a second
time to choose LO.
Press the ventilated seat button a third time
to turn the ventilated seat off.
NOTE:The engine must be running for the ventilated
seats to operate.
For information on use with the Remote Start
system, see Ú page 19.
VEHICLES WITHOUT PASSENGER
S
EATING INSTALLED
All passenger occupants within the vehicle must be
in a seat equipped with a Seat Belt System and
Head Restraint for the safety of the passenger. If
the passenger and/or rear seats have been
removed, do not ride in those areas.
This vehicle has been designed to maximize total
performance. In doing so, the deletion of
passenger seats and/or rear seat may affect the
Noise, Vibration, and Harshness (NVH)
characteristics. As a result, the interior will be
louder overall.
WARNING!
Persons who are unable to feel pain to the
skin because of advanced age, chronic illness,
diabetes, spinal cord injury, medication,
alcohol use, exhaustion or other physical
condition must exercise care when using the
seat heater. It may cause burns even at low
temperatures, especially if used for long
periods of time.
Do not place anything on the seat or seatback
that insulates against heat, such as a blanket
or cushion. This may cause the seat heater to
overheat. Sitting in a seat that has been over -
heated could cause serious burns due to the
increased surface temperature of the seat.
WARNING!
If the passenger and/or rear seats have been
removed, do not ride in those areas. In a colli -
sion, people riding in these areas are more
likely to be seriously injured or killed.
If this vehicle was not factory equipped with a
passenger seat, NEVER attempt to install a
passenger seat because the safety systems,
including the air bags and seat belt, may not
properly protect you.
It is dangerous to ride in a cargo area, inside
or outside of a vehicle. In a collision, people
riding in this area are more likely to be seri -
ously injured or killed.
Only ride in available seating positions
equipped with seat belt systems. Always prop -
erly wear your seat belt. Failure to do so could
result in an increased risk of serious injury or
death in the event of an accident.
Be sure everyone in your vehicle is in a seat
and using a seat belt properly. Occupants,
including the driver, should always wear their
seat belts whether or not an air bag is also
provided at their seating positions to minimize
the risk of severe injury or death in the event
of a crash.
2
21_LA_OM_EN_USC_t.book Page 33
Page 50 of 328

48GETTING TO KNOW YOUR VEHICLE
The Rain Sensing system has protection features
for the wiper blades and arms, and will not operate
under the following conditions:
Low Ambient Temperature — When the ignition
is first placed in the ON position, the Rain
Sensing system will not operate until the wiper
switch is moved, vehicle speed is greater than
0 mph (0 km/h), or the outside temperature is
greater than 32°F (0°C).
Transmission In NEUTRAL Position — When the
ignition is ON, and the transmission is in the
NEUTRAL position, the Rain Sensing system will
not operate until the wiper switch is moved,
vehicle speed is greater than 3 mph (5 km/h),
or the gear selector is moved out of the
NEUTRAL position.
Remote Start Mode Inhibit — On vehicles
equipped with Remote Start system, Rain
Sensing wipers are not operational when the
vehicle is in the Remote Start mode.
CLIMATE CONTROLS
The Climate Control system allows you to regulate
the temperature, air flow, and direction of air
circulating throughout the vehicle. The controls are
located on the touchscreen (if equipped) and on
the instrument panel below the radio.
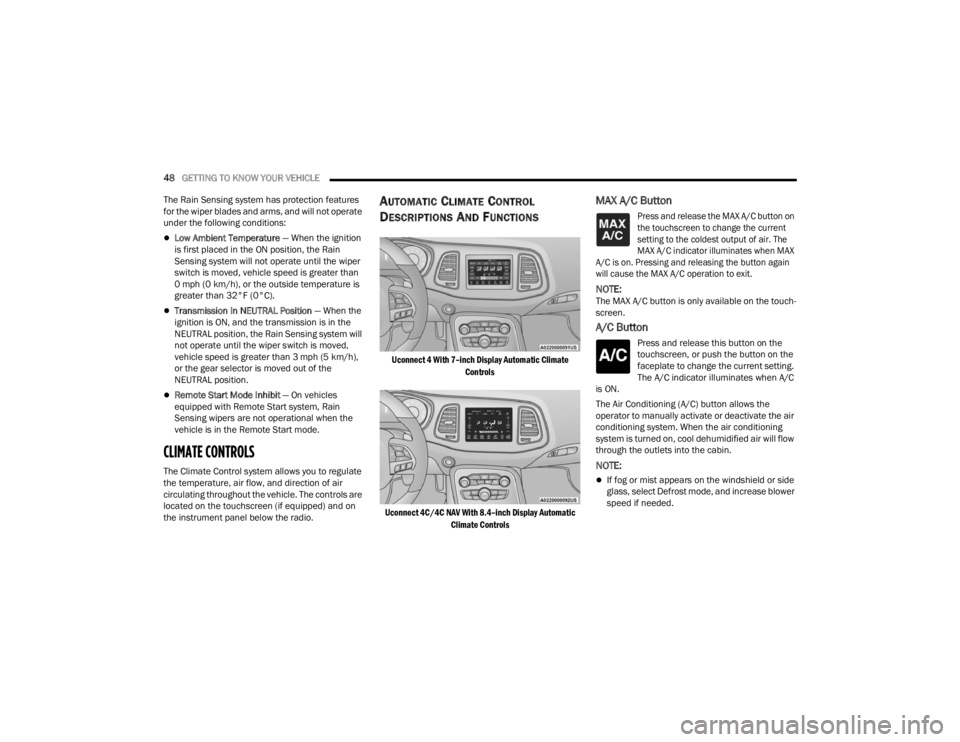
AUTOMATIC CLIMATE CONTROL
D
ESCRIPTIONS AND FUNCTIONS
Uconnect 4 With 7–inch Display Automatic Climate
Controls
Uconnect 4C/4C NAV With 8.4–inch Display Automatic Climate Controls
MAX A/C Button
Press and release the MAX A/C button on
the touchscreen to change the current
setting to the coldest output of air. The
MAX A/C indicator illuminates when MAX
A/C is on. Pressing and releasing the button again
will cause the MAX A/C operation to exit.
NOTE:The MAX A/C button is only available on the touch -
screen.
A/C Button
Press and release this button on the
touchscreen, or push the button on the
faceplate to change the current setting.
The A/C indicator illuminates when A/C
is ON.
The Air Conditioning (A/C) button allows the
operator to manually activate or deactivate the air
conditioning system. When the air conditioning
system is turned on, cool dehumidified air will flow
through the outlets into the cabin.
NOTE:
If fog or mist appears on the windshield or side
glass, select Defrost mode, and increase blower
speed if needed.
21_LA_OM_EN_USC_t.book Page 48
Page 54 of 328

52GETTING TO KNOW YOUR VEHICLE
Winter Operation
To ensure the best possible heater and defroster
performance, make sure the engine cooling
system is functioning properly and the proper
amount, type, and concentration of coolant is
used. Use of the Air Recirculation mode during
Winter months is not recommended, because it
may cause window fogging.
Vacation/Storage
For information on maintaining the Climate Control
system when the vehicle is being stored for an
extended period of time, see Úpage 298.
Window Fogging
Vehicle windows tend to fog on the inside in mild,
rainy, and/or humid weather. To clear the
windows, select Defrost or Mix mode and increase
the front blower speed. Do not use the
Recirculation mode without A/C for long periods,
as fogging may occur.
Outside Air Intake
Make sure the air intake, located directly in front of
the windshield, is free of obstructions, such as
leaves. Leaves collected in the air intake may
reduce airflow, and if they enter the air distribution
box, they could plug the water drains. In Winter
months, make sure the air intake is clear of ice,
slush, and snow.
Cabin Air Filter
The climate control system filters out dust and
pollen from the air. Contact an authorized dealer to
service your cabin air filter, and to have it replaced
when needed.
Windshield Wiper De-Icer — If Equipped
The windshield wiper de-icer is a heating element
located at the base of the windshield.
It operates automatically once the following
conditions are met:
Activation By Front Defrost
The wiper de-icer activates automatically during
a cold weather manual start with full defrost,
and when the ambient temperature is below
33°F (0.6°C) .
Activation By Rear Defrost
The wiper de-icer activates automatically when
the Rear Defrost is operating and the ambient
temperature is below 33°F (0.6°C) .
Activation By Remote Start Operation
When the Remote Start is activated and the
outside ambient temperature is less than 33°F
(0.6°C) the windshield wiper de-icer is acti -
vated. Exiting Remote Start will resume previous
operation. If the windshield wiper de-icer is
active, the timer and operation will continue.
Operating Tips Chart
WEATHER CONTROL SETTINGS
Hot Weather And
Vehicle Interior Is Very Hot Set the mode control to
(Panel Mode),
(MAX A/C) on, and
blower on high. Roll
down the windows for a minute to flush out the hot air. Adjust the
controls as needed to achieve comfort.
Warm Weather Turn (A/C)
on and set the mode
control to (Panel Mode).
Cool Sunny Operate in (Bi-Level
Mode).
Cool & Humid Conditions Set the mode control to
(Mix Mode) and
turn on (A/C) to
keep windows clear.
21_LA_OM_EN_USC_t.book Page 52
Page 130 of 328

128MULTIMEDIA
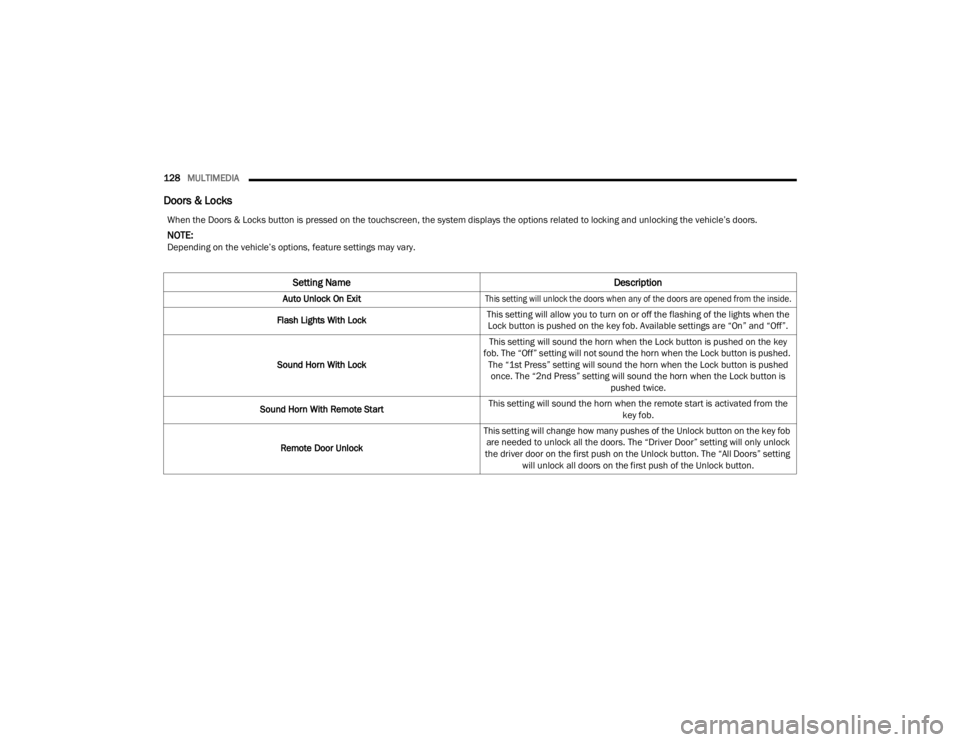
Doors & Locks
When the Doors & Locks button is pressed on the touchscreen, the system displays the options related to locking and unlocking the vehicle’s doors.
NOTE:Depending on the vehicle’s options, feature settings may vary.
Setting Name Description
Auto Unlock On Exit
This setting will unlock the doors when any of the doors are opened from the inside.
Flash Lights With Lock This setting will allow you to turn on or off the flashing of the lights when the
Lock button is pushed on the key fob. Available settings are “On” and “Off”.
Sound Horn With Lock This setting will sound the horn when the Lock button is pushed on the key
fob. The “Off” setting will not sound the horn when the Lock button is pushed. The “1st Press” setting will sound the horn when the Lock button is pushed once. The “2nd Press” setting will sound the horn when the Lock button is pushed twice.
Sound Horn With Remote Start This setting will sound the horn when the remote start is activated from the
key fob.
Remote Door Unlock This setting will change how many pushes of the Unlock button on the key fob
are needed to unlock all the doors. The “Driver Door” setting will only unlock
the driver door on the first push on the Unlock button. The “All Doors” setting will unlock all doors on the first push of the Unlock button.
21_LA_OM_EN_USC_t.book Page 128
Page 131 of 328

MULTIMEDIA129
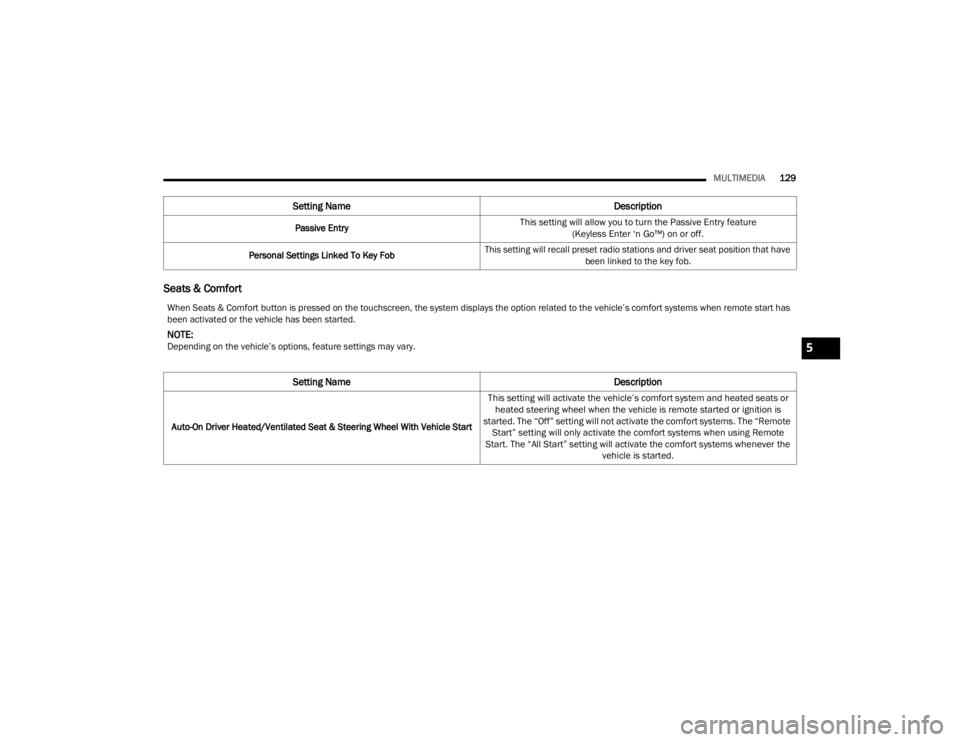
Seats & Comfort
Passive Entry
This setting will allow you to turn the Passive Entry feature
(Keyless Enter ‘n Go™) on or off.
Personal Settings Linked To Key Fob This setting will recall preset radio stations and driver seat position that have
been linked to the key fob.
Setting Name Description
When Seats & Comfort button is pressed on the touchscreen, the system displays the option related to the vehicle’s comfort systems when remote start has
been activated or the vehicle has been started.
NOTE:Depending on the vehicle’s options, feature settings may vary.
Setting NameDescription
Auto-On Driver Heated/Ventilated Seat & Steering Wheel With Vehicle Start
This setting will activate the vehicle’s comfort system and heated seats or
heated steering wheel when the vehicle is remote started or ignition is
started. The “Off” setting will not activate the comfort systems. The “Remote Start” setting will only activate the comfort systems when using Remote
Start. The “All Start” setting will activate the comfort systems whenever the vehicle is started.
5
21_LA_OM_EN_USC_t.book Page 129
Page 241 of 328

IN CASE OF EMERGENCY239
NOTE:
When using a portable battery booster pack, follow the
manufacturer's operating instructions and precautions.
PREPARATIONS FOR JUMP START
The battery is stored under an access cover in the
trunk. Remote battery posts are located on the right
side of the engine compartment for jump starting.
Jump Starting Locations
NOTE:The remote battery posts are viewed by standing
on the right side of the vehicle looking over the
fender. The positive battery post may be covered
with a protective cap. Lift up on the cap to gain
access to the positive battery post. Do not jump off
fuses. Only jump directly off positive post which
has a positive (+) symbol on or around the post.
See below steps to prepare for jump starting:
1. Apply the parking brake, shift into PARK (automatic transmission) or FIRST gear
(manual transmission) and cycle the ignition
to OFF.
2. Turn off the heater, radio, and all electrical accessories.
3. Pull upward and remove the protective cover over the remote positive (+) battery post.
4. If using another vehicle to jump start the battery, park the vehicle within the jumper
cables reach, apply the parking brake and
make sure the ignition is OFF.CAUTION!
Do not use a portable battery booster pack or any
other booster source with a system voltage greater
than 12 Volts or damage to the battery, starter
motor, alternator or electrical system may occur.
Remote Positive (+) Post
Remote Negative (-) Post
WARNING!
Do not allow vehicles to touch each other as this
could establish a ground connection and
personal injury could result.
WARNING!
Take care to avoid the radiator cooling fan
whenever the hood is raised. It can start
anytime the ignition switch is ON. You can be
injured by moving fan blades.
Remove any metal jewelry such as rings,
watch bands and bracelets that could make
an inadvertent electrical contact. You could be
seriously injured.
Batteries contain sulfuric acid that can burn
your skin or eyes and generate hydrogen gas
which is flammable and explosive. Keep open
flames or sparks away from the battery.7
21_LA_OM_EN_USC_t.book Page 239
Page 242 of 328

240IN CASE OF EMERGENCY
JUMP STARTING PROCEDURE
1. Connect the positive
(+) end of the jumper
cable to the remote positive (+)
post of the
vehicle with the discharged battery.
2. Connect the opposite end of the positive (+)
jumper cable to the positive (+) post of the
booster battery.
3. Connect the negative (-) end of the jumper
cable to the negative (-) post of the booster
battery. 4. Connect the opposite end of the negative
(-)
jumper cable to the remote negative (-) post
(exposed metallic/unpainted post of the
discharge vehicle) located directly behind the
under-hood fuse box.
5. Start the engine in the vehicle that has the booster battery, let the engine idle a few
minutes, and then start the engine in the
vehicle with the discharged battery.
6. Once the engine is started, follow the discon -
nection procedure below. Disconnecting The Jumper Cables
1. Disconnect the negative
(-) end of the jumper
cable from the remote negative (-)
post of the
vehicle with the discharged battery.
2. Disconnect the opposite end of the negative (-)
jumper cable from the negative (-) post of the
booster battery.
3. Disconnect the positive (+) end of the jumper
cable from the positive (+) post of the booster
battery.
4. Disconnect the opposite end of the positive (+)
jumper cable from the remote positive (+) post
of the vehicle with the discharged battery.
If frequent jump starting is required to start your
vehicle you should have the battery and charging
system inspected at an authorized dealer.
WARNING!
Failure to follow this jump starting procedure
could result in personal injury or property
damage due to battery explosion.
CAUTION!
Failure to follow these procedures could result in
damage to the charging system of the booster
vehicle or the discharged vehicle.
WARNING!
Do not connect the jumper cable to the negative
(-) post of the discharged battery. The resulting
electrical spark could cause the battery to
explode and could result in personal injury..
CAUTION!
Do not run the booster vehicle engine above
2,000 RPM since it provides no charging benefit,
wastes fuel, and can damage booster vehicle
engine.CAUTION!
Accessories plugged into the vehicle power
outlets draw power from the vehicle’s battery,
even when not in use (i.e., cellular devices, etc.).
Eventually, if plugged in long enough without
engine operation, the vehicle’s battery will
discharge sufficiently to degrade battery life
and/or prevent the engine from starting.
21_LA_OM_EN_USC_t.book Page 240