2021 CITROEN C4 AIRCROSS DAG display
[x] Cancel search: displayPage 21 of 244

19
Instruments
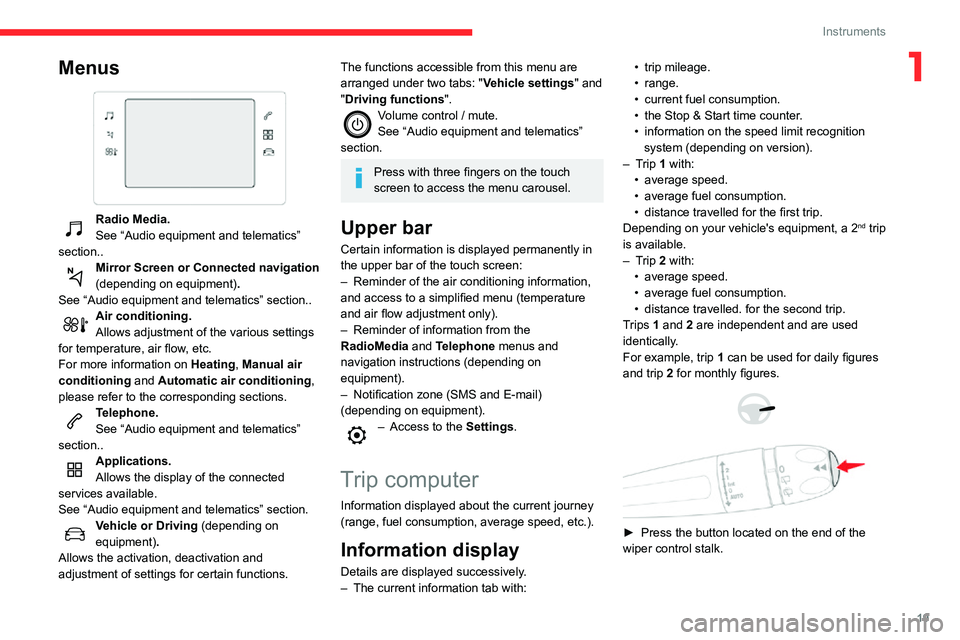
1Menus
Radio Media.
See “Audio equipment and telematics”
section..
Mirror Screen or Connected navigation
(depending on equipment) .
See “Audio equipment and telematics” section..
Air conditioning.Allows adjustment of the various settings
for temperature, air flow, etc.
For more information on Heating, Manual air
conditioning and Automatic air conditioning ,
please refer to the corresponding sections.
Telephone.See “Audio equipment and telematics”
section..
Applications.
Allows the display of the connected
services available.
See “Audio equipment and telematics” section.
Vehicle or Driving (depending on
equipment) .
Allows the activation, deactivation and
adjustment of settings for certain functions.
The functions accessible from this menu are
arranged under two tabs: " Vehicle settings" and
"Driving functions ".
Volume control / mute.See “Audio equipment and telematics”
section.
Press with three fingers on the touch
screen to access the menu carousel.
Upper bar
Certain information is displayed permanently in
the upper bar of the touch screen:
– Reminder of the air conditioning information, and access to a simplified menu (temperature
and air flow adjustment only).
– Reminder of information from the RadioMedia and Telephone menus and
navigation instructions (depending on
equipment).
– Notification zone (SMS and E-mail) (depending on equipment).– Access to the Settings.
Trip computer
Information displayed about the current journey
(range, fuel consumption, average speed, etc.).
Information display
Details are displayed successively.– The current information tab with:
• trip mileage.• range.• current fuel consumption.• the Stop & Start time counter .• information on the speed limit recognition system (depending on version).– Trip 1 with:• average speed.• average fuel consumption.• distance travelled for the first trip.Depending on your vehicle's equipment, a 2nd trip
is available.
– Trip 2 with:• average speed.• average fuel consumption.• distance travelled. for the second trip.Trips 1 and 2 are independent and are used
identically.
For example, trip 1 can be used for daily figures
and trip 2 for monthly figures.
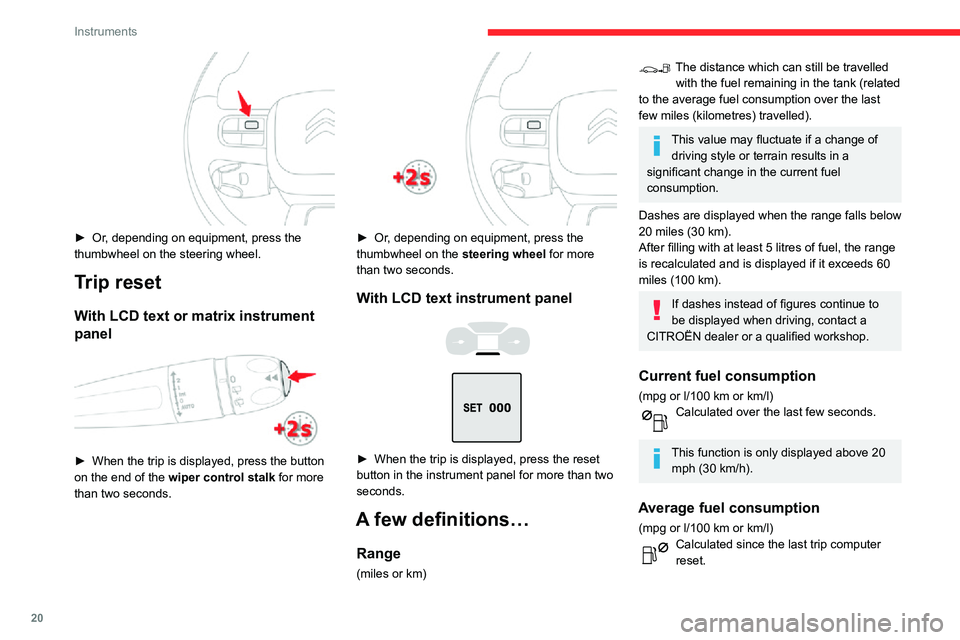
► Press the button located on the end of the
wiper control stalk.
Page 22 of 244

20
Instruments
Average speed
(mph or km/h)Calculated since the last trip computer reset.
Distance travelled
(miles or km)Calculated since the last trip computer reset.Stop & Start time counter
(minutes / seconds or hours / minutes)
A time counter calculates the time spent in STOP
mode during a journey.
It resets to zero every time the ignition is
switched on.
Lighting dimmer
Allows manual adjustment of the brightness of
the instrument panel and touch screen according
to the outside lighting.
Only works when the vehicle lamps are on
(except daytime running lamps) and in night
mode.
Two buttons
► Or, depending on equipment, press the thumbwheel on the steering wheel.
Trip reset
With LCD text or matrix instrument
panel
► When the trip is displayed, press the button on the end of the wiper control stalk for more
than two seconds.
► Or, depending on equipment, press the thumbwheel on the steering wheel for more
than two seconds.
With LCD text instrument panel
► When the trip is displayed, press the reset button in the instrument panel for more than two
seconds.
A few definitions…
Range
(miles or km)
The distance which can still be travelled with the fuel remaining in the tank (related
to the average fuel consumption over the last
few miles (kilometres) travelled).
This value may fluctuate if a change of driving style or terrain results in a
significant change in the current fuel
consumption.
Dashes are displayed when the range falls below
20 miles (30 km).
After filling with at least 5 litres of fuel, the range
is recalculated and is displayed if it exceeds 60
miles (100 km).
If dashes instead of figures continue to
be displayed when driving, contact a
CITROËN dealer or a qualified workshop.
Current fuel consumption
(mpg or l/100 km or km/l)Calculated over the last few seconds.
This function is only displayed above 20 mph (30 km/h).
Average fuel consumption
(mpg or l/100 km or km/l)Calculated since the last trip computer reset.
Page 23 of 244

21
Instruments
1Average speed
(mph or km/h)Calculated since the last trip computer reset.
Distance travelled
(miles or km)Calculated since the last trip computer reset.Stop & Start time counter
(minutes / seconds or hours / minutes)
A time counter calculates the time spent in STOP
mode during a journey.
It resets to zero every time the ignition is
switched on.
Lighting dimmer
Allows manual adjustment of the brightness of
the instrument panel and touch screen according
to the outside lighting.
Only works when the vehicle lamps are on
(except daytime running lamps) and in night
mode.
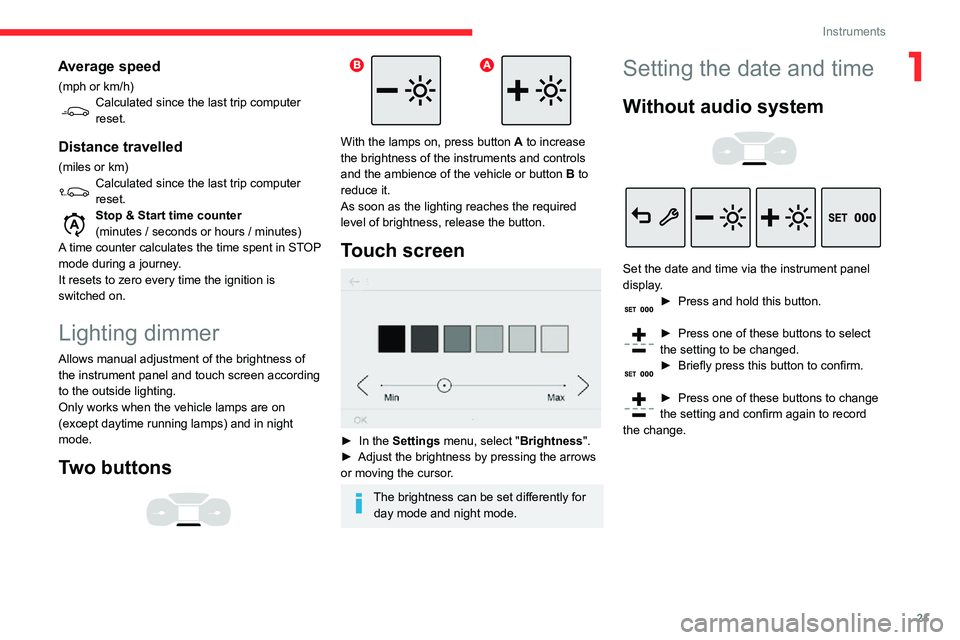
Two buttons
With the lamps on, press button A to increase
the brightness of the instruments and controls
and the ambience of the vehicle or button B to
reduce it.
As soon as the lighting reaches the required
level of brightness, release the button.
Touch screen
► In the Settings menu, select "Brightness".► Adjust the brightness by pressing the arrows or moving the cursor.
The brightness can be set differently for day mode and night mode.
Setting the date and time
Without audio system
Set the date and time via the instrument panel
display.
► Press and hold this button.
► Press one of these buttons to select the setting to be changed.► Briefly press this button to confirm.
► Press one of these buttons to change the setting and confirm again to record
the change.
Page 24 of 244

22
Instruments
With audio system
► Press the MENU button for access to the
main menu.
► Press the "7" or "8" button to display the
"Personalisation-configuration" menu, then press
OK.
► Press the "5" or "6" button to display the
"Display configuration" menu, then press OK.
► Press the "5" or "6" button to select the
"Date and time adjustment" button, then press
OK.
► Press the "7" or "8" button to select the
setting to modify. Confirm by pressing the OK
button.
► Adjust the settings one by one, confirming with the OK button.► Press the "5" or "6" button, then the OK
button to select the OK box and confirm or the
Back button to cancel.
Page 29 of 244

27
Access
2document and, if possible, the label bearing the
key code.
The CITROËN dealer will be able to retrieve the
key code and the transponder code required to
order a new key.
Complete unlocking /
locking of the vehicle with
the key
These procedures should be used in the
following cases:
– remote control battery flat,– remote control fault,– vehicle in an area subject to strong electromagnetic interference.
In the first case, you can also replace the remote
control battery.
Refer to the corresponding section.
In the second case, you can also reinitialise the
remote control.
Refer to the corresponding section.
► Insert the key in the door lock barrel.► Turn the key towards the front of the vehicle to unlock it, or towards the rear to lock it.
► Turn the key rearwards again within 5 seconds to deadlock the vehicle.
For versions without alarm, the lighting of the
direction indicators for a few seconds confirms
that the procedure has completed correctly.
If the alarm is activated, the siren sounds
on opening the door; switch on the
ignition to stop it.
If your vehicle is fitted with an alarm, this
function will not be activated when
locking with the key.
Without central locking
These procedures should be used in the
following cases:
– central locking fault,– battery disconnected or discharged.
In the event of a fault with the central
locking system, it is essential to
disconnect the battery to lock the boot and so
ensure complete locking of the vehicle.
Driver's door
► Turn the key towards the rear of the vehicle to lock it, or towards the front to unlock it.
Passenger doors
Unlocking a door► Pull the interior opening control for the door .
Locking► Open the doors.► For the rear doors, check that the child lock is not on.
Refer to the corresponding section.
► Remove the black cap on the edge of the door, using the key.► Without forcing, insert the key into the aperture; then, without turning it, move the latch
sideways towards the inside of the door.
► Remove the key and refit the black cap.► Close the doors and check from the outside that the vehicle is locked.
Changing the battery
A message is displayed on the instrument panel
when the battery needs changing.
Page 31 of 244

29
Access
2
► Switch on the ignition by pressing the "START/STOP" button.► With a manual gearbox, place the gear lever
in neutral then fully depress the clutch pedal.
► With an automatic gearbox, while in mode
P, depress the brake pedal.
If the fault persists after reinitialisation, contact a
CITROËN dealer or a qualified workshop without
delay.
Doors
Opening
From outside
► After unlocking the vehicle or with the Keyless Entry and Starting electronic key in the
recognition zone, pull the door handle.
From inside
► Pull the interior opening control of a door; this unlocks the vehicle completely.
Closing
When a door is not closed correctly:– with the engine running or the vehicle moving (speed below 6 mph (10 km/h)),
this warning lamp comes on, accompanied by an
alert message displayed for a few seconds.
– with the vehicle moving (speed above 6 mph (10 km/h)), in addition to the warning lamp and
alert message, an audible signal sounds for a
few seconds.
Boot
Opening
► With the vehicle unlocked or with the electronic key of the Keyless Entry and Starting
system in the recognition zone, press the central
tailgate control.
► Lift the tailgate.
In the event of a fault or difficulties
encountered in manoeuvring the tailgate
when opening or closing it, have it quickly
checked by a CITROËN dealer or a qualified
workshop to prevent this inconvenience
worsening, causing the lid to fall and serious
injuries.
Closing
► Lower the tailgate using one of the interior grab handles.
If the tailgate is not fully closed:
– when the engine is running , this
warning lamp comes on, accompanied by
the display of a message for a few seconds,
– when the vehicle is moving (speed higher than 6 mph (10 km/h)), this warning lamp comes on, accompanied by an audible signal and the
display of a message for a few seconds.
Back-up release
To manually unlock the boot in the event of a
battery or central locking failure.
Unlocking
► Fold the rear seats to gain access to the lock from inside the boot.
Page 46 of 244

44
Ease of use and comfort
Adjusting the temperature
► Turn the control from blue (cold) to red (hot) to adjust the temperature to your liking.
Adjusting the air flow
► Turn the knob 4 to obtain a comfortable air
flow.
Adjusting the air distribution
Central and side air vents.
Footwells.
Windscreen and side windows.
The air distribution can be adapted by
combining the corresponding buttons.
Air conditioning ON / OFF
The air conditioning is designed to operate
effectively in all seasons, with the windows
closed.
It enables you to:
– lower the temperature, in summer ,– increase the effectiveness of the demisting in winter, above 3°C.► Press this button to switch the air conditioning on/off.
The air conditioning does not operate
when the air flow adjustment is set to off.
Automatic air conditioning
The air conditioning operates with the engine
running, but the ventilation and its controls can
be accessed with the ignition on.
Operation of the air conditioning and regulation
of temperature, air flow and air distribution in the
passenger compartment are automatic.
Press the Climate menu button to access
the system controls.
1. Temperature adjustment
2. Air flow adjustment
3. Air distribution adjustment
4. Air conditioning on/off
5. Automatic comfort programme on/off
6. Recirculation of interior air
7. Access to the secondary page
Temperature adjustment
► Press one of the buttons 1 to increase (red)
or decrease (blue) the value.
The value displayed corresponds to a level of
comfort and not to a precise temperature.
For maximum cooling or heating of the
passenger compartment, press the
temperature setting button up or down until
LO or HI is displayed.
Automatic comfort programme
Activation/Deactivation
► Press button 5 to activate or deactivate the
air conditioning system’s automatic mode.
The air conditioning system operates
automatically: the system optimises the
temperature, air flow and air distribution in the
passenger compartment based on the comfort
level selected.
► Go to the secondary page by pressing button 7 to adjust the automatic comfort programme by
choosing one of the available settings.
“Soft”: provides soft and quiet operation by
limiting air flow.
“Normal”: offers the best compromise between
a comfortable temperature and quiet operation
(default setting).
“Fast”: provides strong and effective air flow.
Mode AUTO► To change the settings, press the button several times.
The setting is associated with AUTO mode only. However, when AUTO mode is deactivated, the
previous selection is retained.
Changing the setting does not reactivate AUTO
mode if this was deactivated.
In cold weather with the engine cold, the
air flow is increased gradually until the
comfort setting has been reached, in order to
limit the delivery of cold air into the passenger
compartment.
On entering the vehicle, if the interior
temperature is much colder or warmer than
the comfort setting requested, there is no
need to alter the value displayed to reach
the required level of comfort more quickly.
The system automatically corrects the
temperature difference as quickly as possible.
Air flow adjustment
► Press one of the buttons 2 (- or +) to increase
or decrease air flow.
The air flow symbol (a fan) is filled in according
to the request.
When the air flow is reduced to a minimum,
ventilation stops.
"OFF " is displayed alongside the fan.
Adjusting the air distribution
► Press the buttons 3 to adjust the air flow
distribution inside the passenger compartment.
Page 47 of 244

45
Ease of use and comfort
3The setting is associated with AUTO mode only.
However, when AUTO mode is deactivated, the
previous selection is retained.
Changing the setting does not reactivate AUTO
mode if this was deactivated.
In cold weather with the engine cold, the
air flow is increased gradually until the
comfort setting has been reached, in order to
limit the delivery of cold air into the passenger
compartment.
On entering the vehicle, if the interior
temperature is much colder or warmer than
the comfort setting requested, there is no
need to alter the value displayed to reach
the required level of comfort more quickly.
The system automatically corrects the
temperature difference as quickly as possible.
Air flow adjustment
► Press one of the buttons 2 (- or +) to increase
or decrease air flow.
The air flow symbol (a fan) is filled in according
to the request.
When the air flow is reduced to a minimum,
ventilation stops.
"OFF " is displayed alongside the fan.
Adjusting the air distribution
► Press the buttons 3 to adjust the air flow
distribution inside the passenger compartment.
Windscreen.
Central and side air vents.
Footwells.
Each press on a button activates or deactivates
the function.
All three buttons can be activated simultaneously. In this case, priority is
given to the air flows from the central and side
air vents, and from those in the passenger
footwells.
Air conditioning on / off
The air conditioning system is designed to
operate effectively in all seasons, with the
windows closed.
It is used to:
– lower the temperature in summer ,– increase the effectiveness of the demisting in winter, above 3°C.
► Press button 4 to turn the air conditioning on/
off.
When the indicator lamp is on, the air
conditioning function is activated.
The air conditioning cannot operate when the air flow adjustment is set to OFF.
Ventilation function with the
ignition on
When the ignition is switched on, you can
use the ventilation system to adjust the air
flow settings and the air distribution in the
passenger compartment for a duration which
depends on the battery charge.
This function does not operate the air
conditioning.
Recirculation of interior air
The intake of exterior air helps avoid and
eliminate misting of the windscreen and side
windows.
Recirculating the interior air isolates the
passenger compartment from exterior odours
and fumes.
When required, this function also allows
faster heating or cooling of the air in the
passenger compartment.
► Press button 6 to recirculate the interior air or
allow the intake of exterior air.
Avoid prolonged use of interior air recirculation (due to the risk of misting
and deteriorating air quality).