2021 CHRYSLER VOYAGER wheel
[x] Cancel search: wheelPage 260 of 348

258IN CASE OF EMERGENCY
(Continued)
Tire Service Kit Usage Precautions
Replace the Tire Service Kit Sealant Bottle prior
to the expiration date (printed at the lower right
hand corner on the bottle label) to assure
optimum operation of the system. See the
Sealant Bottle Replacement in this section for
further information.
The Sealant Bottle is a one tire application use
and needs to be replaced after each use. Always
replace these components immediately at your
original equipment vehicle dealer.
When the Tire Service Kit sealant is in a liquid
form, clean water, and a damp cloth will remove
the material from the vehicle or tire and wheel
components. Once the sealant dries, it can
easily be peeled off and properly discarded.
For optimum performance, make sure the valve
stem on the wheel is free of debris before
connecting the Tire Service Kit.
The Tire Service Kit Sealant is only intended to
seal punctures less than 1/4 inch (6 mm) diam
-
eter in the tread/contact surface of your
vehicle’s tires.
The Tire Service Kit Sealant is not intended to
seal punctures on the tires' side walls.
You can use the Tire Service Kit air pump to
inflate bicycle tires. The kit also comes with two
needles, located in the Accessory Storage
Compartment (on the bottom of the air pump) for inflating sport balls, rafts, or similar inflat
-
able items. However, use only the Air Pump and
make sure the Mode Select Knob is in the Air
Mode when inflating such items to avoid
injecting sealant into them.
Do not lift or carry the Tire Service Kit by the
hoses.
WARNING!
Do not attempt to seal a tire on the side of the
vehicle closest to traffic. Pull far enough off
the road to avoid the danger of being hit when
using the Tire Service Kit.
Do not use Tire Service Kit or drive the vehicle
under the following circumstances:
If the puncture in the tire tread is approxi -
mately 1/4 inch (6 mm) or larger.
If the tire has any sidewall damage.
If the tire has any damage from driving
with extremely low tire pressure.
If the tire has any damage from driving on
a flat tire.
If the wheel has any damage.
If you are unsure of the condition of the
tire or the wheel.
Keep Tire Service Kit away from open flames
or heat source.
A loose Tire Service Kit thrown forward in a
collision or hard stop could endanger the
occupants of the vehicle. Always stow the Tire
Service Kit in the place provided. Failure to
follow these warnings can result in injuries
that are serious or fatal to you, your passen -
gers, and others around you.
Take care not to allow the contents of Tire
Service Kit to come in contact with hair, eyes,
or clothing. Tire Service Kit sealant is harmful
if inhaled, swallowed, or absorbed through the
skin. It causes skin, eye, and respiratory irrita -
tion. Flush immediately with plenty of water if
there is any contact with eyes or skin. Change
clothing as soon as possible, if there is any
contact with clothing.
Tire Service Kit Sealant solution contains
latex. In case of an allergic reaction or rash,
consult a physician immediately. Keep Tire
Service Kit out of reach of children. If swal -
lowed, rinse mouth immediately with plenty of
water and drink plenty of water. Do not induce
vomiting! Consult a physician immediately.
WARNING!
21_RUV_OM_EN_USC_t.book Page 258
Page 261 of 348

IN CASE OF EMERGENCY259
Sealing A Tire With Tire Service Kit
Whenever You Stop To Use Tire Service Kit:
1. Pull over to a safe location and turn on the vehicle’s Hazard Warning Flashers.
2. Verify that the valve stem (on the wheel with the deflated tire) is in a position that is near to
the ground. This will allow the Tire Service Kit
Hose to reach the valve stem and keep the Tire
Service Kit flat on the ground. This will provide
the best positioning of the kit when injecting
the sealant into the deflated tire and running
the air pump. Move the vehicle as necessary to
place the valve stem in this position before
proceeding.
3. Place the transmission in PARK (P) and cycle the ignition in the OFF position.
4. Apply the parking brake.
Setting Up To Use Tire Service Kit:
1. Uncoil the Sealant Hose and then remove the cap from the fitting at the end of the hose.
2. Place the Tire Service Kit flat on
the ground next to the deflated tire. 3. Remove the cap from the valve stem and then
screw the fitting at the end of the Sealant Hose
onto the valve stem.
4. Uncoil the Power Plug and insert
the plug into the vehicle’s 12 Volt
power outlet.
NOTE:Do not remove foreign objects (e.g., screws or
nails) from the tire.
Injecting Tire Service Kit Sealant Into The Deflated
Tire:
1. Always start the vehicle before
turning the Tire Service Kit on.
2. Ensure the Mode Select Knob is to
the Sealant Mode position.
3. After pushing the Power Button,
the sealant (white fluid) will flow from
the Sealant Bottle through the
Sealant Hose and into the tire.
NOTE:Sealant may leak out through the puncture in the
tire. If the sealant (white fluid) does not flow within
0 – 10 seconds through the Sealant Hose:
1. Push the Power Button to turn the Tire Service
Kit off. Disconnect the Sealant Hose from the
valve stem. Make sure the valve stem is free
of debris. Reconnect the Sealant Hose to the
valve stem. Check that the Mode Select Knob
is in the Sealant Mode position and not Air
Mode. Push the Power Button to turn the Tire
Service Kit on.
2. Connect the Power Plug to a different 12 Volt power outlet in your vehicle or another vehicle,
if available. Make sure the vehicle is running
before turning the Tire Service Kit on.
3. The Sealant Bottle may be empty due to previous use. Call for assistance.
If the sealant (white fluid) does flow through the
Sealant Hose:
1. Continue to operate the pump
until sealant is no longer flowing
through hose (typically takes
30 - 70 seconds). As the sealant
flows through the Sealant Hose, the Pressure
Gauge can read as high as 70 psi (4.8 Bar).
The Pressure Gauge will decrease quickly
from approximately 70 psi (4.8 Bar) to the
actual tire pressure when the Sealant Bottle
is empty.
7
21_RUV_OM_EN_USC_t.book Page 259
Page 262 of 348

260IN CASE OF EMERGENCY
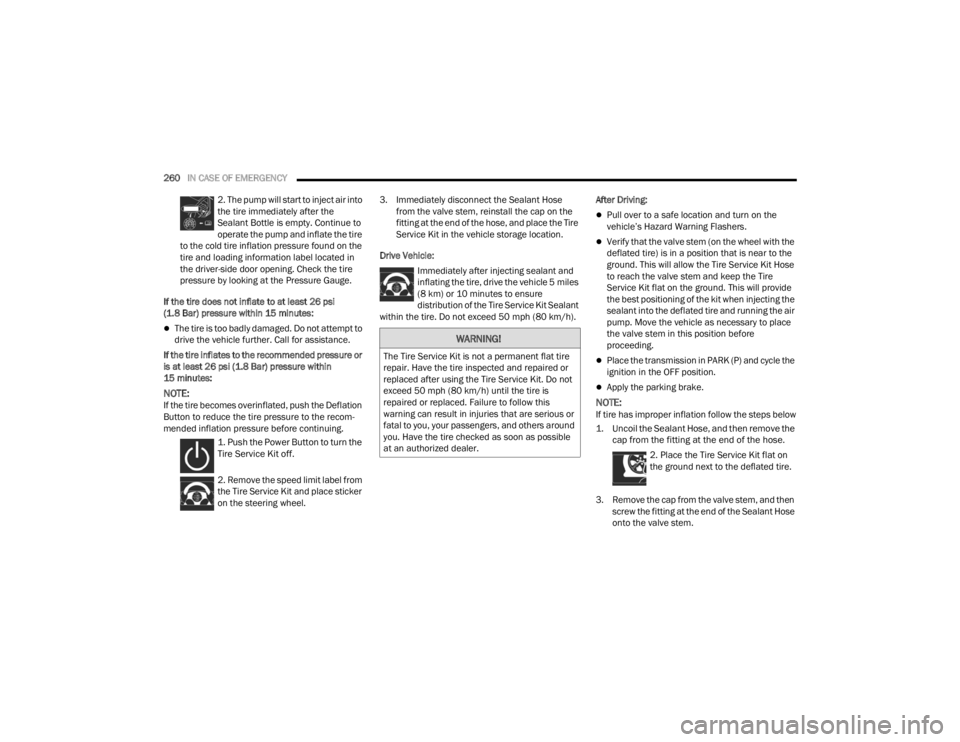
2. The pump will start to inject air into
the tire immediately after the
Sealant Bottle is empty. Continue to
operate the pump and inflate the tire
to the cold tire inflation pressure found on the
tire and loading information label located in
the driver-side door opening. Check the tire
pressure by looking at the Pressure Gauge.
If the tire does not inflate to at least 26 psi
(1.8 Bar) pressure within 15 minutes:
The tire is too badly damaged. Do not attempt to
drive the vehicle further. Call for assistance.
If the tire inflates to the recommended pressure or
is at least 26 psi (1.8 Bar) pressure within
15 minutes:
NOTE:If the tire becomes overinflated, push the Deflation
Button to reduce the tire pressure to the recom -
mended inflation pressure before continuing.
1. Push the Power Button to turn the
Tire Service Kit off.
2. Remove the speed limit label from
the Tire Service Kit and place sticker
on the steering wheel. 3. Immediately disconnect the Sealant Hose
from the valve stem, reinstall the cap on the
fitting at the end of the hose, and place the Tire
Service Kit in the vehicle storage location.
Drive Vehicle: Immediately after injecting sealant and
inflating the tire, drive the vehicle 5 miles
(8 km) or 10 minutes to ensure distribution of the Tire Service Kit Sealant
within the tire. Do not exceed 50 mph (80 km/h). After Driving:
Pull over to a safe location and turn on the
vehicle’s Hazard Warning Flashers.
Verify that the valve stem (on the wheel with the
deflated tire) is in a position that is near to the
ground. This will allow the Tire Service Kit Hose
to reach the valve stem and keep the Tire
Service Kit flat on the ground. This will provide
the best positioning of the kit when injecting the
sealant into the deflated tire and running the air
pump. Move the vehicle as necessary to place
the valve stem in this position before
proceeding.
Place the transmission in PARK (P) and cycle the
ignition in the OFF position.
Apply the parking brake.
NOTE:If tire has improper inflation follow the steps below
1. Uncoil the Sealant Hose, and then remove the
cap from the fitting at the end of the hose.
2. Place the Tire Service Kit flat on
the ground next to the deflated tire.
3. Remove the cap from the valve stem, and then screw the fitting at the end of the Sealant Hose
onto the valve stem.
WARNING!
The Tire Service Kit is not a permanent flat tire
repair. Have the tire inspected and repaired or
replaced after using the Tire Service Kit. Do not
exceed 50 mph (80 km/h) until the tire is
repaired or replaced. Failure to follow this
warning can result in injuries that are serious or
fatal to you, your passengers, and others around
you. Have the tire checked as soon as possible
at an authorized dealer.
21_RUV_OM_EN_USC_t.book Page 260
Page 263 of 348

IN CASE OF EMERGENCY261
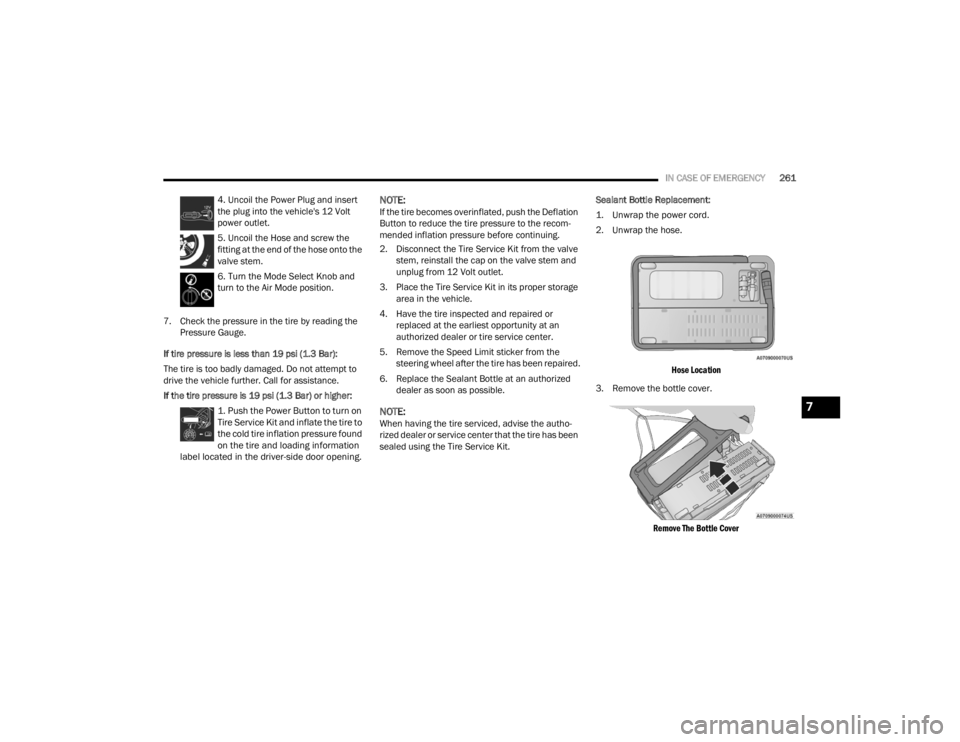
4. Uncoil the Power Plug and insert
the plug into the vehicle's 12 Volt
power outlet.
5. Uncoil the Hose and screw the
fitting at the end of the hose onto the
valve stem.
6. Turn the Mode Select Knob and
turn to the Air Mode position.
7. Check the pressure in the tire by reading the Pressure Gauge.
If tire pressure is less than 19 psi (1.3 Bar):
The tire is too badly damaged. Do not attempt to
drive the vehicle further. Call for assistance.
If the tire pressure is 19 psi (1.3 Bar) or higher:
1. Push the Power Button to turn on
Tire Service Kit and inflate the tire to
the cold tire inflation pressure found
on the tire and loading information
label located in the driver-side door opening.
NOTE:If the tire becomes overinflated, push the Deflation
Button to reduce the tire pressure to the recom -
mended inflation pressure before continuing.
2. Disconnect the Tire Service Kit from the valve stem, reinstall the cap on the valve stem and
unplug from 12 Volt outlet.
3. Place the Tire Service Kit in its proper storage area in the vehicle.
4. Have the tire inspected and repaired or replaced at the earliest opportunity at an
authorized dealer or tire service center.
5. Remove the Speed Limit sticker from the steering wheel after the tire has been repaired.
6. Replace the Sealant Bottle at an authorized dealer as soon as possible.
NOTE:When having the tire serviced, advise the autho -
rized dealer or service center that the tire has been
sealed using the Tire Service Kit. Sealant Bottle Replacement:
1. Unwrap the power cord.
2. Unwrap the hose.
Hose Location
3. Remove the bottle cover.
Remove The Bottle Cover
7
21_RUV_OM_EN_USC_t.book Page 261
Page 269 of 348

IN CASE OF EMERGENCY267
To Reset The Manual Park Release:
1. Apply firm pressure to the brake pedal while seated in the driver’s seat.
2. Pull the tether strap out again, then release it.
3. Allow the tether to retract with the lever back to its original position.
4. Verify that the transmission is in PARK (P).
5. Confirm that the tether has retracted fully and re-install the access cover. If the
access cover cannot be re-installed,
repeat steps 1 through 4.
FREEING A STUCK VEHICLE
If your vehicle becomes stuck in mud, sand or
snow, it can often be moved using a rocking
motion. Turn the steering wheel right and left to
clear the area around the front wheels. Then shift
back and forth between DRIVE (D) and REVERSE
(R) while gently pressing the accelerator.
NOTE:Shifts between DRIVE and REVERSE can only be
achieved at wheel speeds of 5 mph (8 km/h) or
less. Whenever the transmission remains in
NEUTRAL (N) for more than two seconds, you must
press the brake pedal to engage DRIVE or
REVERSE. Use the least amount of accelerator pedal
pressure that will maintain the rocking motion
without spinning the wheels or racing the engine.
NOTE:Push the ESC OFF switch to place the Electronic
Stability Control (ESC) system in “Partial Off”
mode, before rocking the vehicle
Úpage 188.
Once the vehicle has been freed, push the ESC OFF
switch again to restore “ESC On” mode.
WARNING!
Fast spinning tires can be dangerous. Forces
generated by excessive wheel speeds may
cause damage, or even failure, of the axle and
tires. A tire could explode and injure someone.
Do not spin your vehicle's wheels faster than
30 mph (48 km/h) or for longer than 30
seconds continuously without stopping when
you are stuck and do not let anyone near a
spinning wheel, no matter what the speed.
CAUTION!
Racing the engine or spinning the wheels may
lead to transmission overheating and failure.
Allow the engine to idle with the transmission
in NEUTRAL for at least one minute after every
five rocking-motion cycles. This will minimize
overheating and reduce the risk of transmis -
sion failure during prolonged efforts to free a
stuck vehicle.
When “rocking” a stuck vehicle by shifting
between DRIVE and REVERSE, do not spin the
wheels faster than 15 mph (24 km/h), or
drivetrain damage may result.
Revving the engine or spinning the wheels too
fast may lead to transmission overheating and
failure. It can also damage the tires. Do not
spin the wheels above 30 mph (48 km/h)
while in gear (no transmission shifting occur -
ring).
7
21_RUV_OM_EN_USC_t.book Page 267
Page 270 of 348

268IN CASE OF EMERGENCY
TOWING A DISABLED VEHICLE
This section describes procedures for towing a disabled vehicle using a commercial towing service.
Proper towing or lifting equipment is required to
prevent damage to your vehicle. Use only tow bars
and other equipment designed for this purpose,
following equipment manufacturer’s instructions.
Use of safety chains is mandatory. Attach a tow bar
or other towing device to main structural members
of the vehicle, not to fascia/bumper or associated
brackets. State and local laws regarding vehicles
under tow must be observed.
NOTE:
You must ensure that the Auto Park Brake
feature is disabled before towing this vehicle (if
rear wheels are on the ground), to avoid inadver -
tent Electric Park Brake (EPB) engagement. The
Auto Park Brake feature is enabled or disabled
via the customer programmable features in the
Uconnect Settings.
Vehicles with a discharged battery or total elec -
trical failure when the Electric Park Brake (EPB)
is engaged, will need a wheel dolly or jack to
raise the rear wheels off the ground when
moving the vehicle onto a flatbed.
FCA US LLC recommends towing your vehicle with
all four wheels OFF the ground using a flatbed.
If flatbed equipment is not available, this vehicle
must be towed with the front wheels OFF the
ground (using a towing dolly, or wheel lift
equipment with the front wheels raised).
Towing Condition
Wheel OFF The Ground ALL MODELS
Flat Tow NONENOT ALLOWED
Wheel Lift Or Dolly Tow Front
OK
Rear NOT ALLOWED
Flatbed ALLBEST METHOD
21_RUV_OM_EN_USC_t.book Page 268
Page 299 of 348

SERVICING AND MAINTENANCE297
F83 20 Amp Blue
–TT Park Lights *
30 Amp Pink –Headlamp Washer Pump *
F84 30 Amp Pink –Drive Train Control MOD *
F85 –20 Amp Yellow Cigar Lighter
F86 ––Not Used
F87 ––Not Used
F88 –20 Amp Yellow Front Heated Seats *
F89 –20 Amp Yellow Rear Heated Seats *
F90 ––Not Used
F91 –15 Amp BlueFront Ventilated Seats/Heated
Steering Wheel *
F92 –5 Amp Tan Security Gateway
F93 ––Not Used
F94 40 Amp Green –ESC Motor Pump
F95A –10 Amp RedUSB Charge Port — ACC RUN
F95B –10 Amp RedSelectable Fuse Location – USB IP
(Direct) B+
Cavity Cartridge Fuse Blade FuseDescription
* If Equipped
8
21_RUV_OM_EN_USC_t.book Page 297
Page 303 of 348

SERVICING AND MAINTENANCE301
Replacing Exterior Bulbs
FRONT TURN SIGNAL LAMP
See below steps to replace:
1. Open the hood.
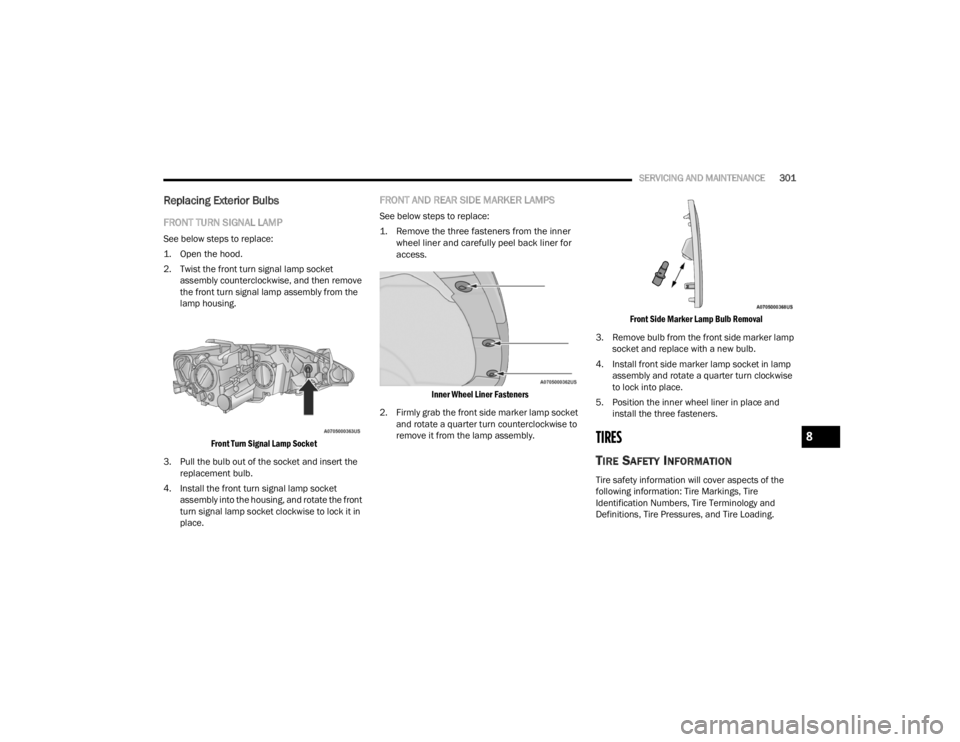
2. Twist the front turn signal lamp socket
assembly counterclockwise, and then remove
the front turn signal lamp assembly from the
lamp housing.
Front Turn Signal Lamp Socket
3. Pull the bulb out of the socket and insert the replacement bulb.
4. Install the front turn signal lamp socket assembly into the housing, and rotate the front
turn signal lamp socket clockwise to lock it in
place.
FRONT AND REAR SIDE MARKER LAMPS
See below steps to replace:
1. Remove the three fasteners from the inner wheel liner and carefully peel back liner for
access.
Inner Wheel Liner Fasteners
2. Firmly grab the front side marker lamp socket and rotate a quarter turn counterclockwise to
remove it from the lamp assembly.
Front Side Marker Lamp Bulb Removal
3. Remove bulb from the front side marker lamp socket and replace with a new bulb.
4. Install front side marker lamp socket in lamp assembly and rotate a quarter turn clockwise
to lock into place.
5. Position the inner wheel liner in place and install the three fasteners.
TIRES
TIRE SAFETY INFORMATION
Tire safety information will cover aspects of the
following information: Tire Markings, Tire
Identification Numbers, Tire Terminology and
Definitions, Tire Pressures, and Tire Loading.
8
21_RUV_OM_EN_USC_t.book Page 301