2021 CHRYSLER VOYAGER sliding door
[x] Cancel search: sliding doorPage 33 of 348

GETTING TO KNOW YOUR VEHICLE31
Using body pressure, lean forward and rearward on
the seat to be sure the seatback has latched.
Recline Lever
The bench seat does not stow in the floor, but is
removable for added cargo space.
Removing The Bench Seat
1. Adjust the driver and passenger seats forward to allow room for the bench seat
removal.
2. Raise the armrest completely, then lift the recline lever located on the outboard side of
the seat to fold the seatback flat against the
seat cushion.
Folded Position
3. Pull the release strap located behind the seat, in the center near the floor to release the
latches.
Release Strap Location
4. Once the latches are released, tilt the entire
seat toward the front of the vehicle. The seat
can now be removed through either sliding
side door, or through the liftgate.
Tilt Bench Seat Forward
NOTE:
Due to the weight of the bench seat, it is recom -
mended that two people are utilized for its
removal.
When storing the removed bench seat, it is
important to keep the seatback in the folded
position.
2
21_RUV_OM_EN_USC_t.book Page 31
Page 58 of 348

56GETTING TO KNOW YOUR VEHICLE
Rear Courtesy/Reading Lights —
If Equipped
Located above the rear passengers are
courtesy/reading lights. The lights turn on when a
front door, a sliding door or the liftgate is opened.
If your vehicle is equipped with Remote Keyless
Entry (RKE) the lights will also turn on when the
unlock button on the key fob is pushed.
The courtesy lights also function as reading lights.
Push the lens to turn these lights on while inside
the vehicle. Push the lens a second time to turn
each light off.
Ambient Light Control — If Equipped
Rotate the ambient dimmer control upward or
downward to increase or decrease the brightness
of the ambient light located in the door handle
lights, under instrument panel lights, door map
pocket lights, and cubby bin lights.
Ambient Light/Door Handle Light Dimmer
Interior Lighting Off
Rotate the dimmer control on the right to the off
position (extreme bottom). The interior lights will
remain off when the doors or liftgate are open.
Instrument Panel Dimmer Control
The instrument panel dimmer control is part of the
headlight switch, and is located on the driver’s side
of the instrument panel.
With the parking lights or headlights on, rotate the
instrument panel dimmer control upward or
downward to increase or decrease the brightness
of the instrument panel. At the top detent of the
instrument panel dimmer, all the interior lights will
also illuminate. At the bottom most setting
(extreme bottom) interior lights are turned off
(dome off), and the cluster, radio and instrument
lighting go to their lowest dimmable setting.Rotate the instrument panel dimmer control
upward to the first detent. This feature brightens
all text displays such as the odometer, instrument
cluster display, and radio when the position lights
or headlights are on.
Instrument Panel Dimmer
WINDSHIELD WIPER AND WASHERS
The windshield wiper/washer controls are located
on the right side of the steering column. The front
wipers are operated by rotating a switch, located
on the end of the lever.
21_RUV_OM_EN_USC_t.book Page 56
Page 81 of 348

GETTING TO KNOW YOUR VEHICLE79
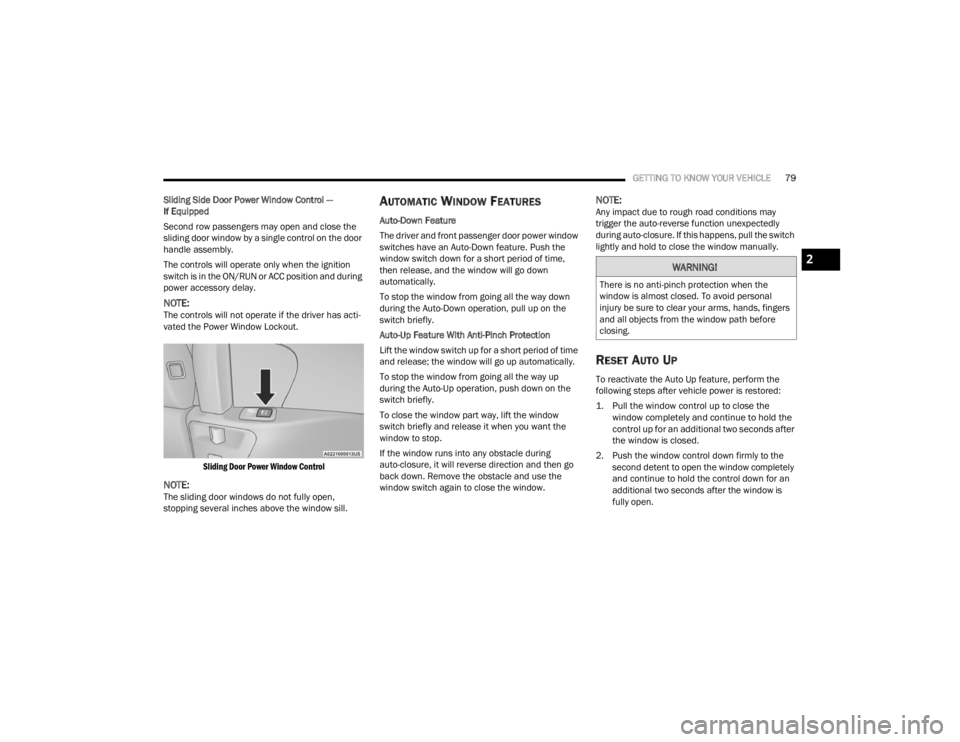
Sliding Side Door Power Window Control —
If Equipped
Second row passengers may open and close the
sliding door window by a single control on the door
handle assembly.
The controls will operate only when the ignition
switch is in the ON/RUN or ACC position and during
power accessory delay.
NOTE:The controls will not operate if the driver has acti-
vated the Power Window Lockout.
Sliding Door Power Window Control
NOTE:The sliding door windows do not fully open,
stopping several inches above the window sill.
AUTOMATIC WINDOW FEATURES
Auto-Down Feature
The driver and front passenger door power window
switches have an Auto-Down feature. Push the
window switch down for a short period of time,
then release, and the window will go down
automatically.
To stop the window from going all the way down
during the Auto-Down operation, pull up on the
switch briefly.
Auto-Up Feature With Anti-Pinch Protection
Lift the window switch up for a short period of time
and release; the window will go up automatically.
To stop the window from going all the way up
during the Auto-Up operation, push down on the
switch briefly.
To close the window part way, lift the window
switch briefly and release it when you want the
window to stop.
If the window runs into any obstacle during
auto-closure, it will reverse direction and then go
back down. Remove the obstacle and use the
window switch again to close the window.
NOTE:Any impact due to rough road conditions may
trigger the auto-reverse function unexpectedly
during auto-closure. If this happens, pull the switch
lightly and hold to close the window manually.
RESET AUTO UP
To reactivate the Auto Up feature, perform the
following steps after vehicle power is restored:
1. Pull the window control up to close the window completely and continue to hold the
control up for an additional two seconds after
the window is closed.
2. Push the window control down firmly to the second detent to open the window completely
and continue to hold the control down for an
additional two seconds after the window is
fully open.
WARNING!
There is no anti-pinch protection when the
window is almost closed. To avoid personal
injury be sure to clear your arms, hands, fingers
and all objects from the window path before
closing.
2
21_RUV_OM_EN_USC_t.book Page 79
Page 84 of 348

82GETTING TO KNOW YOUR VEHICLE
Using the above ways to open or close the liftgate:
When the liftgate is fully closed, the liftgate will
open
When the liftgate is fully open, the liftgate will
close
When the liftgate is moving, the liftgate will
reverse
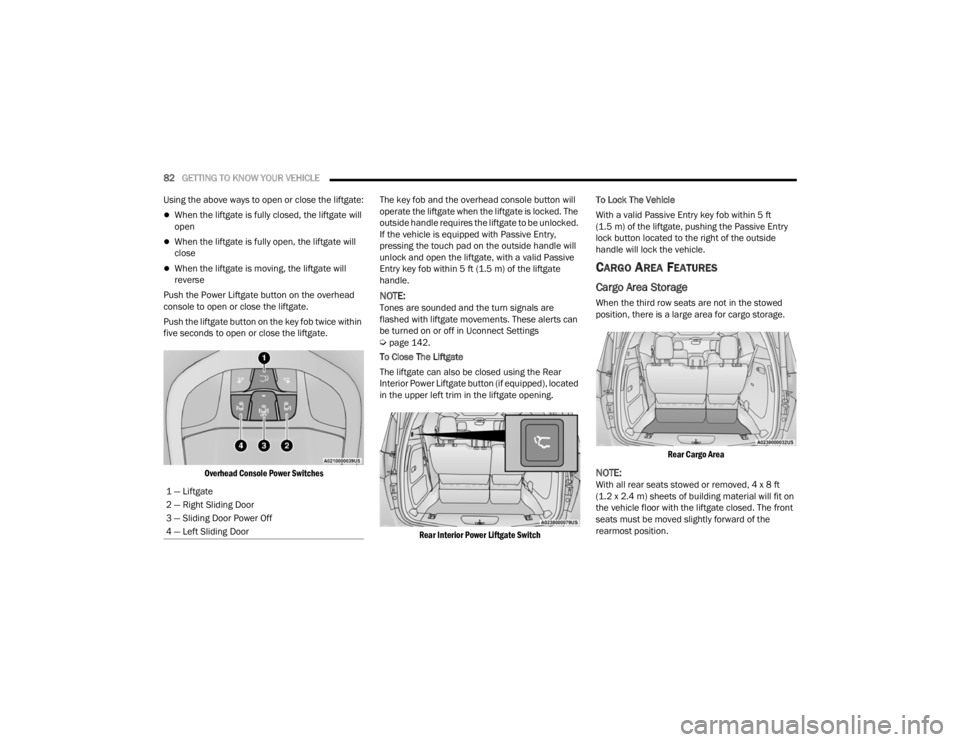
Push the Power Liftgate button on the overhead
console to open or close the liftgate.
Push the liftgate button on the key fob twice within
five seconds to open or close the liftgate.
Overhead Console Power Switches
The key fob and the overhead console button will
operate the liftgate when the liftgate is locked. The
outside handle requires the liftgate to be unlocked.
If the vehicle is equipped with Passive Entry,
pressing the touch pad on the outside handle will
unlock and open the liftgate, with a valid Passive
Entry key fob within 5 ft (1.5 m) of the liftgate
handle.
NOTE:Tones are sounded and the turn signals are
flashed with liftgate movements. These alerts can
be turned on or off in Uconnect Settings
Úpage 142.
To Close The Liftgate
The liftgate can also be closed using the Rear
Interior Power Liftgate button (if equipped), located
in the upper left trim in the liftgate opening.
Rear Interior Power Liftgate Switch
To Lock The Vehicle
With a valid Passive Entry key fob within 5 ft
(1.5 m) of the liftgate, pushing the Passive Entry
lock button located to the right of the outside
handle will lock the vehicle.
CARGO AREA FEATURES
Cargo Area Storage
When the third row seats are not in the stowed
position, there is a large area for cargo storage.
Rear Cargo Area
NOTE:With all rear seats stowed or removed, 4 x 8 ft
(1.2 x 2.4 m) sheets of building material will fit on
the vehicle floor with the liftgate closed. The front
seats must be moved slightly forward of the
rearmost position.
1 — Liftgate
2 — Right Sliding Door
3 — Sliding Door Power Off
4 — Left Sliding Door
21_RUV_OM_EN_USC_t.book Page 82
Page 151 of 348

MULTIMEDIA149
Brakes
Rear ParkSense Volume This setting adjusts the volume of the Rear ParkSense system. The available settings are
“Low”, “Medium”, and “High”.
Rear ParkSense Braking Assist This setting will turn the Rear ParkSense Braking Assist on or off.
Sliding Door Alert This setting will turn the Sliding Door Alert on and off.
Blind Spot Alert — If Equipped This setting will change the type of alert provided when an object is detected in a vehicle’s blind spot. The
“Off” setting will turn off Blind Spot Alert. The “Lights” setting will activate the Blind Spot Alert lights on
the outside mirrors. The “Lights & Chime” setting will activate both the lights on the outside mirrors and
an audible chime.
Hill Start Assist This setting will turn the Hill Start Assist system on or off.
Setting Name Description
When the Brakes button is pressed on the touchscreen, the system will display settings related to the vehicle’s brake system.
Setting Name Description
Auto Park BrakeThis setting will turn the Auto Park Brake on or off.
Brake Service This setting will allow you to retract the brakes for servicing.
5
21_RUV_OM_EN_USC_t.book Page 149
Page 152 of 348

150MULTIMEDIA
Lights
When the Lights button is pressed on the touchscreen, the system displays the options related to the vehicle’s exterior and interior lights.
NOTE:When the “Daytime Running Lights” feature is selected, the daytime running lights can be turned on or off. This feature is only allowed by law in the country of
the vehicle purchased.
Setting Name Description
Headlight Off DelayThis setting will allow you to set the amount of time it takes for the headlights to shut off after the vehicle
is turned off. The available settings are “0 sec”, “30 sec”, “60 sec”, and “90 sec”.
Headlight Illumination On Approach This setting will allow you to set the amount of time it takes for the headlights to shut off after the vehicle
is unlocked. The available settings are “0 sec”, “30 sec”, “60 sec”, and “90 sec”.
Daytime Running Lights This setting will allow you to turn the Daytime Running Lights on or off.
Flash Lights With Lock This setting will allow you to turn the flashing of the lights when the Lock button is pushed on the key fob
on or off.
Flash Lights With Sliding Door This setting will flash the lights when the sliding door reverses. The available options are “On” and “Off”.
21_RUV_OM_EN_USC_t.book Page 150
Page 154 of 348

152MULTIMEDIA
Seats & Comfort
Power Liftgate Alert This setting will chime an audible alert when the power liftgate is raising or lowering. Selectable options
are “On” and “Off”.
Passive Entry This setting will allow you to turn the Passive Entry feature (Keyless Enter n’ Go™) on or off.
Sliding Door Alert This setting will chime an audible alert when the sliding door reverses or senses an obstacle. Selectable
options are “On” and “Off”.
Flash Lights with Sliding Door This setting will flash the lights when the sliding door is opening. Selectable options are “On” and “Off”.
Setting Name Description
When the Seats & Comfort button is pressed on the touchscreen, the system displays the options related to the vehicle’s comfort systems when remote start
has been activated or the vehicle has been started.
Setting Name Description
Auto-On Driver Heated/Ventilated Seat & Heated
Steering Wheel With Vehicle StartThis setting will activate the vehicle’s comfort system and heated seats (if equipped) or heated steering
wheel (if equipped) when the vehicle is remote started or ignition is started. The available options are
“On” and “Off”.
21_RUV_OM_EN_USC_t.book Page 152
Page 208 of 348

206SAFETY
Lap/Shoulder Belt Operating Instructions
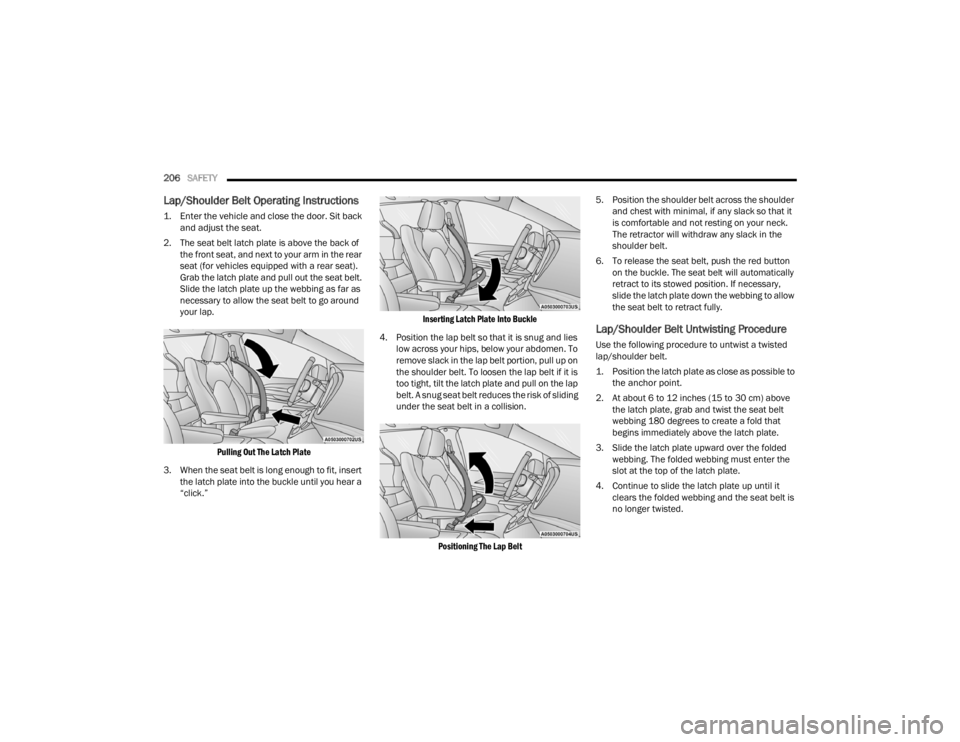
1. Enter the vehicle and close the door. Sit back
and adjust the seat.
2. The seat belt latch plate is above the back of the front seat, and next to your arm in the rear
seat (for vehicles equipped with a rear seat).
Grab the latch plate and pull out the seat belt.
Slide the latch plate up the webbing as far as
necessary to allow the seat belt to go around
your lap.
Pulling Out The Latch Plate
3. When the seat belt is long enough to fit, insert the latch plate into the buckle until you hear a
“click.”
Inserting Latch Plate Into Buckle
4. Position the lap belt so that it is snug and lies low across your hips, below your abdomen. To
remove slack in the lap belt portion, pull up on
the shoulder belt. To loosen the lap belt if it is
too tight, tilt the latch plate and pull on the lap
belt. A snug seat belt reduces the risk of sliding
under the seat belt in a collision.
Positioning The Lap Belt
5. Position the shoulder belt across the shoulder
and chest with minimal, if any slack so that it
is comfortable and not resting on your neck.
The retractor will withdraw any slack in the
shoulder belt.
6. To release the seat belt, push the red button on the buckle. The seat belt will automatically
retract to its stowed position. If necessary,
slide the latch plate down the webbing to allow
the seat belt to retract fully.
Lap/Shoulder Belt Untwisting Procedure
Use the following procedure to untwist a twisted
lap/shoulder belt.
1. Position the latch plate as close as possible to the anchor point.
2. At about 6 to 12 inches (15 to 30 cm) above the latch plate, grab and twist the seat belt
webbing 180 degrees to create a fold that
begins immediately above the latch plate.
3. Slide the latch plate upward over the folded webbing. The folded webbing must enter the
slot at the top of the latch plate.
4. Continue to slide the latch plate up until it clears the folded webbing and the seat belt is
no longer twisted.
21_RUV_OM_EN_USC_t.book Page 206