2021 CHRYSLER VOYAGER ignition
[x] Cancel search: ignitionPage 262 of 348

260IN CASE OF EMERGENCY
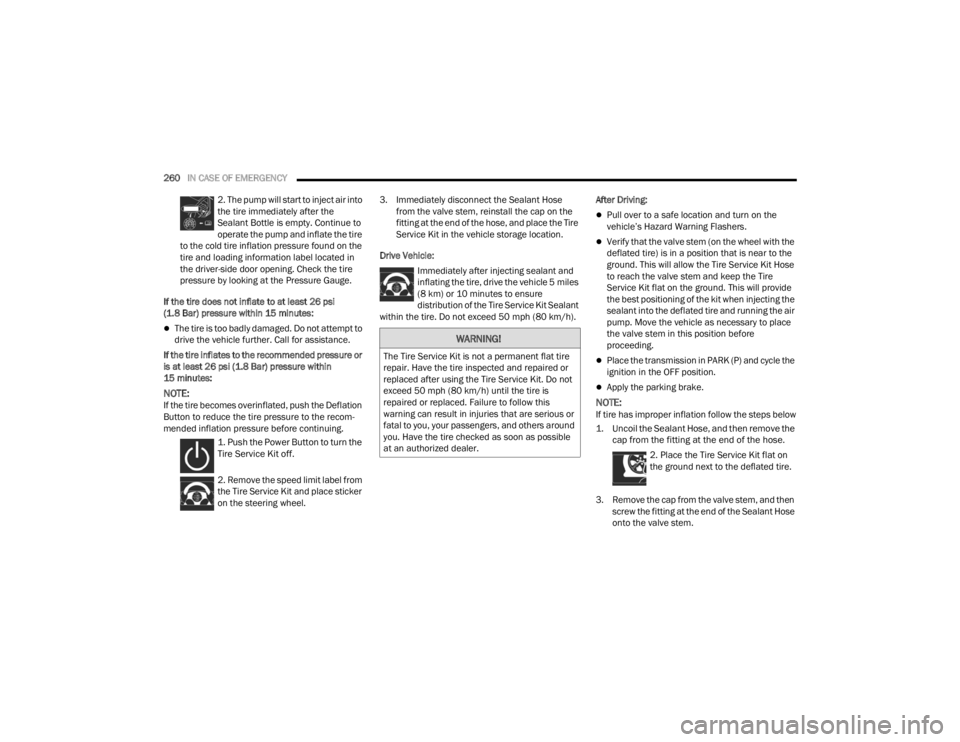
2. The pump will start to inject air into
the tire immediately after the
Sealant Bottle is empty. Continue to
operate the pump and inflate the tire
to the cold tire inflation pressure found on the
tire and loading information label located in
the driver-side door opening. Check the tire
pressure by looking at the Pressure Gauge.
If the tire does not inflate to at least 26 psi
(1.8 Bar) pressure within 15 minutes:
The tire is too badly damaged. Do not attempt to
drive the vehicle further. Call for assistance.
If the tire inflates to the recommended pressure or
is at least 26 psi (1.8 Bar) pressure within
15 minutes:
NOTE:If the tire becomes overinflated, push the Deflation
Button to reduce the tire pressure to the recom -
mended inflation pressure before continuing.
1. Push the Power Button to turn the
Tire Service Kit off.
2. Remove the speed limit label from
the Tire Service Kit and place sticker
on the steering wheel. 3. Immediately disconnect the Sealant Hose
from the valve stem, reinstall the cap on the
fitting at the end of the hose, and place the Tire
Service Kit in the vehicle storage location.
Drive Vehicle: Immediately after injecting sealant and
inflating the tire, drive the vehicle 5 miles
(8 km) or 10 minutes to ensure distribution of the Tire Service Kit Sealant
within the tire. Do not exceed 50 mph (80 km/h). After Driving:
Pull over to a safe location and turn on the
vehicle’s Hazard Warning Flashers.
Verify that the valve stem (on the wheel with the
deflated tire) is in a position that is near to the
ground. This will allow the Tire Service Kit Hose
to reach the valve stem and keep the Tire
Service Kit flat on the ground. This will provide
the best positioning of the kit when injecting the
sealant into the deflated tire and running the air
pump. Move the vehicle as necessary to place
the valve stem in this position before
proceeding.
Place the transmission in PARK (P) and cycle the
ignition in the OFF position.
Apply the parking brake.
NOTE:If tire has improper inflation follow the steps below
1. Uncoil the Sealant Hose, and then remove the
cap from the fitting at the end of the hose.
2. Place the Tire Service Kit flat on
the ground next to the deflated tire.
3. Remove the cap from the valve stem, and then screw the fitting at the end of the Sealant Hose
onto the valve stem.
WARNING!
The Tire Service Kit is not a permanent flat tire
repair. Have the tire inspected and repaired or
replaced after using the Tire Service Kit. Do not
exceed 50 mph (80 km/h) until the tire is
repaired or replaced. Failure to follow this
warning can result in injuries that are serious or
fatal to you, your passengers, and others around
you. Have the tire checked as soon as possible
at an authorized dealer.
21_RUV_OM_EN_USC_t.book Page 260
Page 265 of 348

IN CASE OF EMERGENCY263
Only jump directly off positive post which has a
positive (+) symbol on or around the post.
Battery Post Locations
See below steps to prepare for jump starting:
1. Apply the parking brake, shift the automatic transmission into PARK (P) and place the
ignition to OFF.
2. Turn off the heater, radio, and all electrical accessories.
3. Pull upward and remove the protective cover over the remote positive (+) battery post.
4. If using another vehicle to jump start the battery, park the vehicle within the jumper
cables reach, set the parking brake and make
sure the ignition is OFF.
JUMP STARTING PROCEDURE
Connecting The Jumper Cables
1. Connect the positive
(+) end of the jumper
cable to the remote positive (+)
post of the
vehicle with the discharged battery.
2. Connect the opposite end of the positive (+)
jumper cable to the positive (+) post of the
booster battery.
3. Connect the negative (-) end of the jumper
cable to the negative (-) post of the booster
battery.
WARNING!
Take care to avoid the radiator cooling fan
whenever the hood is raised. It can start
anytime the ignition switch is ON. You can be
injured by moving fan blades.
Remove any metal jewelry such as rings,
watch bands and bracelets that could make
an inadvertent electrical contact. You could be
seriously injured.
Batteries contain sulfuric acid that can burn
your skin or eyes and generate hydrogen gas
which is flammable and explosive. Keep open
flames or sparks away from the battery.
WARNING!
Do not allow vehicles to touch each other as this
could establish a ground connection and
personal injury could result.
WARNING!
Failure to follow this jump starting procedure
could result in personal injury or property
damage due to battery explosion.
CAUTION!
Failure to follow these procedures could result in
damage to the charging system of the booster
vehicle or the discharged vehicle.
7
21_RUV_OM_EN_USC_t.book Page 263
Page 271 of 348

IN CASE OF EMERGENCY269
(Continued)
NOTE:Ensure that the Electric Park Brake is released,
and remains released, while being towed.
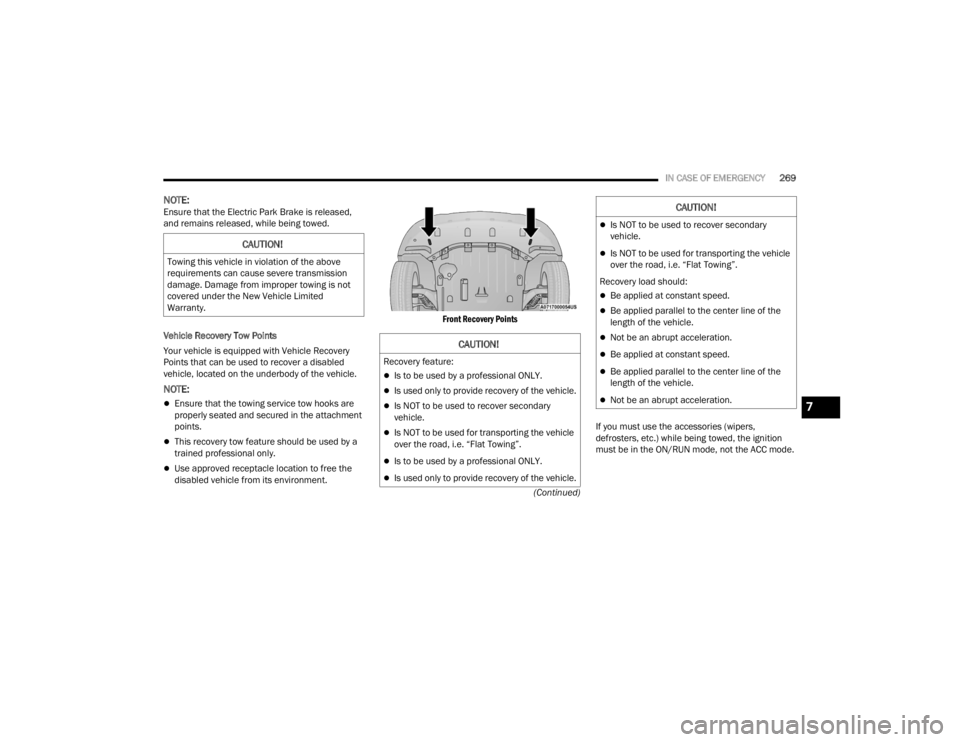
Vehicle Recovery Tow Points
Your vehicle is equipped with Vehicle Recovery
Points that can be used to recover a disabled
vehicle, located on the underbody of the vehicle.
NOTE:
Ensure that the towing service tow hooks are
properly seated and secured in the attachment
points.
This recovery tow feature should be used by a
trained professional only.
Use approved receptacle location to free the
disabled vehicle from its environment.
Front Recovery Points
If you must use the accessories (wipers,
defrosters, etc.) while being towed, the ignition
must be in the ON/RUN mode, not the ACC mode.
CAUTION!
Towing this vehicle in violation of the above
requirements can cause severe transmission
damage. Damage from improper towing is not
covered under the New Vehicle Limited
Warranty.
CAUTION!
Recovery feature:
Is to be used by a professional ONLY.
Is used only to provide recovery of the vehicle.
Is NOT to be used to recover secondary
vehicle.
Is NOT to be used for transporting the vehicle
over the road, i.e. “Flat Towing”.
Is to be used by a professional ONLY.
Is used only to provide recovery of the vehicle.
Is NOT to be used to recover secondary
vehicle.
Is NOT to be used for transporting the vehicle
over the road, i.e. “Flat Towing”.
Recovery load should:
Be applied at constant speed.
Be applied parallel to the center line of the
length of the vehicle.
Not be an abrupt acceleration.
Be applied at constant speed.
Be applied parallel to the center line of the
length of the vehicle.
Not be an abrupt acceleration.
CAUTION!
7
21_RUV_OM_EN_USC_t.book Page 269
Page 272 of 348

270IN CASE OF EMERGENCY
NOTE:The Safehold feature will engage the Electric Park
Brake whenever the driver's door is opened (if the
ignition is ON, transmission is not in PARK, and
brake pedal is released). If you are towing this
vehicle with the ignition in the ON/RUN mode, you
must manually disable the Electric Park Brake
each time the driver's door is opened, by pressing
the brake pedal and then releasing the EPB.
If the key fob is unavailable or the vehicle's battery
is discharged, detailed instructions on shifting the
transmission out of PARK in order to move the
vehicle
Úpage 266.
ENHANCED ACCIDENT RESPONSE SYSTEM
(EARS)
This vehicle is equipped with an Enhanced
Accident Response System.
This feature is a communication network that
takes effect in the event of an impact
Úpage 223.
EVENT DATA RECORDER (EDR)
This vehicle is equipped with an event data
recorder (EDR). The main purpose of an EDR is to
record data that will assist in understanding how a
vehicle’s systems performed under certain crash
or near crash-like situations, such as an air bag
deployment or hitting a road obstacle
Úpage 224.
CAUTION!
Do not use sling-type equipment when towing.
Vehicle damage may occur.
When securing the vehicle to a flatbed truck,
do not attach to front or rear suspension
components. Damage to your vehicle may
result from improper towing.
Ensure that the Electric Park Brake is
released, and remains released, while being
towed.
21_RUV_OM_EN_USC_t.book Page 270
Page 281 of 348

SERVICING AND MAINTENANCE279
(Continued)
ACCESSORY DRIVE BELT INSPECTION
When inspecting accessory drive belts, small
cracks that run across the ribbed surface of a belt
from rib to rib, are considered normal. These are
not a reason to replace belt. However, cracks
running along a rib (not across) are not normal. Any
belt with cracks running along a rib must be
replaced. Also, have the belt replaced if it has
excessive wear, frayed cords, or severe glazing.
Accessory Belt (Serpentine Belt)
Conditions that would require replacement:
Rib chunking (one or more ribs has separated
from belt body)
Rib or belt wear
Longitudinal belt cracking
(cracks between two ribs)
Belt slips
“Groove jumping" (belt does not maintain
correct position on pulley)
Belt broken
NOTE:Identify and correct problem before new belt is
installed
Noise (objectionable squeal, squeak, or rumble
is heard or felt while drive belt is in operation).
Some conditions can be caused by a faulty
component such as a belt pulley. Belt pulleys
should be carefully inspected for damage and
proper alignment.
Belt replacement on some models requires the
use of special tools; we recommend having your
vehicle serviced at an authorized dealer.
AIR CONDITIONER MAINTENANCE
For best possible performance, your air conditioner
should be checked and serviced by an authorized
dealer at the start of each warm season. This
service should include cleaning of the condenser
fins and a performance test. Drive belt tension
should also be checked at this time.
WARNING!
Do not attempt to inspect an accessory drive
belt with vehicle running.
When working near the radiator cooling fan,
disconnect the fan motor lead. The fan is
temperature controlled and can start at any
time regardless of ignition mode. You could be
injured by the moving fan blades.
You can be badly injured working on or around
a motor vehicle. Only do service work for which
you have the knowledge and the proper equip -
ment. If you have any doubt about your ability
to perform a service job, take your vehicle to a
competent mechanic.
WARNING!
Use only refrigerants and compressor lubri -
cants approved by the manufacturer for your
air conditioning system. Some unapproved
refrigerants are flammable and can explode,
injuring you. Other unapproved refrigerants or
lubricants can cause the system to fail,
requiring costly repairs. Refer to Warranty
Information located online, for further
warranty information.8
21_RUV_OM_EN_USC_t.book Page 279
Page 282 of 348

280SERVICING AND MAINTENANCE
Refrigerant Recovery And Recycling —
R–1234yf
R–1234yf Air Conditioning Refrigerant is a
hydrofluoroolefin (HFO) that is endorsed by the
Environmental Protection Agency and is an
ozone-friendly substance with a low
global-warming potential. It is recommended that
air conditioning service be performed by an
authorized dealer using recovery and recycling
equipment.
NOTE:Use only manufacturer approved A/C system PAG
compressor oil, and refrigerants.
Cabin Air Filter
The cabin air filter is located in the fresh air inlet
behind the glove compartment. Perform the
following procedure to replace the filter:
1. Remove all contents from the glove
compartment.
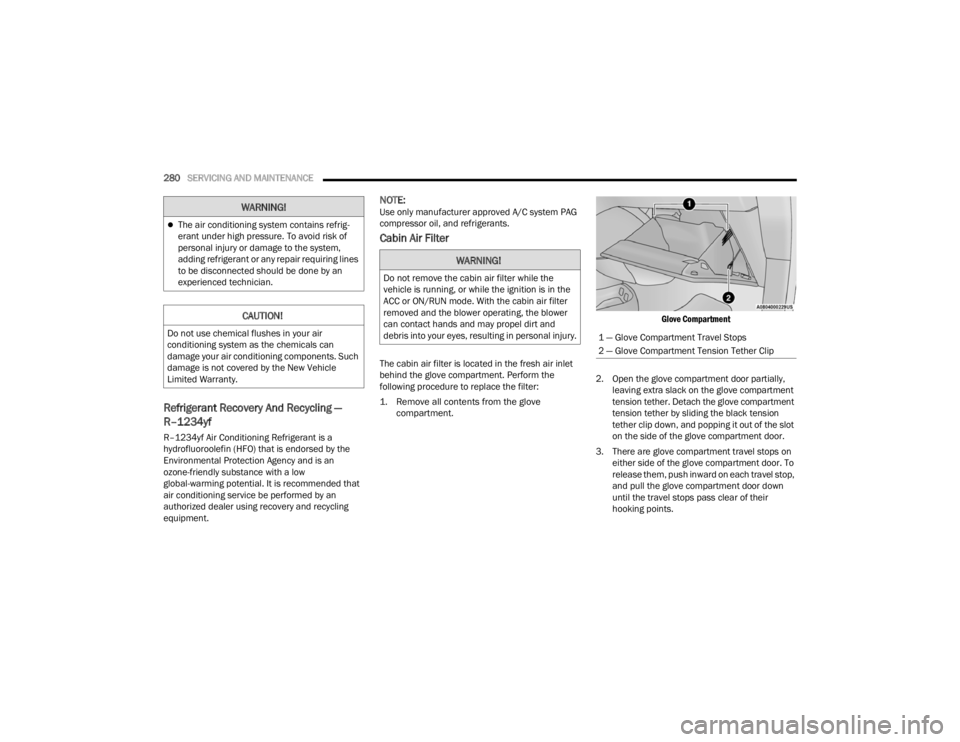
Glove Compartment
2. Open the glove compartment door partially, leaving extra slack on the glove compartment
tension tether. Detach the glove compartment
tension tether by sliding the black tension
tether clip down, and popping it out of the slot
on the side of the glove compartment door.
3. There are glove compartment travel stops on either side of the glove compartment door. To
release them, push inward on each travel stop,
and pull the glove compartment door down
until the travel stops pass clear of their
hooking points.
The air conditioning system contains refrig -
erant under high pressure. To avoid risk of
personal injury or damage to the system,
adding refrigerant or any repair requiring lines
to be disconnected should be done by an
experienced technician.
CAUTION!
Do not use chemical flushes in your air
conditioning system as the chemicals can
damage your air conditioning components. Such
damage is not covered by the New Vehicle
Limited Warranty.
WARNING!
WARNING!
Do not remove the cabin air filter while the
vehicle is running, or while the ignition is in the
ACC or ON/RUN mode. With the cabin air filter
removed and the blower operating, the blower
can contact hands and may propel dirt and
debris into your eyes, resulting in personal injury.
1 — Glove Compartment Travel Stops
2 — Glove Compartment Tension Tether Clip
21_RUV_OM_EN_USC_t.book Page 280
Page 288 of 348

286SERVICING AND MAINTENANCE
Under normal operating conditions, the catalytic
converter will not require maintenance. However, it
is important to keep the engine properly tuned to
ensure proper catalyst operation and prevent
possible catalyst damage.
NOTE:Intentional tampering with emissions control
systems can result in civil penalties being
assessed against you.
In unusual situations involving grossly
malfunctioning engine operation, a scorching odor
may suggest severe and abnormal catalyst
overheating. If this occurs, stop the vehicle, turn off
the engine and allow it to cool. Service, including a
tune-up to the manufacturer specifications, should
be obtained immediately.
To minimize the possibility of catalytic converter
damage:
Do not interrupt the ignition when the transmis -
sion is in gear and the vehicle is in motion.
Do not try to start the vehicle by pushing or
towing the vehicle.
Do not idle the engine with any ignition compo -
nents disconnected or removed, such as when
diagnostic testing, or for prolonged periods
during very rough idle or malfunctioning oper -
ating conditions.
COOLING SYSTEM
Engine Coolant Checks
Check the engine coolant (antifreeze) protection
every 12 months (before the onset of freezing
weather, where applicable). If the engine coolant is
dirty, the system should be drained, flushed, and
refilled with fresh Organic Additive Technology
(OAT) coolant (conforming to MS.90032) by an authorized dealer. Check the front of the A/C
condenser for any accumulation of bugs, leaves,
etc. If dirty, clean by gently spraying water from a
garden hose vertically down the face of the
condenser.
Check the engine cooling system hoses for brittle
rubber, cracking, tears, cuts, and tightness of the
connection at the coolant recovery bottle and
radiator. Inspect the entire system for leaks. DO
NOT REMOVE THE COOLANT PRESSURE CAP
WHEN THE COOLING SYSTEM IS HOT.
Cooling System — Drain, Flush And Refill
NOTE:Some vehicles require special tools to add coolant
properly. Failure to fill these systems properly
could lead to severe internal engine damage. If any
coolant is needed to be added to the system
please contact an authorized dealer.
If the engine coolant (antifreeze) is dirty
or contains visible sediment, have an authorized
dealer clean and flush with Organic Additive
Technology (OAT) coolant (conforming to
MS.90032).
For the proper maintenance intervals
Úpage 272.
WARNING!
You or others can be badly burned by hot
engine coolant (antifreeze) or steam from your
radiator. If you see or hear steam coming from
under the hood, do not open the hood until the
radiator has had time to cool. Never open a
cooling system pressure cap when the radi
-
ator or coolant bottle is hot.
Keep hands, tools, clothing, and jewelry away
from the radiator cooling fan when the hood is
raised. The fan starts automatically and may
start at any time, whether the engine is
running or not.
When working near the radiator cooling fan,
disconnect the fan motor lead or turn the igni -
tion to the OFF mode. The fan is temperature
controlled and can start at any time the igni -
tion is in the ON mode.
21_RUV_OM_EN_USC_t.book Page 286
Page 292 of 348

290SERVICING AND MAINTENANCE
(Continued)
AUTOMATIC TRANSMISSION
Special Additives
The manufacturer strongly recommends against
using any special additives in the transmission.
Automatic Transmission Fluid (ATF) is an
engineered product and its performance may be
impaired by supplemental additives. Therefore, do
not add any fluid additives to the transmission.
Avoid using transmission sealers as they may
adversely affect seals.
Fluid Level Check
The fluid level is preset at the factory and does not
require adjustment under normal operating
conditions. Routine fluid level checks are not
required; therefore the transmission has no
dipstick. An authorized dealer can check your
transmission fluid level using special service tools. If you notice fluid leakage or transmission
malfunction, visit an authorized dealer
immediately to have the transmission fluid level
checked. Operating the vehicle with an improper
fluid level can cause severe transmission damage.
Fluid And Filter Changes
Under normal operating conditions, the fluid
installed at the factory will provide satisfactory
lubrication for the life of the vehicle.
Routine fluid and filter changes are not required.
However, change the fluid and filter if the fluid
becomes contaminated (with water, etc.), or if the
transmission is disassembled for any reason.
Selection Of Lubricant
It is important to use the proper transmission fluid
to ensure optimum transmission performance and
life. Use only the manufacturer specified
transmission fluid
Úpage 327. It is important to
maintain the transmission fluid at the correct level
using the recommended fluid.
NOTE:No chemical flushes should be used in any trans -
mission; only the approved lubricant should be
used.
FUSES
General Information
CAUTION!
Do not use chemical flushes in your
transmission as the chemicals can damage your
transmission components. Such damage is not
covered by the New Vehicle Limited Warranty.
CAUTION!
If a transmission fluid leak occurs, visit an
authorized dealer immediately. Severe
transmission damage may occur. An authorized
dealer has the proper tools to adjust the fluid
level accurately.
CAUTION!
Using a transmission fluid other than
manufacturer recommended fluid may cause
deterioration in transmission shift quality and/or
torque converter shudder
Úpage 327.
WARNING!
When replacing a blown fuse, always use an
appropriate replacement fuse with the same
amp rating as the original fuse. Never replace
a fuse with another fuse of higher amp rating.
Never replace a blown fuse with metal wires or
any other material. Do not place a fuse inside
a circuit breaker cavity or vice versa. Failure to
use proper fuses may result in serious
personal injury, fire and/or property damage.
Before replacing a fuse, make sure that the
ignition is off and that all the other services
are switched off and/or disengaged.
21_RUV_OM_EN_USC_t.book Page 290