2021 CHEVROLET SILVERADO 2500HD reset
[x] Cancel search: resetPage 325 of 433
Chevrolet Silverado 2500 HD/3500 HD Owner Manual (GMNA-Localizing-U.
S./Canada/Mexico-14632154) - 2021 - CRC - 11/20/20
324 Vehicle Care
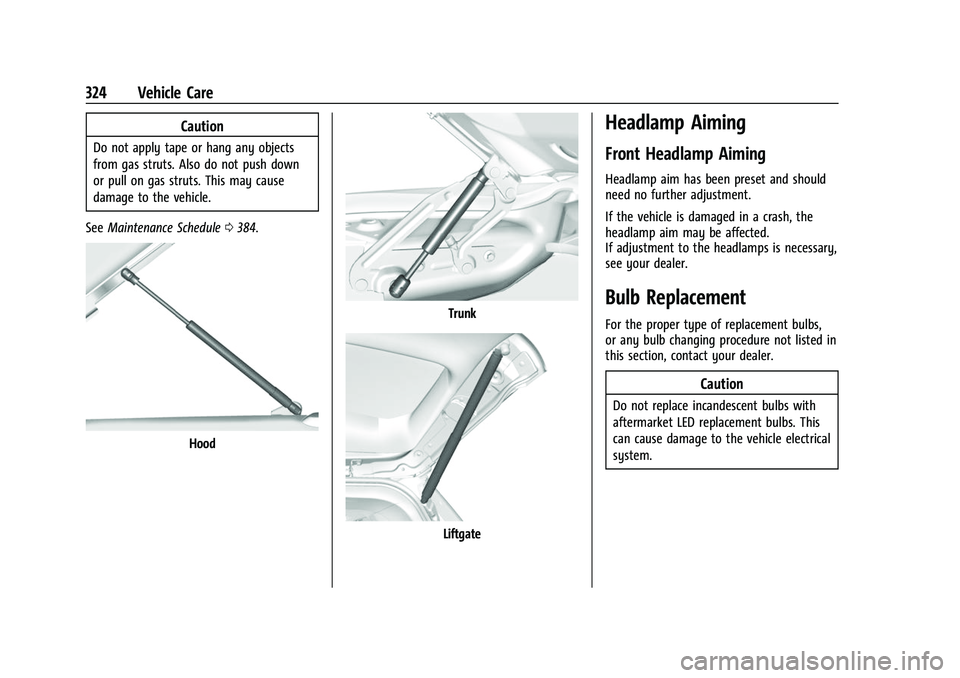
Caution
Do not apply tape or hang any objects
from gas struts. Also do not push down
or pull on gas struts. This may cause
damage to the vehicle.
See Maintenance Schedule 0384.
Hood
Trunk
Liftgate
Headlamp Aiming
Front Headlamp Aiming
Headlamp aim has been preset and should
need no further adjustment.
If the vehicle is damaged in a crash, the
headlamp aim may be affected.
If adjustment to the headlamps is necessary,
see your dealer.
Bulb Replacement
For the proper type of replacement bulbs,
or any bulb changing procedure not listed in
this section, contact your dealer.
Caution
Do not replace incandescent bulbs with
aftermarket LED replacement bulbs. This
can cause damage to the vehicle electrical
system.
Page 347 of 433

Chevrolet Silverado 2500 HD/3500 HD Owner Manual (GMNA-Localizing-U.
S./Canada/Mexico-14632154) - 2021 - CRC - 11/20/20
346 Vehicle Care
A TPMS relearn tool can also be purchased.
See Tire Pressure Monitor Sensor Activation
Tool at www.gmtoolsandequipment.com or
call 1-800-GM TOOLS (1-800-468-6657).
There are two minutes to match the first
tire/wheel position, and five minutes overall
to match all four tire/wheel positions. If it
takes longer, the matching process stops
and must be restarted.
The TPMS sensor matching process is:1. Set the parking brake.
2. Turn the ignition on without starting the vehicle.
3. Uplevel DIC Only: Make sure the Tire Pressure info page option is turned on.
The info pages on the DIC can be turned
on and off through the Options menu.
See Driver Information Center (DIC) (Base
Level) 0119 or
Driver Information Center (DIC) (Midlevel
and Uplevel) 0120.
4. If the vehicle has an uplevel DIC, use the DIC controls on the right side of the
steering wheel to scroll to the Tire
Pressure screen under the DIC info page.
If the vehicle has a base level DIC, use
the trip odometer reset stem to scroll to
the Tire Pressure screen. 5. If the vehicle has an uplevel DIC, press
and hold the thumbwheel located in the
center of the DIC controls on the right
side of the steering wheel.
If the vehicle has a base level DIC, press
and hold the trip odometer reset stem
for about five seconds. A message asking
if the process should begin should
appear. Select yes and press the trip
odometer reset stem to confirm the
selection.
The horn sounds twice to signal the
receiver is in relearn mode and the TIRE
LEARNING ACTIVE message displays on
the DIC screen.
6. Start with the driver side front tire.
7. Place the relearn tool against the tire sidewall, near the valve stem. Then press
the button to activate the TPMS sensor.
A horn chirp confirms that the sensor
identification code has been matched to
this tire and wheel position.
8. Proceed to the passenger side front tire, and repeat the procedure in Step 7.
9. Proceed to the passenger side rear tire, and repeat the procedure in Step 7. 10. Proceed to the driver side rear tire, and
repeat the procedure in Step 7. The horn
sounds two times to indicate the sensor
identification code has been matched to
the driver side rear tire, and the TPMS
sensor matching process is no longer
active. The TIRE LEARNING ACTIVE
message on the DIC display screen
goes off.
11. Turn the vehicle off.
12. Set all four tires to the recommended air pressure level as indicated on the Tire
and Loading Information label.
Trailer Tire Pressure Monitoring
Operation
If equipped, the Trailer Tire Pressure
Monitoring System (TTPMS) is designed to
monitor the pressure of the trailer tires and
warn the driver when a low pressure
condition exists. TTPMS sensors for four tires
are provided. The system can accommodate
a trailer with up to six tires if additional
sensors are purchased from the dealer. Also,
the system can be paired with up to five
individual trailers.
Prior to use, the vehicle must learn the
sensors by following the learning process.
SeeTrailering App 0286.
Page 351 of 433
Chevrolet Silverado 2500 HD/3500 HD Owner Manual (GMNA-Localizing-U.
S./Canada/Mexico-14632154) - 2021 - CRC - 11/20/20
350 Vehicle Care
Adjust the front and rear tires to the
recommended inflation pressure on the
Tire and Loading Information label after
the tires have been rotated. SeeTire
Pressure 0341 and
Vehicle Load Limits 0217.
Reset the Tire Pressure Monitor System.
See Tire Pressure Monitor Operation
0 343.
Check that all wheel nuts are properly
tightened. See “Wheel Nut Torque”
under Capacities and Specifications
0 398, and “Removing the Flat Tire and
Installing the Spare Tire” underTire
Changing 0356.
{Warning
Rust or dirt on a wheel, or on the
parts to which it is fastened, can
cause wheel nuts to become loose
over time. The wheel could come off
and cause a crash. When changing a
wheel, remove any rust or dirt from
places where the wheel attaches to
the vehicle. In an emergency, a cloth
(Continued)
Warning (Continued)
or paper towel can be used; however,
use a scraper or wire brush later to
remove all rust or dirt.
Lightly coat the inner diameter of the
wheel hub opening with wheel bearing
grease after a wheel change or tire
rotation to prevent corrosion or rust
build-up.
{Warning
Do not apply grease to the wheel
mounting surface, wheel conical
seats, or the wheel nuts or bolts.
Grease applied to these areas could
cause a wheel to become loose or
come off, resulting in a crash.
When It Is Time for New Tires
Factors, such as maintenance, temperatures,
driving speeds, vehicle loading, and road
conditions affect the wear rate of the tires.
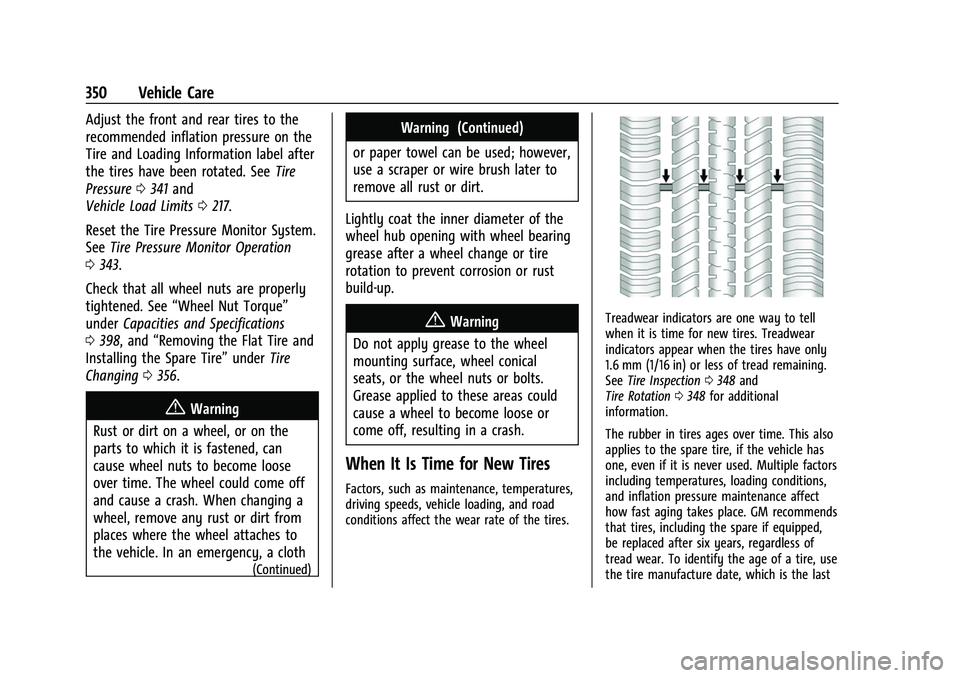
Treadwear indicators are one way to tell
when it is time for new tires. Treadwear
indicators appear when the tires have only
1.6 mm (1/16 in) or less of tread remaining.
See Tire Inspection 0348 and
Tire Rotation 0348 for additional
information.
The rubber in tires ages over time. This also
applies to the spare tire, if the vehicle has
one, even if it is never used. Multiple factors
including temperatures, loading conditions,
and inflation pressure maintenance affect
how fast aging takes place. GM recommends
that tires, including the spare if equipped,
be replaced after six years, regardless of
tread wear. To identify the age of a tire, use
the tire manufacture date, which is the last
Page 373 of 433
Chevrolet Silverado 2500 HD/3500 HD Owner Manual (GMNA-Localizing-U.
S./Canada/Mexico-14632154) - 2021 - CRC - 11/20/20
372 Vehicle Care
the transmission to D (Drive) and then to
R (Reverse). There should be no
movement while shifting the
transmission.
6. Shift the transmission to D (Drive).
7. If equipped with an ignition key, turn the ignition to ACC/ACCESSORY.
If equipped with Keyless Access, turn the
engine off. Disregard the Shift to P (Park)
DIC message. See Ignition Positions
(Keyless Access) 0226 or
Ignition Positions (Key Access) 0224.
{Warning
To avoid death, serious injury,
or property damage, before dinghy
towing the vehicle, always disconnect and
secure the negative battery cable and
cover the negative battery post and cable
with a non-conductive material. If the
battery is left connected or the battery
cable contacts the post, the Electric
Parking Brake may activate during
towing, which could cause a crash.
8. Disconnect the negative (–) battery cable. See “Negative Battery Cable
Disconnection” inBattery - North
America 0318. 9. Shift the transmission to P (Park).
Caution
If the steering column is locked, vehicle
damage may occur.
10. Move the steering wheel to make sure the steering column is unlocked.
11. If the vehicle has an ignition key, keep it in the towed vehicle in ACC/ACCESSORY
to prevent the steering column from
locking. If the vehicle is equipped with
Keyless Access, keep the RKE transmitter
outside of the vehicle and manually lock
the doors. Access the vehicle by using
the key in the door lock. See Door Locks
0 21.
Disconnecting the Towed Vehicle
Before disconnecting from the tow vehicle: 1. Park on a level surface. Secure the vehicle with wheel blocks.
2. Re-connect the negative (–) battery. See Battery - North America 0318.
3. Turn on the ignition with the engine off. For vehicles with a key, turn the ignition
to ON/RUN with the engine off. If the
vehicle is equipped with Keyless Access,
with your foot off the brake pedal, press and hold ENGINE START/STOP for
five seconds until the green light comes
on in the button. See
Ignition Positions
(Keyless Access) 0226 or
Ignition Positions (Key Access) 0224.
4. Set the parking brake. See Electric
Parking Brake 0240.
5. Disconnect from the tow vehicle.
6. Shift the transmission to N (Neutral).
7. Shift the transfer case to 2
m(Two-Wheel
Drive High). When the shift to 2
m
(Two-Wheel Drive High) is complete, the
light in the instrument cluster will stop
flashing and stay lit. See
Four-Wheel-Drive Light 0114.
8. Start the engine. Check that the vehicle is in 2
m(Two-Wheel Drive High) by
starting the engine and shifting the
transmission to D (Drive) and then to
R (Reverse). There should be movement
of the vehicle while shifting.
9. Shift the transmission to P (Park) and turn off the ignition.
10. Release the parking brake and remove the wheel blocks.
11. Reset any lost presets.
Page 374 of 433
Chevrolet Silverado 2500 HD/3500 HD Owner Manual (GMNA-Localizing-U.
S./Canada/Mexico-14632154) - 2021 - CRC - 11/20/20
Vehicle Care 373
The outside temperature display will
default to 0 °C (32 °F) but will reset with
normal usage.
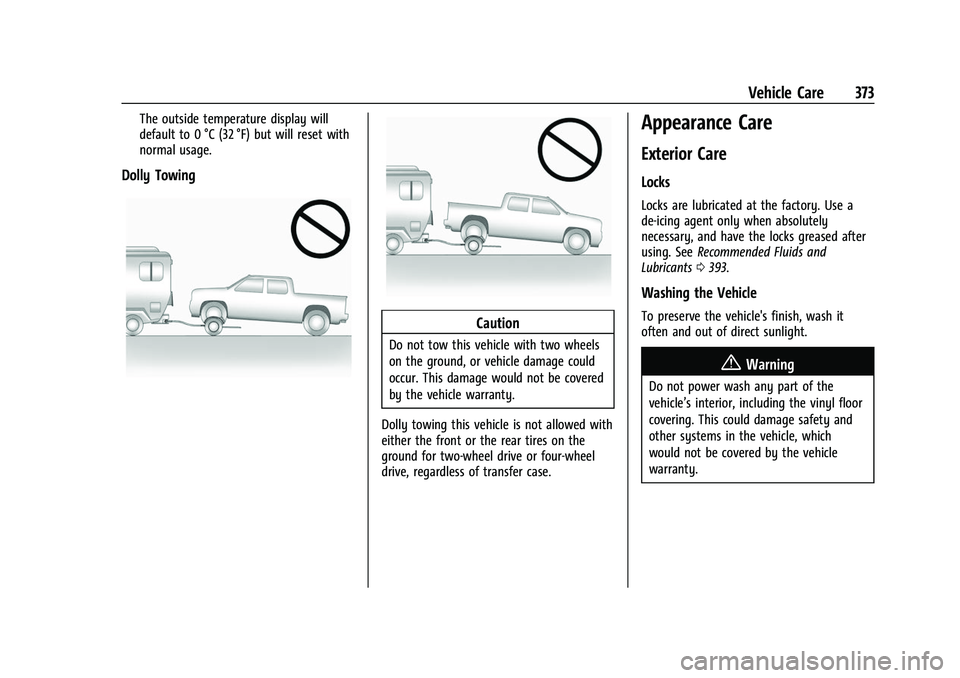
Dolly Towing
Caution
Do not tow this vehicle with two wheels
on the ground, or vehicle damage could
occur. This damage would not be covered
by the vehicle warranty.
Dolly towing this vehicle is not allowed with
either the front or the rear tires on the
ground for two-wheel drive or four-wheel
drive, regardless of transfer case.
Appearance Care
Exterior Care
Locks
Locks are lubricated at the factory. Use a
de-icing agent only when absolutely
necessary, and have the locks greased after
using. See Recommended Fluids and
Lubricants 0393.
Washing the Vehicle
To preserve the vehicle's finish, wash it
often and out of direct sunlight.
{Warning
Do not power wash any part of the
vehicle’s interior, including the vinyl floor
covering. This could damage safety and
other systems in the vehicle, which
would not be covered by the vehicle
warranty.
Page 385 of 433
Chevrolet Silverado 2500 HD/3500 HD Owner Manual (GMNA-Localizing-U.
S./Canada/Mexico-14632154) - 2021 - CRC - 11/20/20
384 Service and Maintenance
Because of the way people use vehicles,
maintenance needs vary. There may need to
be more frequent checks and services. The
Additional Required Services - Normal are for
vehicles that:
.Carry passengers and cargo within
recommended limits on the Tire and
Loading Information label. SeeVehicle
Load Limits 0217.
.Are driven on reasonable road surfaces
within legal driving limits.
.Use the recommended fuel. See
Recommended Fuel 0263.
Refer to the information in the Maintenance
Schedule Additional Required Services -
Normal chart.
The Additional Required Services - Severe are
for vehicles that are:
.Mainly driven in heavy city traffic in hot
weather
.Mainly driven in hilly or mountainous
terrain
.Frequently towing a trailer
.Used for high speed or competitive
driving
.Used for taxi, police, or delivery service Refer to the information in the Maintenance
Schedule Additional Required Services -
Severe chart.
{Warning
Performing maintenance work can be
dangerous and can cause serious injury.
Perform maintenance work only if the
required information, proper tools, and
equipment are available. If they are not,
see your dealer to have a trained
technician do the work. See
Doing Your
Own Service Work 0302.
Maintenance Schedule
Owner Checks and Services
Check the engine oil level. See Engine Oil
0 305.
Once a Month
.Check the tire inflation pressures,
including the spare. See Tire Pressure
0 341.
.Inspect the tires for wear. See Tire
Inspection 0348.
.Check the windshield washer fluid level.
See Washer Fluid 0315.
Engine Oil Change
When the CHANGE ENGINE OIL SOON
message displays, have the engine oil and
filter changed within the next 1 000 km/
600 mi. If driven under the best conditions,
the engine oil life system may not indicate
the need for vehicle service for up to a year.
The engine oil and filter must be changed at
least once a year and the oil life system
must be reset. Your trained dealer technician
can perform this work. If the engine oil life
system is reset accidentally, service the
vehicle within 5 000 km/3,000 mi since the
last service. Reset the oil life system when
the oil is changed. See Engine Oil Life
System 0307.
Engine Air Filter Change
When the REPLACE AT NEXT OIL CHANGE
message displays, the engine air filter
should be replaced at the next engine oil
change. When the REPLACE ENGINE AIR
FILTER SOON message displays, the engine
air filter should be replaced at the earliest
convenience. Reset the engine air filter life
system after the engine air filter is replaced.
See Engine Air Filter Life System 0308.
Page 386 of 433

Chevrolet Silverado 2500 HD/3500 HD Owner Manual (GMNA-Localizing-U.
S./Canada/Mexico-14632154) - 2021 - CRC - 11/20/20
Service and Maintenance 385
Passenger Compartment Air Filter
The passenger compartment air filter
removes dust, pollen, and other airborne
irritants from outside air that is pulled into
the vehicle. The filter should be replaced as
part of routine scheduled maintenance.
Inspect the passenger compartment air filter
every 36 000 km/22,500 miles or two years,
whichever comes first. Replace if necessary.
More frequent replacement may be needed
if the vehicle is driven in areas with heavy
traffic, areas with poor air quality, or areas
with high dust levels. Replacement may also
be needed if there is a reduction in air flow,
excessive window fogging, or odors.
Power Take Off (PTO) and Extended
Idle Use
When the vehicle is used with the PTO
equipment or used in a way that requires
extended idle time, one hour of use shall be
deemed the same as 53 km (33 mi).
SeeDriver Information Center (DIC) (Base
Level) 0119 or
Driver Information Center (DIC) (Midlevel and
Uplevel) 0120 for hourmeter, if equipped.
Air Conditioning Desiccant (Replace Every
Seven Years)
The air conditioning system requires
maintenance every seven years. This service
requires replacement of the desiccant to
help the longevity and efficient operation of
the air conditioning system. This service can
be complex. See your dealer.
Tire Rotation and Required Services
Every 12 000 km/7,500 mi
Rotate the tires, if recommended for the
vehicle, and perform the following services.
See Tire Rotation 0348.
.Check engine oil level and oil
life percentage. If needed, change engine
oil and filter, and reset oil life system.
See Engine Oil 0305 and
Engine Oil Life System 0307.
.If equipped with the engine air filter life
system, check the air filter
life percentage. If necessary, replace the
engine air filter and reset the engine air
filter life system. See Engine Air Filter Life
System 0308. If the vehicle is not
equipped with the engine air filter life
system, inspect the engine air cleaner
filter. See Engine Air Cleaner/Filter 0309.
.Check engine coolant level. See Cooling
System 0310.
.Check windshield washer fluid level. See
Washer Fluid 0315.
.Check tire inflation pressures, including
the spare. See Tire Pressure0341.
.Inspect tire wear. See Tire Inspection
0 348.
.Visually check for fluid leaks.
.Inspect brake system. See Exterior Care
0 373.
.Visually inspect steering, suspension, and
chassis components for damage, including
cracks or tears in the rubber boots, loose
or missing parts, or signs of wear at least
once a year. See Exterior Care0373.
If equipped with grease fittings, lubricate
the suspension and steering components
every oil change.
.Inspect power steering for proper
attachment, connections, binding, leaks,
cracks, chafing, etc.
.Visually inspect drive shafts for excessive
wear, lubricant leaks or damage including:
tube dents, cracks, constant velocity joint
or universal joint looseness, cracked or
missing boots, loose or missing boot
clamps, center bearing excessive
looseness, missing or loose fasteners.
Page 400 of 433

Chevrolet Silverado 2500 HD/3500 HD Owner Manual (GMNA-Localizing-U.
S./Canada/Mexico-14632154) - 2021 - CRC - 11/20/20
Technical Data 399
ApplicationCapacities
Metric English
I3500 Series Chassis Cab –Front Tank 89.0 L
23.5 gal
I3500 Series Chassis Cab –Rear Tank 151.4 L
40.0 gal
Transfer Case Fluid 2.3 L2.4 qt
Hydraulic Power Steering Fluid 2.0 L2.1 qt
Wheel Nut Torque 190Y 140 lb ft
All capacities are approximate. When adding, be sure to fill to the approximate level, as recommended in this manual. Recheck fluid level
after filling.
*Engine cooling system capacity values are based on the entire cooling system and its components.
Engine Specifications
Engine VIN CodeSpark Plug Gap
6.6L V8 (L8T) 70.95–1.10 mm (0.037–0.043 in)
Spark plug gaps are preset by the manufacturer. Re-gapping the spark plug is not recommended and can damage the spark plug.