2021 CHEVROLET SILVERADO 2500HD change wheel
[x] Cancel search: change wheelPage 214 of 433
Chevrolet Silverado 2500 HD/3500 HD Owner Manual (GMNA-Localizing-U.
S./Canada/Mexico-14632154) - 2021 - CRC - 11/20/20
Driving and Operating 213
2. Shift into P (Park) and then restart theengine.
.If driving uphill when the vehicle
stalls, shift to R (Reverse), release the
parking brake, and back
straight down.
.Never try to turn the vehicle around.
If the hill is steep enough to stall the
vehicle, it is steep enough to cause it
to roll over.
.If you cannot make it up the hill,
back straight down the hill.
.Never back down a hill in N (Neutral)
using only the brake. The vehicle can
roll backward quickly and you could
lose control.
.If driving downhill when the vehicle
stalls, shift to a lower gear, release
the parking brake, and drive straight
down the hill.
3. If the vehicle cannot be restarted after stalling, set the parking brake, shift into
P (Park), and turn the vehicle off.
3.1. Leave the vehicle and seek help.
3.2. Stay clear of the path the vehicle would take if it rolled downhill.
.Avoid turns that take the vehicle across
the incline of the hill. A hill that can be
driven straight up or down might be too
steep to drive across. Driving across an
incline puts more weight on the downhill
wheels, which could cause a downhill
slide or a rollover.
.Surface conditions can be a problem.
Loose gravel, muddy spots, or even wet
grass can cause the tires to slip sideways,
downhill. If the vehicle slips sideways, it
can hit something that will trip it —a
rock, a rut, etc. —and roll over.
.Hidden obstacles can make the steepness
of the incline more severe. If a rock is
driven across with the uphill wheels, or if
the downhill wheels drop into a rut or
depression, the vehicle can tilt even more.
.If an incline must be driven across, and
the vehicle starts to slide, turn downhill.
This should help straighten out the
vehicle and prevent the side slipping.
{Warning
Getting out of the vehicle on the
downhill side when stopped across an
incline is dangerous. If the vehicle rolls
over, you could be crushed or killed.
(Continued)
Warning (Continued)
Always get out on the uphill side of the
vehicle and stay well clear of the
rollover path.
Driving in Mud, Sand, Snow, or Ice
Use a low gear when driving in mud —the
deeper the mud, the lower the gear. Keep
the vehicle moving to avoid getting stuck.
Traction changes when driving on sand. On
loose sand, such as on beaches or sand
dunes, the tires tend to sink into the sand.
This affects steering, accelerating, and
braking. Drive at a reduced speed and avoid
sharp turns or abrupt maneuvers.
Traction is reduced on hard packed snow
and ice and it is easy to lose control. Reduce
vehicle speed when driving on hard packed
snow and ice.
{Warning
Driving on frozen lakes, ponds, or rivers
can be dangerous. Ice conditions vary
greatly and the vehicle could fall through
(Continued)
Page 218 of 433
Chevrolet Silverado 2500 HD/3500 HD Owner Manual (GMNA-Localizing-U.
S./Canada/Mexico-14632154) - 2021 - CRC - 11/20/20
Driving and Operating 217
Turn the steering wheel left and right to
clear the area around the front wheels. Then
make sure the wheels are pointed straight
ahead. For four-wheel-drive vehicles, shift
into Four-Wheel Drive High. Turn the TCS
off. Shift back and forth between R (Reverse)
and a forward gear, spinning the wheels as
little as possible. To prevent transmission
wear, wait until the wheels stop spinning
before shifting gears. Slowly spinning the
wheels in the forward and reverse directions
causes a rocking motion that could free the
vehicle. If that does not get the vehicle out
after a few tries, it might need to be towed
out. SeeTowing the Vehicle 0369. Recovery
hooks can be used, if the vehicle has them.
Recovery Hooks
{Warning
Never pull on recovery hooks from the
side. The hooks could break and you and
others could be injured. When using
recovery hooks, always pull the vehicle
from the front.
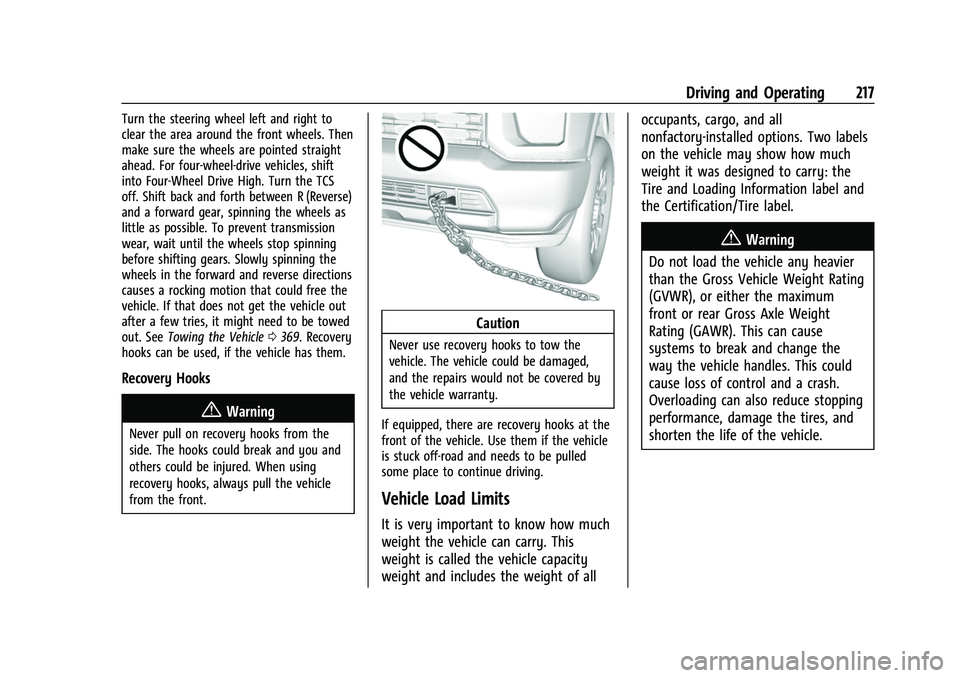
Caution
Never use recovery hooks to tow the
vehicle. The vehicle could be damaged,
and the repairs would not be covered by
the vehicle warranty.
If equipped, there are recovery hooks at the
front of the vehicle. Use them if the vehicle
is stuck off-road and needs to be pulled
some place to continue driving.
Vehicle Load Limits
It is very important to know how much
weight the vehicle can carry. This
weight is called the vehicle capacity
weight and includes the weight of all occupants, cargo, and all
nonfactory-installed options. Two labels
on the vehicle may show how much
weight it was designed to carry: the
Tire and Loading Information label and
the Certification/Tire label.
{Warning
Do not load the vehicle any heavier
than the Gross Vehicle Weight Rating
(GVWR), or either the maximum
front or rear Gross Axle Weight
Rating (GAWR). This can cause
systems to break and change the
way the vehicle handles. This could
cause loss of control and a crash.
Overloading can also reduce stopping
performance, damage the tires, and
shorten the life of the vehicle.
Page 238 of 433
Chevrolet Silverado 2500 HD/3500 HD Owner Manual (GMNA-Localizing-U.
S./Canada/Mexico-14632154) - 2021 - CRC - 11/20/20
Driving and Operating 237
If equipped, the transfer case controls are
used to shift into and out of four-wheel
drive.
To shift the transfer case, press the desired
button. The graphic in the instrument
cluster will flash while a shift is in progress.
The graphic displayed will change to indicate
the setting requested.
When the shift is complete the graphic will
stop flashing. The DIC message turns off
once the shift is complete. If the transfer
case cannot complete a shift request, it will
go back to its last chosen setting.
The settings are:
N (Neutral) :Use only when the vehicle
needs to be towed. See Recreational Vehicle
Towing 0370 or
Towing the Vehicle 0369.
2
m(Two-Wheel Drive High) : Use for driving
on most streets and highways. The front
axle is not engaged. This setting provides
the best fuel economy.
AUTO (Automatic Four-Wheel Drive) : Use
when road surface conditions are variable.
When driving in AUTO, the front axle is
engaged, and the vehicle's power is sent to
the front and rear wheels automatically based on driving conditions. This setting
provides slightly lower fuel economy
than 2
m.
4
m(Four-Wheel Drive High) : Use this
setting when extra traction is needed, such
as when driving on snowy or icy roads,
when off-roading, or when plowing snow.
4
n(Four-Wheel Drive Low) : This setting
engages the front axle and delivers extra
torque. Choose 4
nwhen driving off-road in
deep sand, deep mud, or deep snow, and
while climbing or descending steep hills.
While driving in 4
n, keep vehicle speed
below 72 km/h (45 mph).
Shifting into 4
nwill turn Traction Control
and StabiliTrak/ESC off. See Traction Control/
Electronic Stability Control 0242.
Shifts between 2
m, 4m, and AUTO
Any of these shifts can be made at normal
driving speed.
The actual 4x4 shift request is only made
after the button is released. The 4x4 graphic
will remain flashing until the shift request
has completed. A DIC message displays to
indicate that the 4x4 transfer case has been
requested to shift to the new desired state. Once the 4x4 shift has completed, the DIC
message disappears, the 4x4 graphic stops
flashing, and the current setting is indicated.
When a shift to 2
mis completed successfully
while in P (Park), the parking brake will
engage. To resume driving, shift the
transmission to the desired gear and
manually release the parking brake or press
the accelerator pedal to begin driving. See
Electric Parking Brake 0240.
If equipped, use 4
n, AUTO, or 4mto provide
additional traction when parking on a steep
grade with poor traction such as ice, snow,
mud, or gravel.
Shifting Into 4
n
1. The ignition must be on and the vehicle must be stopped or moving less than
5 km/h (3 mph) with the transmission in
N (Neutral). It is best for the vehicle to
be moving 1.6 to 3.2 km/h (1 to 2 mph).
2. Press 4
n. The actual 4x4 shift request is
only made after the button is released.
The 4x4 graphic will remain flashing
until the shift request has completed.
A DIC message displays to indicate that
the 4x4 transfer case has been requested
to shift to the new desired state.
Page 240 of 433
Chevrolet Silverado 2500 HD/3500 HD Owner Manual (GMNA-Localizing-U.
S./Canada/Mexico-14632154) - 2021 - CRC - 11/20/20
Driving and Operating 239
If the parking brake and/or brake pedal
is not applied within 20 seconds, the
transfer case will remain in the original
state.
6. If the transmission is not shifted into N (Neutral) or the vehicle has not slowed
to 5 km/h (3 mph) within 20 seconds,
the transfer case will remain in its
original state. This will be indicated in
the instrument cluster.
Shifting Out of N (Neutral)
To shift out of N (Neutral): 1. Turn the ignition on with the engine off. See Ignition Positions (Keyless Access)
0 226 or
Ignition Positions (Key Access) 0224.
2. Set the parking brake. See Electric
Parking Brake 0240.
3. Shift the transmission to N (Neutral).
4. Shift the transfer case to 2
m. Transfer
case shifts out of N (Neutral) can only be
made into 2
m. When the shift to 2mis
complete, the graphic in the instrument
cluster will stop flashing. If the transfer
case cannot complete a shift, the graphic
will return to the previously selected
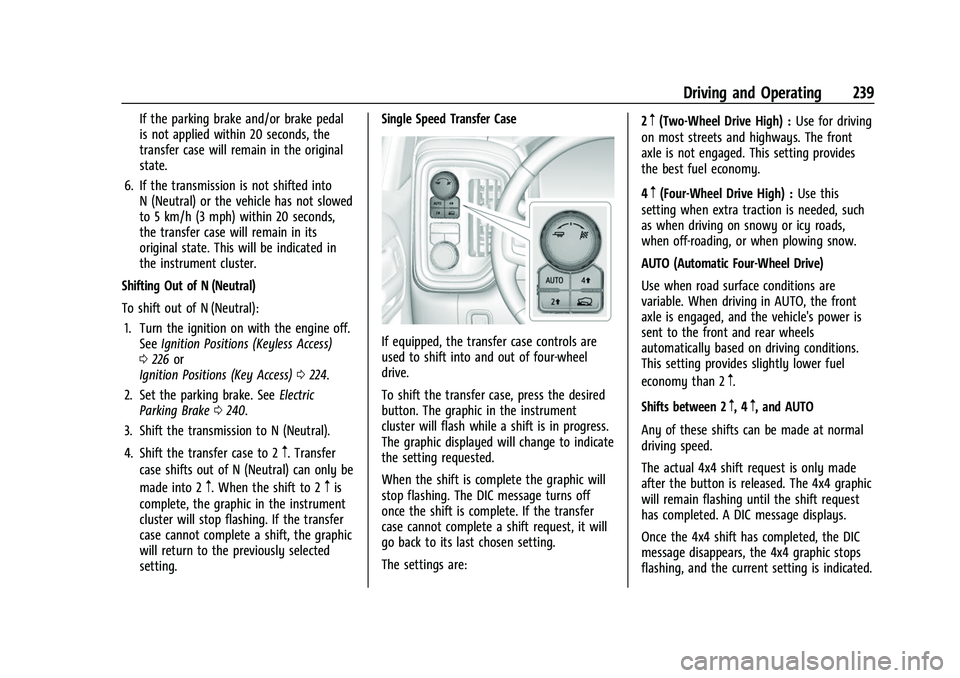
setting. Single Speed Transfer Case
If equipped, the transfer case controls are
used to shift into and out of four-wheel
drive.
To shift the transfer case, press the desired
button. The graphic in the instrument
cluster will flash while a shift is in progress.
The graphic displayed will change to indicate
the setting requested.
When the shift is complete the graphic will
stop flashing. The DIC message turns off
once the shift is complete. If the transfer
case cannot complete a shift request, it will
go back to its last chosen setting.
The settings are:
2
m(Two-Wheel Drive High) :
Use for driving
on most streets and highways. The front
axle is not engaged. This setting provides
the best fuel economy.
4
m(Four-Wheel Drive High) : Use this
setting when extra traction is needed, such
as when driving on snowy or icy roads,
when off-roading, or when plowing snow.
AUTO (Automatic Four-Wheel Drive)
Use when road surface conditions are
variable. When driving in AUTO, the front
axle is engaged, and the vehicle's power is
sent to the front and rear wheels
automatically based on driving conditions.
This setting provides slightly lower fuel
economy than 2
m.
Shifts between 2
m, 4m, and AUTO
Any of these shifts can be made at normal
driving speed.
The actual 4x4 shift request is only made
after the button is released. The 4x4 graphic
will remain flashing until the shift request
has completed. A DIC message displays.
Once the 4x4 shift has completed, the DIC
message disappears, the 4x4 graphic stops
flashing, and the current setting is indicated.
Page 246 of 433
Chevrolet Silverado 2500 HD/3500 HD Owner Manual (GMNA-Localizing-U.
S./Canada/Mexico-14632154) - 2021 - CRC - 11/20/20
Driving and Operating 245
Modes:
Normal Mode :Use for normal city and
highway driving to provide a smooth ride.
This setting provides balance between
comfort and handling. This is the standard/
default mode. There is no persistent
indicator in the instrument cluster for
this mode.
6Snow/Ice Mode : Snow/Ice Mode
improves vehicle acceleration on snow and
ice covered roads. When active, Snow/Ice
Mode will adjust acceleration to optimize
traction on slippery surfaces. This can
compromise the acceleration on dry asphalt.
This feature is not intended for use when
the vehicle is stuck in sand, mud, ice, snow,
or gravel. If the vehicle becomes stuck, see If
the Vehicle Is Stuck 0216.
7Off-Road Mode : Use this mode for
off-road recreational driving. Off-Road Mode
should be used to improve driving at
moderate speeds, on grass, gravel, dirt,
unpaved roads, or snow-covered roads. The
accelerator pedal is tuned for off-road use.
This mode modifies pedal mapping,
All-Wheel Drive (AWD), ride height, Antilock Brake System (ABS), StabiliTrak/Electronic
Stability Control (ESC), and Traction Control
System (TCS) performance.
For more information on off-road driving see
Off-Road Driving
0211.
_Tow/Haul Mode : Use this mode
when hauling heavy loads to provide
increased performance and vehicle control.
Tow/Haul Mode adjusts the transmission
shift pattern, AWD, and ESC performance.
If the vehicle is turned off with Tow/Haul
Mode active and then restarted within four
hours or less, Tow/Haul will remain active.
Otherwise, the vehicle will start in
Normal Mode.
If the vehicle has a diesel engine, exhaust
braking is automatically activated when
Tow/Haul Mode is selected. It maintains
vehicle speed by automatically
implementing a shift pattern that uses the
engine and the transmission to slow the
vehicle. The system will command
downshifts and use the turbocharger on the
engine to reduce vehicle speed when the
brake is applied. The normal tow/haul shift
pattern will return once the vehicle is on a
low grade or when the accelerator pedal is
pressed. While in the Electronic Range Select (ERS)
Mode (see
“manual mode”), grade breaking
is deactivated, allowing the driver to select a
range and limiting the highest gear
available.
For more information on trailer weight
specifications, see Towing Equipment 0276.
Limited-Slip Differential
If equipped, the limited-slip differential can
give more traction on snow, mud, ice, sand,
or gravel. It works like a standard axle most
of the time, but when traction is low, this
feature allows the drive wheel with the
most traction to move the vehicle. For
vehicles with the limited-slip differential,
driven under severe conditions, the rear axle
fluid should be changed. See Maintenance
Schedule 0384.
Locking Rear Axle
Vehicles with a locking rear axle can give
more traction on snow, mud, ice, sand,
or gravel. It works like a standard axle most
of the time, but when traction is low, this
feature will allow the rear wheel with the
most traction to move the vehicle.
Page 247 of 433
Chevrolet Silverado 2500 HD/3500 HD Owner Manual (GMNA-Localizing-U.
S./Canada/Mexico-14632154) - 2021 - CRC - 11/20/20
246 Driving and Operating
Cruise Control{
Warning
Cruise control can be dangerous where
you cannot drive safely at a steady
speed. Do not use cruise control on
winding roads or in heavy traffic.
Cruise control can be dangerous on
slippery roads. On such roads, fast
changes in tire traction can cause
excessive wheel slip, and you could lose
control. Do not use cruise control on
slippery roads.
If equipped with cruise control, a speed of
about 40 km/h (25 mph) or more can be
maintained without keeping your foot on
the accelerator. Cruise control does not work
at speeds below about 40 km/h (25 mph).
If the cruise control is being used and the
Traction Control System (TCS) or StabiliTrak/
Electronic Stability Control (ESC) begins to
limit wheel spin, the cruise control will
automatically disengage. See Traction
Control/Electronic Stability Control 0242.
If a collision alert occurs when cruise control
is activated, cruise control is disengaged. See
Forward Collision Alert (FCA) System 0257. When road conditions allow you to safely
use it again, cruise control can be turned
back on.
Turning off the TCS or StabiliTrak/ESC
system will disengage the cruise control.
If the brakes are applied, cruise control
disengages.
5:
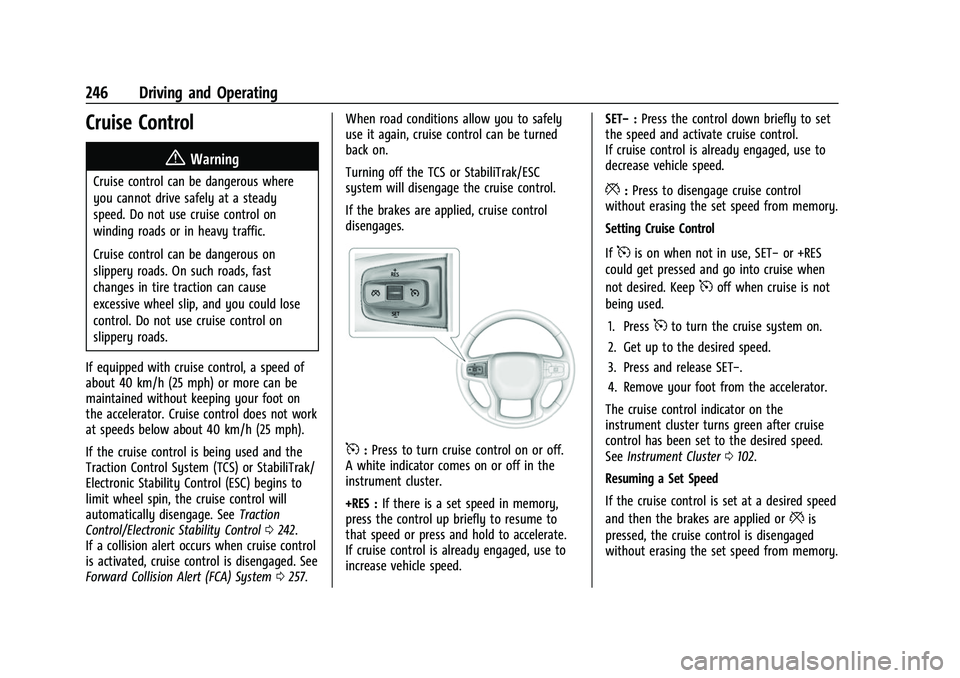
Press to turn cruise control on or off.
A white indicator comes on or off in the
instrument cluster.
+RES : If there is a set speed in memory,
press the control up briefly to resume to
that speed or press and hold to accelerate.
If cruise control is already engaged, use to
increase vehicle speed. SET−
:Press the control down briefly to set
the speed and activate cruise control.
If cruise control is already engaged, use to
decrease vehicle speed.
*: Press to disengage cruise control
without erasing the set speed from memory.
Setting Cruise Control
If
5is on when not in use, SET− or +RES
could get pressed and go into cruise when
not desired. Keep
5off when cruise is not
being used.
1. Press
5to turn the cruise system on.
2. Get up to the desired speed.
3. Press and release SET−.
4. Remove your foot from the accelerator.
The cruise control indicator on the
instrument cluster turns green after cruise
control has been set to the desired speed.
See Instrument Cluster 0102.
Resuming a Set Speed
If the cruise control is set at a desired speed
and then the brakes are applied or
*is
pressed, the cruise control is disengaged
without erasing the set speed from memory.
Page 253 of 433
Chevrolet Silverado 2500 HD/3500 HD Owner Manual (GMNA-Localizing-U.
S./Canada/Mexico-14632154) - 2021 - CRC - 11/20/20
252 Driving and Operating
available in Front/Rear Standard
Views, Front/Rear Top-Down Views
and Surround View.
Hitch Guidance displays a single
centered guideline on the
infotainment display to assist with
aligning the vehicle’s hitch ball with a
trailer coupler. Touch the Hitch
Guidance icon, then align the trailer
guidance line over the trailer coupler.
Continuously steer the vehicle to keep
the guideline centered on the coupler
when backing. Park Assist overlays will
not display when the trailer guidance
line is active. Hitch Guidance is
available in Rear Standard View.
{Warning
Use Hitch Guidance only to help back the
vehicle to a trailer hitch or, when
traveling above 12 km/h (8 mph), to
briefly check the status of your trailer. Do
not use for any other purpose, such as
making lane change decisions. Before
making a lane change, always check the
mirrors and glance over your shoulder.
Improper use could result in serious
injury to you or others.
7. Interior Trailer View
Provides a view of the interior of the
trailer. The feature is available when a
trailer is connected. The feature
requires user installation of an
accessory trailer camera on the
interior of the trailer per the accessory
trailer camera installation instructions
(see your dealer for accessory trailer
camera(s) and information). To select,
touch Interior Trailer View on the
infotainment display when a camera
view is active. To access this view
when in a forward gear above
12 km/h (8 mph), touch CAMERA on
the infotainment display and touch
the Interior Trailer View icon. The view
will close after 8 seconds and can be
closed early by touching X.
8. Hitch View
Assists with connecting to a trailer by
providing a zoomed-in view of the
hitch to help align the vehicle’s hitch
ball with the trailer coupler, or to
monitor the trailer connection. To
select, touch Hitch View on the
infotainment display when a camera
view is active. To access this view
when in a forward gear above
12 km/h (8 mph), touch CAMERA onthe infotainment display and touch
the Cargo Bed View icon. The view
will close after 8 seconds and can be
closed early by touching X. Shifting
into P (Park) while in this view will
automatically engage the Electric
Parking Brake (EPB).
9. Bed View
Provides a view of the truck bed and
the area behind the vehicle to assist
in cargo or hitch monitoring or
hitching to a fifth wheel or gooseneck
trailer. To select, touch Bed View on
the infotainment display when a
camera view is active. To access this
view when in a forward gear above
12 km/h (8 mph), touch CAMERA on
the infotainment display and touch
the Bed View icon. The view will close
after 8 seconds and can be closed
early by touching X.
10. Transparent Trailer View
Provides a view that allows the driver
to virtually
“see through” the trailer.
The feature is available when a
compatible trailer is connected and a
profile is configured and selected via
the Trailering App. See Trailering App
0 286. The feature requires user
installation of an accessory trailer
Page 260 of 433
Chevrolet Silverado 2500 HD/3500 HD Owner Manual (GMNA-Localizing-U.
S./Canada/Mexico-14632154) - 2021 - CRC - 11/20/20
Driving and Operating 259
Tailgating Alert
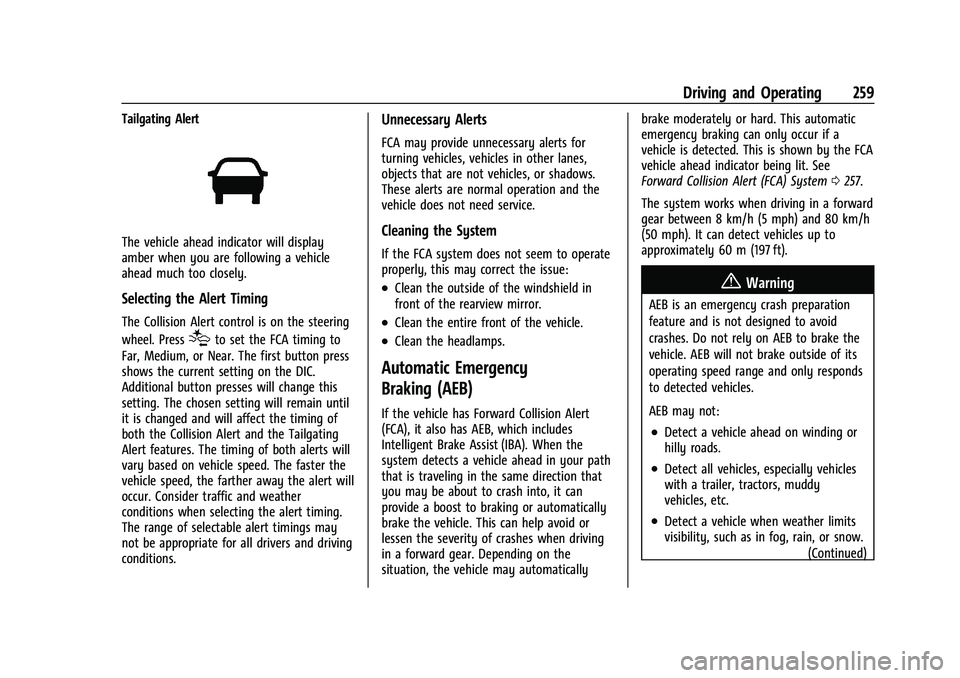
The vehicle ahead indicator will display
amber when you are following a vehicle
ahead much too closely.
Selecting the Alert Timing
The Collision Alert control is on the steering
wheel. Press
[to set the FCA timing to
Far, Medium, or Near. The first button press
shows the current setting on the DIC.
Additional button presses will change this
setting. The chosen setting will remain until
it is changed and will affect the timing of
both the Collision Alert and the Tailgating
Alert features. The timing of both alerts will
vary based on vehicle speed. The faster the
vehicle speed, the farther away the alert will
occur. Consider traffic and weather
conditions when selecting the alert timing.
The range of selectable alert timings may
not be appropriate for all drivers and driving
conditions.
Unnecessary Alerts
FCA may provide unnecessary alerts for
turning vehicles, vehicles in other lanes,
objects that are not vehicles, or shadows.
These alerts are normal operation and the
vehicle does not need service.
Cleaning the System
If the FCA system does not seem to operate
properly, this may correct the issue:
.Clean the outside of the windshield in
front of the rearview mirror.
.Clean the entire front of the vehicle.
.Clean the headlamps.
Automatic Emergency
Braking (AEB)
If the vehicle has Forward Collision Alert
(FCA), it also has AEB, which includes
Intelligent Brake Assist (IBA). When the
system detects a vehicle ahead in your path
that is traveling in the same direction that
you may be about to crash into, it can
provide a boost to braking or automatically
brake the vehicle. This can help avoid or
lessen the severity of crashes when driving
in a forward gear. Depending on the
situation, the vehicle may automatically brake moderately or hard. This automatic
emergency braking can only occur if a
vehicle is detected. This is shown by the FCA
vehicle ahead indicator being lit. See
Forward Collision Alert (FCA) System
0257.
The system works when driving in a forward
gear between 8 km/h (5 mph) and 80 km/h
(50 mph). It can detect vehicles up to
approximately 60 m (197 ft).
{Warning
AEB is an emergency crash preparation
feature and is not designed to avoid
crashes. Do not rely on AEB to brake the
vehicle. AEB will not brake outside of its
operating speed range and only responds
to detected vehicles.
AEB may not:
.Detect a vehicle ahead on winding or
hilly roads.
.Detect all vehicles, especially vehicles
with a trailer, tractors, muddy
vehicles, etc.
.Detect a vehicle when weather limits
visibility, such as in fog, rain, or snow. (Continued)