2021 CHEVROLET SILVERADO 2500HD Door panel
[x] Cancel search: Door panelPage 28 of 433

Chevrolet Silverado 2500 HD/3500 HD Owner Manual (GMNA-Localizing-U.
S./Canada/Mexico-14632154) - 2021 - CRC - 11/20/20
Keys, Doors, and Windows 27
Warning (Continued)
hands or other body parts between the
extended power assist step and the
vehicle.
If equipped, the power assist steps will
deploy when the door is opened and
automatically retract three seconds after the
door is closed. The power assist steps will
retract immediately if the vehicle starts
moving.
Disable the power assist steps before jacking
or placing any object under the vehicle. Too
much ice buildup may prevent deployment
of the power assist steps. Check the step
position before exiting the vehicle. If this
happens, disable the power assist steps,
clear the ice, then enable the assist steps
and confirm normal function prior to use.
Keep hands, children, pets, objects, and
clothing clear of the power assist steps
when in motion. The steps will reverse
direction if they encounter an obstruction
when opening or closing. Remove the
obstruction, then open and close the door
on the same side to complete the motion of the assist steps. If the obstruction is not
cleared. the assist steps remain extended
while driving.
To extend both power assist steps
for cleaning, press
jwhile the vehicle is
in P (Park) or N (Neutral). Press
jagain
to retract them. The Driver Information
Center (DIC) will display a message.
Enable/Disable
Press and hold
jfor four seconds to lock
and disable the power assist steps. Press
and hold
jfor four seconds again to
enable them. The DIC will display a
message.
Vehicle Security
This vehicle has theft-deterrent features;
however, they do not make the vehicle
impossible to steal.
Vehicle Alarm System
The indicator light, on the instrument panel
near the windshield, indicates the status of
the system.
Off : Alarm system is disarmed.
On Solid : Vehicle is secured during the
delay to arm the system.
Fast Flash : Vehicle is unsecured. A door or
the hood is open.
Page 59 of 433

Chevrolet Silverado 2500 HD/3500 HD Owner Manual (GMNA-Localizing-U.
S./Canada/Mexico-14632154) - 2021 - CRC - 11/20/20
58 Seats and Restraints
All vehicle airbags have the word AIRBAG on
the trim or on a label near the deployment
opening.
For frontal airbags, the word AIRBAG is on
the center of the steering wheel for the
driver and on the instrument panel for the
front outboard passenger.
For seat-mounted side impact airbags, the
word AIRBAG is on the side of the seatback
or side of the seat closest to the door.
For roof-rail airbags, the word AIRBAG is on
the ceiling or trim.
Airbags are designed to supplement the
protection provided by seat belts. Even
though today's airbags are also designed to
help reduce the risk of injury from the force
of an inflating bag, all airbags must inflate
very quickly to do their job.
Here are the most important things to know
about the airbag system:
{Warning
You can be severely injured or killed in a
crash if you are not wearing your seat
belt, even with airbags. Airbags are
designed to work with seat belts, not(Continued)
Warning (Continued)
replace them. Also, airbags are not
designed to inflate in every crash. In
some crashes seat belts are the only
restraint. SeeWhen Should an Airbag
Inflate? 060.
Wearing your seat belt during a crash
helps reduce your chance of hitting
things inside the vehicle or being ejected
from it. Airbags are “supplemental
restraints” to the seat belts. Everyone in
the vehicle should wear a seat belt
properly, whether or not there is an
airbag for that person.
{Warning
Because airbags inflate with great force
and faster than the blink of an eye,
anyone who is up against, or very close
to, any airbag when it inflates can be
seriously injured or killed. Do not sit
unnecessarily close to any airbag, as you
would be if sitting on the edge of the
seat or leaning forward. Seat belts help
keep you in position before and during a
(Continued)
Warning (Continued)
crash. Always wear a seat belt, even with
airbags. The driver should sit as far back
as possible while still maintaining control
of the vehicle. The seat belts and the
front outboard passenger airbags are
most effective when you are sitting well
back and upright in the seat with both
feet on the floor.
Occupants should not lean on or sleep
against the door or side windows in
seating positions with seat-mounted side
impact airbags and/or roof-rail airbags.
{Warning
Children who are up against, or very
close to, any airbag when it inflates can
be seriously injured or killed. Always
secure children properly in the vehicle. To
read how, seeOlder Children 068 or
Infants and Young Children 069.
Page 60 of 433

Chevrolet Silverado 2500 HD/3500 HD Owner Manual (GMNA-Localizing-U.
S./Canada/Mexico-14632154) - 2021 - CRC - 11/20/20
Seats and Restraints 59
There is an airbag readiness light on the
instrument cluster, which shows the airbag
symbol.
The system checks the airbag electrical
system for malfunctions. The light tells you
if there is an electrical problem. SeeAirbag
Readiness Light 0110.
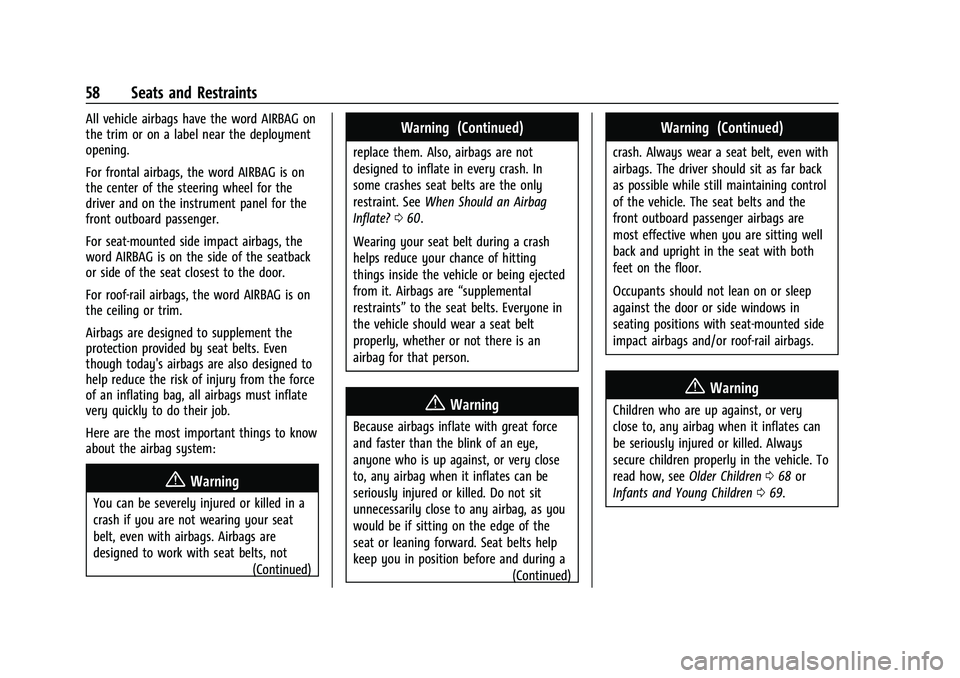
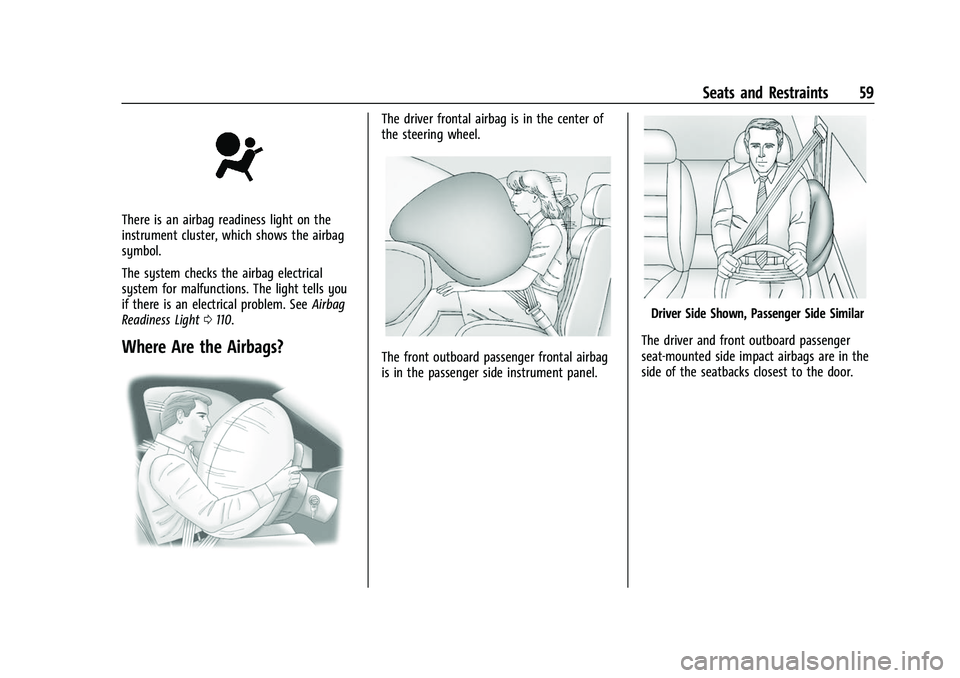
Where Are the Airbags?
The driver frontal airbag is in the center of
the steering wheel.
The front outboard passenger frontal airbag
is in the passenger side instrument panel.
Driver Side Shown, Passenger Side Similar
The driver and front outboard passenger
seat-mounted side impact airbags are in the
side of the seatbacks closest to the door.
Page 67 of 433

Chevrolet Silverado 2500 HD/3500 HD Owner Manual (GMNA-Localizing-U.
S./Canada/Mexico-14632154) - 2021 - CRC - 11/20/20
66 Seats and Restraints
approved by GM for your specific vehicle.
SeeAdding Equipment to the
Airbag-Equipped Vehicle 066 for more
information about modifications that can
affect how the system operates.
The ON indicator may be lit if an object,
such as a briefcase, handbag, grocery bag,
laptop, or other electronic device, is put on
an unoccupied seat. If this is not desired,
remove the object from the seat.
{Warning
Stowing articles under the passenger seat
or between the passenger seat cushion
and seatback may interfere with the
proper operation of the passenger
sensing system.
Servicing the Airbag-Equipped
Vehicle
Airbags affect how the vehicle should be
serviced. There are parts of the airbag
system in several places around the vehicle.
Your dealer and the service manual have
information about servicing the vehicle and
the airbag system. To purchase a service
manual, see Publication Ordering
Information 0408.
{Warning
For up to 10 seconds after the vehicle is
turned off and the battery is
disconnected, an airbag can still inflate
during improper service. You can be
injured if you are close to an airbag
when it inflates. Avoid yellow connectors.
They are probably part of the airbag
system. Be sure to follow proper service
procedures, and make sure the person
performing work for you is qualified to
do so.
Adding Equipment to the
Airbag-Equipped Vehicle
Adding accessories that change the vehicle's
frame, bumper system, height, front end,
or side sheet metal, may keep the airbag
system from working properly.
The operation of the airbag system can also
be affected by changing, including
improperly repairing or replacing, any parts
of the following:
.Airbag system, including airbag modules,
front or side impact sensors, sensing and
diagnostic module, or airbag wiring
.Front seats, including stitching, seams,
or zippers
.Seat belts
.Steering wheel, instrument panel,
overhead console, ceiling trim, or pillar
garnish trim
.Inner door seals, including speakers
Your dealer and the service manual have
information about the location of the airbag
modules and sensors, sensing and diagnostic
module, and airbag wiring along with the
proper replacement procedures.
In addition, the vehicle has a passenger
sensing system for the front outboard
passenger position, which includes sensors
that are part of the passenger seat. The
passenger sensing system may not operate
properly if the original seat trim is replaced
with non-GM covers, upholstery, or trim; or
with GM covers, upholstery, or trim
designed for a different vehicle. Any object,
such as an aftermarket seat heater or a
comfort-enhancing pad or device, installed
under or on top of the seat fabric, could
also interfere with the operation of the
passenger sensing system. This could either
prevent proper deployment of the passenger
airbag(s) or prevent the passenger sensing
Page 137 of 433

Chevrolet Silverado 2500 HD/3500 HD Owner Manual (GMNA-Localizing-U.
S./Canada/Mexico-14632154) - 2021 - CRC - 11/20/20
136 Lighting
.Driving on winding or hilly roads.
The automatic high-beam headlamps may
need to be disabled if any of the above
conditions exist.
Exterior Lamps Off Reminder
A reminder chime sounds when the
headlamps or parking lamps are manually
turned on, the ignition is off, and a door is
open. To disable the chime, turn the
lamps off.
Headlamp High/Low-Beam
Changer
Push the turn signal lever toward the
instrument panel to change the headlamps
from low to high beam.
Pull or push the turn signal lever to return
to low-beam headlamps.
When the high-beam headlamps are on, this
indicator light on the instrument cluster will
also be on.
Flash-to-Pass
This feature lets you use the high-beam
headlamps to signal a driver in front of you
that you want to pass. It works even if the
headlamps are in the automatic position.
To use it, pull the turn signal lever toward
you, then release it.
If the headlamps are in the automatic
position or on low beam, the high-beam
headlamps will turn on. Depending on the
type of headlamp, they will either turn off
after a short duration or stay on as long as
you hold the lever toward you. The
high-beam indicator on the instrument
cluster will come on. Release the lever to
return to normal operation.
Daytime Running Lamps (DRL)
DRL can make it easier for others to see the
front of the vehicle during the day. Fully
functional DRL are required on all vehicles
first sold in Canada. The DRL system comes on when the
following conditions are met:
.The ignition is on.
.The exterior lamp control is in AUTO.
.The transmission is not in P (Park).
.The light sensor determines it is daytime.
When the DRL system is on, only the DRL
are on. The taillamps, sidemarker lamps,
instrument panel lights, and other lamps
will not be on.
When it begins to get dark, the automatic
headlamp system switches from DRL to the
headlamps.
To turn off the DRL, turn the exterior lamp
control to
Oand then release. For vehicles
first sold in Canada, off will only work when
the vehicle is parked.
Automatic Headlamp System
When the exterior lamp control is set to
AUTO and it is dark enough outside, the
headlamps come on automatically.
Page 141 of 433

Chevrolet Silverado 2500 HD/3500 HD Owner Manual (GMNA-Localizing-U.
S./Canada/Mexico-14632154) - 2021 - CRC - 11/20/20
140 Lighting
- Next Press: (if with in 5 seconds of the
previous button press):
- CHMSL/Cargo Bed Lights - On
- Cargo Mirror Lights - Off
- Cargo Switch Indicator (if equipped) - On
- Next Press:
- CHMSL/Cargo Bed Lights - Off
- Cargo Mirror Lights - Off
- Cargo Switch Indicator (if equipped) - Off
Become familiar with and follow all state
and local laws that apply to cargo lamp
operation.Interior Lighting
Instrument Panel Illumination
Control
This feature adjusts the brightness of all
illuminated controls. The instrument panel
illumination control is next to the exterior
lamp control.
D:PressD+ to brighten orD− to
dim the lights.
This feature is functional at night, or when
the headlamps or parking lamps are ON.
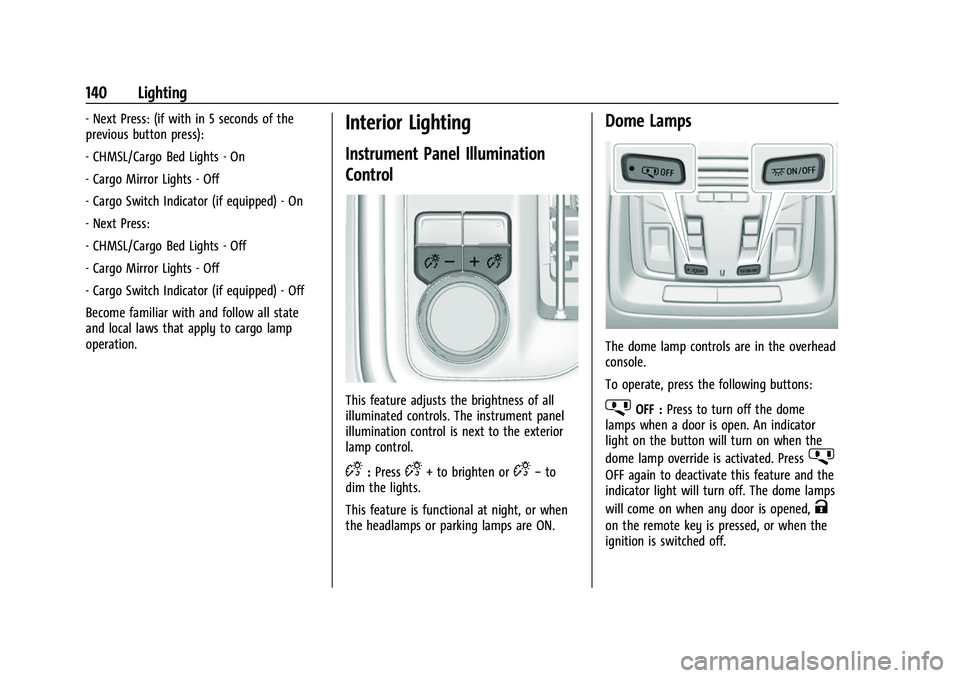
Dome Lamps
The dome lamp controls are in the overhead
console.
To operate, press the following buttons:
jOFF : Press to turn off the dome
lamps when a door is open. An indicator
light on the button will turn on when the
dome lamp override is activated. Press
j
OFF again to deactivate this feature and the
indicator light will turn off. The dome lamps
will come on when any door is opened,
K
on the remote key is pressed, or when the
ignition is switched off.
Page 205 of 433

Chevrolet Silverado 2500 HD/3500 HD Owner Manual (GMNA-Localizing-U.
S./Canada/Mexico-14632154) - 2021 - CRC - 11/20/20
204 Climate Controls
The solar sensor, on top of the instrument
panel near the windshield, monitors the
solar heat.
The climate control system uses the sensor
information to adjust the temperature, fan
speed, recirculation, and air delivery mode
for best comfort.
Do not cover the sensor; otherwise the
automatic climate control system may not
work properly.
Air Vents
Use the sliding knobs on the center and side
air vents to change the direction of the
airflow.
Air vents blow warm air on the side
windows in cold weather. If Floor, Defog,
or Defrost modes are selected, a small
amount of air will come from the vents
close to the window.
To close the front a/c vents, move the
sliding knobs to the full down position.
To close the rear a/c vents, move the sliding
knobs to the full inboard position.Operation Tips
.Clear away any ice, snow, or leaves from
air inlets at the base of the windshield
that could block the flow of air into the
vehicle.
.Clear snow off the hood to improve
visibility and help decrease moisture
drawn into the vehicle.
.Keep the path under the front seats clear
of objects to help circulate the air inside
of the vehicle more effectively.
.Use of non-GM approved hood deflectors
can adversely affect the performance of
the system. Check with your dealer
before adding equipment to the outside
of the vehicle.
.Do not attach any devices to the air vent
slats. This will restrict airflow and may
cause damage to the air vents.
Maintenance
Passenger Compartment Air Filter
The filter reduces the dust, pollen, and other
airborne irritants from outside air that is
pulled into the vehicle.The filter should be replaced as part of
routine scheduled maintenance. See
Maintenance Schedule
0384. To find out
what type of filter to use, see Maintenance
Replacement Parts 0394.
1. Open the lower glove box door
completely.
Page 333 of 433

Chevrolet Silverado 2500 HD/3500 HD Owner Manual (GMNA-Localizing-U.
S./Canada/Mexico-14632154) - 2021 - CRC - 11/20/20
332 Vehicle Care
FusesUsage
82 Trailer Interface Module 2
83 FTZM
84 Trailer brake 85 ENG
86 Engine control module 87 Injector B even
88 O2 B sensor
89 O2 A sensor
90 Injector A odd 91 Engine control module throttle control
92 Cool fan clutch/ Aeroshutter Relays
Usage
5 Headlamp
18 DC/AC inverter
23 Rear window defogger
35 Parking lamp
36 Run/Crank
43 –
59 A/C clutch
64 Starter Motor (LD & HD DSL)
70 Starter Pinion (LD) / Starter Motor (HD Gas)
77 PowertrainInstrument Panel Fuse Block (Left)
The left instrument panel fuse block access
door is on the driver side edge of the
instrument panel.
The vehicle may not be equipped with all of
the fuses, relays, and features shown.
Pull off the cover to access the fuse block.
A fuse puller is available in the left
instrument panel end cap.