2021 CHEVROLET SILVERADO 1500 infotainment
[x] Cancel search: infotainmentPage 273 of 463
Chevrolet Silverado 1500 Owner Manual (GMNA-Localizing-U.S./Canada/
Mexico/Paraguay-14632303) - 2021 - CRC - 11/9/20
270 Driving and Operating
Trailer View, Left Transparent Trailer
View or Right Transparent Trailer
View. The Transparent Trailer View is
shown when the position of the trailer
is relatively straight behind the
vehicle. The Left or Right Transparent
Trailer View is shown when the
position of the trailer is too far to the
left or right. When the system is not
calibrated or trailer position is not
known the Transparent Trailer
Picture-in-Picture View will be shown.
11. Rear Trailer View/Rear Side View withAvailable Articulation Functionality/
Picture-in-Picture Side View
.Rear Trailer View provides a view
of the area behind the trailer. the
feature is available when a trailer
is connected. The feature requires
user installation of an accessory
trailer camera on the rear exterior
surface of the trailer per the
accessory trailer camera
installation instructions (see your
dealer for accessory trailer
camera(s) and information). To
select, touch Rear Trailer View/Rear
Side View with Available
Articulation Functionality/
Picture-in-Pictue Side View on the infotainment display when a
camera view is active. Each touch
will toggle through the Rear Trailer
View, Trailer Tow Mirror View and
Combo View. To access this view
when in a forward gear above
12 km/h (8 mph), touch CAMERA
on the infotainment display and
touch the Interior Rear Trailer
View/Rear Side View with Available
Articulation Functionality/
Picture-in-Picture Side View icon.
Touch X to exit.
.Rear Side View with Available
Articulation Functionality provides
a rearward split view of the left
and right sides of the vehicle and
trailer. When in a forward gear the
view well automatically pan to
show more of the left or right side
based on the position of the
trailer. The feature is available
when a trailer is connected. To
select, touch Rear trailer View/Rear
Side View with Available
Articulation Functionality/
Picture-in-Picture Side View on the
infotainment display when a
camera view is active. Each touch
will toggle through the Rear Trailer
View, trailer tow Mirror view and
Combo View. To access this view
when in a forward gear above
12 km/h (8 mph), Touch CAMERA
on the infotainment display and
touch the Rear Trailer View/Rear
Side View with Available
Articulation Functionality/
Picture-in-Picture Side icon. Touch X
to exit.
.Provides a rearward split view of
the left and right sides of the
vehicle and trailer with an overlay
view of the area behind the trailer.
The feature is available when a
trailer is connected. the feature
requires user installation of an
accessory trailer camera on the
rear exterior surface of the trailer
per the accessory trailer camera
installation instructions (see your
dealer for accessory trailer
camera(s) and information). To
select, touch Rear Trailer View/Rear
Side View with Available
Articulation Functionality/
Picture-in-Picture Side view on the
infotainment display when a
camera view is active. Each press
of the button will toggle through
Page 274 of 463
Chevrolet Silverado 1500 Owner Manual (GMNA-Localizing-U.S./Canada/
Mexico/Paraguay-14632303) - 2021 - CRC - 11/9/20
Driving and Operating 271
the Rear Trailer View, Trailer Tow
mirror View and Combo View. To
access this view when in a forward
gear above 12 km/h (8 mph), touch
CAMERA on the infotainment
display and touch the Rear Trailer
View/Rear Side View with Available
Articulation Functionality/
Picture-in-Picture Side View icon.
Touch X to exit.
HD Surround Vision with Trailer Camera
Provisions
If equipped, this feature provides additional
views to aid in trailering/towing. The
system shows multiple views in the
infotainment display using five cameras
mounted around the vehicle and up to two
additional accessory cameras that can be
mounted on or in a trailer. The front camera
is in the grille under the front emblem, the
side cameras are on the bottom of the
outside mirrors, the rear camera is in the
tailgate handle and the bed camera is
mounted on the rear of the cab.
Additionally, up to two accessory cameras
can be mounted to the rear and/or interior
of the trailer. See your dealer for accessory
trailer cameras. To access, touch CAMERA on
the infotainment display or shift to R (Reverse). To return to the previous screen
when not in reverse, touch the Home or
Back buttons on the infotainment display.
Certain trailer views require a compatible
trailer profile be configured and selected.
A compatible trailer is a box type trailer
(cargo, camper, etc.) with a conventional
hitch.
Available camera views:
.Front/Rear Standard View
.Front/Rear Top-Down View
.Rear Bowl View
.Front/Rear Side View
.Hitch View
.Bed View
.Rear trailer View
.Rear Side view with a available
articulation functionality
.Picture-in-Picture Side View
.Interior Trailer View
.Transparent trailer View
.Surround View
.Guidance Lines
.Hitch Guidance
Surround Vision (360 Degrees)
If equipped, the Surround Vision system can
display various views surrounding the
vehicle in the infotainment display using
four cameras mounted around the vehicle.
The front camera is in the grille under the
front emblem, the side cameras are on the
bottom of the outside mirrors, and the rear
camera is in the tailgate handle.
The Surround Vision system can be accessed
by selecting CAMERA in the infotainment
display or when the vehicle is shifted into
R (Reverse). To return to the previous screen
sooner, when not in R (Reverse), press the
Home or Back button on the infotainment
system, shift into P (Park), or, while in D
(Drive), reach a vehicle speed of
approximately 12 km/h (8 mph).
Available camera views:
.Front/Rear Standard View
.Front/Rear Top-Down View
.Rear Bowl View
.Front/Rear Side View
.Hitch View
.Surround View
.Guidance Lines
.Hitch Guidance
Page 275 of 463
Chevrolet Silverado 1500 Owner Manual (GMNA-Localizing-U.S./Canada/
Mexico/Paraguay-14632303) - 2021 - CRC - 11/9/20
272 Driving and Operating
Surround Vision
If equipped, this feature provides, additional
views to aid in trailering/towing. The Front
Vision Camera and Surround Vision cameras
are not supported. The system can show
various views in the infotainment display
using cameras mounted in and around the
vehicle and trailer. The rear camera is in the
tailgate handle and the cargo bed camera is
mounted on the rear of the cab. Up to two
accessory cameras can be mounted to the
rear and/or interior of the trailer. See your
dealer for these accessory cameras.
The system can be accessed by selecting
CAMERA in the infotainment display or
when the vehicle is shifted into R (Reverse).
To return to the previous screen sooner,
when not in R (Reverse), press the Home or
Back button on the infotainment system or
shift into P (Park).
Available camera views:
.Rear Standard View
.Hitch View
.Bed View
.Rear Trailer View
.Interior Trailer View
.Guidance Lines
.Hitch GuidanceTroubleshooting
The Transparent Trailer calibration may take
longer than expected or not calibrate if:
.The vehicle is driven too fast during
calibration. Speed should be maintained
below 50 km/h (31 mph).
.The vehicle is not driven straight during
calibration. Steering should be maintained
as straight as possible, excessive steering
during calibration may extend
calibration time.
.The calibration is attempted in low light.
Calibration should be attempted when
there is enough light.
.The calibration is attempted during
adverse weather conditions. Calibration
during conditions such as snow or heavy
rain should be avoided.
.The road surface is not ideal for
calibration. Calibration should be
attempted on an alternate road surface.
.The accessory trailer cameras are
swapped at the hitch connector. Ensure
that the camera mounted to the rear of
the trailer is connected to the rear trailer
camera input.
.The accessory trailer camera is mounted,
angled or rotated outside of the defined
mounting location (see camera
installation instructions).
Distortion may be observed in the calibrated
Transparent Trailer View if:
.The accessory trailer camera is mounted,
angled or rotated outside of the defined
mounting location (see camera
installation instructions).
The Transparent Trailer icon may appear
grayed out if:
.A compatible trailer profile is not
configured or a non-compatible trailer
profile is selected.
.The vehicle is in R (Reverse).
.The trailer is not connected.
.The accessory rear trailer camera is not
connected or connected to the incorrect
input.
The preview may not be provided or the
wrong preview may be provided if:
.The accessory cameras are not recognized.
Ensure that the accessory camera(s) are
connected and power cycle the vehicle.
Page 276 of 463
Chevrolet Silverado 1500 Owner Manual (GMNA-Localizing-U.S./Canada/
Mexico/Paraguay-14632303) - 2021 - CRC - 11/9/20
Driving and Operating 273
.The accessory trailer cameras are
swapped at the hitch connector. Ensure
that the accessory camera(s) are
connected to the correct input.
.The accessory trailer camera(s) are
connected to the correct camera input.
.The accessory trailer camera(s) are not
installed according to the installation
instructions.
A feature may be unavailable or not
activating as expected if:
.The customization is disabled. Check the
customization settings where applicable.
.The accessory trailer cameras are
swapped at the hitch connector. Ensure
that the accessory camera(s) are
connected to the correct camera input.
A view may switch automatically if:
.The vehicle is shifted to another gear.
Park Assist
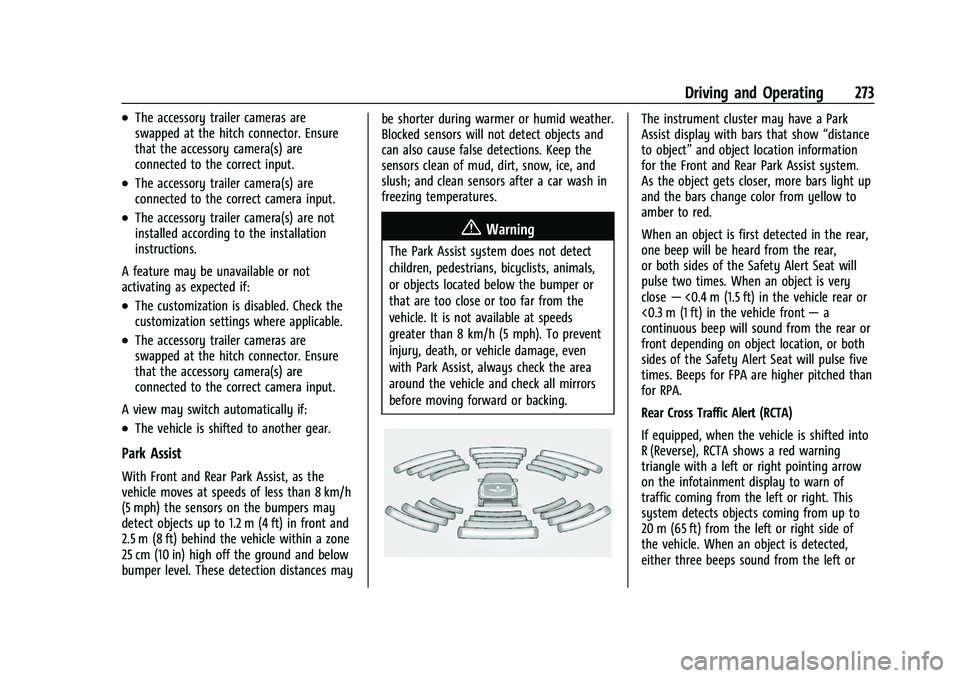
With Front and Rear Park Assist, as the
vehicle moves at speeds of less than 8 km/h
(5 mph) the sensors on the bumpers may
detect objects up to 1.2 m (4 ft) in front and
2.5 m (8 ft) behind the vehicle within a zone
25 cm (10 in) high off the ground and below
bumper level. These detection distances may be shorter during warmer or humid weather.
Blocked sensors will not detect objects and
can also cause false detections. Keep the
sensors clean of mud, dirt, snow, ice, and
slush; and clean sensors after a car wash in
freezing temperatures.
{Warning
The Park Assist system does not detect
children, pedestrians, bicyclists, animals,
or objects located below the bumper or
that are too close or too far from the
vehicle. It is not available at speeds
greater than 8 km/h (5 mph). To prevent
injury, death, or vehicle damage, even
with Park Assist, always check the area
around the vehicle and check all mirrors
before moving forward or backing.
The instrument cluster may have a Park
Assist display with bars that show
“distance
to object” and object location information
for the Front and Rear Park Assist system.
As the object gets closer, more bars light up
and the bars change color from yellow to
amber to red.
When an object is first detected in the rear,
one beep will be heard from the rear,
or both sides of the Safety Alert Seat will
pulse two times. When an object is very
close —<0.4 m (1.5 ft) in the vehicle rear or
<0.3 m (1 ft) in the vehicle front —a
continuous beep will sound from the rear or
front depending on object location, or both
sides of the Safety Alert Seat will pulse five
times. Beeps for FPA are higher pitched than
for RPA.
Rear Cross Traffic Alert (RCTA)
If equipped, when the vehicle is shifted into
R (Reverse), RCTA shows a red warning
triangle with a left or right pointing arrow
on the infotainment display to warn of
traffic coming from the left or right. This
system detects objects coming from up to
20 m (65 ft) from the left or right side of
the vehicle. When an object is detected,
either three beeps sound from the left or
Page 309 of 463
Chevrolet Silverado 1500 Owner Manual (GMNA-Localizing-U.S./Canada/
Mexico/Paraguay-14632303) - 2021 - CRC - 11/9/20
306 Driving and Operating
trailer connections or trailer brakes could
appear on the DIC. The effects of these
aftermarket devices may have on vehicle
handling or trailer brake performance is not
known.
{Warning
Use of aftermarket electronic trailer sway
control devices could result in reduced
trailer brake performance, loss of trailer
brakes, or other malfunctions, and result
in a crash. You or others could be
seriously injured or killed. Before using
one of these devices:
.Ask the device or trailer manufacturer
if the device has been thoroughly
tested for compatibility with the
make, model, and year of your vehicle
and any optional equipment installed
on your vehicle.
.Before driving, check the trailer brakes
are working properly, if equipped.
Drive the vehicle with the trailer
attached on a level road surface that
is free of traffic at about 32-40 km/h
(20-25 mph) and fully apply the(Continued)
Warning (Continued)
manual trailer brake apply lever. Also,
check the trailer brake lamps and
other lamps are functioning correctly.
.If the trailer brakes are not operating
properly at any time, or if a DIC
message indicates problems with the
trailer connections or trailer brakes,
carefully pull the vehicle over to the
side of the road when traffic
conditions allow.
Trailer Tires
Special Trailer (ST) tires differ from vehicle
tires. Trailer tires are designed with stiff
sidewalls to help prevent sway and to
support heavy loads. These features can
make it difficult to determine if the trailer
tire pressures are low only based on a visual
inspection.
Always check all trailer tire pressures before
each trip when the tires are cool. Low trailer
tire pressure is a leading cause of trailer tire
blow-outs. If the vehicle is equipped with a trailer tire
pressure monitoring system, see the trailer
tire pressure monitoring system description
and the trailering app.
Trailer tires deteriorate over time. The trailer
tire sidewall will show the week and year
the tire was manufactured. Many trailer tire
manufacturers recommend replacing tires
more than six years old.
Overloading is another leading cause of
trailer tire blow-outs. Never load your trailer
with more weight than the tires are
designed to support. The load rating is
located on the trailer tire sidewall.
Always know the maximum speed rating for
the trailer tires before driving. This may be
significantly lower than the vehicle tire
speed rating. The speed rating may be on
the trailer tire sidewall. If the speed rating is
not shown, the default trailer tire speed
rating is 105 km/h (65 mph).
Trailering App
Trailer Lights App
If equipped, the Trailer Lights App is on the
Home Page of the infotainment display.
Page 310 of 463
Chevrolet Silverado 1500 Owner Manual (GMNA-Localizing-U.S./Canada/
Mexico/Paraguay-14632303) - 2021 - CRC - 11/9/20
Driving and Operating 307
Touch Start to cycle the trailer lamps on and
off to determine if they are working. The
test follows this sequence:1. The running lights turn on first and remain on throughout the sequence.
2. The brake lights turn on for about two seconds.
3. The left turn signal light flashes three times.
4. The right turn signal light flashes three times.
5. The reverse lights turn on for about two seconds.
6. Steps 2–5 repeat for approximately one minute and 45 seconds, or until the
test deactivates.
Touch Stop to stop the test. The test will
automatically end after one minute and
45 seconds.
The sequence also deactivates when any of
the following occur:
.The ignition is turned off.
.The transmission is shifted out of P (Park).
.The brake pedal is pressed.
.The turn signal is activated.
.The hazard warning lights are activated.
Trailering App
If equipped, the Trailering App is on the
Home Page of the infotainment display.
If equipped this feature allows profiles for
connected trailers to be created to view
status, to store and track trailer usage
information, and to set up towing assistance
features.
The Trailering App Preview will appear when
the Trailering App is opened for the first
time from the Home Page. Touch GET
STARTED in the Trailering App to go into
the app.
When a trailer is electrically connected and
a trailer profile has not been created, there
will be an option to create a profile, use a
guest profile, or select Accessory/No trailer.
After the pop-up is displayed three times,
Don’t Remind Me will display and touching
that will turn off the trailer detection
pop-up. To turn the Trailer Detection Alert
on, select ON in the Settings tab.
When a trailer is electrically connected and
after a Trailer Profile has been created, the
trailer detection pop-up will appear with a
list of all of the custom Trailer Profiles made
on the vehicle. To load an existing Trailer
Profile, select one of the Trailer Profiles listed, or load the Guest Trailer Profile by
selecting GUEST TRAILER. Touching
Accessory/No trailer will select Accessory/No
trailer as the active Trailer Profile and will
dismiss the pop- up. Shifting the vehicle
from P (Park) will select Guest Trailer as the
active Trailer Profile and will dismiss the
pop-up.
Create a Trailer Profile
1. Touch Create Profile on the trailer detection pop-up or touch + Add Trailer
Profile in the Trailering App.
2. Create a name for the trailer.
3. Select the trailer type.
4. Select Save Profile.
A pop-up will indicate the setup is complete.
Touch DONE to complete the process or
touch TRAILER FEATURE SETUP to set up the
Tow/Haul Mode reminder, Trailer Tire
Pressure Monitoring System, if equipped,
maintenance reminders, or towing
assistance, if equipped.
Import a Trailer Profile
A trailer profile saved to an OnStar account
can be imported to the vehicle. 1. Touch + Add Trailer Profile in the Trailering App
Page 311 of 463
Chevrolet Silverado 1500 Owner Manual (GMNA-Localizing-U.S./Canada/
Mexico/Paraguay-14632303) - 2021 - CRC - 11/9/20
308 Driving and Operating
2. Touch Import Profile on the pop-up.
3. Select a trailer profile from the list.
4. Touch IMPORT.
A pop-up will indicate the import was
successful. Touch OK to return to the trailer
list and select the trailer profile. The Tow/
Haul Mode reminder, Brake Gain Setting and
Trailer Tire Pressure sensor learning,
if equipped, do not import.
Trailer Feature Setup
Tow/Haul Mode Reminder
To turn the Tow/Haul Mode Reminder
setting on, touch Yes. To turn it off,
touch No.
Trailer Tire Pressure Setup
If the Trailer Tire Pressure Monitoring
System (TTPMS) is detected, touch the Tire
Pressure Monitoring icon to set up tire
pressure monitoring. Touch Yes to set up
the sensors or touch No to return to the
previous screen.
The trailer tire pressure sensors can transmit
up to 7 m (23 feet) from the hitch receiver of
the vehicle. A trailer must be electrically connected to
the vehicle before starting the
sensor-to-vehicle learn process.
After selecting Start from the Learn Sensors
screen, use the Tool Method or the Manual
Method (described below) to learn each tire
sensor, during which the current tire number
will be highlighted.
Each sensor has a minimum of two minutes
to learn, shown by a timer. After a sensor is
learned, a checkmark appears next to the
tire, the vehicle horn will sound, the
vehicle’s brake lamps will flash, and all
working trailer lamps will flash. It then
moves to the next sensor.
To cancel the process touch Stop.
The recommended tire pressure must be
entered for the trailer tires. This allows the
vehicle to alert when the tire pressure is
high or low.
TTPMS must learn the location of the
installed tire sensors to show correct air
pressure and temperature for each tire. To
set up, use one of the following options or
see a tire or trailer dealer for service. The
learning process must be repeated when thetrailer tires are rotated or replaced. See
“Editing a Trailer Profile”
later in this section
for tire pressure sensor relearn information.
Tool Method: A TTPMS activation tool can
be purchased separately to learn the sensor
locations.
Manual Method: Without the tool, the air
pressure can be increased or decreased in
each tire for 10 seconds. Do not exceed the
maximum inflation pressure found on the
tire sidewalls. Make sure to re-adjust tire
pressure to the recommended level when
the process is complete.
Sensor Learning Steps
To complete the sensor-to-vehicle learn
process:
1. Touch Start on the Learn Sensors screen. The horn chirps twice and the Learning
Active screen appears on the
infotainment display.
2. Start with the driver side front trailer tire.
3. Activate the tool near the valve stem or adjust the air pressure of this tire until
the horn chirps and all working vehicle
and trailer lights flash.
Page 313 of 463
Chevrolet Silverado 1500 Owner Manual (GMNA-Localizing-U.S./Canada/
Mexico/Paraguay-14632303) - 2021 - CRC - 11/9/20
310 Driving and Operating
Trailer Side Blind Zone Alert Setup (if
equipped)
Trailer dimensions must be in range to
enable this feature.
.Trailer Length: 300 cm (118.1 in)–
1200 cm (472.4 in). Measure from center
of coupler to furthest rear point on the
trailer.
If trailer dimensions are out of range, this
feature will be unavailable.
Status View
The Status view shows:
.Vehicle
.Connections
.Tires
.Maintenance
.Cameras
Upon entry, the most recent items will be
shown. Select MORE to view all options.
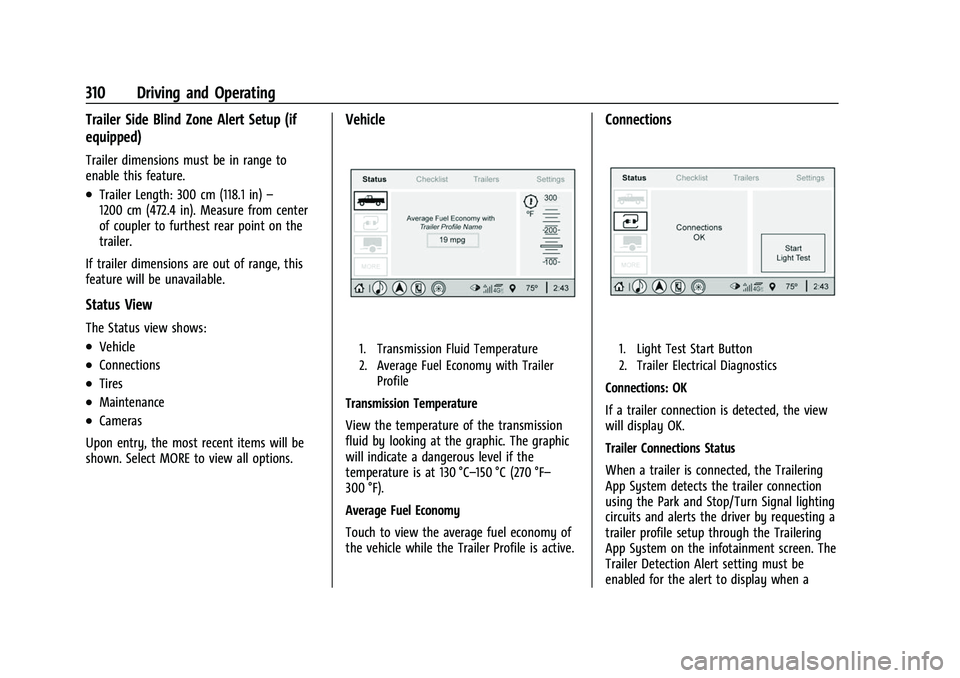
Vehicle
1. Transmission Fluid Temperature
2. Average Fuel Economy with Trailer Profile
Transmission Temperature
View the temperature of the transmission
fluid by looking at the graphic. The graphic
will indicate a dangerous level if the
temperature is at 130 °C–150 °C (270 °F–
300 °F).
Average Fuel Economy
Touch to view the average fuel economy of
the vehicle while the Trailer Profile is active.
Connections
1. Light Test Start Button
2. Trailer Electrical Diagnostics
Connections: OK
If a trailer connection is detected, the view
will display OK.
Trailer Connections Status
When a trailer is connected, the Trailering
App System detects the trailer connection
using the Park and Stop/Turn Signal lighting
circuits and alerts the driver by requesting a
trailer profile setup through the Trailering
App System on the infotainment screen. The
Trailer Detection Alert setting must be
enabled for the alert to display when a