2021 CHEVROLET MALIBU lock
[x] Cancel search: lockPage 71 of 351
Chevrolet Malibu Owner Manual (GMNA-Localizing-U.S./Canada-
14584249) - 2021 - CRC - 11/9/20
70 Seats and Restraints
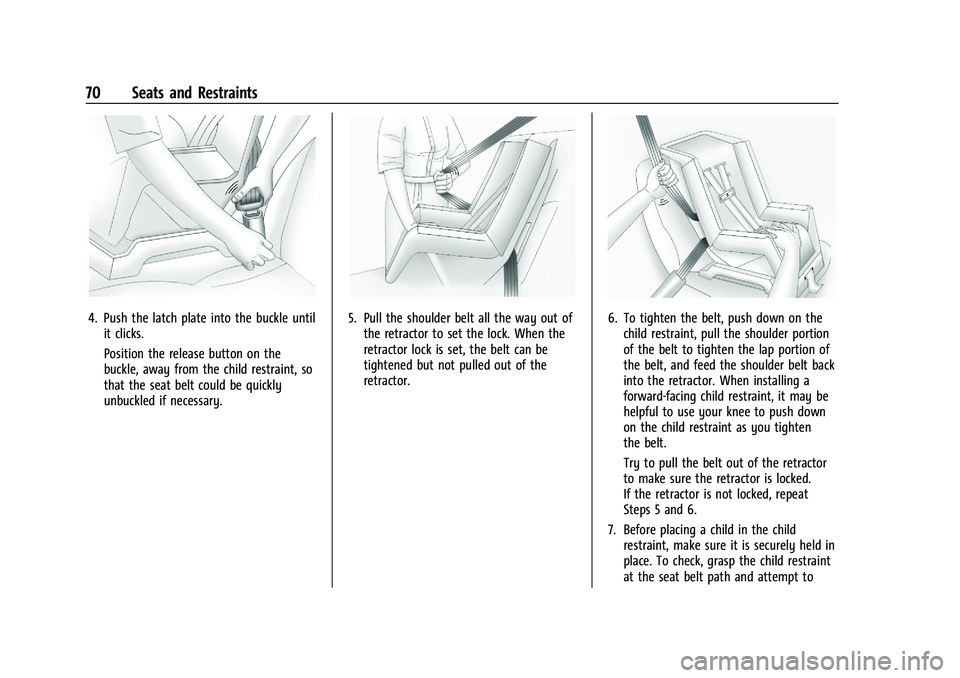
4. Push the latch plate into the buckle untilit clicks.
Position the release button on the
buckle, away from the child restraint, so
that the seat belt could be quickly
unbuckled if necessary.5. Pull the shoulder belt all the way out ofthe retractor to set the lock. When the
retractor lock is set, the belt can be
tightened but not pulled out of the
retractor.6. To tighten the belt, push down on thechild restraint, pull the shoulder portion
of the belt to tighten the lap portion of
the belt, and feed the shoulder belt back
into the retractor. When installing a
forward-facing child restraint, it may be
helpful to use your knee to push down
on the child restraint as you tighten
the belt.
Try to pull the belt out of the retractor
to make sure the retractor is locked.
If the retractor is not locked, repeat
Steps 5 and 6.
7. Before placing a child in the child restraint, make sure it is securely held in
place. To check, grasp the child restraint
at the seat belt path and attempt to
Page 75 of 351

Chevrolet Malibu Owner Manual (GMNA-Localizing-U.S./Canada-
14584249) - 2021 - CRC - 11/9/20
74 Instruments and Controls
Instruments and Controls
Controls
Steering Wheel Adjustment . . . . . . . . . . . . . 75
Steering Wheel Controls . . . . . . . . . . . . . . . . 75
Heated Steering Wheel . . . . . . . . . . . . . . . . . 75
Horn . . . . . . . . . . . . . . . . . . . . . . . . . . . . . . . . . . . . 75
Windshield Wiper/Washer . . . . . . . . . . . . . . 75
Clock . . . . . . . . . . . . . . . . . . . . . . . . . . . . . . . . . . . 76
Power Outlets . . . . . . . . . . . . . . . . . . . . . . . . . . 77
Wireless Charging . . . . . . . . . . . . . . . . . . . . . . 78
Warning Lights, Gauges, and Indicators
Warning Lights, Gauges, andIndicators . . . . . . . . . . . . . . . . . . . . . . . . . . . . 80
Instrument Cluster . . . . . . . . . . . . . . . . . . . . . 80
Speedometer . . . . . . . . . . . . . . . . . . . . . . . . . . . 82
Odometer . . . . . . . . . . . . . . . . . . . . . . . . . . . . . . 82
Trip Odometer . . . . . . . . . . . . . . . . . . . . . . . . . . 82
Tachometer . . . . . . . . . . . . . . . . . . . . . . . . . . . . 83
Fuel Gauge . . . . . . . . . . . . . . . . . . . . . . . . . . . . . 83
Engine Coolant Temperature Gauge . . . . 84
Voltmeter Gauge (Uplevel Cluster Only) . . . . . . . . . . . . . . . . . . . . . . . . . 84
Seat Belt Reminders . . . . . . . . . . . . . . . . . . . . 85
Airbag Readiness Light . . . . . . . . . . . . . . . . . 85
Passenger Airbag Status Indicator . . . . . . 86
Charging System Light . . . . . . . . . . . . . . . . . 86
Malfunction Indicator Lamp (Check Engine Light) . . . . . . . . . . . . . . . . . . . . . . . . . 87 Brake System Warning Light . . . . . . . . . . . 88
Electric Parking Brake Light . . . . . . . . . . . . . 89
Service Electric Parking Brake Light . . . . . 89
Antilock Brake System (ABS) Warning
Light . . . . . . . . . . . . . . . . . . . . . . . . . . . . . . . . . 89
Lane Keep Assist (LKA) Light . . . . . . . . . . . 90
Vehicle Ahead Indicator . . . . . . . . . . . . . . . . 90
Pedestrian Ahead Indicator . . . . . . . . . . . . . 90
Traction Off Light . . . . . . . . . . . . . . . . . . . . . . 90
StabiliTrak OFF Light . . . . . . . . . . . . . . . . . . . . 91
Traction Control System (TCS)/StabiliTrak Light . . . . . . . . . . . . . . . . . . . . . . . . . . . . . . . . . . 91
Engine Coolant Temperature Warning Light (Uplevel Only) . . . . . . . . . . . . . . . . . . 91
Tire Pressure Light . . . . . . . . . . . . . . . . . . . . . . 92
Engine Oil Pressure Light . . . . . . . . . . . . . . . 92
Low Fuel Warning Light . . . . . . . . . . . . . . . . 92
Security Light . . . . . . . . . . . . . . . . . . . . . . . . . . 93
High-Beam On Light . . . . . . . . . . . . . . . . . . . . 93
Lamps On Reminder . . . . . . . . . . . . . . . . . . . . 93
Cruise Control Light . . . . . . . . . . . . . . . . . . . . 93
Door Ajar Light (Uplevel) . . . . . . . . . . . . . . . 94
Information Displays
Driver Information Center (DIC) (Base Level) . . . . . . . . . . . . . . . . . . . . . . . . . . . . . . . . . 94
Driver Information Center (DIC) (Uplevel) . . . . . . . . . . . . . . . . . . . . . . . . . . . . . 96
Vehicle Messages
Vehicle Messages . . . . . . . . . . . . . . . . . . . . . . 99
Engine Power Messages . . . . . . . . . . . . . . . . 99
Vehicle Speed Messages . . . . . . . . . . . . . . . 100
Vehicle Personalization
Vehicle Personalization . . . . . . . . . . . . . . . . 100
Page 76 of 351
Chevrolet Malibu Owner Manual (GMNA-Localizing-U.S./Canada-
14584249) - 2021 - CRC - 11/9/20
Instruments and Controls 75
Controls
Steering Wheel Adjustment
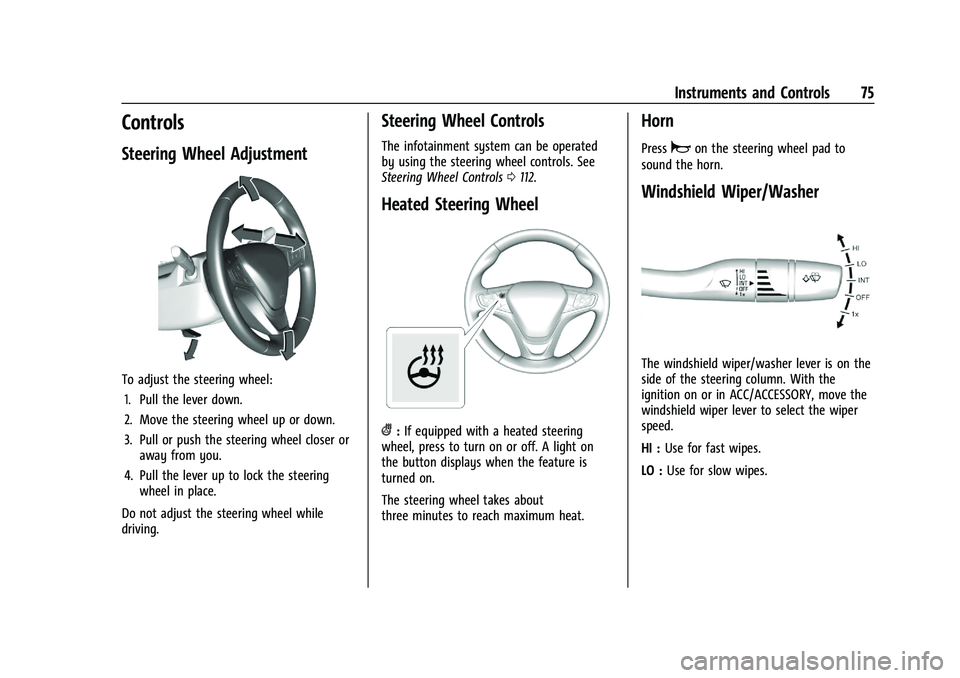
To adjust the steering wheel:1. Pull the lever down.
2. Move the steering wheel up or down.
3. Pull or push the steering wheel closer or away from you.
4. Pull the lever up to lock the steering wheel in place.
Do not adjust the steering wheel while
driving.
Steering Wheel Controls
The infotainment system can be operated
by using the steering wheel controls. See
Steering Wheel Controls 0112.
Heated Steering Wheel
(:If equipped with a heated steering
wheel, press to turn on or off. A light on
the button displays when the feature is
turned on.
The steering wheel takes about
three minutes to reach maximum heat.
Horn
Pressaon the steering wheel pad to
sound the horn.
Windshield Wiper/Washer
The windshield wiper/washer lever is on the
side of the steering column. With the
ignition on or in ACC/ACCESSORY, move the
windshield wiper lever to select the wiper
speed.
HI : Use for fast wipes.
LO : Use for slow wipes.
Page 77 of 351
Chevrolet Malibu Owner Manual (GMNA-Localizing-U.S./Canada-
14584249) - 2021 - CRC - 11/9/20
76 Instruments and Controls
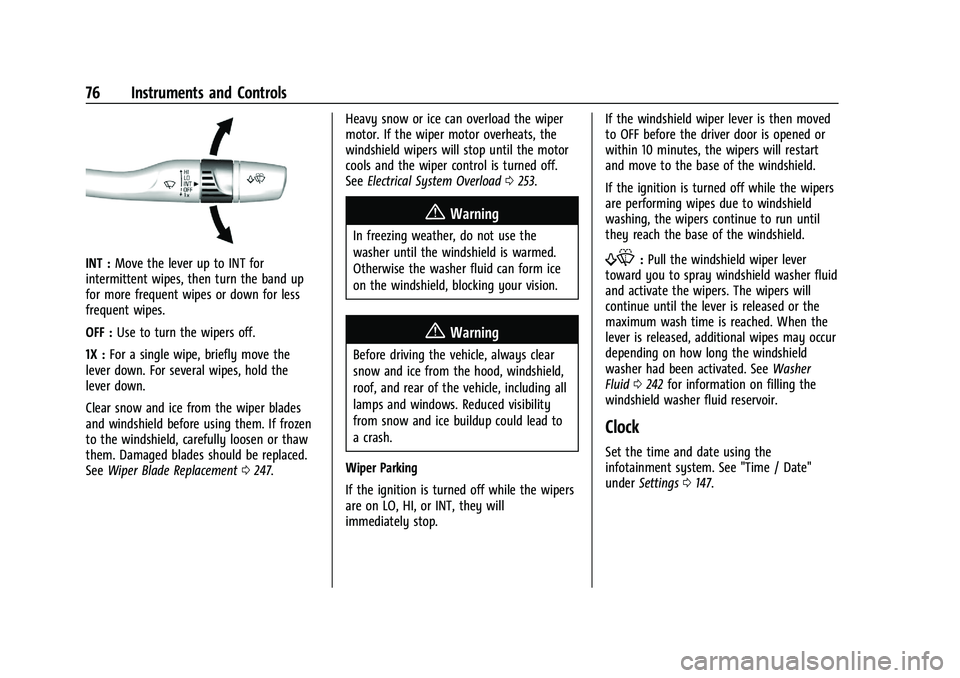
INT :Move the lever up to INT for
intermittent wipes, then turn the band up
for more frequent wipes or down for less
frequent wipes.
OFF : Use to turn the wipers off.
1X : For a single wipe, briefly move the
lever down. For several wipes, hold the
lever down.
Clear snow and ice from the wiper blades
and windshield before using them. If frozen
to the windshield, carefully loosen or thaw
them. Damaged blades should be replaced.
See Wiper Blade Replacement 0247. Heavy snow or ice can overload the wiper
motor. If the wiper motor overheats, the
windshield wipers will stop until the motor
cools and the wiper control is turned off.
See
Electrical System Overload 0253.
{Warning
In freezing weather, do not use the
washer until the windshield is warmed.
Otherwise the washer fluid can form ice
on the windshield, blocking your vision.
{Warning
Before driving the vehicle, always clear
snow and ice from the hood, windshield,
roof, and rear of the vehicle, including all
lamps and windows. Reduced visibility
from snow and ice buildup could lead to
a crash.
Wiper Parking
If the ignition is turned off while the wipers
are on LO, HI, or INT, they will
immediately stop. If the windshield wiper lever is then moved
to OFF before the driver door is opened or
within 10 minutes, the wipers will restart
and move to the base of the windshield.
If the ignition is turned off while the wipers
are performing wipes due to windshield
washing, the wipers continue to run until
they reach the base of the windshield.
f:
Pull the windshield wiper lever
toward you to spray windshield washer fluid
and activate the wipers. The wipers will
continue until the lever is released or the
maximum wash time is reached. When the
lever is released, additional wipes may occur
depending on how long the windshield
washer had been activated. See Washer
Fluid 0242 for information on filling the
windshield washer fluid reservoir.
Clock
Set the time and date using the
infotainment system. See "Time / Date"
under Settings 0147.
Page 90 of 351
Chevrolet Malibu Owner Manual (GMNA-Localizing-U.S./Canada-
14584249) - 2021 - CRC - 11/9/20
Instruments and Controls 89
{Warning
The brake system might not be working
properly if the brake system warning
light is on. Driving with the brake system
warning light on can lead to a crash.
If the light is still on after the vehicle has
been pulled off the road and carefully
stopped, have the vehicle towed for
service.
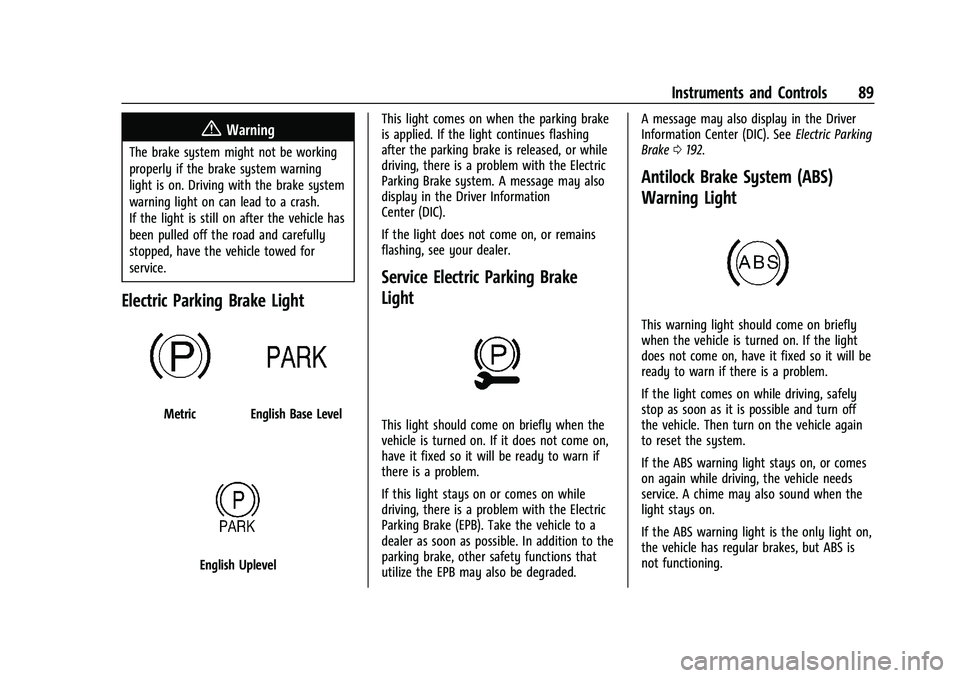
Electric Parking Brake Light
MetricEnglish Base Level
English UplevelThis light comes on when the parking brake
is applied. If the light continues flashing
after the parking brake is released, or while
driving, there is a problem with the Electric
Parking Brake system. A message may also
display in the Driver Information
Center (DIC).
If the light does not come on, or remains
flashing, see your dealer.
Service Electric Parking Brake
Light
This light should come on briefly when the
vehicle is turned on. If it does not come on,
have it fixed so it will be ready to warn if
there is a problem.
If this light stays on or comes on while
driving, there is a problem with the Electric
Parking Brake (EPB). Take the vehicle to a
dealer as soon as possible. In addition to the
parking brake, other safety functions that
utilize the EPB may also be degraded. A message may also display in the Driver
Information Center (DIC). See
Electric Parking
Brake 0192.
Antilock Brake System (ABS)
Warning Light
This warning light should come on briefly
when the vehicle is turned on. If the light
does not come on, have it fixed so it will be
ready to warn if there is a problem.
If the light comes on while driving, safely
stop as soon as it is possible and turn off
the vehicle. Then turn on the vehicle again
to reset the system.
If the ABS warning light stays on, or comes
on again while driving, the vehicle needs
service. A chime may also sound when the
light stays on.
If the ABS warning light is the only light on,
the vehicle has regular brakes, but ABS is
not functioning.
Page 103 of 351
Chevrolet Malibu Owner Manual (GMNA-Localizing-U.S./Canada-
14584249) - 2021 - CRC - 11/9/20
102 Instruments and Controls
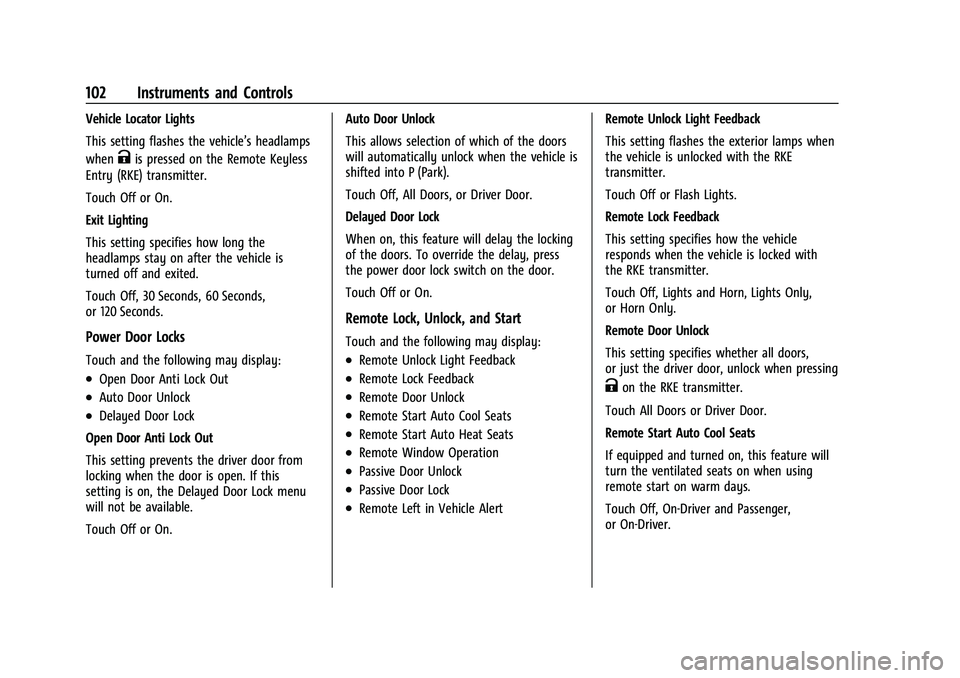
Vehicle Locator Lights
This setting flashes the vehicle’s headlamps
when
Kis pressed on the Remote Keyless
Entry (RKE) transmitter.
Touch Off or On.
Exit Lighting
This setting specifies how long the
headlamps stay on after the vehicle is
turned off and exited.
Touch Off, 30 Seconds, 60 Seconds,
or 120 Seconds.
Power Door Locks
Touch and the following may display:
.Open Door Anti Lock Out
.Auto Door Unlock
.Delayed Door Lock
Open Door Anti Lock Out
This setting prevents the driver door from
locking when the door is open. If this
setting is on, the Delayed Door Lock menu
will not be available.
Touch Off or On. Auto Door Unlock
This allows selection of which of the doors
will automatically unlock when the vehicle is
shifted into P (Park).
Touch Off, All Doors, or Driver Door.
Delayed Door Lock
When on, this feature will delay the locking
of the doors. To override the delay, press
the power door lock switch on the door.
Touch Off or On.
Remote Lock, Unlock, and Start
Touch and the following may display:
.Remote Unlock Light Feedback
.Remote Lock Feedback
.Remote Door Unlock
.Remote Start Auto Cool Seats
.Remote Start Auto Heat Seats
.Remote Window Operation
.Passive Door Unlock
.Passive Door Lock
.Remote Left in Vehicle Alert
Remote Unlock Light Feedback
This setting flashes the exterior lamps when
the vehicle is unlocked with the RKE
transmitter.
Touch Off or Flash Lights.
Remote Lock Feedback
This setting specifies how the vehicle
responds when the vehicle is locked with
the RKE transmitter.
Touch Off, Lights and Horn, Lights Only,
or Horn Only.
Remote Door Unlock
This setting specifies whether all doors,
or just the driver door, unlock when pressing
Kon the RKE transmitter.
Touch All Doors or Driver Door.
Remote Start Auto Cool Seats
If equipped and turned on, this feature will
turn the ventilated seats on when using
remote start on warm days.
Touch Off, On-Driver and Passenger,
or On-Driver.
Page 104 of 351
Chevrolet Malibu Owner Manual (GMNA-Localizing-U.S./Canada-
14584249) - 2021 - CRC - 11/9/20
Instruments and Controls 103
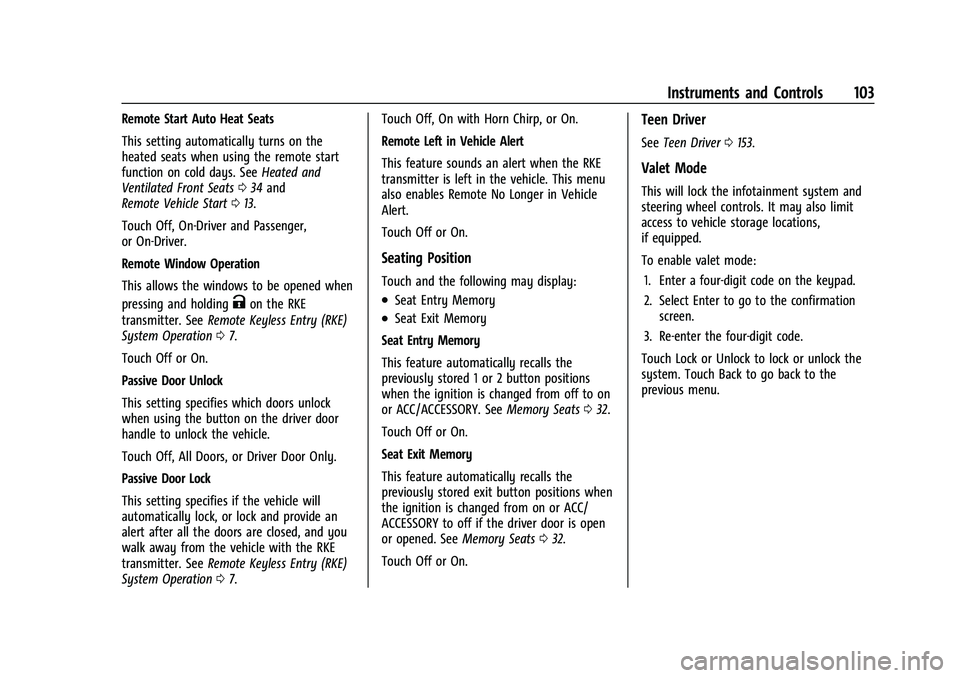
Remote Start Auto Heat Seats
This setting automatically turns on the
heated seats when using the remote start
function on cold days. SeeHeated and
Ventilated Front Seats 034 and
Remote Vehicle Start 013.
Touch Off, On-Driver and Passenger,
or On-Driver.
Remote Window Operation
This allows the windows to be opened when
pressing and holding
Kon the RKE
transmitter. See Remote Keyless Entry (RKE)
System Operation 07.
Touch Off or On.
Passive Door Unlock
This setting specifies which doors unlock
when using the button on the driver door
handle to unlock the vehicle.
Touch Off, All Doors, or Driver Door Only.
Passive Door Lock
This setting specifies if the vehicle will
automatically lock, or lock and provide an
alert after all the doors are closed, and you
walk away from the vehicle with the RKE
transmitter. See Remote Keyless Entry (RKE)
System Operation 07. Touch Off, On with Horn Chirp, or On.
Remote Left in Vehicle Alert
This feature sounds an alert when the RKE
transmitter is left in the vehicle. This menu
also enables Remote No Longer in Vehicle
Alert.
Touch Off or On.
Seating Position
Touch and the following may display:
.Seat Entry Memory
.Seat Exit Memory
Seat Entry Memory
This feature automatically recalls the
previously stored 1 or 2 button positions
when the ignition is changed from off to on
or ACC/ACCESSORY. See Memory Seats032.
Touch Off or On.
Seat Exit Memory
This feature automatically recalls the
previously stored exit button positions when
the ignition is changed from on or ACC/
ACCESSORY to off if the driver door is open
or opened. See Memory Seats032.
Touch Off or On.
Teen Driver
See Teen Driver 0153.
Valet Mode
This will lock the infotainment system and
steering wheel controls. It may also limit
access to vehicle storage locations,
if equipped.
To enable valet mode:
1. Enter a four-digit code on the keypad.
2. Select Enter to go to the confirmation screen.
3. Re-enter the four-digit code.
Touch Lock or Unlock to lock or unlock the
system. Touch Back to go back to the
previous menu.
Page 106 of 351

Chevrolet Malibu Owner Manual (GMNA-Localizing-U.S./Canada-
14584249) - 2021 - CRC - 11/9/20
Lighting 105
To enable the IntelliBeam system, press
bon the turn signal lever when the
exterior lamp control is in the AUTO or
5
position.
Driving with IntelliBeam
The system only activates the high beams
when driving over 40 km/h (25 mph).
The blue high-beam on light appears on the
instrument cluster when the high beams
are on.
There is a sensor near the top center of the
windshield that automatically controls the
system. Keep this area of the windshield
clear of debris to allow for best system
performance.
The high-beam headlamps remain on, under
the automatic control, until one of the
following situations occurs:
.The system detects an approaching
vehicle's headlamps.
.The system detects a preceding vehicle's
taillamps.
.The outside light is bright enough that
high-beam headlamps are not required.
.The vehicle's speed drops below 20 km/h
(12 mph).
.The IntelliBeam system is disabled by the
button on the turn signal lever. If this
happens, press
bon the turn signal
lever when the exterior lamp control is in
the AUTO or
5position. The instrument
cluster light will come on to indicate the
IntelliBeam system is reactivated.
The high beams may not turn off
automatically if the system cannot detect
another vehicle's lamps because of any of
the following:
.The other vehicle's lamps are missing,
damaged, obstructed from view,
or otherwise undetected.
.The other vehicle's lamps are covered
with dirt, snow, and/or road spray.
.The other vehicle's lamps cannot be
detected due to dense exhaust, smoke,
fog, snow, road spray, mist, or other
airborne obstructions.
.The vehicle's windshield is dirty, cracked,
or obstructed by something that blocks
the view of the light sensor.
.The vehicle is loaded such that the front
end points upward, causing the light
sensor to aim high and not detect
headlamps and taillamps.
.Driving on winding or hilly roads. The IntelliBeam system may need to be
disabled if any of the above conditions exist.
Exterior Lamps Off Reminder
A warning chime sounds if the driver door is
opened while the ignition is off and the
exterior lamps are on.
Headlamp High/Low-Beam
Changer
3:
Push the turn signal lever away from
you and release, to turn the high beams on.
To return to low beams, push the lever
again or pull it toward you and release.
This indicator light turns on in the
instrument cluster when the high-beam
headlamps are on.
Flash-to-Pass
To flash the high beams, pull the turn signal
lever toward you, and release.