2021 CHEVROLET MALIBU trunk
[x] Cancel search: trunkPage 21 of 351
Chevrolet Malibu Owner Manual (GMNA-Localizing-U.S./Canada-
14584249) - 2021 - CRC - 11/9/20
20 Keys, Doors, and Windows
.Use the Keyless Access system,
if equipped.
.With a door open, press the
inside
Q.
3. After 30 seconds the alarm system will arm, and the indicator light will begin to
slowly flash indicating the alarm system
is operating. Pressing
Qon the RKE
transmitter a second time will bypass
the 30-second delay and immediately
arm the alarm system.
The vehicle alarm system will not arm if the
doors are locked with the key.
If the driver door is opened without first
unlocking with the RKE transmitter, the horn
will chirp and the lights will flash to indicate
pre-alarm. If the vehicle is not started,
or the door is not unlocked by pressing
K
on the RKE transmitter during the 10-second
pre-alarm, the alarm will be activated.
If a door, the hood, or the trunk is opened
without first disarming the system, the turn
signals will flash and the horn will sound for
about 30 seconds. The alarm system will
then re-arm to monitor for the next
unauthorized event.
Disarming the Alarm System
Do one of the following to disarm the alarm
system or turn off the alarm if it has been
activated:
.PressKon the RKE transmitter.
.Unlock the vehicle using the Keyless
Access system, if equipped.
.Start the vehicle.
To avoid setting off the alarm by accident:
.Lock the vehicle after all occupants have
left the vehicle and all doors are closed.
.Always unlock a door with the RKE
transmitter or use the Keyless Access
system, if equipped.
Unlocking the driver door with the key will
not disarm the system or turn off the alarm.
How to Detect a Tamper Condition
IfKis pressed on the RKE transmitter and
the horn chirps and the lights flash three
times, an alarm occurred previously while
the alarm system was armed.
If the alarm has been activated, a message
will appear on the Driver Information
Center (DIC).
Immobilizer
See Radio Frequency Statement 0328.
Immobilizer Operation
This vehicle has a passive theft-deterrent
system.
The system does not have to be manually
armed or disarmed.
The vehicle is automatically immobilized
when the transmitter leaves the vehicle.
The immobilization system is disarmed
when the ignition button is pushed in and a
valid transmitter is in the vehicle.
The security light on the instrument cluster
comes on when there is a problem with
arming or disarming the theft-deterrent
system.
The system has one or more transmitters
matched to an immobilizer control unit in
the vehicle. Only a correctly matched
Page 37 of 351
Chevrolet Malibu Owner Manual (GMNA-Localizing-U.S./Canada-
14584249) - 2021 - CRC - 11/9/20
36 Seats and Restraints
Folding the Seatback
Either side of the seatback can be folded
down for more cargo space. Fold a seatback
only when the vehicle is not moving.
Caution
Folding a rear seat with the seat belts
still fastened may cause damage to the
seat or the seat belts. Always unbuckle
the seat belts and return them to their
normal stowed position before folding a
rear seat.
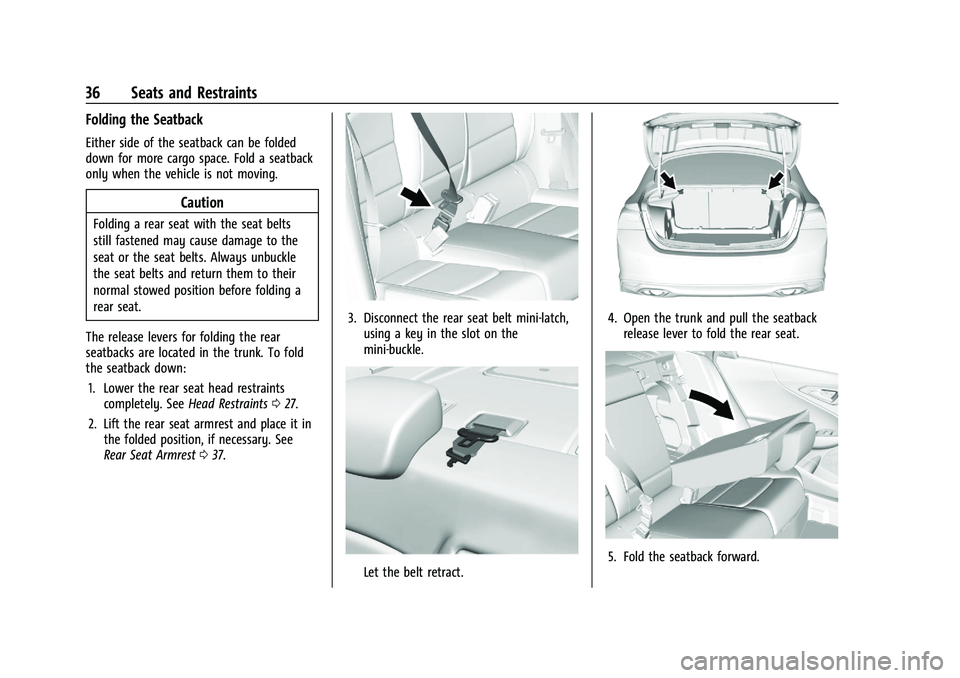
The release levers for folding the rear
seatbacks are located in the trunk. To fold
the seatback down: 1. Lower the rear seat head restraints completely. See Head Restraints027.
2. Lift the rear seat armrest and place it in the folded position, if necessary. See
Rear Seat Armrest 037.
3. Disconnect the rear seat belt mini-latch,
using a key in the slot on the
mini-buckle.
Let the belt retract.
4. Open the trunk and pull the seatbackrelease lever to fold the rear seat.
5. Fold the seatback forward.
Page 74 of 351
Chevrolet Malibu Owner Manual (GMNA-Localizing-U.S./Canada-
14584249) - 2021 - CRC - 11/9/20
Storage 73
Umbrella Storage
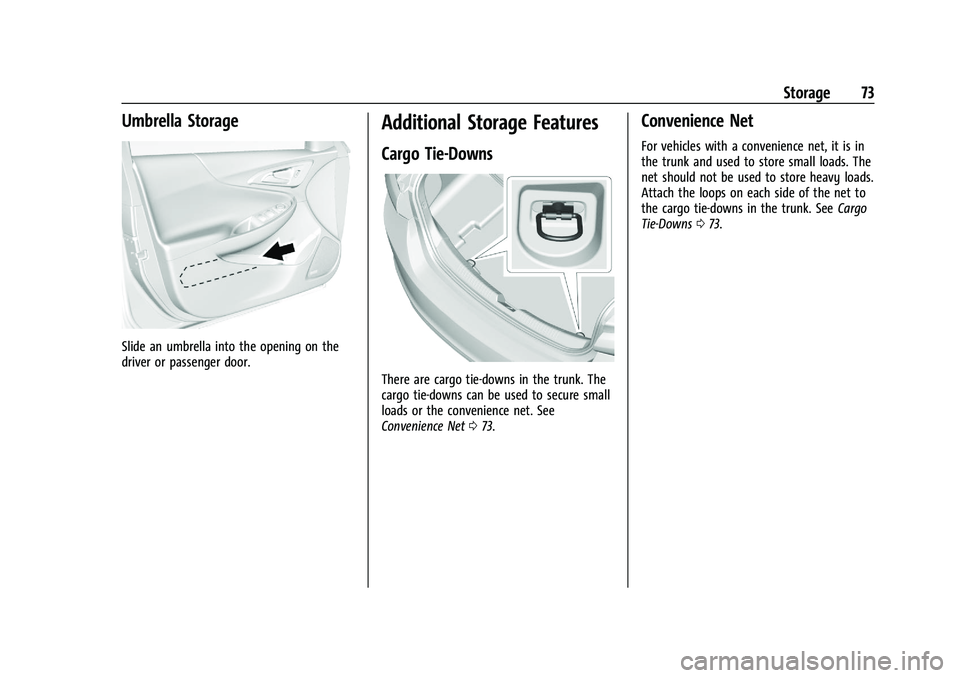
Slide an umbrella into the opening on the
driver or passenger door.
Additional Storage Features
Cargo Tie-Downs
There are cargo tie-downs in the trunk. The
cargo tie-downs can be used to secure small
loads or the convenience net. See
Convenience Net073.
Convenience Net
For vehicles with a convenience net, it is in
the trunk and used to store small loads. The
net should not be used to store heavy loads.
Attach the loops on each side of the net to
the cargo tie-downs in the trunk. See Cargo
Tie-Downs 073.
Page 221 of 351
Chevrolet Malibu Owner Manual (GMNA-Localizing-U.S./Canada-
14584249) - 2021 - CRC - 11/9/20
220 Driving and Operating
Be careful not to spill fuel. Wait five seconds
after you have finished pumping before
removing the fill nozzle. Clean fuel from
painted surfaces as soon as possible. See
Exterior Care0295. Push the fuel door
closed until it latches.
{Warning
If a fire starts while you are refueling, do
not remove the fill nozzle. Shut off the
flow of fuel by shutting off the pump or
by notifying the station attendant. Leave
the area immediately.
Filling the Tank with a Portable Fuel
Container
If the vehicle runs out of fuel and must be
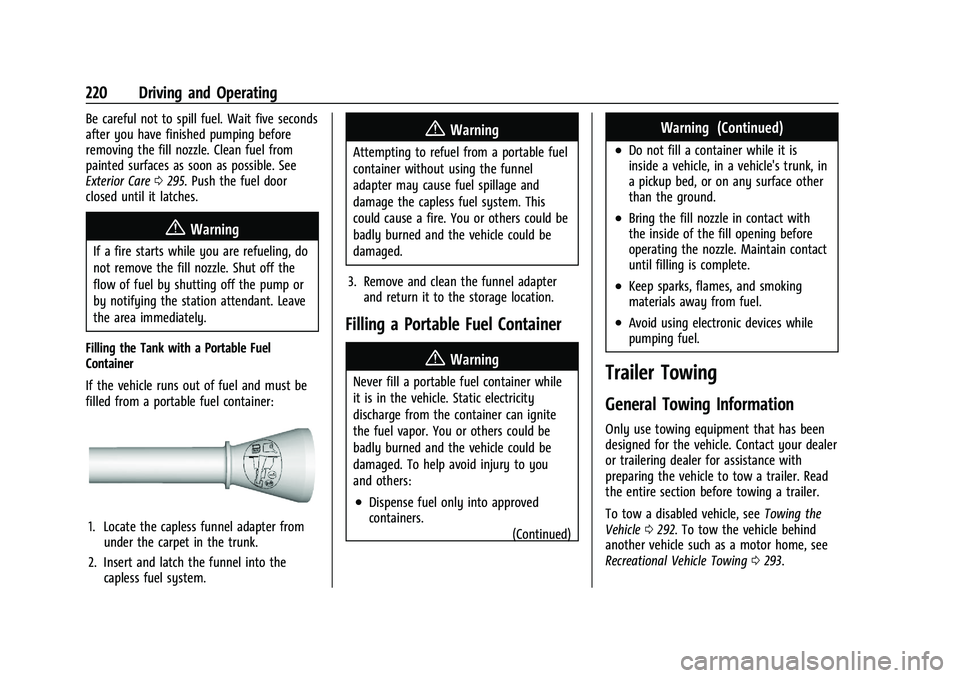
filled from a portable fuel container:
1. Locate the capless funnel adapter from under the carpet in the trunk.
2. Insert and latch the funnel into the capless fuel system.
{Warning
Attempting to refuel from a portable fuel
container without using the funnel
adapter may cause fuel spillage and
damage the capless fuel system. This
could cause a fire. You or others could be
badly burned and the vehicle could be
damaged.
3. Remove and clean the funnel adapter and return it to the storage location.
Filling a Portable Fuel Container
{Warning
Never fill a portable fuel container while
it is in the vehicle. Static electricity
discharge from the container can ignite
the fuel vapor. You or others could be
badly burned and the vehicle could be
damaged. To help avoid injury to you
and others:
.Dispense fuel only into approved
containers.
(Continued)
Warning (Continued)
.Do not fill a container while it is
inside a vehicle, in a vehicle's trunk, in
a pickup bed, or on any surface other
than the ground.
.Bring the fill nozzle in contact with
the inside of the fill opening before
operating the nozzle. Maintain contact
until filling is complete.
.Keep sparks, flames, and smoking
materials away from fuel.
.Avoid using electronic devices while
pumping fuel.
Trailer Towing
General Towing Information
Only use towing equipment that has been
designed for the vehicle. Contact your dealer
or trailering dealer for assistance with
preparing the vehicle to tow a trailer. Read
the entire section before towing a trailer.
To tow a disabled vehicle, see Towing the
Vehicle 0292. To tow the vehicle behind
another vehicle such as a motor home, see
Recreational Vehicle Towing 0293.
Page 223 of 351
Chevrolet Malibu Owner Manual (GMNA-Localizing-U.S./Canada-
14584249) - 2021 - CRC - 11/9/20
222 Driving and Operating
If equipped with Lane Change Alert (LCA),
the LCA detection zones that extend back
from the side of the vehicle do not move
further back when a trailer is towed. Use
caution while changing lanes when towing a
trailer.
If equipped with Rear Cross Traffic Alert
(RCTA), use caution while backing up when
towing a trailer, as the RCTA detection zones
that extend out from the back of the vehicle
do not move further back when a trailer is
towed.
{Warning
To prevent serious injury or death from
carbon monoxide (CO), when towing a
trailer:
.Do not drive with the liftgate, trunk/
hatch, or rear-most window open.
.Fully open the air outlets on or under
the instrument panel.
.Adjust the climate control system to a
setting that brings in only outside air.
See“Climate Control Systems” in the
Index.
For more information about carbon
monoxide, see Engine Exhaust 0188. Towing a trailer requires experience. The
combination of the vehicle and trailer is
longer and not as responsive as the vehicle
itself. Get used to the handling and braking
of the combination by driving on a level
road surface before driving on public roads.
The trailer structure, the tires, and the
brakes must all be rated to carry the
intended cargo. Inadequate trailer
equipment can cause the combination to
operate in an unexpected or unsafe manner.
Before driving, inspect all trailer hitch parts
and attachments, safety chains, electrical
connectors, lamps, tires, and mirrors. See
Towing Equipment
0225. If the trailer has
electric brakes, start the combination
moving and then manually apply the trailer
brake controller to check that the trailer
brakes work. During the trip, occasionally
check that the cargo and trailer are secure
and that the lamps and any trailer brakes
are working.Towing with a Stability Control System
When towing, the stability control system
might be heard. The system reacts to
vehicle movement caused by the trailer,
which mainly occurs during cornering. This is
normal when towing heavier trailers.
Following Distance
Stay at least twice as far behind the vehicle
ahead as you would when driving without a
trailer. This can help to avoid heavy braking
and sudden turns.
Passing
More passing distance is needed when
towing a trailer. The combination of the
vehicle and trailer will not accelerate as
quickly and is much longer than the vehicle
alone. It is necessary to go much farther
beyond the passed vehicle before returning
to the lane. Pass on level roadways. Avoid
passing on hills if possible.
Backing Up
Hold the bottom of the steering wheel with
one hand. To move the trailer to the left,
move that hand to the left. To move the
trailer to the right, move that hand to the
right. Always back up slowly and, if possible,
have someone guide you.
Page 249 of 351
Chevrolet Malibu Owner Manual (GMNA-Localizing-U.S./Canada-
14584249) - 2021 - CRC - 11/9/20
248 Vehicle Care
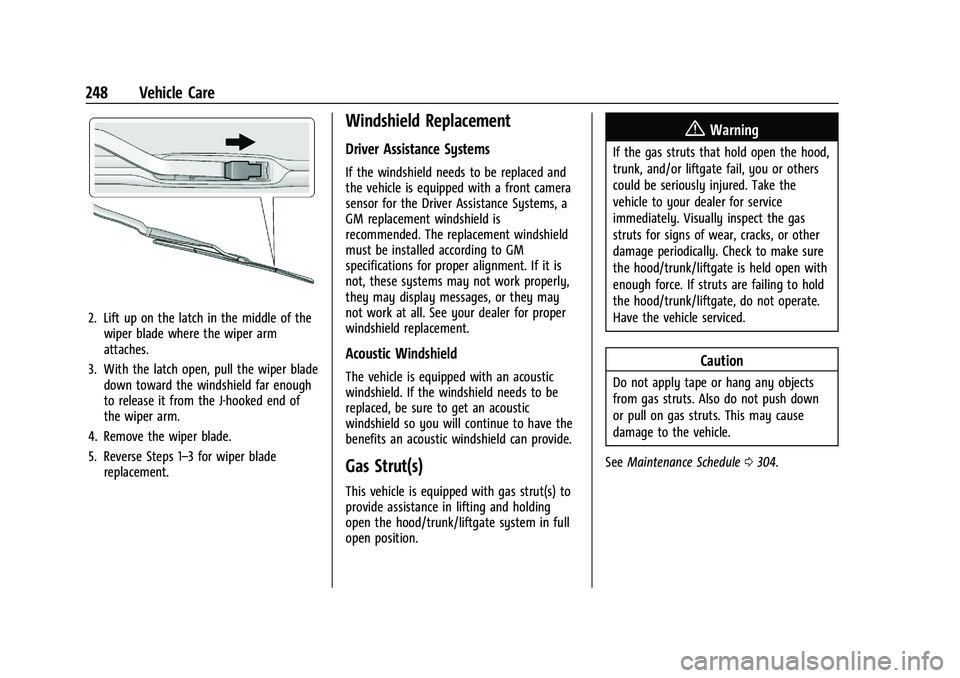
2. Lift up on the latch in the middle of thewiper blade where the wiper arm
attaches.
3. With the latch open, pull the wiper blade down toward the windshield far enough
to release it from the J-hooked end of
the wiper arm.
4. Remove the wiper blade.
5. Reverse Steps 1–3 for wiper blade replacement.
Windshield Replacement
Driver Assistance Systems
If the windshield needs to be replaced and
the vehicle is equipped with a front camera
sensor for the Driver Assistance Systems, a
GM replacement windshield is
recommended. The replacement windshield
must be installed according to GM
specifications for proper alignment. If it is
not, these systems may not work properly,
they may display messages, or they may
not work at all. See your dealer for proper
windshield replacement.
Acoustic Windshield
The vehicle is equipped with an acoustic
windshield. If the windshield needs to be
replaced, be sure to get an acoustic
windshield so you will continue to have the
benefits an acoustic windshield can provide.
Gas Strut(s)
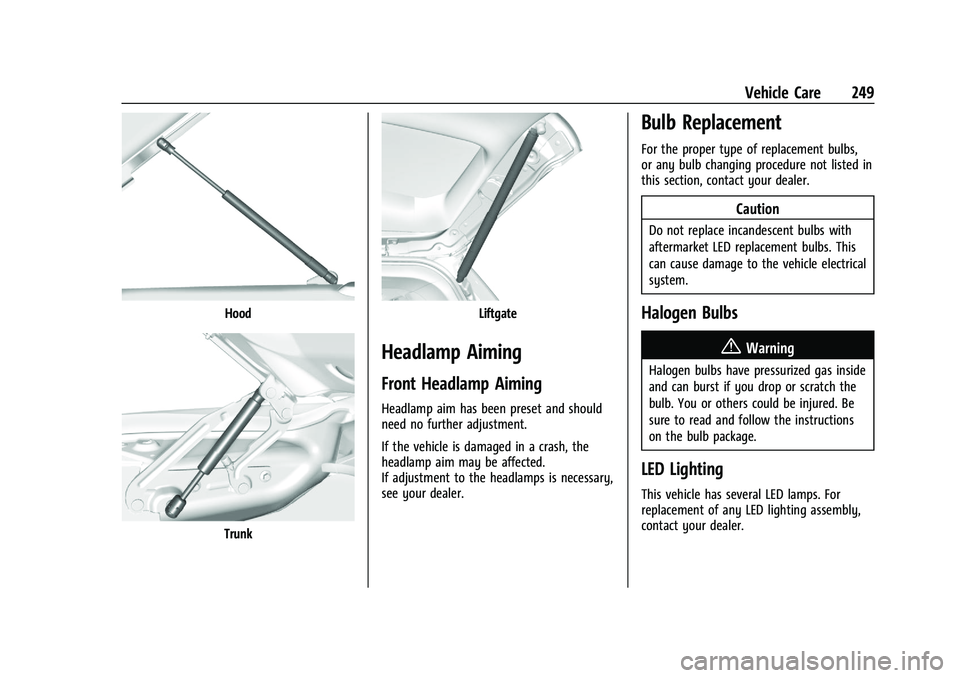
This vehicle is equipped with gas strut(s) to
provide assistance in lifting and holding
open the hood/trunk/liftgate system in full
open position.
{Warning
If the gas struts that hold open the hood,
trunk, and/or liftgate fail, you or others
could be seriously injured. Take the
vehicle to your dealer for service
immediately. Visually inspect the gas
struts for signs of wear, cracks, or other
damage periodically. Check to make sure
the hood/trunk/liftgate is held open with
enough force. If struts are failing to hold
the hood/trunk/liftgate, do not operate.
Have the vehicle serviced.
Caution
Do not apply tape or hang any objects
from gas struts. Also do not push down
or pull on gas struts. This may cause
damage to the vehicle.
See Maintenance Schedule 0304.
Page 250 of 351
Chevrolet Malibu Owner Manual (GMNA-Localizing-U.S./Canada-
14584249) - 2021 - CRC - 11/9/20
Vehicle Care 249
Hood
Trunk
Liftgate
Headlamp Aiming
Front Headlamp Aiming
Headlamp aim has been preset and should
need no further adjustment.
If the vehicle is damaged in a crash, the
headlamp aim may be affected.
If adjustment to the headlamps is necessary,
see your dealer.
Bulb Replacement
For the proper type of replacement bulbs,
or any bulb changing procedure not listed in
this section, contact your dealer.
Caution
Do not replace incandescent bulbs with
aftermarket LED replacement bulbs. This
can cause damage to the vehicle electrical
system.
Halogen Bulbs
{Warning
Halogen bulbs have pressurized gas inside
and can burst if you drop or scratch the
bulb. You or others could be injured. Be
sure to read and follow the instructions
on the bulb package.
LED Lighting
This vehicle has several LED lamps. For
replacement of any LED lighting assembly,
contact your dealer.
Page 251 of 351
Chevrolet Malibu Owner Manual (GMNA-Localizing-U.S./Canada-
14584249) - 2021 - CRC - 11/9/20
250 Vehicle Care
Headlamps, Front Turn Signal,
Sidemarker, and Parking Lamps
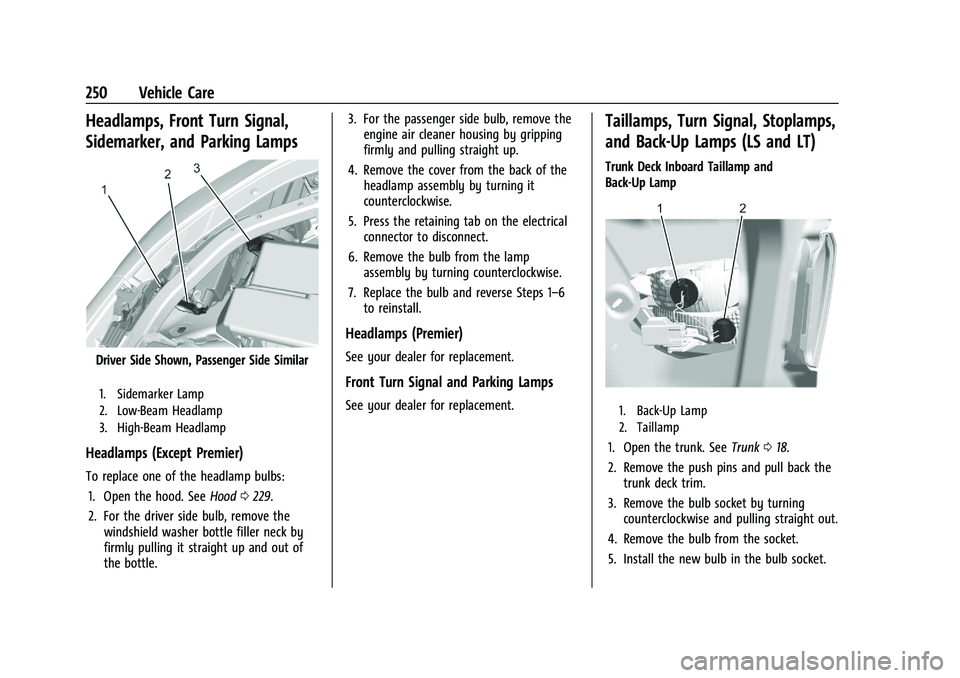
Driver Side Shown, Passenger Side Similar
1. Sidemarker Lamp
2. Low-Beam Headlamp
3. High-Beam Headlamp
Headlamps (Except Premier)
To replace one of the headlamp bulbs:1. Open the hood. See Hood0229.
2. For the driver side bulb, remove the windshield washer bottle filler neck by
firmly pulling it straight up and out of
the bottle. 3. For the passenger side bulb, remove the
engine air cleaner housing by gripping
firmly and pulling straight up.
4. Remove the cover from the back of the headlamp assembly by turning it
counterclockwise.
5. Press the retaining tab on the electrical connector to disconnect.
6. Remove the bulb from the lamp assembly by turning counterclockwise.
7. Replace the bulb and reverse Steps 1–6 to reinstall.
Headlamps (Premier)
See your dealer for replacement.
Front Turn Signal and Parking Lamps
See your dealer for replacement.
Taillamps, Turn Signal, Stoplamps,
and Back-Up Lamps (LS and LT)
Trunk Deck Inboard Taillamp and
Back-Up Lamp
1. Back-Up Lamp
2. Taillamp
1. Open the trunk. See Trunk018.
2. Remove the push pins and pull back the trunk deck trim.
3. Remove the bulb socket by turning counterclockwise and pulling straight out.
4. Remove the bulb from the socket.
5. Install the new bulb in the bulb socket.