Page 251 of 351

Chevrolet Malibu Owner Manual (GMNA-Localizing-U.S./Canada-
14584249) - 2021 - CRC - 11/9/20
250 Vehicle Care
Headlamps, Front Turn Signal,
Sidemarker, and Parking Lamps
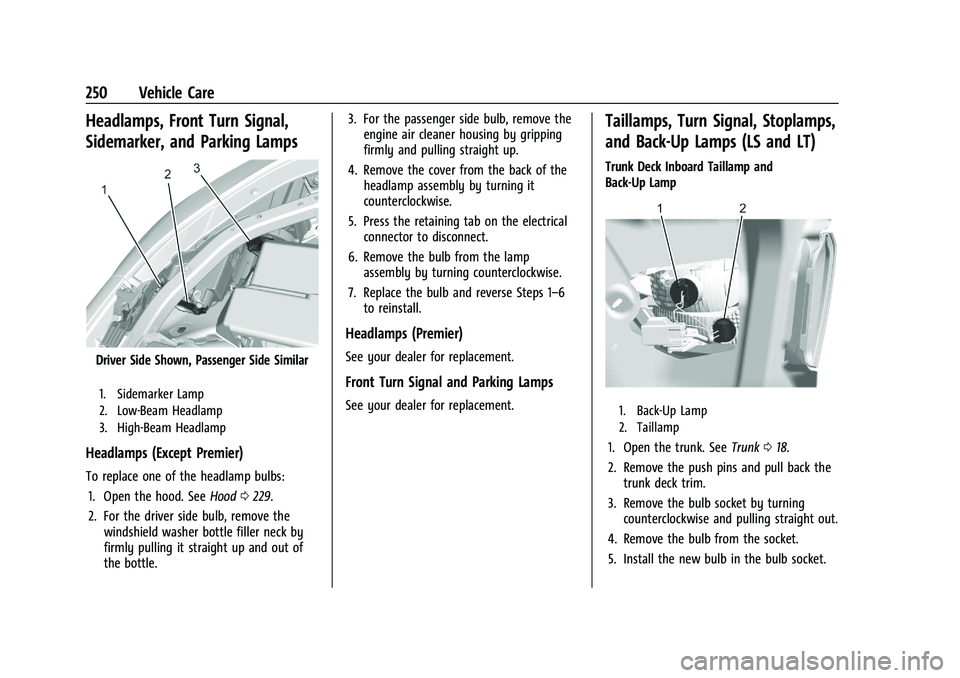
Driver Side Shown, Passenger Side Similar
1. Sidemarker Lamp
2. Low-Beam Headlamp
3. High-Beam Headlamp
Headlamps (Except Premier)
To replace one of the headlamp bulbs:1. Open the hood. See Hood0229.
2. For the driver side bulb, remove the windshield washer bottle filler neck by
firmly pulling it straight up and out of
the bottle. 3. For the passenger side bulb, remove the
engine air cleaner housing by gripping
firmly and pulling straight up.
4. Remove the cover from the back of the headlamp assembly by turning it
counterclockwise.
5. Press the retaining tab on the electrical connector to disconnect.
6. Remove the bulb from the lamp assembly by turning counterclockwise.
7. Replace the bulb and reverse Steps 1–6 to reinstall.
Headlamps (Premier)
See your dealer for replacement.
Front Turn Signal and Parking Lamps
See your dealer for replacement.
Taillamps, Turn Signal, Stoplamps,
and Back-Up Lamps (LS and LT)
Trunk Deck Inboard Taillamp and
Back-Up Lamp
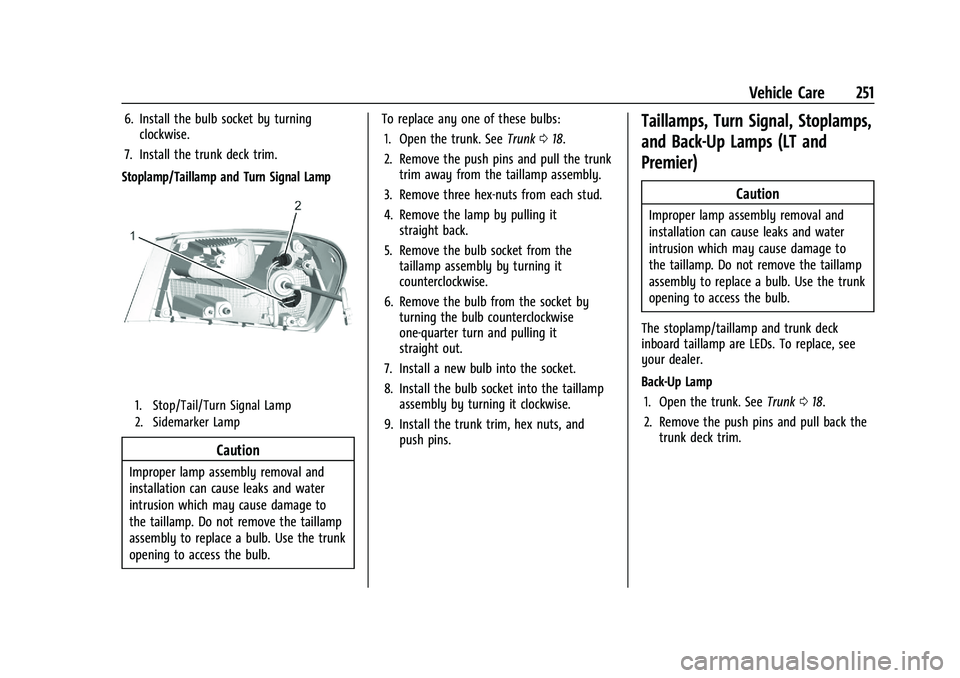
1. Back-Up Lamp
2. Taillamp
1. Open the trunk. See Trunk018.
2. Remove the push pins and pull back the trunk deck trim.
3. Remove the bulb socket by turning counterclockwise and pulling straight out.
4. Remove the bulb from the socket.
5. Install the new bulb in the bulb socket.
Page 252 of 351

Chevrolet Malibu Owner Manual (GMNA-Localizing-U.S./Canada-
14584249) - 2021 - CRC - 11/9/20
Vehicle Care 251
6. Install the bulb socket by turningclockwise.
7. Install the trunk deck trim.
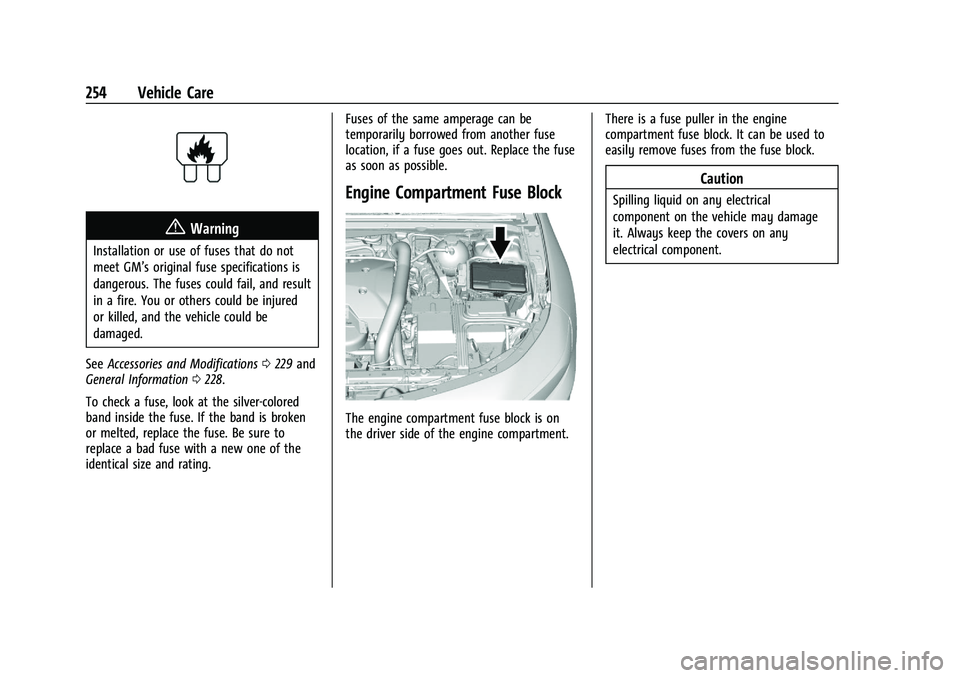
Stoplamp/Taillamp and Turn Signal Lamp
1. Stop/Tail/Turn Signal Lamp
2. Sidemarker Lamp
Caution
Improper lamp assembly removal and
installation can cause leaks and water
intrusion which may cause damage to
the taillamp. Do not remove the taillamp
assembly to replace a bulb. Use the trunk
opening to access the bulb. To replace any one of these bulbs:
1. Open the trunk. See Trunk018.
2. Remove the push pins and pull the trunk trim away from the taillamp assembly.
3. Remove three hex-nuts from each stud.
4. Remove the lamp by pulling it straight back.
5. Remove the bulb socket from the taillamp assembly by turning it
counterclockwise.
6. Remove the bulb from the socket by turning the bulb counterclockwise
one-quarter turn and pulling it
straight out.
7. Install a new bulb into the socket.
8. Install the bulb socket into the taillamp assembly by turning it clockwise.
9. Install the trunk trim, hex nuts, and push pins.
Taillamps, Turn Signal, Stoplamps,
and Back-Up Lamps (LT and
Premier)
Caution
Improper lamp assembly removal and
installation can cause leaks and water
intrusion which may cause damage to
the taillamp. Do not remove the taillamp
assembly to replace a bulb. Use the trunk
opening to access the bulb.
The stoplamp/taillamp and trunk deck
inboard taillamp are LEDs. To replace, see
your dealer.
Back-Up Lamp 1. Open the trunk. See Trunk018.
2. Remove the push pins and pull back the trunk deck trim.
Page 253 of 351
Chevrolet Malibu Owner Manual (GMNA-Localizing-U.S./Canada-
14584249) - 2021 - CRC - 11/9/20
252 Vehicle Care
3. Remove the bulb socket by turningcounterclockwise and pulling straight out.
4. Remove the bulb from the socket.
5. Install the new bulb in the bulb socket.
6. Install the bulb socket by turning clockwise.
7. Install the trunk deck trim.
License Plate Lamp
To replace one of these bulbs:
Passenger Side Shown, Driver Side Similar
1. Push the release tab toward the lamp assembly.
2. Pull the lamp assembly down to remove.
3. Turn the bulb socket counterclockwise to remove it from the lamp assembly.
4. Pull the bulb straight out of the bulb socket.
5. Push the replacement bulb straight into the bulb socket and turn the bulb socket
clockwise to install it into the lamp
assembly.
6. Push the lamp assembly back into position until the release tab locks into
place.
Page 255 of 351

Chevrolet Malibu Owner Manual (GMNA-Localizing-U.S./Canada-
14584249) - 2021 - CRC - 11/9/20
254 Vehicle Care
{Warning
Installation or use of fuses that do not
meet GM’s original fuse specifications is
dangerous. The fuses could fail, and result
in a fire. You or others could be injured
or killed, and the vehicle could be
damaged.
See Accessories and Modifications 0229 and
General Information 0228.
To check a fuse, look at the silver-colored
band inside the fuse. If the band is broken
or melted, replace the fuse. Be sure to
replace a bad fuse with a new one of the
identical size and rating. Fuses of the same amperage can be
temporarily borrowed from another fuse
location, if a fuse goes out. Replace the fuse
as soon as possible.
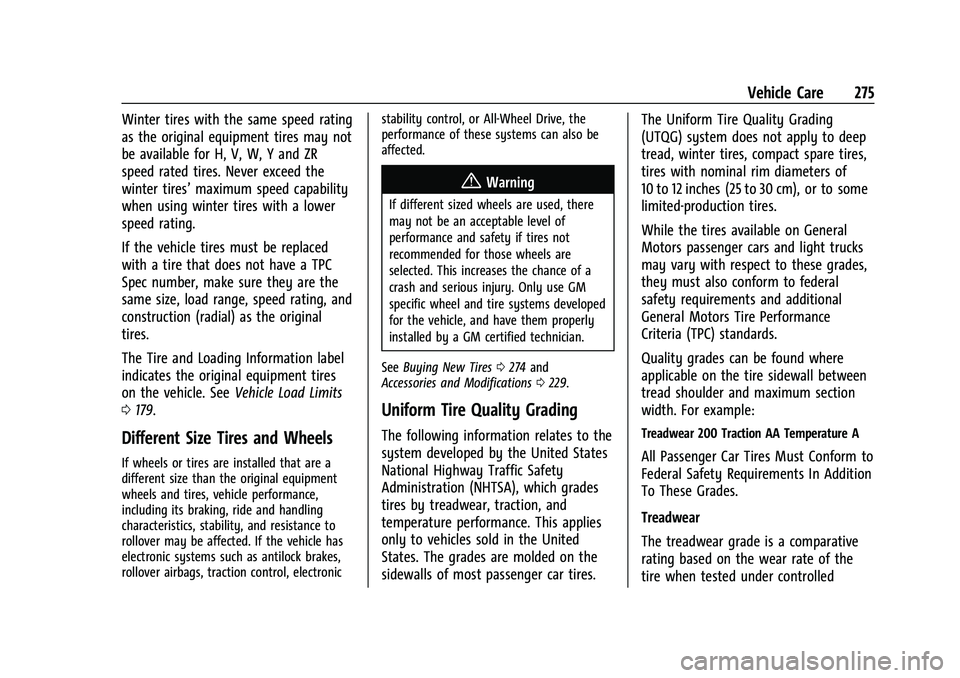
Engine Compartment Fuse Block
The engine compartment fuse block is on
the driver side of the engine compartment.
There is a fuse puller in the engine
compartment fuse block. It can be used to
easily remove fuses from the fuse block.
Caution
Spilling liquid on any electrical
component on the vehicle may damage
it. Always keep the covers on any
electrical component.
Page 257 of 351

Chevrolet Malibu Owner Manual (GMNA-Localizing-U.S./Canada-
14584249) - 2021 - CRC - 11/9/20
256 Vehicle Care
The vehicle may not be equipped with all of
the fuses, relays, and features shown.Fuses Usage
1 –
2 –
3 Antilock brake system pump/Electric brake
booster
5 –
6 Rear closure 7 –
8 Memory seat module
9 –
10 –
11 DC DC converter 1
12 Rear window defogger
13 Heated mirrors
14 –
15 Passive entry/Passive start
16 Front wiper 17 Passenger power seat Fuses
Usage
18 Antilock brake system valve
19 Driver power seat 21 Sunroof
22 Parking lamp
23 Automatic headlamp leveling/Adaptive forward
lighting
24 –
26 Transmission control module/Ignition
27 Instrument panel/Body/ Ignition
28 –
29 Rear vision camera/ Ventilated seats
30 Malfunction indicator lamp/Ignition
32 Canister vent solenoid/Evap leak check module
33 Front heated seat
34 – Fuses
Usage
35 Body control module 6/ Body control module 7
36 Fuel module
38 –
39 –
40 Steering column lock 41 –
43 Heated steering wheel
44 Headlamp leveling 45 –
46 Engine control module/ Ignition
47 –
48 –
49 DC DC converter 2 50 –
51 –
52 –
53 –
54 –
Page 259 of 351
Chevrolet Malibu Owner Manual (GMNA-Localizing-U.S./Canada-
14584249) - 2021 - CRC - 11/9/20
258 Vehicle Care
Instrument Panel Fuse Block
The instrument panel fuse block is on the
driver side of the instrument panel. To
access the fuses:1. Pull out at the center of the right edge, and swing the cover out and to the left.
2. Remove the cover.
To reinstall the cover, line up the tabs on
the left edge, and press the cover into place.
The vehicle may not be equipped with all of
the fuses, relays, and features shown. Fuses Usage
F1 Left power windows
F2 Right power windows
F3 –
F4 Heating, ventilation, and air conditioning blower
F5 Body control module 2 (without Stop/Start option) Fuses
Usage
F6 Left rear heated seat F7 Right rear heated seat
F8 Body control module 3
F9 –
F10 Body control module 2 (with Stop/Start option)
F11 –
F12 –
Page 260 of 351

Chevrolet Malibu Owner Manual (GMNA-Localizing-U.S./Canada-
14584249) - 2021 - CRC - 11/9/20
Vehicle Care 259
FusesUsage
F13 –
F14 –
F15 Transmission control module (with Stop/Start
option)
F16 Amplifier F17 Seat power lumbar
F18 –
F19 –
F20 Body control module 1 (without Stop/Start option)
F21 Body control module 4
F22 –
F23 Electric steering column lock
F24 Sensing and diagnostic module/Automatic
occupant sensing (Airbag)
F25 Data link connector
F26 –
F27 AC DC inverter
F28 – Fuses
Usage
F29 Body control module 8
F30 Overhead console F31 Steering wheel controls
F32 –
F33 Heating, ventilation, and air conditioning
F34 Central gateway module F35 –
F36 Wireless charger/USB charger
F37 –
F38 OnStar
F39 Display
F40 Obstacle detection F41 Body control module 1 (with Stop/Start option)
F42 Radio
F43 –
F44 Console accessory power outlet–rear Relays
Usage
K1 –
K2 Interruptible retained accessory power
K3 –
K4 –
K5 –
Wheels and Tires
Tires
Every new GM vehicle has high-quality
tires made by a leading tire
manufacturer. See the warranty manual
for information regarding the tire
warranty and where to get service. For
additional information refer to the tire
manufacturer.
{Warning
.Poorly maintained and improperly
used tires are dangerous.
(Continued)
Page 276 of 351

Chevrolet Malibu Owner Manual (GMNA-Localizing-U.S./Canada-
14584249) - 2021 - CRC - 11/9/20
Vehicle Care 275
Winter tires with the same speed rating
as the original equipment tires may not
be available for H, V, W, Y and ZR
speed rated tires. Never exceed the
winter tires’maximum speed capability
when using winter tires with a lower
speed rating.
If the vehicle tires must be replaced
with a tire that does not have a TPC
Spec number, make sure they are the
same size, load range, speed rating, and
construction (radial) as the original
tires.
The Tire and Loading Information label
indicates the original equipment tires
on the vehicle. See Vehicle Load Limits
0 179.
Different Size Tires and Wheels
If wheels or tires are installed that are a
different size than the original equipment
wheels and tires, vehicle performance,
including its braking, ride and handling
characteristics, stability, and resistance to
rollover may be affected. If the vehicle has
electronic systems such as antilock brakes,
rollover airbags, traction control, electronic stability control, or All-Wheel Drive, the
performance of these systems can also be
affected.
{Warning
If different sized wheels are used, there
may not be an acceptable level of
performance and safety if tires not
recommended for those wheels are
selected. This increases the chance of a
crash and serious injury. Only use GM
specific wheel and tire systems developed
for the vehicle, and have them properly
installed by a GM certified technician.
See Buying New Tires 0274 and
Accessories and Modifications 0229.
Uniform Tire Quality Grading
The following information relates to the
system developed by the United States
National Highway Traffic Safety
Administration (NHTSA), which grades
tires by treadwear, traction, and
temperature performance. This applies
only to vehicles sold in the United
States. The grades are molded on the
sidewalls of most passenger car tires. The Uniform Tire Quality Grading
(UTQG) system does not apply to deep
tread, winter tires, compact spare tires,
tires with nominal rim diameters of
10 to 12 inches (25 to 30 cm), or to some
limited-production tires.
While the tires available on General
Motors passenger cars and light trucks
may vary with respect to these grades,
they must also conform to federal
safety requirements and additional
General Motors Tire Performance
Criteria (TPC) standards.
Quality grades can be found where
applicable on the tire sidewall between
tread shoulder and maximum section
width. For example:Treadwear 200 Traction AA Temperature A
All Passenger Car Tires Must Conform to
Federal Safety Requirements In Addition
To These Grades.
Treadwear
The treadwear grade is a comparative
rating based on the wear rate of the
tire when tested under controlled