2021 CHEVROLET EXPRESS CARGO spare tire
[x] Cancel search: spare tirePage 224 of 296

Chevrolet Express Owner Manual (GMNA-Localizing-U.S./Canada/Mexico-
14583525) - 2021 - CRC - 12/9/20
Vehicle Care 223
{Warning
Do not apply grease to the wheel
mounting surface, wheel conical
seats, or the wheel nuts or bolts.
Grease applied to these areas could
cause a wheel to become loose or
come off, resulting in a crash.
When It Is Time for New Tires
Factors, such as maintenance, temperatures,
driving speeds, vehicle loading, and road
conditions affect the wear rate of the tires.
Treadwear indicators are one way to tell
when it is time for new tires. Treadwear
indicators appear when the tires have only 1.6 mm (1/16 in) or less of tread remaining.
See
Tire Inspection 0221 and
Tire Rotation 0221 for additional
information.
The rubber in tires ages over time. This also
applies to the spare tire, if the vehicle has
one, even if it is never used. Multiple factors
including temperatures, loading conditions,
and inflation pressure maintenance affect
how fast aging takes place. GM recommends
that tires, including the spare if equipped,
be replaced after six years, regardless of
tread wear. To identify the age of a tire, use
the tire manufacture date, which is the last
four digits of the DOT Tire Identification
Number (TIN) molded into one side of the
tire sidewall. The last four digits of the TIN
indicate the tire manufactured date. The
first two digits represent the week and the
last two digits, the year. For example, the
third week of the year 2020 would have a
4-digit DOT date of 0320. Week 01 is the
first full week (Sunday through Saturday) of
each year.
Vehicle Storage
Tires age when stored normally mounted on
a parked vehicle. Park a vehicle that will be
stored for at least a month in a cool, dry,
clean area away from direct sunlight to slow aging. This area should be free of grease,
gasoline, or other substances that can
deteriorate rubber.
Parking for an extended period can cause
flat spots on the tires that may result in
vibrations while driving. When storing a
vehicle for at least a month, remove the
tires or raise the vehicle to reduce the
weight from the tires.
Buying New Tires
GM has developed and matched specific
tires for the vehicle. The original
equipment tires installed were designed
to meet General Motors Tire
Performance Criteria Specification (TPC
Spec) system rating. When replacement
tires are needed, GM strongly
recommends buying tires with the same
TPC Spec rating.
GM's exclusive TPC Spec system
considers over a dozen critical
specifications that impact the overall
performance of the vehicle, including
brake system performance, ride and
handling, traction control, and tire
pressure monitoring performance. GM's
Page 226 of 296

Chevrolet Express Owner Manual (GMNA-Localizing-U.S./Canada/Mexico-
14583525) - 2021 - CRC - 12/9/20
Vehicle Care 225
Different Size Tires and Wheels
If wheels or tires are installed that are a
different size than the original equipment
wheels and tires, vehicle performance,
including its braking, ride and handling
characteristics, stability, and resistance to
rollover may be affected. If the vehicle has
electronic systems such as antilock brakes,
rollover airbags, traction control, electronic
stability control, or All-Wheel Drive, the
performance of these systems can also be
affected.
{Warning
If different sized wheels are used, there
may not be an acceptable level of
performance and safety if tires not
recommended for those wheels are
selected. This increases the chance of a
crash and serious injury. Only use GM
specific wheel and tire systems developed
for the vehicle, and have them properly
installed by a GM certified technician.
See Buying New Tires 0223 and
Accessories and Modifications 0178.
Uniform Tire Quality Grading
The following information relates to the
system developed by the United States
National Highway Traffic Safety
Administration (NHTSA), which grades
tires by treadwear, traction, and
temperature performance. This applies
only to vehicles sold in the United
States. The grades are molded on the
sidewalls of most passenger car tires.
The Uniform Tire Quality Grading
(UTQG) system does not apply to deep
tread, winter tires, compact spare tires,
tires with nominal rim diameters of
10 to 12 inches (25 to 30 cm), or to some
limited-production tires.
While the tires available on General
Motors passenger cars and light trucks
may vary with respect to these grades,
they must also conform to federal
safety requirements and additional
General Motors Tire Performance
Criteria (TPC) standards. Quality grades can be found where
applicable on the tire sidewall between
tread shoulder and maximum section
width. For example:
Treadwear 200 Traction AA Temperature A
All Passenger Car Tires Must Conform to
Federal Safety Requirements In Addition
To These Grades.
Treadwear
The treadwear grade is a comparative
rating based on the wear rate of the
tire when tested under controlled
conditions on a specified government
test course. For example, a tire graded
150 would wear one and one-half (1½)
times as well on the government course
as a tire graded 100. The relative
performance of tires depends upon the
actual conditions of their use, however,
and may depart significantly from the
norm due to variations in driving habits,
service practices and differences in road
characteristics and climate.
Page 230 of 296

Chevrolet Express Owner Manual (GMNA-Localizing-U.S./Canada/Mexico-
14583525) - 2021 - CRC - 12/9/20
Vehicle Care 229
1. Wheel Block (If Equipped)
2. Flat Tire
The following information explains how to
repair or change a tire.
Tire Changing
Removing the Spare Tire and Tools
Equipment needed for a cargo van or a
passenger van is in the passenger side rear
corner of the vehicle.
Remove the retaining wing bolt and lift it
off of the mounting bracket.
Equipment needed for a 15-passenger seating
arrangement is secured on the rear floor on
the passenger side of the vehicle.Remove the retaining wing bolt and lift it
out of the mounting bracket to access the
equipment.
The tools you will be using include:
Page 231 of 296

Chevrolet Express Owner Manual (GMNA-Localizing-U.S./Canada/Mexico-
14583525) - 2021 - CRC - 12/9/20
230 Vehicle Care
1. Jack
2. Hoist Handle
3. Extension(s)
4. Wheel Wrench
5. Jack Handle
The spare tire is mounted in the rear
underbody of the vehicle.
Use the hoist handle, extension(s), and the
wheel wrench to remove the
underbody-mounted spare tire.
To lower the spare tire from the vehicle:
1. Spare Tire
2. Tire/Wheel Retainer
3. Hoist Cable
4. Hoist Assembly5. Hoist Shaft
6. Hoist Handle and Extension(s)
7. Wheel Wrench
1. Assemble the wheel wrench (7) to the
hoist handle and the extension(s) (6).
2. Open the passenger side rear door.
3. Insert the chisel end of the hoist handle, on an angle, through the hole in the rear
floor panel above the bumper.
Be sure the hoist handle connects to the
hoist shaft. The chiseled end of the hoist
handle is used to lower the spare tire.
4. Turn the wheel wrench counterclockwise to lower the spare tire to the ground.
Continue to turn the wheel wrench until
the spare tire can be pulled out from
under the vehicle.
5. Pull the spare tire out from under the vehicle.6. Tilt the tire toward the vehicle withsome slack in the cable to access the
tire/wheel retainer.
Tilt the retainer and pull it through the
center of the wheel along with the cable
and spring.
For a vehicle that was completed from a
cab and chassis, refer to the information
from the body supplier/installer.
The spare tire is a full-size tire, like the
other tires on the vehicle.
Page 232 of 296

Chevrolet Express Owner Manual (GMNA-Localizing-U.S./Canada/Mexico-
14583525) - 2021 - CRC - 12/9/20
Vehicle Care 231
7. Put the spare tire near the flat tire.
8. Close the passenger side rear door.
Removing the Flat Tire and Installing the
Spare Tire
If the vehicle has plastic wheel nut caps,
loosen them by turning the wheel wrench
counterclockwise. The wheel nut caps are
designed to remain with the center cap.
Remove the center cap.
If the wheel has a smooth center piece,
place the chisel end of the wheel wrench in
the slot on the wheel and gently pry it out.
1. Jack
2. Hoist Handle
3. Extension(s)4. Wheel Wrench
5. Jack Handle
1. Do a safety check before proceeding. See
If a Tire Goes Flat 0227.
2. Turn the wheel wrench counterclockwise
to loosen all the wheel nuts, but do not
remove them yet.
Caution
Make sure that the jack lift head is in the
correct position or you may damage your
vehicle. The repairs would not be covered
by your warranty. 3. Assemble the jack and tools:
Front Flat: Assemble the jack (1) together
with the jack handle (5), one or two
extension(s) (3), and the wheel
wrench (4).
Rear Flat: Assemble the jack (1) together
with the jack handle (5), two
extensions (3), and the wheel wrench (4).
Front Position
Page 234 of 296
Chevrolet Express Owner Manual (GMNA-Localizing-U.S./Canada/Mexico-
14583525) - 2021 - CRC - 12/9/20
Vehicle Care 233
Warning (Continued)
badly injured or killed if the vehicle slips
off the jack. If a jack is provided with the
vehicle, only use it for changing a
flat tire.
Caution
Using a jack to raise the vehicle without
positioning it correctly could damage
your vehicle. When raising your vehicle
on a jack, be sure to position it correctly
under the frame and avoid contact with
the plastic molding.
5. Turn the wheel wrench clockwise to raise the vehicle. Raise the vehicle far enough
off the ground so there is enough room
for the spare tire to fit.
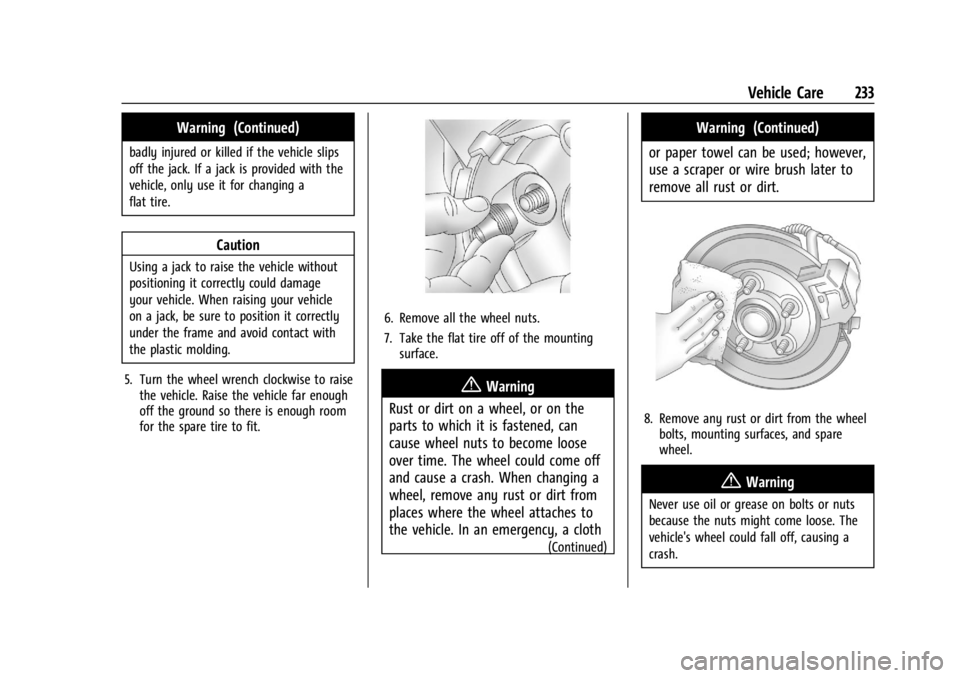
6. Remove all the wheel nuts.
7. Take the flat tire off of the mountingsurface.
{Warning
Rust or dirt on a wheel, or on the
parts to which it is fastened, can
cause wheel nuts to become loose
over time. The wheel could come off
and cause a crash. When changing a
wheel, remove any rust or dirt from
places where the wheel attaches to
the vehicle. In an emergency, a cloth
(Continued)
Warning (Continued)
or paper towel can be used; however,
use a scraper or wire brush later to
remove all rust or dirt.
8. Remove any rust or dirt from the wheel bolts, mounting surfaces, and spare
wheel.
{Warning
Never use oil or grease on bolts or nuts
because the nuts might come loose. The
vehicle's wheel could fall off, causing a
crash.
Page 236 of 296

Chevrolet Express Owner Manual (GMNA-Localizing-U.S./Canada/Mexico-
14583525) - 2021 - CRC - 12/9/20
Vehicle Care 235
Storing a Flat or Spare Tire and Tools
{Warning
Storing a jack, a tire, or other equipment
in the passenger compartment of the
vehicle could cause injury. In a sudden
stop or collision, loose equipment could
strike someone. Store all these in the
proper place.
{Warning
Failure to follow these tire storage
instructions carefully could result in
personal injury or property damage if the
hoist cable fails or if the tire comes loose.
Make sure the tire is stored securely
before driving.
Caution
The tire hoist can be damaged if there is
no tension on the cable when using it. To
have the necessary tension, the spare or
road tire and wheel assembly must be
installed on the tire hoist to use it.
{Warning
An improperly stored spare tire could
come loose and cause a crash. To avoid
personal injury or property damage,
always store the spare tire when the
vehicle is parked on a level surface.
Store the tire under the rear of the vehicle
in the spare tire carrier.
1. Spare Tire
2. Tire/Wheel Retainer
3. Hoist Cable
4. Hoist Assembly
5. Hoist Shaft 6. Hoist Handle and Extension(s)
7. Wheel Wrench
1. Put the tire on the ground at the rear of
the vehicle with the valve stem pointed
down, and to the rear.
2. Pull the cable and spring through the center of the wheel. Tilt the wheel
retainer plate down and through the
center wheel.
Make sure the retainer is fully seated
across the underside of the wheel.
3. Assemble the wheel wrench (7) to thehoist handle and the extension(s) (6).
4. Open the passenger side rear door.
Caution
Use of an air wrench or other power
tools with the hoist mechanism is not
recommended and could damage the
system. Use only the tools supplied with
the hoist mechanism.
Page 237 of 296

Chevrolet Express Owner Manual (GMNA-Localizing-U.S./Canada/Mexico-
14583525) - 2021 - CRC - 12/9/20
236 Vehicle Care
5. Insert the chisel end of the hoist handle,on an angle, through the hole in the rear
floor panel above the bumper and onto
the hoist shaft.
Do not use the chiseled end of the wheel
wrench.
6. Raise the tire part way upward. Make sure the retainer is seated in the wheel
opening.
7. Raise the tire fully against the underside of the vehicle by turning the wheel
wrench clockwise until you hear two
clicks or feel it skip twice. You cannot
overtighten the cable.8. Make sure the tire is stored securely.Push, pull (1), and then try to turn (2) the
tire. If the tire moves, use the wheel
wrench to tighten the cable.
Two clicks mean the tire is up all
the way.
Repeat this tightness check procedure
when checking the spare tire pressure
according to the scheduled maintenance
information or any time the spare tire is
handled due to service of other
components.
Correctly Stored
Incorrectly Stored
9. Return the jacking equipment to the proper location. Secure the items and
replace the jack cover.
Full-Size Spare Tire
If this vehicle came with a full-size spare
tire, it was fully inflated when new,
however, it can lose air over time. Check the
inflation pressure regularly. See Tire Pressure
0 217 and
Vehicle Load Limits 0132. For instructions on
how to remove, install, or store a spare tire,
see Tire Changing 0229.