2021 CHEVROLET EQUINOX turn signal light
[x] Cancel search: turn signal lightPage 6 of 369

Chevrolet Equinox Owner Manual (GMNA-Localizing-U.S./Canada/Mexico-
14420010) - 2021 - CRC - 11/10/20
Introduction 5
1.Air Vents 0181.
2. Turn Signal Lever. See Turn and
Lane-Change Signals 0119.
IntelliBeam
®System Button (If Equipped).
See Exterior Lamp Controls 0116.
3. Instrument Cluster (Base and Midlevel)
085 or
Instrument Cluster (Uplevel) 088.
Driver Information Center (DIC) Display.
See Driver Information Center (DIC) (Base
and Midlevel) 0101 or
Driver Information Center (DIC) (Uplevel)
0 105.
4. Windshield Wiper/Washer 079.
5. Infotainment Controls. See Overview
0 124.
6. Light Sensor. See Automatic Headlamp
System 0118.
7. Hazard Warning Flashers 0119.
8. Climate Control Systems 0177 (If
Equipped).
Dual Automatic Climate Control System
0 179 (If Equipped).
9. Heated and Ventilated Front Seats 035
(If Equipped).
10. Power Outlets 081.
11. Wireless Charging 083 (If Equipped). 12.
USB Port 0132.
13. All-Wheel Drive 0209 (If Equipped).
Tow/Haul Mode 0208.
14. Electric Parking Brake 0210.
15. Shift Lever. See Automatic Transmission
0 206.
Manual Mode 0208.
16. ENGINE START/STOP Button. See Ignition
Positions 0198.
17. Steering Wheel Controls 079.
Traction Control/Electronic Stability
Control 0211.
18. Horn 079.
19. Steering Wheel Adjustment 079 (Out
of View).
20. Cruise Control 0215.
Adaptive Cruise Control (Camera) 0217
(If Equipped).
Heated Steering Wheel 079 (If
Equipped).
Forward Collision Alert (FCA) System
0 230 (If Equipped).
Lane Keep Assist (LKA) 0237 (If
Equipped).
21. Hood Release. See Hood0252. 22.
Fog Lamps 0119 (If Equipped).
23. Exterior Lamp Controls 0116.
24. Data Link Connector (DLC) (Out of View). SeeMalfunction Indicator Lamp (Check
Engine Light) 094.
25. Instrument Panel Illumination Control
0120.
Page 14 of 369

Chevrolet Equinox Owner Manual (GMNA-Localizing-U.S./Canada/Mexico-
14420010) - 2021 - CRC - 11/10/20
Keys, Doors, and Windows 13
2. Separate the two halves of thetransmitter using a flat tool inserted into
the area near the key slot.
3. Remove the battery by pushing on thebattery and sliding it toward the bottom
of the transmitter.
4. Insert the new battery, positive side facing the back cover. Push the battery
down until it is held in place. Replace
with a CR2032 or equivalent battery.
5. Snap the battery cover back on to the transmitter.
6. Reinsert the key.
Remote Vehicle Start
The vehicle may have this feature that
allows you to start the engine from outside
the vehicle.
/: This button will be on the RKE
transmitter if the vehicle has remote start.
The climate control system will use the
previous settings during a remote start. The
rear defog may come on during remote
start based on cold ambient conditions. The
rear defog indicator light does not come on
during remote start.
If the vehicle has heated and ventilated
front seats, they may come on during a
remote start. See Heated and Ventilated
Front Seats 035. Laws in some local communities may restrict
the use of remote starters. For example,
some laws require a person using remote
start to have the vehicle in view. Check local
regulations for any requirements.
Do not use the remote start feature if the
vehicle is low on fuel. The vehicle could run
out of fuel.
Other conditions can affect the performance
of the transmitter. See
Remote Keyless Entry
(RKE) System 07.
Starting the Engine Using Remote Start
1. Press and release
Qon the RKE
transmitter.
2. Immediately press and hold
/for at
least four seconds or until the turn
signal lamps flash. The turn signal lamps
flashing confirms the request to remote
start the vehicle has been received.
The parking lamps will turn on and
remain on as long as the engine is
running. The vehicle's doors will be
locked.
3. Turn the ignition on before driving. The engine will shut off after 15 minutes
unless a time extension is done or the
ignition is turned on.
Page 21 of 369

Chevrolet Equinox Owner Manual (GMNA-Localizing-U.S./Canada/Mexico-
14420010) - 2021 - CRC - 11/10/20
20 Keys, Doors, and Windows
Caution
Manually forcing the liftgate to open or
close during a power cycle can damage
the vehicle. Allow the power cycle to
complete.
The power liftgate may be temporarily
disabled under extreme low temperatures,
or after repeated power cycling over a short
period of time. If this occurs, the liftgate can
still be operated manually.
If the vehicle is shifted out of P (Park) while
the power function is in progress, the
liftgate will continue to completion. If the
vehicle is accelerated before the liftgate has
completed moving, the liftgate may stop or
reverse direction. Check for Driver
Information Center (DIC) messages and make
sure the liftgate is closed and latched before
driving.
Falling Liftgate Detection
If the power liftgate automatically closes
after a power opening cycle, it indicates that
the system is reacting to excess weight on
the liftgate or a possible support strut
failure. A repetitive chime will sound while
the falling liftgate detection feature is
operating. Remove any excess weight. If the liftgate continues to automatically close
after opening, see your dealer for service
before using the power liftgate.
Interfering with the power liftgate motion
or manually closing the liftgate too quickly
after power opening may resemble a
support strut failure. This could also activate
the falling liftgate detection feature. Allow
the liftgate to complete its operation and
wait a few seconds before manually closing
the liftgate.
Obstacle Detection Features
If the liftgate encounters an obstacle during
a power open or close cycle, the liftgate will
automatically reverse direction and move a
short distance away from the obstacle. After
removing the obstruction, the power liftgate
operation can be used again. If the liftgate
encounters multiple obstacles on the same
power cycle, the power function will
deactivate. After removing the obstructions,
manually close the liftgate, This will allow
normal power operation functions to
resume.
If the vehicle is locked while the liftgate is
closing, and an obstacle is encountered that
prevents the liftgate from completely
closing, the horn will sound as an alert that
the liftgate did not close.
Setting the 3/4 Mode
To change the position the liftgate stops at
when opening:
1. Select MAX or 3/4 mode and power open the liftgate.
2. Stop the liftgate movement at the desired height by pressing any liftgate
button. Manually adjust the liftgate
position if needed.
3. Press and hold
lnext to the pull cup
on the outside of the liftgate until the
turn signals flash and a beep sounds.
This indicates the setting has been
recorded.
The liftgate cannot be set below a minimum
programmable height. If there is no light
flash or sound, then the height adjustment
may be too low.
Page 23 of 369

Chevrolet Equinox Owner Manual (GMNA-Localizing-U.S./Canada/Mexico-
14420010) - 2021 - CRC - 11/10/20
22 Keys, Doors, and Windows
.Do not sweep your foot side to side.
.Do not keep your foot under the bumper;
the liftgate will not activate.
.Do not touch the liftgate until it has
stopped moving.
.This feature may be temporarily disabled
under some conditions. If the liftgate
does not respond to the kick, open or
close the liftgate by another method or
start the vehicle. The feature will be
re-enabled.
When closing the liftgate using this feature,
there will be a short delay. The taillamps
will flash and a chime will sound. Step away
from the liftgate before it starts moving.
Vehicle Security
This vehicle has theft-deterrent features;
however, they do not make the vehicle
impossible to steal.
Vehicle Alarm System
This vehicle has an anti-theft alarm system.
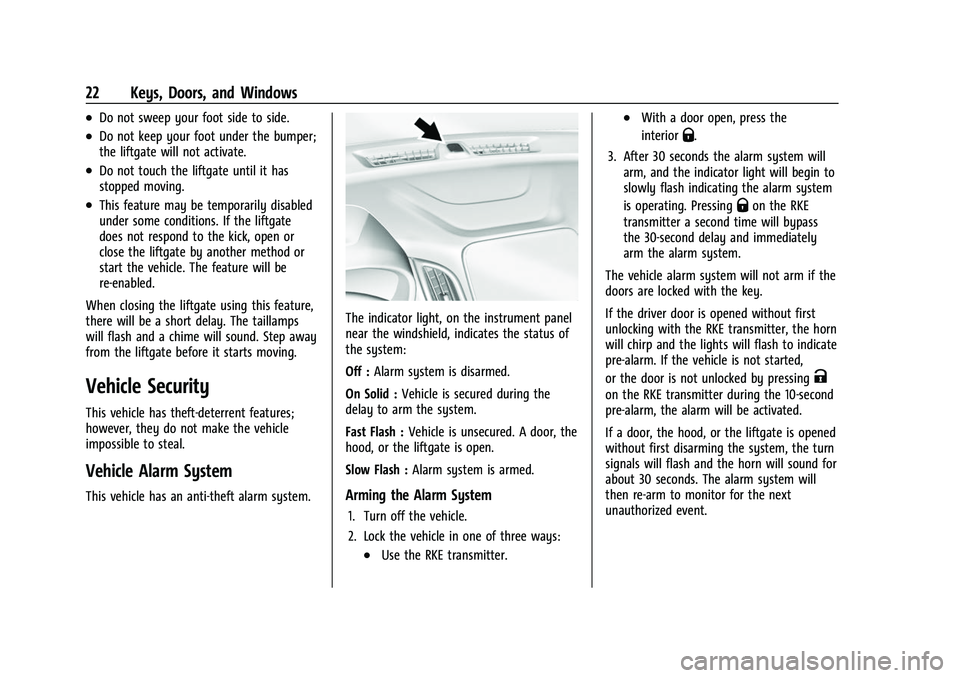
The indicator light, on the instrument panel
near the windshield, indicates the status of
the system:
Off : Alarm system is disarmed.
On Solid : Vehicle is secured during the
delay to arm the system.
Fast Flash : Vehicle is unsecured. A door, the
hood, or the liftgate is open.
Slow Flash : Alarm system is armed.
Arming the Alarm System
1. Turn off the vehicle.
2. Lock the vehicle in one of three ways:
.Use the RKE transmitter.
.With a door open, press the
interior
Q.
3. After 30 seconds the alarm system will arm, and the indicator light will begin to
slowly flash indicating the alarm system
is operating. Pressing
Qon the RKE
transmitter a second time will bypass
the 30-second delay and immediately
arm the alarm system.
The vehicle alarm system will not arm if the
doors are locked with the key.
If the driver door is opened without first
unlocking with the RKE transmitter, the horn
will chirp and the lights will flash to indicate
pre-alarm. If the vehicle is not started,
or the door is not unlocked by pressing
K
on the RKE transmitter during the 10-second
pre-alarm, the alarm will be activated.
If a door, the hood, or the liftgate is opened
without first disarming the system, the turn
signals will flash and the horn will sound for
about 30 seconds. The alarm system will
then re-arm to monitor for the next
unauthorized event.
Page 25 of 369

Chevrolet Equinox Owner Manual (GMNA-Localizing-U.S./Canada/Mexico-
14420010) - 2021 - CRC - 11/10/20
24 Keys, Doors, and Windows
Do not leave the transmitter or device that
disarms or deactivates the theft-deterrent
system in the vehicle.
Exterior Mirrors
Convex Mirrors
{Warning
A convex mirror can make things, like
other vehicles, look farther away than
they really are. If you cut too sharply
into the right lane, you could hit a
vehicle on the right. Check the inside
mirror or glance over your shoulder
before changing lanes.
The passenger side mirror is convex shaped.
A convex mirror's surface is curved so more
can be seen from the driver seat.
Power Mirrors
To adjust each mirror: 1. Press
jor|to select the driver or
passenger side mirror. The indicator light
will illuminate.
2. Press the arrows on the control pad to move the mirror in the desired direction.
3. Adjust each outside mirror so that a little of the vehicle and the area behind it can
be seen.
4. Press
jor|again to deselect the
mirror. Memory Mirrors
The vehicle may have memory mirrors. See
Memory Seats
033.
Turn Signal Indicator
The vehicle may have a turn signal indicator
lamp built into the mirror housing. The turn
signal lamp flashes when the turn signals or
hazard flashers are used.
Lane Change Alert (LCA)
The vehicle may have LCA. See Lane Change
Alert (LCA) 0235.
Side Blind Zone Alert
The vehicle may have Side Blind Zone Alert.
See Side Blind Zone Alert (SBZA) 0235.
Folding Mirrors
Manual Folding Mirrors
The mirrors can be folded inward toward
the vehicle to prevent damage when going
through an automatic car wash. Push the
mirror outward to return it to the original
position.
Page 98 of 369

Chevrolet Equinox Owner Manual (GMNA-Localizing-U.S./Canada/Mexico-
14420010) - 2021 - CRC - 11/12/20
Instruments and Controls 97
SeeTow/Haul Mode 0208.
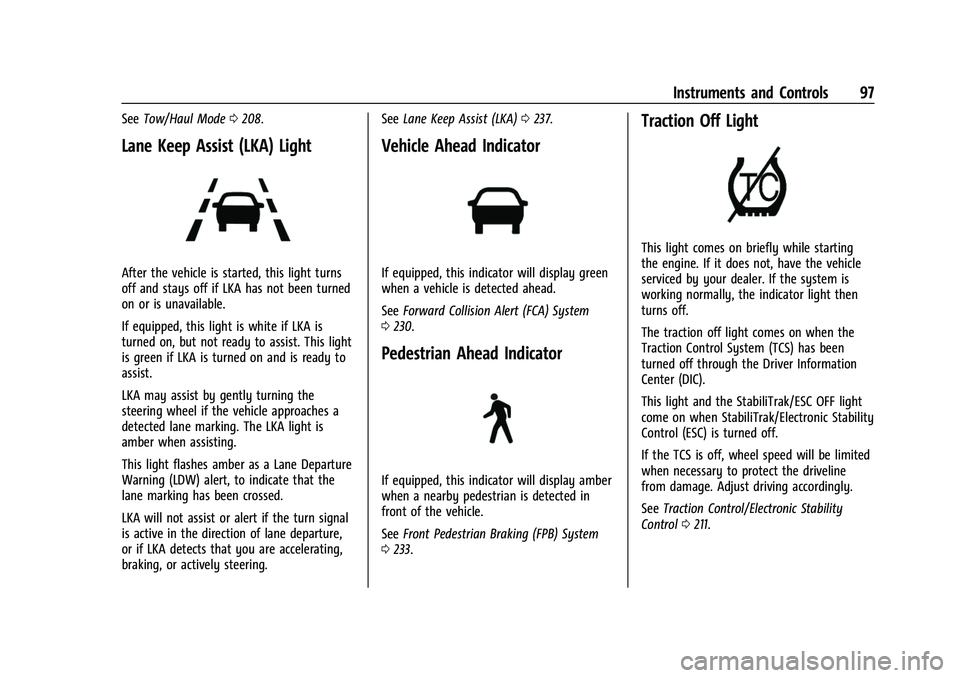
Lane Keep Assist (LKA) Light
After the vehicle is started, this light turns
off and stays off if LKA has not been turned
on or is unavailable.
If equipped, this light is white if LKA is
turned on, but not ready to assist. This light
is green if LKA is turned on and is ready to
assist.
LKA may assist by gently turning the
steering wheel if the vehicle approaches a
detected lane marking. The LKA light is
amber when assisting.
This light flashes amber as a Lane Departure
Warning (LDW) alert, to indicate that the
lane marking has been crossed.
LKA will not assist or alert if the turn signal
is active in the direction of lane departure,
or if LKA detects that you are accelerating,
braking, or actively steering. See
Lane Keep Assist (LKA) 0237.
Vehicle Ahead Indicator
If equipped, this indicator will display green
when a vehicle is detected ahead.
See Forward Collision Alert (FCA) System
0 230.
Pedestrian Ahead Indicator
If equipped, this indicator will display amber
when a nearby pedestrian is detected in
front of the vehicle.
See Front Pedestrian Braking (FPB) System
0 233.
Traction Off Light
This light comes on briefly while starting
the engine. If it does not, have the vehicle
serviced by your dealer. If the system is
working normally, the indicator light then
turns off.
The traction off light comes on when the
Traction Control System (TCS) has been
turned off through the Driver Information
Center (DIC).
This light and the StabiliTrak/ESC OFF light
come on when StabiliTrak/Electronic Stability
Control (ESC) is turned off.
If the TCS is off, wheel speed will be limited
when necessary to protect the driveline
from damage. Adjust driving accordingly.
See Traction Control/Electronic Stability
Control 0211.
Page 115 of 369

Chevrolet Equinox Owner Manual (GMNA-Localizing-U.S./Canada/Mexico-
14420010) - 2021 - CRC - 11/12/20
114 Instruments and Controls
Some garage door openers may require
substitution of Step 2 with the procedure
under“Radio Signals for Some Gate
Operators” later in this section.
3. Press and hold the newly programmed Universal Remote system button for
five seconds while watching the indicator
light and garage door activation.
.If the indicator light stays on
continuously or the garage door
moves when the button is pressed,
then programming is complete. There
is no need to complete Steps 4–6.
.If the indicator light does not come
on or the garage door does not
move, a second button press may be
required. For a second time, press
and hold the newly programmed
button for five seconds. If the
indicator light is continuously lit,
or the garage door moves,
programming is complete.
.If the indicator light flashes rapidly
and the garage door does not move,
continue with programming
Steps 4–6.
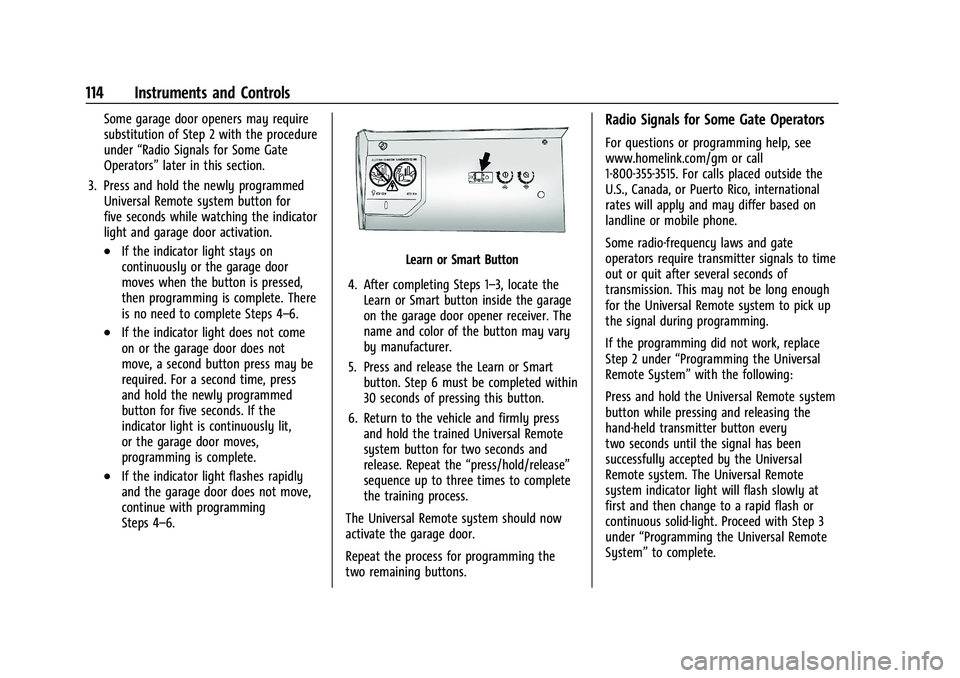
Learn or Smart Button
4. After completing Steps 1–3, locate the Learn or Smart button inside the garage
on the garage door opener receiver. The
name and color of the button may vary
by manufacturer.
5. Press and release the Learn or Smart button. Step 6 must be completed within
30 seconds of pressing this button.
6. Return to the vehicle and firmly press and hold the trained Universal Remote
system button for two seconds and
release. Repeat the “press/hold/release”
sequence up to three times to complete
the training process.
The Universal Remote system should now
activate the garage door.
Repeat the process for programming the
two remaining buttons.
Radio Signals for Some Gate Operators
For questions or programming help, see
www.homelink.com/gm or call
1-800-355-3515. For calls placed outside the
U.S., Canada, or Puerto Rico, international
rates will apply and may differ based on
landline or mobile phone.
Some radio-frequency laws and gate
operators require transmitter signals to time
out or quit after several seconds of
transmission. This may not be long enough
for the Universal Remote system to pick up
the signal during programming.
If the programming did not work, replace
Step 2 under “Programming the Universal
Remote System” with the following:
Press and hold the Universal Remote system
button while pressing and releasing the
hand-held transmitter button every
two seconds until the signal has been
successfully accepted by the Universal
Remote system. The Universal Remote
system indicator light will flash slowly at
first and then change to a rapid flash or
continuous solid-light. Proceed with Step 3
under “Programming the Universal Remote
System” to complete.
Page 117 of 369

Chevrolet Equinox Owner Manual (GMNA-Localizing-U.S./Canada/Mexico-
14420010) - 2021 - CRC - 11/10/20
116 Lighting
Lighting
Exterior Lighting
Exterior Lamp Controls . . . . . . . . . . . . . . . . . 116
Headlamp High/Low-Beam Changer . . . . 117
Flash-to-Pass . . . . . . . . . . . . . . . . . . . . . . . . . . . 118
Daytime Running Lamps (DRL) . . . . . . . . . 118
Automatic Headlamp System . . . . . . . . . . 118
Hazard Warning Flashers . . . . . . . . . . . . . . 119
Turn and Lane-Change Signals . . . . . . . . . 119
Fog Lamps . . . . . . . . . . . . . . . . . . . . . . . . . . . . . 119
Interior Lighting
Instrument Panel IlluminationControl . . . . . . . . . . . . . . . . . . . . . . . . . . . . . . 120
Courtesy Lamps . . . . . . . . . . . . . . . . . . . . . . . 120
Dome Lamps . . . . . . . . . . . . . . . . . . . . . . . . . . 120
Reading Lamps . . . . . . . . . . . . . . . . . . . . . . . . 120
Lighting Features
Entry Lighting . . . . . . . . . . . . . . . . . . . . . . . . . . 121
Exit Lighting . . . . . . . . . . . . . . . . . . . . . . . . . . . 121
Battery Load Management . . . . . . . . . . . . . 121
Battery Power Protection . . . . . . . . . . . . . . 122
Exterior Lighting Battery Saver . . . . . . . . . 122
Exterior Lighting
Exterior Lamp Controls
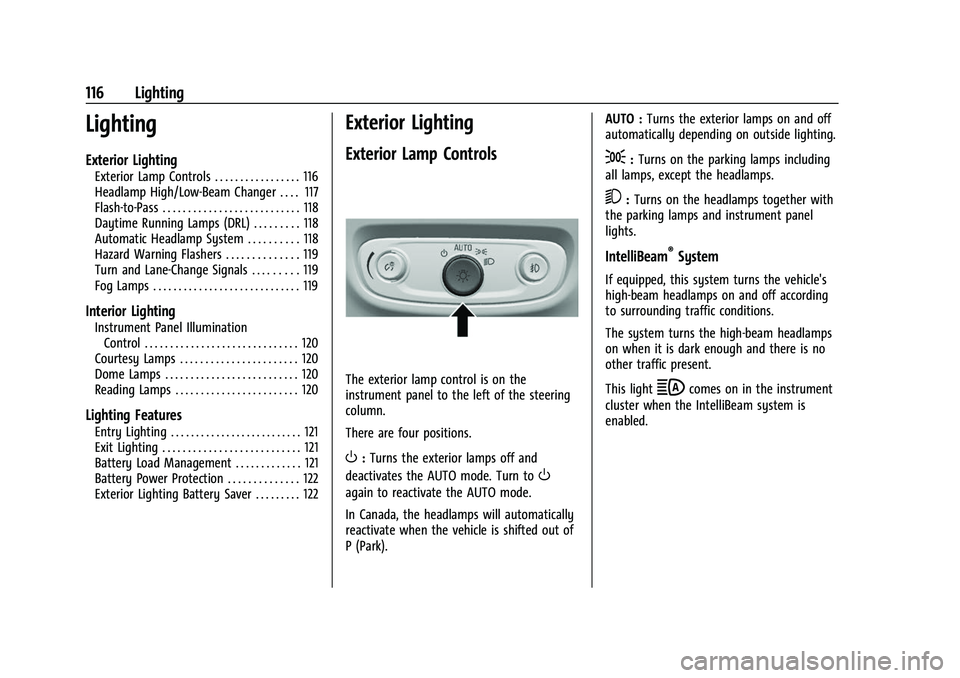
The exterior lamp control is on the
instrument panel to the left of the steering
column.
There are four positions.
O: Turns the exterior lamps off and
deactivates the AUTO mode. Turn to
O
again to reactivate the AUTO mode.
In Canada, the headlamps will automatically
reactivate when the vehicle is shifted out of
P (Park). AUTO :
Turns the exterior lamps on and off
automatically depending on outside lighting.
;: Turns on the parking lamps including
all lamps, except the headlamps.
5: Turns on the headlamps together with
the parking lamps and instrument panel
lights.
IntelliBeam®System
If equipped, this system turns the vehicle's
high-beam headlamps on and off according
to surrounding traffic conditions.
The system turns the high-beam headlamps
on when it is dark enough and there is no
other traffic present.
This light
bcomes on in the instrument
cluster when the IntelliBeam system is
enabled.