2021 CHEVROLET EQUINOX tail light
[x] Cancel search: tail lightPage 23 of 369
Chevrolet Equinox Owner Manual (GMNA-Localizing-U.S./Canada/Mexico-
14420010) - 2021 - CRC - 11/10/20
22 Keys, Doors, and Windows
.Do not sweep your foot side to side.
.Do not keep your foot under the bumper;
the liftgate will not activate.
.Do not touch the liftgate until it has
stopped moving.
.This feature may be temporarily disabled
under some conditions. If the liftgate
does not respond to the kick, open or
close the liftgate by another method or
start the vehicle. The feature will be
re-enabled.
When closing the liftgate using this feature,
there will be a short delay. The taillamps
will flash and a chime will sound. Step away
from the liftgate before it starts moving.
Vehicle Security
This vehicle has theft-deterrent features;
however, they do not make the vehicle
impossible to steal.
Vehicle Alarm System
This vehicle has an anti-theft alarm system.
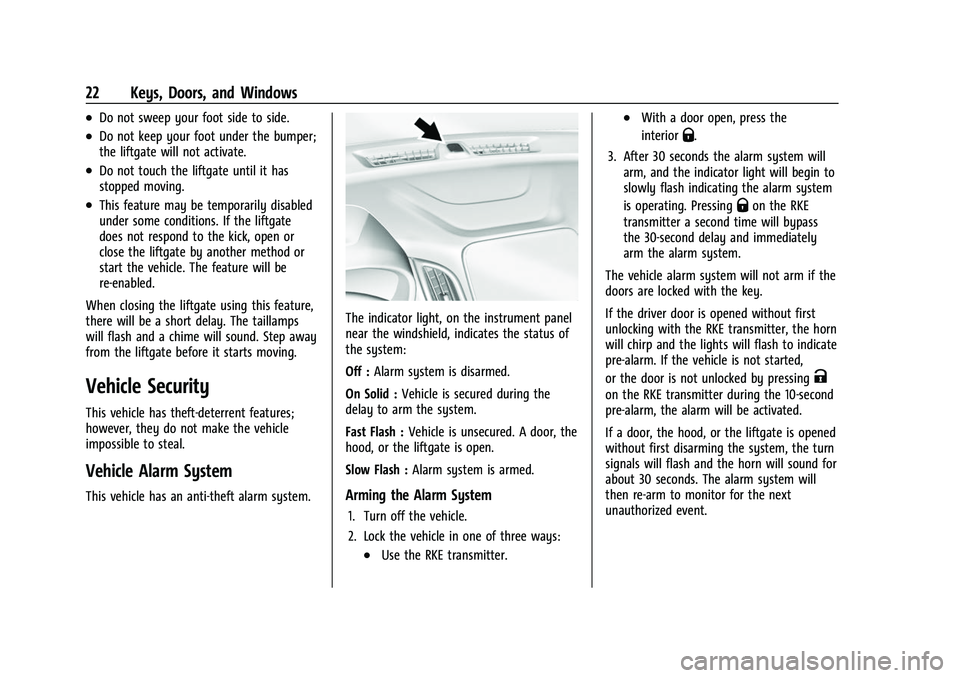
The indicator light, on the instrument panel
near the windshield, indicates the status of
the system:
Off : Alarm system is disarmed.
On Solid : Vehicle is secured during the
delay to arm the system.
Fast Flash : Vehicle is unsecured. A door, the
hood, or the liftgate is open.
Slow Flash : Alarm system is armed.
Arming the Alarm System
1. Turn off the vehicle.
2. Lock the vehicle in one of three ways:
.Use the RKE transmitter.
.With a door open, press the
interior
Q.
3. After 30 seconds the alarm system will arm, and the indicator light will begin to
slowly flash indicating the alarm system
is operating. Pressing
Qon the RKE
transmitter a second time will bypass
the 30-second delay and immediately
arm the alarm system.
The vehicle alarm system will not arm if the
doors are locked with the key.
If the driver door is opened without first
unlocking with the RKE transmitter, the horn
will chirp and the lights will flash to indicate
pre-alarm. If the vehicle is not started,
or the door is not unlocked by pressing
K
on the RKE transmitter during the 10-second
pre-alarm, the alarm will be activated.
If a door, the hood, or the liftgate is opened
without first disarming the system, the turn
signals will flash and the horn will sound for
about 30 seconds. The alarm system will
then re-arm to monitor for the next
unauthorized event.
Page 118 of 369
Chevrolet Equinox Owner Manual (GMNA-Localizing-U.S./Canada/Mexico-
14420010) - 2021 - CRC - 11/10/20
Lighting 117
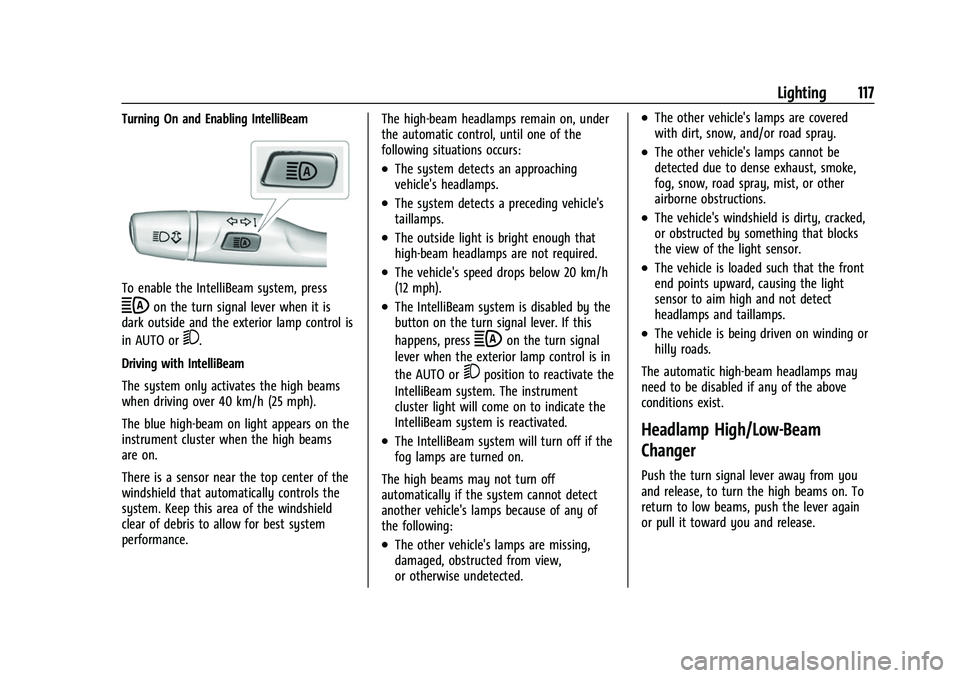
Turning On and Enabling IntelliBeam
To enable the IntelliBeam system, press
bon the turn signal lever when it is
dark outside and the exterior lamp control is
in AUTO or
5.
Driving with IntelliBeam
The system only activates the high beams
when driving over 40 km/h (25 mph).
The blue high-beam on light appears on the
instrument cluster when the high beams
are on.
There is a sensor near the top center of the
windshield that automatically controls the
system. Keep this area of the windshield
clear of debris to allow for best system
performance. The high-beam headlamps remain on, under
the automatic control, until one of the
following situations occurs:
.The system detects an approaching
vehicle's headlamps.
.The system detects a preceding vehicle's
taillamps.
.The outside light is bright enough that
high-beam headlamps are not required.
.The vehicle's speed drops below 20 km/h
(12 mph).
.The IntelliBeam system is disabled by the
button on the turn signal lever. If this
happens, press
bon the turn signal
lever when the exterior lamp control is in
the AUTO or
5position to reactivate the
IntelliBeam system. The instrument
cluster light will come on to indicate the
IntelliBeam system is reactivated.
.The IntelliBeam system will turn off if the
fog lamps are turned on.
The high beams may not turn off
automatically if the system cannot detect
another vehicle's lamps because of any of
the following:
.The other vehicle's lamps are missing,
damaged, obstructed from view,
or otherwise undetected.
.The other vehicle's lamps are covered
with dirt, snow, and/or road spray.
.The other vehicle's lamps cannot be
detected due to dense exhaust, smoke,
fog, snow, road spray, mist, or other
airborne obstructions.
.The vehicle's windshield is dirty, cracked,
or obstructed by something that blocks
the view of the light sensor.
.The vehicle is loaded such that the front
end points upward, causing the light
sensor to aim high and not detect
headlamps and taillamps.
.The vehicle is being driven on winding or
hilly roads.
The automatic high-beam headlamps may
need to be disabled if any of the above
conditions exist.
Headlamp High/Low-Beam
Changer
Push the turn signal lever away from you
and release, to turn the high beams on. To
return to low beams, push the lever again
or pull it toward you and release.
Page 119 of 369

Chevrolet Equinox Owner Manual (GMNA-Localizing-U.S./Canada/Mexico-
14420010) - 2021 - CRC - 11/10/20
118 Lighting
This indicator light turns on in the
instrument cluster when the high-beam
headlamps are on.
Flash-to-Pass
The flash-to-pass feature works with the low
beams or Daytime Running Lamps (DRL) on
or off.
To flash the high beams, pull the turn signal
lever toward you momentarily and then
release it.
Daytime Running Lamps (DRL)
DRL can make it easier for others to see the
front of your vehicle during the day.
The DRL system comes on in daylight when
the following conditions are met:
.The ignition is on.
.The exterior lamp control is in AUTO.
.The light sensor determines it is daytime.When the DRL are on, the taillamps,
sidemarker lamps, instrument panel lights,
and other lamps will not be on. The
instrument cluster will be lit.
The DRL turn off when the ignition is off.
The regular headlamp system should be
turned on when needed.
Automatic Headlamp System
When the exterior lamp control is set to
AUTO and it is dark enough outside, the
headlamps come on automatically.
There is a light sensor on top of the
instrument panel. Do not cover the sensor;
otherwise the headlamps will come on when
they are not needed. The system may also turn on the headlamps
when driving through a parking garage or
tunnel.
When it is bright enough outside, the
headlamps will turn off or may change to
Daytime Running Lamps (DRL).
The automatic headlamp system turns off
when the exterior lamp control is turned to
Oor the ignition is off.
Lights On with Wipers
If the windshield wipers are activated in
daylight with the engine on, and the
exterior lamp control is in AUTO, the
headlamps, parking lamps, and other
exterior lamps come on. The transition time
for the lamps coming on varies based on
wiper speed. When the wipers are not
operating, these lamps turn off. Move the
exterior lamp control to
Oor;to disable
this feature.
Page 143 of 369
Chevrolet Equinox Owner Manual (GMNA-Localizing-U.S./Canada/Mexico-
14420010) - 2021 - CRC - 11/10/20
142 Infotainment System
If the vehicle passes the waypoint or gets
out of the current route, the system will
automatically reroute back to this waypoint.
At the same time, it will show a Drive to
icon along with the next waypoint address
so the current waypoint can be skipped and
guidance can resume to the next waypoint
or destination.
Editing a Waypoint
When waypoints are added during active
guidance, the system allows a stop to be
deleted or the order to be changed. To edit
a waypoint:1. Touch
A.
2. Touch Edit Destinations.
.Modify destination order by touching
and holding the arrow until it is
highlighted. Drag to move the
waypoint up or down the list.
.Delete a waypoint by touchingY.
A pop-up will appear to confirm
waypoint removal. Once the request
is confirmed, the system will remove
the address from the destinations list.
Touch
zon the top right corner so
the system can recalculate the route. If there is only one address in the
destinations list, the system will
disable the move and delete
functions. The system will not allow
the final destination to be deleted.
Map Information
Road network attributes are contained in the
map database for map information.
Attributes include information such as street
names, street addresses, and turn
restrictions. A detailed area includes all
major highways, service roads, and
residential roads. The detailed areas include
Places of Interest (POIs) such as restaurants,
airports, banks, hospitals, police stations, gas
stations, tourist attractions, and historical
monuments.
If the vehicle does not have an applicable
service plan, the map database may not
include data for newly constructed areas or
map database corrections that are
completed after production. The navigation
system provides full route guidance in the
detailed map areas.
Zoom Control
The zoom control display is shown on the
map view. A few ways to zoom in or
out are:
.Touch + or
–to zoom in or out on
the map.
.Double tap with one finger to zoom in or
single tap with two fingers to zoom out
on the map.
.Use the index finger and thumb to zoom
out by pinching and then zoom in by
spreading those two fingers on the map.
Map Gestures and Map Scale
Use the following gestures on the
infotainment display to adjust the map scale
and display options.
.Pinch to zoom in or out.
.Pan the map.
.Use two fingers to tilt down and change
from 2D to 3D. Tilt up to change back
to 2D.
.Rotate the map.
See Using the System 0126.
Page 226 of 369
Chevrolet Equinox Owner Manual (GMNA-Localizing-U.S./Canada/Mexico-
14420010) - 2021 - CRC - 11/12/20
Driving and Operating 225
droplets from rain or snow that remain on
the windshield may also limit ACC’s ability
to detect objects.
Lighting Conditions Affecting ACC
The ACC front camera can be affected by
poor lighting conditions, and ACC may have
limited performance when:
.There are changes in brightness, such as
entering and exiting tunnels, bridges, and
overpasses.
.Low sun angles cause the camera to not
detect objects, or it is more difficult to
detect objects in the same traffic lane.
.Lighting is poor in the evening or early
morning
.There are multiple changes in brightness
or shadows along the vehicle roadway.
.In a tunnel without the headlamps on,
or in a tunnel when there is a vehicle in
front that does not have its taillamps on.
.Subjected to strong light from opposing
lane traffic in the front of the vehicle,
such as high-beam headlamps from
oncoming traffic.Accessory Installations and Vehicle
Modifications
Do not install or place any object around
the front camera windshield area that would
obstruct the front camera view.
Do not install objects on top of the vehicle
that overhang and obstruct the front
camera, such as a canoe, kayak, or other
items that can be transported on a roof rack
system. See
Roof Rack System 076.
Do not modify the hood, headlamps, or fog
lamps, as this may limit the camera’s ability
to detect an object.
Cleaning the Sensing System
The camera sensor on the windshield behind
the rearview mirror can become blocked by
snow, ice, dirt, mud, or debris. This area
needs to be cleaned for ACC to operate
properly.
The vehicle headlamps may need to be
cleaned due to dirt, snow, or ice. Objects
that are not illuminated correctly may be
difficult to detect. If ACC will not operate, regular cruise control
may be available. See
“Switching Between
ACC and Regular Cruise Control” in this
section. Always consider driving conditions
before using either cruise control system.
For cleaning instructions, see “Washing the
Vehicle” underExterior Care 0314.
Driver Assistance Systems
This vehicle may have features that work
together to help avoid crashes or reduce
crash damage while driving, backing, and
parking. Read this entire section before
using these systems.
{Warning
Do not rely on the Driver Assistance
Systems. These systems do not replace
the need for paying attention and driving
safely. You may not hear or feel alerts or
warnings provided by these systems.
Failure to use proper care when driving
may result in injury, death, or vehicle
damage. See Defensive Driving 0186.
(Continued)
Page 251 of 369

Chevrolet Equinox Owner Manual (GMNA-Localizing-U.S./Canada/Mexico-
14420010) - 2021 - CRC - 11/10/20
250 Vehicle Care
Vehicle Care
General Information
General Information . . . . . . . . . . . . . . . . . . . 251
California Proposition 65 Warning . . . . . 251
California Perchlorate MaterialsRequirements . . . . . . . . . . . . . . . . . . . . . . . . 251
Accessories and Modifications . . . . . . . . . 252
Vehicle Checks
Doing Your Own Service Work . . . . . . . . . 252
Hood . . . . . . . . . . . . . . . . . . . . . . . . . . . . . . . . . . 252
Engine Compartment Overview . . . . . . . . 254
Engine Oil . . . . . . . . . . . . . . . . . . . . . . . . . . . . . 255
Engine Oil Life System . . . . . . . . . . . . . . . . . 257
Automatic Transmission Fluid . . . . . . . . . 258
Engine Air Filter Life System . . . . . . . . . . 258
Engine Air Cleaner/Filter . . . . . . . . . . . . . . . 258
Cooling System . . . . . . . . . . . . . . . . . . . . . . . 260
Engine Overheating . . . . . . . . . . . . . . . . . . . 262
Washer Fluid . . . . . . . . . . . . . . . . . . . . . . . . . . 263
Brakes . . . . . . . . . . . . . . . . . . . . . . . . . . . . . . . . 264
Brake Fluid . . . . . . . . . . . . . . . . . . . . . . . . . . . . 265
Battery - North America . . . . . . . . . . . . . . . 266 All-Wheel Drive . . . . . . . . . . . . . . . . . . . . . . . 266
Starter Switch Check . . . . . . . . . . . . . . . . . . 266
Automatic Transmission Shift Lock
Control Function Check (If
Equipped) . . . . . . . . . . . . . . . . . . . . . . . . . . . . 267
Park Brake and P (Park) Mechanism Check . . . . . . . . . . . . . . . . . . . . . . . . . . . . . . . . 267
Wiper Blade Replacement . . . . . . . . . . . . . 267
Windshield Replacement . . . . . . . . . . . . . . 268
Gas Strut(s) . . . . . . . . . . . . . . . . . . . . . . . . . . . 269Headlamp Aiming
Front Headlamp Aiming . . . . . . . . . . . . . . . 270
Bulb Replacement
Bulb Replacement . . . . . . . . . . . . . . . . . . . . . 270
Halogen Bulbs . . . . . . . . . . . . . . . . . . . . . . . . . 270
High Intensity Discharge (HID) Lighting . . . . . . . . . . . . . . . . . . . . . . . . . . . . . 270
LED Lighting . . . . . . . . . . . . . . . . . . . . . . . . . . . 270
Headlamps . . . . . . . . . . . . . . . . . . . . . . . . . . . . 270
Front Turn Signal and Fog Lamps . . . . . . 271
Taillamps . . . . . . . . . . . . . . . . . . . . . . . . . . . . . . 271
License Plate Lamp . . . . . . . . . . . . . . . . . . . . 272
Electrical System
Electrical System Overload . . . . . . . . . . . . . 272
Fuses and Circuit Breakers . . . . . . . . . . . . . 273
Engine Compartment Fuse Block . . . . . . 274
Instrument Panel Fuse Block . . . . . . . . . . 276
Rear Compartment Fuse Block . . . . . . . . . 278
Wheels and Tires
Tires . . . . . . . . . . . . . . . . . . . . . . . . . . . . . . . . . . . 279
All-Season Tires . . . . . . . . . . . . . . . . . . . . . . . 280
Winter Tires . . . . . . . . . . . . . . . . . . . . . . . . . . . 280
Tire Sidewall Labeling . . . . . . . . . . . . . . . . . 280
Tire Designations . . . . . . . . . . . . . . . . . . . . . . 282
Tire Terminology and Definitions . . . . . . 283
Tire Pressure . . . . . . . . . . . . . . . . . . . . . . . . . . 285
Tire Pressure Monitor System . . . . . . . . . 286
Tire Pressure Monitor Operation . . . . . . 286
Tire Inspection . . . . . . . . . . . . . . . . . . . . . . . . 290
Tire Rotation . . . . . . . . . . . . . . . . . . . . . . . . . . 290
When It Is Time for New Tires . . . . . . . . 291
Buying New Tires . . . . . . . . . . . . . . . . . . . . . 292
Different Size Tires and Wheels . . . . . . . 293
Uniform Tire Quality Grading . . . . . . . . . 293
Wheel Alignment and Tire Balance . . . . 294
Wheel Replacement . . . . . . . . . . . . . . . . . . . 294
Page 288 of 369

Chevrolet Equinox Owner Manual (GMNA-Localizing-U.S./Canada/Mexico-
14420010) - 2021 - CRC - 11/10/20
Vehicle Care 287
the air pressure in the tires and transmit the
tire pressure readings to a receiver located
in the vehicle.
When a low tire pressure condition is
detected, the TPMS illuminates the low tire
pressure warning light located on the
instrument cluster. If the warning light
comes on, stop as soon as possible and
inflate the tires to the recommended
pressure shown on the Tire and Loading
Information label. SeeVehicle Load Limits
0 195.
A message to check the pressure in a
specific tire displays in the Driver
Information Center (DIC). The low tire
pressure warning light and the DIC warning
message come on at each ignition cycle
until the tires are inflated to the correct
inflation pressure. Using the DIC, tire pressure levels can be viewed. For additional
information and details about the DIC
operation and displays see
Driver
Information Center (DIC) (Base and Midlevel)
0 101 or
Driver Information Center (DIC) (Uplevel)
0 105.
The low tire pressure warning light may
come on in cool weather when the vehicle is
first started, and then turn off as the vehicle
is driven. This could be an early indicator
that the air pressure is getting low and
needs to be inflated to the proper pressure.
A Tire and Loading Information label,
attached to your vehicle, shows the size of
the original equipment tires and the correct
inflation pressure for the tires when they
are cold. See Vehicle Load Limits 0195, for
an example of the Tire and Loading
Information label and its location. Also see
Tire Pressure 0285.
The TPMS can warn about a low tire
pressure condition but it does not replace
normal tire maintenance. See Tire Inspection
0 290, Tire Rotation 0290 and
Tires 0279.
Caution
Tire sealant materials are not all the
same. A non-approved tire sealant could
damage the TPMS sensors. TPMS sensor
damage caused by using an incorrect tire
sealant is not covered by the vehicle
warranty. Always use only the GM
approved tire sealant available through
your dealer or included in the vehicle.
Factory-installed Tire Inflator Kits use a
GM-approved liquid tire sealant. Using
non-approved tire sealants could damage the
TPMS sensors. See Tire Sealant and
Compressor Kit 0297 for information
regarding the inflator kit materials and
instructions.
TPMS Malfunction Light and Message
The TPMS will not function properly if one
or more of the TPMS sensors are missing or
inoperable. When the system detects a
malfunction, the low tire pressure warning
light flashes for about one minute and then
stays on for the remainder of the ignition
cycle. A DIC warning message also displays.
The malfunction light and DIC warning
message come on at each ignition cycle
Page 330 of 369
Chevrolet Equinox Owner Manual (GMNA-Localizing-U.S./Canada/Mexico-
14420010) - 2021 - CRC - 11/10/20
Service and Maintenance 329
.Trained dealer technicians have the
diagnostic equipment to test the battery
and ensure that the connections and
cables are corrosion-free.
Belts
.Belts may need replacing if they squeak
or show signs of cracking or splitting.
.Trained dealer technicians have access to
tools and equipment to inspect the belts
and recommend adjustment or
replacement when necessary.
Brakes
Brakes stop the vehicle and are crucial to
safe driving.
.Signs of brake wear may include chirping,
grinding, or squealing noises, or difficulty
stopping.
.Trained dealer technicians have access to
tools and equipment to inspect the brakes
and recommend quality parts engineered
for the vehicle.
Fluids
Proper fluid levels and approved fluids
protect the vehicle’s systems and
components. See Recommended Fluids and
Lubricants 0331 for GM approved fluids.
.Engine oil and windshield washer fluid
levels should be checked at every fuel fill.
.Instrument cluster lights may come on to
indicate that fluids may be low and need
to be filled.
Hoses
Hoses transport fluids and should be
regularly inspected to ensure that there are
no cracks or leaks. With a multi-point
inspection, your dealer can inspect the hoses
and advise if replacement is needed.
Lamps
Properly working headlamps, taillamps, and
brake lamps are important to see and be
seen on the road.
.Signs that the headlamps need attention
include dimming, failure to light, cracking,
or damage. The brake lamps need to be
checked periodically to ensure that they
light when braking.
.With a multi-point inspection, your dealer
can check the lamps and note any
concerns.
Shocks and Struts
Shocks and struts help aid in control for a
smoother ride.
.Signs of wear may include steering wheel
vibration, bounce/sway while braking,
longer stopping distance, or uneven
tire wear.
.As part of the multi-point inspection,
trained dealer technicians can visually
inspect the shocks and struts for signs of
leaking, blown seals, or damage, and can
advise when service is needed.
Tires
Tires need to be properly inflated, rotated,
and balanced. Maintaining the tires can save
money and fuel, and can reduce the risk of
tire failure.
.Signs that the tires need to be replaced
include three or more visible treadwear
indicators; cord or fabric showing through
the rubber; cracks or cuts in the tread or
sidewall; or a bulge or split in the tire.
.Trained dealer technicians can inspect and
recommend the right tires. Your dealer
can also provide tire/wheel balancing
services to ensure smooth vehicle
operation at all speeds. Your dealer sells
and services name brand tires.