2021 CHEVROLET CORVETTE seats
[x] Cancel search: seatsPage 102 of 338

Chevrolet Corvette Owner Manual (GMNA-Localizing-U.S./Canada/Mexico-
14622938) - 2021 - CRC - 2/10/21
Instruments and Controls 101
Remote Lock, Unlock, and Start
Touch and the following may display:
.Remote Unlock Light Feedback
.Remote Lock Feedback
.Remote Door Unlock
.Remote Start Auto Cool Seats
.Remote Start Auto Heat Seats
.Remote Window Operation
.Passive Door Unlock
.Passive Door Lock
.Remote Left in Vehicle Alert
.Remote Removed from Vehicle Alert
Remote Unlock Light Feedback
This setting flashes the exterior lamps when
the vehicle is unlocked with the remote key.
Touch Off or Flash Lights.
Remote Lock Feedback
This setting specifies how the vehicle
responds when the vehicle is locked with
the remote key.
Touch Off, Lights and Horn, Lights Only,
or Horn Only. Remote Door Unlock
This setting specifies whether all doors,
or just the driver door, unlock when pressing
Kon the remote key.
Touch All Doors or Driver Door.
Remote Start Auto Cool Seats
This setting automatically turns on the
ventilated seats when using the remote
start function on warm days. See Heated
and Ventilated Front Seats 044 and
Remote Vehicle Start 012.
Touch Off or On.
Remote Start Auto Heat Seats
This setting automatically turns on the
heated seats when using the remote start
function on cold days. See Heated and
Ventilated Front Seats 044 and
Remote Vehicle Start 012.
If equipped with Auto Heated Steering
Wheel, this feature will turn on when the
Remote Start Auto Heat Seats turn on.
Touch Off or On. Remote Window Operation
When enabled, this feature allows the
windows to be opened remotely when
pressing and holdingKon the remote key.
See Remote Keyless Entry (RKE) System
Operation 07.
Touch Off or On.
Passive Door Unlock
This setting specifies which doors unlock
when using the button on the driver door
handle to unlock the vehicle.
Touch Off, All Doors, or Driver Door Only.
Passive Door Lock
This setting specifies if the vehicle will
automatically lock, or lock and provide an
alert after all the doors are closed, and you
walk away from the vehicle with the remote
key. See Remote Keyless Entry (RKE) System
Operation 07.
Touch Off, On with Horn Chirp, or On.
Remote Left in Vehicle Alert
This feature sounds an alert when the
remote key is left in the vehicle.
Touch Off or On.
Page 103 of 338

Chevrolet Corvette Owner Manual (GMNA-Localizing-U.S./Canada/Mexico-
14622938) - 2021 - CRC - 2/10/21
102 Instruments and Controls
Remote Removed from Vehicle Alert
This feature beeps the horn 3 times when
exiting a running vehicle with the
remote key.
Touch Off or On.
Ride Height
Touch and the following may display:
Location Based Auto Lift
This setting enables the Front Lift to
automatically raise or lower when the
vehicle is near GPS stored locations. See
Front Lift System0214.
Touch Off or On.
Seating Position
Touch and the following may display:
.Seat Entry Memory
.Seat Exit Memory
Seat Entry Memory
This feature automatically recalls the
previously stored 1 or 2 button positions
when the ignition is changed from off to on.
See Memory Seats 041.
Touch Off or On. Seat Exit Memory
This feature automatically recalls the
previously stored exit button positions when
the ignition is changed from on to off if the
driver door is open or opened. See
Memory
Seats 041.
Touch Off or On.
Teen Driver
See Teen Driver 0160.
Valet Mode
This will lock the infotainment system and
steering wheel controls. It may also limit
access to vehicle storage locations,
if equipped.
To enable valet mode:
1. Enter a four-digit code on the keypad.
2. Touch Enter to go to the confirmation screen.
3. Re-enter the four-digit code.
Touch Lock or Unlock to lock or unlock the
system. Touch Back to go back to the
previous menu. To configure the Performance Data Recorder
(PDR) to automatically record in Valet mode,
see
“Settings” inPerformance Data Recorder
(PDR) 0143.
Universal Remote System
See Radio Frequency Statement 0316.
The FCC Grant of Equipment Authorization
Certificate number is NZLSAHL5B.
The Canadian Registration ID number is
4112A-SAHL5B.
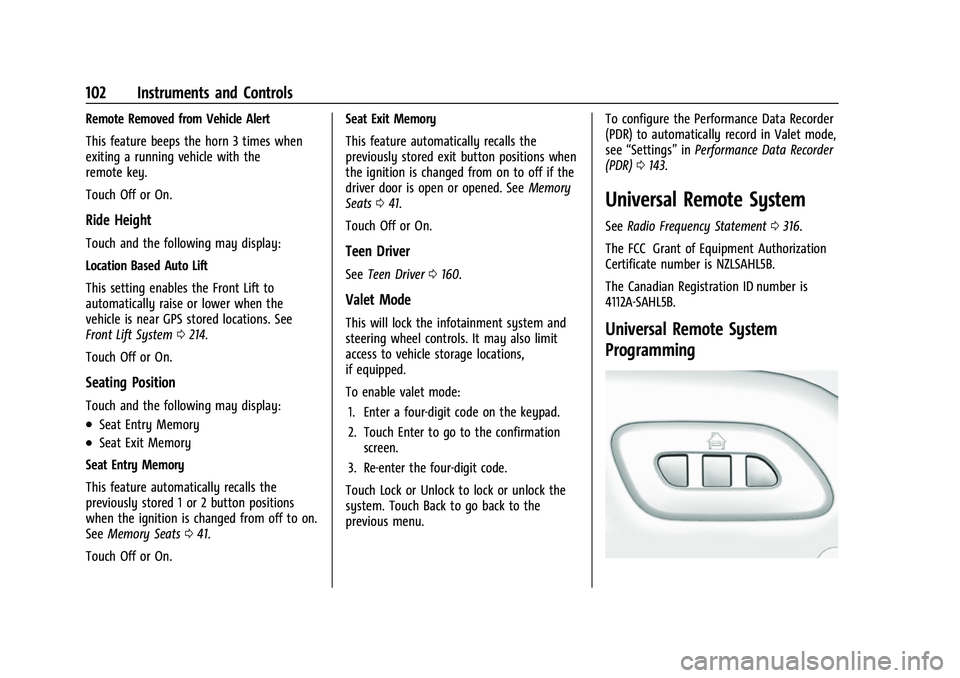
Universal Remote System
Programming
Page 159 of 338

Chevrolet Corvette Owner Manual (GMNA-Localizing-U.S./Canada/Mexico-
14622938) - 2021 - CRC - 2/10/21
158 Infotainment System
.Bose AudioPilot Noise Compensation
Technology: This feature adjusts the
volume based on the noise in the vehicle.
When turned on, AudioPilot detects
ambient noise and vehicle speed to
continuously adjust the audio signal so
that music will sound the same at a set
volume level. This feature is most
effective at lower radio volume settings
where background noise can affect how
well the music is being heard.
Touch Off or On.
.Manage Favorites: Touch to display a list
of Audio, Mobile Devices, and Navigation
favorites.
Favorites can be moved, renamed,
or deleted.
To move, touch and hold the favorite, and
then drag up or down to rearrange the
position.
.Set Number of Audio Favorites: Touch to
select how many favorites pages can be
viewed from the audio application. The
Auto setting will automatically adjust this
number based on the number of favorites
you have saved. Touch Auto, 5, 10, 15, 20,
25, 30, 35, or 40.
.RDS: This allows the Radio Data System
(RDS) to be turned on or off.Touch the controls on the infotainment
display to disable or enable.
.HD Radio: This allows HD Radio reception
to be turned on or off.
Touch the controls on the infotainment
display to disable or enable.
.Explicit Content Filter: This setting allows
access to explicit content SiriusXM
channels.
Touch Off or On.
.Manage Phones: Select to connect to a
different phone source, disconnect a
phone, or delete a phone.
.Reset Music Index: This allows the music
index to be reset if you are having
difficulty accessing all of the media
content on your device.
Touch Yes or No.
Climate
Touch and the following may display:
.Auto Fan Speed: This setting specifies the
amount of airflow when the climate
control fan setting is Auto Fan.
Touch Low, Medium, or High.
.Air Quality Sensor: This setting switches
the system into Recirculation Mode based
on the quality of the outside air. Touch Off, Low Sensitivity, or High
Sensitivity.
.Auto Cooled Seats: This setting
automatically turns on and regulates the
ventilated seats when the cabin
temperature is warm.
Touch the controls on the infotainment
display to disable or enable.
.Auto Heated Seats: This setting
automatically turns on and regulates the
heated seats when the cabin temperature
is cool. The auto heated seats can be
turned off by using the heated seat
controls on the center stack.
Touch the controls on the infotainment
display to disable or enable.
.Auto Defog: This setting automatically
turns the front defogger on when the
vehicle engine is started.
Touch the controls on the infotainment
display to disable or enable.
.Auto Rear Defog: This setting
automatically turns the rear window
defogger on when the vehicle engine is
started.
Touch the controls on the infotainment
display to disable or enable.
Page 172 of 338

Chevrolet Corvette Owner Manual (GMNA-Localizing-U.S./Canada/Mexico-
14622938) - 2021 - CRC - 2/15/21
Climate Controls 171
Climate Controls
Climate Control Systems
Dual Automatic Climate ControlSystem . . . . . . . . . . . . . . . . . . . . . . . . . . . . . . . 171
Air Vents
Air Vents . . . . . . . . . . . . . . . . . . . . . . . . . . . . . . 174
Maintenance
Passenger Compartment Air Filter . . . . . 174
Service . . . . . . . . . . . . . . . . . . . . . . . . . . . . . . . . . 175
Climate Control Systems
Dual Automatic Climate Control
System
The heating, cooling, and ventilation in the
vehicle can be controlled with this system.
1. Driver Temperature Control
2. Driver and Passenger Heated and Ventilated Seats (If Equipped)
3. SYNC (Synchronized Temperature)
4. AUTO (Automatic Operation)
Page 175 of 338

Chevrolet Corvette Owner Manual (GMNA-Localizing-U.S./Canada/Mexico-
14622938) - 2021 - CRC - 2/15/21
174 Climate Controls
Caution
Using a razor blade or sharp object to
clear the inside rear window can damage
the rear window defogger. Repairs would
not be covered by the vehicle warranty.
Do not clear the inside rear window with
sharp objects.
Remote Start Climate Control Operation :
If equipped with remote start, the climate
control system may run when the vehicle is
started remotely. If equipped with heated or
ventilated seats or a heated steering wheel,
these features may come on during a
remote start. See Remote Vehicle Start 012,
Heated and Ventilated Front Seats 044, and
Heated Steering Wheel 074.
Air Vents
Use the tab on the air outlets to change the
direction of the airflow or shut the outlet.
Operation Tips
.Clear away any ice, snow, or leaves from
the air inlets at the base of the
windshield that may block the flow of air
into the vehicle.
.Clear snow off the hood to improve
visibility and help decrease moisture
drawn into the vehicle.
.Use of non-GM approved hood deflectors
may adversely affect the performance of
the system.
.Keep the area around the base of the
instrument panel console and air path
under the seats clear of objects to help
circulate the air inside of the vehicle more
effectively.
Maintenance
Passenger Compartment Air Filter
The passenger compartment air filter
reduces dust, pollen, and other airborne
irritants from outside air that are pulled into
the vehicle. Reductions in airflow, which
may occur more often in dusty areas,
indicate that the filter may need to be
replaced. See Maintenance Schedule 0293.
Caution
Driving without a passenger compartment
air filter in place can cause water and
small particles, like paper and leaves, to
be pulled into your climate control
(Continued)
Caution (Continued)
system which may cause damage to it.
Make sure you always replace the old
filter with a new one.
The passenger compartment air filter is
located under the hood between the battery
and windshield. See Underhood
Compartment Overview 0234.
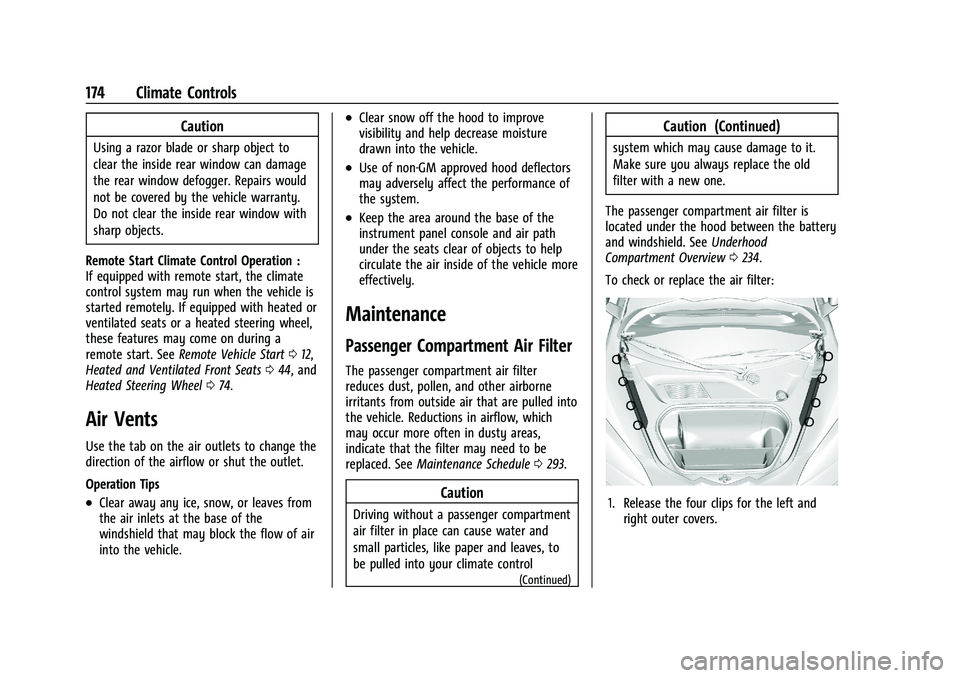
To check or replace the air filter:
1. Release the four clips for the left and right outer covers.
Page 186 of 338

Chevrolet Corvette Owner Manual (GMNA-Localizing-U.S./Canada/Mexico-
14622938) - 2021 - CRC - 2/10/21
Driving and Operating 185
Right Side Rear Shown, Left Side Rear Similar3. Rear Knuckle Mounted Cooling Duct
4. Rear Lower Control Arm Cooling Duct
Shock Spring Seat Adjustment
The front shocks, on vehicles without
hydraulic front lift and rear shocks, have
threaded spring seats that allow adjustment
of the preload on the coil springs. The
vehicle corner weights can be adjusted for
track use. If the vehicle trim height is
modified, it should be returned to normal
trim height before street use. The spring seat can be adjusted
approximately 20 mm (0.8 in) up or down
from the nominal position. Each complete
turn of the spring seat will change the
vehicle height approximately 1.5 mm
(0.06 in). When adjusting the seat to the
upper limit, lift the dust boot and ensure
the seat does not thread off the center
support tube (stop adjustment when threads
no longer visible). When adjusting the seat
to the lower limit, leave approximately
10 mm (0.4 in) of thread visible for the
lower lock nut to have full thread
engagement.
The following procedure can be complex and
should only be performed by trained
personnel. See your dealer.
To adjust the lower spring seat:
1. Raise the vehicle so the tires are completely off the ground.
Front Shown, Rear Similar
2. Loosen the lower spring seat lock nut (2).
3. Thread the lower spring seat lock nut (2) downward off of the threads to its
resting location on the shoulder of the
center support tube.
4. While holding the center support tube holes, turn the spring seat (1) upward to
increase spring preload, or downward to
decrease spring preload.
5. Thread the lower lock nut (2) back on to the center support tube and torque it
against the spring seat (1) to 25 Y
(18.4 lb ft).
Page 193 of 338

Chevrolet Corvette Owner Manual (GMNA-Localizing-U.S./Canada/Mexico-
14622938) - 2021 - CRC - 2/10/21
192 Driving and Operating
{Warning
Things you put inside your vehicle
can strike and injure people in a
sudden stop or turn, or in a crash.
.Put things in the rear area of your
vehicle. Try to spread the weight
evenly.
.Never stack heavier things, like
suitcases, inside the vehicle so
that some of them are above the
tops of the seats.
.Do not leave an unsecured child
restraint in your vehicle.
.When you carry something inside
the vehicle, secure it whenever
you can.
Starting and Operating
New Vehicle Break-In
Follow these recommended guidelines
during the first 2 414 km (1,500 mi) of driving
this vehicle. Parts have a break-in period and
performance will be better in the long run. During the first 800 km (500 mi), engine
torque will be limited in low gears.
For the first 322 km (200 mi):
.To break in new tires, drive at moderate
speeds and avoid hard cornering.
.New brake linings also need a break-in
period. Avoid making hard stops. This is
recommended every time brake linings
are replaced.
For the first 800 km (500 mi):
.Avoid full throttle starts and abrupt stops.
.Do not exceed 4000 rpm.
.Avoid driving at any one constant speed,
fast or slow, including the use of cruise
control.
.Avoid downshifting to brake or slow the
vehicle when the engine speed will
exceed 4000 rpm.
.Do not let the engine labor. Never lug the
engine. This rule applies at all times, not
just during the break-in period.
For the first 2 414 km (1,500 mi):
.Do not participate in track events, sport
driving schools, or similar activities.
.Check engine oil with every refueling and
add if necessary. Oil and fuel
consumption may be higher than normal.
Front Air Dam (and Splitter)
If equipped, the front air dam and splitter
have minimal ground clearance.
Under normal operation, the components
will occasionally contact some road surfaces
(speed bumps, driveway ramps, etc.). This
can be heard inside the vehicle as a scraping
noise. This is normal and does not indicate a
problem.
Use care when approaching bumps or
objects on road surfaces and avoid them
when possible.
If equipped, the Front Lift System may be
used to increase front air dam or splitter
clearance. See Front Lift System 0214.
Composite Materials
This vehicle may be equipped with parts
containing carbon fiber, sheet-molding
compound, or other composite materials.
Dealer-installed accessories may also contain
composite materials. These parts and
accessories may include the splitter or rocker
extensions.
Page 259 of 338

Chevrolet Corvette Owner Manual (GMNA-Localizing-U.S./Canada/Mexico-
14622938) - 2021 - CRC - 2/10/21
258 Vehicle Care
FusesUsage
F30 Sensing and diagnostic module/Automatic
occupant sensing
F31 Body control module 1
F32 Column lock module
F33 Data link connection/ Wireless charging module
F34 Telematics/Head up display
F35 Horn
F36 –
F37 –
F38 Front wash pump
F39 Rear auxiliary power outlet
F40 Performance data recorder/Center stack
module
F41 –
F42 Theft deterrent
F43 Left headlamp
F44 Exterior lighting module 2 Fuses
Usage
F45 Power steering column module
F46 Body control module 3 F47 Exterior lighting module 5
F48 Exterior lighting module 7
F49 Body control module 4 F50 Front auxiliary power outlet
F51 –
F52 Steering wheel control switch
F53 Heated steering wheel
F54 –
Relays Usage
K1 –
K2 Glove box relay
K3 Horn relay
K4 Front wash relay K5 Retained accessory power/Accessory relay Relays
Usage
K6 Front trunk release relay 1 K7 –
K8 –
K9 Front trunk release relay 2
K10 Wiper relay
Rear Compartment Fuse Block
The rear compartment fuse block is in the
rear of the vehicle in between the seats.
To Access: 1. Open top cover.