2021 CHEVROLET CORVETTE wheel
[x] Cancel search: wheelPage 56 of 338

Chevrolet Corvette Owner Manual (GMNA-Localizing-U.S./Canada/Mexico-
14622938) - 2021 - CRC - 2/10/21
Seats and Restraints 55
sensors that help the airbag system
determine the severity of the impact.
Deployment thresholds can vary with
specific vehicle design.
Frontal airbags are designed to inflate in
moderate to severe frontal or near frontal
crashes to help reduce the potential for
severe injuries, mainly to the driver's or
front outboard passenger's head and chest.
Whether the frontal airbags will or should
inflate is not based primarily on how fast
the vehicle is traveling. It depends on what
is hit, the direction of the impact, and how
quickly the vehicle slows down.
Frontal airbags may inflate at different crash
speeds depending on whether the vehicle
hits an object straight on or at an angle,
and whether the object is fixed or moving,
rigid or deformable, narrow or wide.
Frontal airbags are not intended to inflate
during vehicle rollovers, in rear impacts,
or in many side impacts.
In addition, the vehicle has advanced
technology frontal airbags. Advanced
technology frontal airbags adjust the
restraint according to crash severity or
occupant interaction. The passenger seatbelt buckle provides information that is used
to adjust the deployment of the front
outboard passenger frontal airbag.
Seat-mounted side impact airbags are
designed to inflate in moderate to severe
side crashes depending on the location of
the impact. Seat-mounted side impact
airbags are not designed to inflate in frontal
impacts, near frontal impacts, rollovers,
or rear impacts. A seat-mounted side impact
airbag is designed to inflate on the side of
the vehicle that is struck.
In any particular crash, no one can say
whether an airbag should have inflated
simply because of the vehicle damage or
repair costs.
What Makes an Airbag Inflate?
In a deployment event, the sensing system
sends an electrical signal triggering a release
of gas from the inflator. Gas from the
inflator fills the airbag causing the bag to
break out of the cover. The inflator, the
airbag, and related hardware are all part of
the airbag module.
For airbag locations, see
Where Are the
Airbags? 054.
How Does an Airbag Restrain?
In moderate to severe frontal or near frontal
collisions, even belted occupants can contact
the steering wheel or the instrument panel.
In moderate to severe side collisions, even
belted occupants can contact the inside of
the vehicle.
Airbags supplement the protection provided
by seat belts by distributing the force of the
impact more evenly over the
occupant's body.
But airbags would not help in many types
of collisions, primarily because the
occupant's motion is not toward those
airbags. See When Should an Airbag Inflate?
0 54.
Airbags should never be regarded as
anything more than a supplement to seat
belts.
What Will You See after an
Airbag Inflates?
After the frontal and seat-mounted side
impact airbags inflate, they quickly deflate,
so quickly that some people may not even
realize the airbags inflated. Some
Page 61 of 338

Chevrolet Corvette Owner Manual (GMNA-Localizing-U.S./Canada/Mexico-
14622938) - 2021 - CRC - 2/10/21
60 Seats and Restraints
approved by GM for your specific vehicle.
SeeAdding Equipment to the
Airbag-Equipped Vehicle 060 for more
information about modifications that can
affect how the system operates.
The ON indicator may be lit if an object,
such as a briefcase, handbag, grocery bag,
laptop, or other electronic device, is put on
an unoccupied seat. If this is not desired,
remove the object from the seat.
{Warning
Stowing articles under the passenger seat
or between the passenger seat cushion
and seatback may interfere with the
proper operation of the passenger
sensing system.
Servicing the Airbag-Equipped
Vehicle
Airbags affect how the vehicle should be
serviced. There are parts of the airbag
system in several places around the vehicle.
Your dealer and the service manual have
information about servicing the vehicle and
the airbag system. To purchase a service
manual, see Publication Ordering
Information 0315.
{Warning
For up to 10 seconds after the vehicle is
turned off and the battery is
disconnected, an airbag can still inflate
during improper service. You can be
injured if you are close to an airbag
when it inflates. Avoid yellow connectors.
They are probably part of the airbag
system. Be sure to follow proper service
procedures, and make sure the person
performing work for you is qualified to
do so.
Adding Equipment to the
Airbag-Equipped Vehicle
Adding accessories that change the vehicle's
frame, bumper system, height, front end,
or side sheet metal may keep the airbag
system from working properly.
The operation of the airbag system can also
be affected by changing, including
improperly repairing or replacing, any parts
of the following:
.Airbag system, including airbag modules,
front or side impact sensors, sensing and
diagnostic module, or airbag wiring
.Front seats, including stitching, seams or
zippers
.Seat belts
.Steering wheel, instrument panel, ceiling
trim, or pillar garnish trim
.Inner door seals, including speakers
Your dealer and the service manual have
information about the location of the airbag
modules and sensors, sensing and diagnostic
module, and airbag wiring along with the
proper replacement procedures.
In addition, the vehicle has a passenger
sensing system for the front outboard
passenger position, which includes sensors
that are part of the passenger seat. The
passenger sensing system may not operate
properly if the original seat trim is replaced
with non-GM covers, upholstery or trim,
or with GM covers, upholstery or trim
designed for a different vehicle. Any object,
such as an aftermarket seat heater or a
comfort-enhancing pad or device, installed
under or on top of the seat fabric, could
also interfere with the operation of the
passenger sensing system. This could either
prevent proper deployment of the passenger
airbag(s) or prevent the passenger sensing
Page 74 of 338

Chevrolet Corvette Owner Manual (GMNA-Localizing-U.S./Canada/Mexico-
14622938) - 2021 - CRC - 2/10/21
Instruments and Controls 73
Instruments and Controls
Controls
Steering Wheel Adjustment . . . . . . . . . . . . 74
Steering Wheel Controls . . . . . . . . . . . . . . . . 74
Heated Steering Wheel . . . . . . . . . . . . . . . . . 74
Horn . . . . . . . . . . . . . . . . . . . . . . . . . . . . . . . . . . . 74
Windshield Wiper/Washer . . . . . . . . . . . . . . 74
Compass . . . . . . . . . . . . . . . . . . . . . . . . . . . . . . . . 75
Clock . . . . . . . . . . . . . . . . . . . . . . . . . . . . . . . . . . . 75
Power Outlets . . . . . . . . . . . . . . . . . . . . . . . . . . 76
Wireless Charging . . . . . . . . . . . . . . . . . . . . . . 77
Warning Lights, Gauges, and Indicators
Warning Lights, Gauges, andIndicators . . . . . . . . . . . . . . . . . . . . . . . . . . . . . 79
Instrument Cluster . . . . . . . . . . . . . . . . . . . . . 80
Speedometer . . . . . . . . . . . . . . . . . . . . . . . . . . . 83
Odometer . . . . . . . . . . . . . . . . . . . . . . . . . . . . . . 83
Trip Odometer . . . . . . . . . . . . . . . . . . . . . . . . . . 83
Tachometer . . . . . . . . . . . . . . . . . . . . . . . . . . . . 83
Fuel Gauge . . . . . . . . . . . . . . . . . . . . . . . . . . . . . 83
Engine Coolant Temperature Gauge . . . . 84
Transmission Temperature Gauge . . . . . . 84
Seat Belt Reminders . . . . . . . . . . . . . . . . . . . . 84
Airbag Readiness Light . . . . . . . . . . . . . . . . . 85
Passenger Airbag Status Indicator . . . . . . 85
Charging System Light . . . . . . . . . . . . . . . . . 86
Malfunction Indicator Lamp (Check Engine Light) . . . . . . . . . . . . . . . . . . . . . . . . . 86 Front Lift System Light . . . . . . . . . . . . . . . . . 88
Brake System Warning Light . . . . . . . . . . . 88
Electric Parking Brake Light . . . . . . . . . . . . . 88
Service Electric Parking Brake Light . . . . . 89
Antilock Brake System (ABS) Warning
Light . . . . . . . . . . . . . . . . . . . . . . . . . . . . . . . . . 89
Performance Shifting Light . . . . . . . . . . . . . 89
Traction Off Light . . . . . . . . . . . . . . . . . . . . . . 90
Traction Control System (TCS)/Electronic Stability Control Light . . . . . . . . . . . . . . . . 90
Electronic Stability Control (ESC) Off Light . . . . . . . . . . . . . . . . . . . . . . . . . . . . . . . . . 90
Tire Pressure Light . . . . . . . . . . . . . . . . . . . . . . 91
Engine Oil Pressure Light . . . . . . . . . . . . . . . 91
Security Light . . . . . . . . . . . . . . . . . . . . . . . . . . . 91
High-Beam On Light . . . . . . . . . . . . . . . . . . . . 92
Lamps On Reminder . . . . . . . . . . . . . . . . . . . . 92
Cruise Control Light . . . . . . . . . . . . . . . . . . . . 92
Door Ajar Light . . . . . . . . . . . . . . . . . . . . . . . . . 92
Information Displays
Driver Information Center (DIC) . . . . . . . . . 92
Head-Up Display (HUD) . . . . . . . . . . . . . . . . 94
Vehicle Messages
Vehicle Messages . . . . . . . . . . . . . . . . . . . . . . . 97
Engine Power Messages . . . . . . . . . . . . . . . . 98
Vehicle Speed Messages . . . . . . . . . . . . . . . . 98
Vehicle Personalization
Vehicle Personalization . . . . . . . . . . . . . . . . . 98
Universal Remote System
Universal Remote System . . . . . . . . . . . . . 102
Universal Remote System Programming . . . . . . . . . . . . . . . . . . . . . . . . 102
Universal Remote System Operation . . . . . . . . . . . . . . . . . . . . . . . . . . . 104
Page 75 of 338

Chevrolet Corvette Owner Manual (GMNA-Localizing-U.S./Canada/Mexico-
14622938) - 2021 - CRC - 2/10/21
74 Instruments and Controls
Controls
Steering Wheel Adjustment
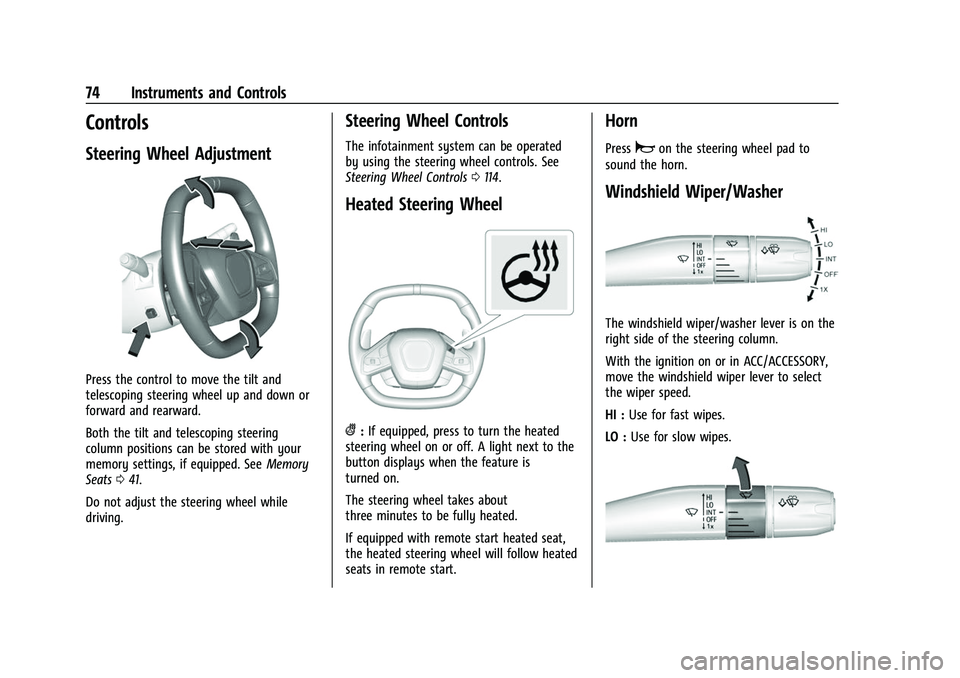
Press the control to move the tilt and
telescoping steering wheel up and down or
forward and rearward.
Both the tilt and telescoping steering
column positions can be stored with your
memory settings, if equipped. SeeMemory
Seats 041.
Do not adjust the steering wheel while
driving.
Steering Wheel Controls
The infotainment system can be operated
by using the steering wheel controls. See
Steering Wheel Controls 0114.
Heated Steering Wheel
(:If equipped, press to turn the heated
steering wheel on or off. A light next to the
button displays when the feature is
turned on.
The steering wheel takes about
three minutes to be fully heated.
If equipped with remote start heated seat,
the heated steering wheel will follow heated
seats in remote start.
Horn
Pressaon the steering wheel pad to
sound the horn.
Windshield Wiper/Washer
The windshield wiper/washer lever is on the
right side of the steering column.
With the ignition on or in ACC/ACCESSORY,
move the windshield wiper lever to select
the wiper speed.
HI : Use for fast wipes.
LO : Use for slow wipes.
Page 81 of 338

Chevrolet Corvette Owner Manual (GMNA-Localizing-U.S./Canada/Mexico-
14622938) - 2021 - CRC - 2/10/21
80 Instruments and Controls
Instrument Cluster
Tour Mode Shown, Other Modes Similar
1.Engine Coolant Temperature Gauge
084
2. Speedometer 083
3. Fuel Gauge 083
4. Driver Information Center (DIC) 092Cluster Menu
There is an interactive display area in the
center of the instrument cluster.
Use the right steering wheel control to open
and scroll through the different items and
displays.
PressSorTto access the cluster
applications. Use the thumbwheel to scroll
yorzthrough the list of available
features. Press the thumbwheel to select.
Not all applications will be available on all
vehicles.
.Info Pages: The selected Driver
Information Center (DIC) displays can be
viewed. See Driver Information Center
(DIC) 092.
.Performance
.Audio
.Options
.Simplify
Page 82 of 338

Chevrolet Corvette Owner Manual (GMNA-Localizing-U.S./Canada/Mexico-
14622938) - 2021 - CRC - 2/10/21
Instruments and Controls 81
Performance
Press the thumbwheel to enter the
Performance menu. Scroll through the
available items.
G-force :Gives the driver an indication of
the vehicle performance in cornering. The
G-force gauge will show as an info tile on
the left side of the cluster, if selected.
Friction Bubble : A four quadrant visual
display, indicative of the four corners of the
car, with a “bubble”showing where the
most inertia is being exerted on the vehicle.
Performance Timer : Press the thumbwheel
to enter the setup menu, then select Set
Start Speed. Scroll to desired Start Speed,
then press the thumbwheel to save it. While
on this menu, to change the End Speed,
scroll to End Speed and use the thumbwheel
to scroll to desired End Speed. Press the
thumbwheel to save it. On the next
acceleration, the performance timer will
record the time. Pressing the thumbwheel
while the timer is running will cancel the
timer if done before reaching the End Speed.
Lap Timer (without PDR) : Press
Twhen
Lap Timer is displayed to start, stop, or reset
the lap timer. Press the thumbwheel while
the Lap Timer page is active to start the timer. If the lap timer is active, pressing the
thumbwheel will stop the current lap timer
and start a new lap. Pressing the
thumbwheel within 10 seconds after
completing the last lap (Stop Lap Timer
option is displayed), the Lap Timer will stop.
Lap Timer (with PDR) :
The lap times
recorded with the PDR system will
automatically be displayed in this window.
This only happens if a track has been
selected in the PDR system and a video
recording is started. See Performance Data
Recorder (PDR) 0143.
Oil Temperature : Shows the current oil
temperature in either degrees Celsius (°C) or
degrees Fahrenheit (°F).
Oil Pressure : Shows the current oil pressure
in either kilopascal (kPa) or in pounds per
square inch (psi).
Battery Voltage : Shows the current battery
voltage.
Transmission Fluid Temperature : Shows the
temperature of the transmission fluid in
either degrees Celsius (°C) or degrees
Fahrenheit (°F).
Tire Status : Shows individual tire pressures
and overall temperature as either Cold, Cool,
Normal, Warm, or Hot. Normal is typical for normal driving while Warm is typical for
aggressive driving. Unknown may be
displayed if tire temperature information is
unavailable.
eLSD (Z51 Only) :
Displays the amount of
rear differential coupling when the Electronic
Limited-Slip Differential (eLSD) is active and
functioning during vehicle operation.
A reading of 1% is an open differential and
100% is locked. It is normal for the value to
make small or large changes due to driving
conditions and driver inputs. See Limited-Slip
Differential (Without Z51) 0218 or
Limited-Slip Differential (With Z51) 0218.
Front Lift : During a driver requested Front
Lift (if equipped), the driver may
"remember" using the
S, or dismiss the
display by pressing the thumbwheel. When
the Front Lift is Raised due to location, the
driver may delete that stored location using
the
S, or dismiss the display by pressing
the thumbwheel.
See Front Lift System 0214.
Audio
In the Audio menu, use the thumbwheel to
scroll through audio presets.
Page 83 of 338

Chevrolet Corvette Owner Manual (GMNA-Localizing-U.S./Canada/Mexico-
14622938) - 2021 - CRC - 2/10/21
82 Instruments and Controls
Options
Use the thumbwheel to scroll through items
in the Options menu.
Units
Press the thumbwheel while Units is
displayed to enter the Units menu. Choose
US or metric units by pressing the
thumbwheel while the desired item is
highlighted. A selected mark will be
displayed next to the selected item.
Display Themes
Press the thumbwheel to enter the Display
menu. There are six instrument cluster
display configurations to choose from. Sport,
Tour, Track, Weather, My Mode, and
Z-Mode. The style of the cluster will change
depending on the theme selected.
Default is linked to Driver mode. Other
display themes can be set
If in Z-Mode or My Mode then those
displays plus HUD (if equipped) can be set.
.Sport/Z-Mode: Displays Coolant
Temperature, Fuel Gauge, Compass, Drive
Mode Indicator, Odometer, Speed,
Tachometer, Electronic Transmission
Range, Current Gear, Active FuelManagement (AFM), Peak Performance,
Performance Shift Lights, Speed Limit, Info
Area, and Interaction Area.
.Tour/Weather/My Mode: Displays Coolant
Temperature, Fuel Gauge, Compass, Drive
Mode Indicator, Odometer, Speed,
Tachometer, Electronic Transmission
Range, Current Gear, Active Fuel
Management (AFM), Peak Performance,
Speed Limit, Info Area, and
Interaction Area.
.Track: Displays Coolant Temperature, Fuel
Gauge, Performance Traction
Management, Drive Mode Indicator,
Speed, Tachometer, Electronic
Transmission Range, Current Gear, Info
Area, and Interactive Area.
Preset info tiles shown on each layout:
Sport : G-Force, Oil Temperature
Track : Oil Pressure, Transmissions Fluid
Temperature, Tire Pressure & Tire
Temperature, Oil Temperature
Tour : Time & Outside Air Temperature, Oil
Pressure
Weather : Time & Outside Air Temperature,
Tire Status
Z-Mode : Oil Temperature, G-Force My Mode :
Economy Trend, Oil Pressure
Head-Up Display (HUD) Rotation
Press the thumbwheel while Adjust Rotation
is highlighted to enter Adjust Mode. Scroll
to adjust the angle of the HUD display.
Press the thumbwheel to confirm and save
the setting. This feature may only be
available in P (Park).
Speed Warning
The Speed Warning display allows the driver
to set a speed that they do not want to
exceed. To set the Speed Warning, press the
thumbwheel when Speed Warning is
displayed, or press the thumbwheel on the
main view to set the speed value. Scroll to
adjust the value. Press the thumbwheel to
set the speed. Once the speed is set, this
feature can be turned off by pressing the
thumbwheel while viewing this page. If the
selected speed limit is exceeded, a pop-up
warning is displayed with a chime.
Software Info
Press
Twhile Software Info is highlighted
to display open source software information.
Page 84 of 338

Chevrolet Corvette Owner Manual (GMNA-Localizing-U.S./Canada/Mexico-
14622938) - 2021 - CRC - 2/10/21
Instruments and Controls 83
Simplify
Press the thumbwheel to enter the Simplify
menu. Simplify mode allows certain features
of the instrument cluster to be hidden.
These features include info tiles and
interactive areas.
Scroll to the desired features with the
thumbwheel, and press to toggle them on
or off.
Using the thumbwheel, except to
acknowledge an alert, will exit
Simplify mode.
The selected features will stay hidden even
after starting and restarting the vehicle,
unless Simplify mode is manually canceled.
Speedometer
The speedometer shows the vehicle's speed
in either kilometers per hour (km/h) or
miles per hour (mph).
Odometer
The odometer shows how far the vehicle has
been driven, in either kilometers or miles.
Trip Odometer
The trip odometer shows how far the
vehicle has been driven since the trip
odometer was last reset.
The trip odometer is accessed and reset
through the Driver Information Center (DIC).
SeeDriver Information Center (DIC) 092.
Tachometer
The tachometer displays the engine speed in
revolutions per minute (rpm).
Shift lights will not appear until the engine
is warm.
In Track theme, the tachometer can be set
to display a traditional tachometer, or a
numerical tachometer with shift lights.
Caution
If the engine is operated with the rpm in
the warning area at the high end of the
tachometer, the vehicle could be
damaged, and the damage would not be
covered by the vehicle warranty. Do not
operate the engine with the rpm in the
warning area.
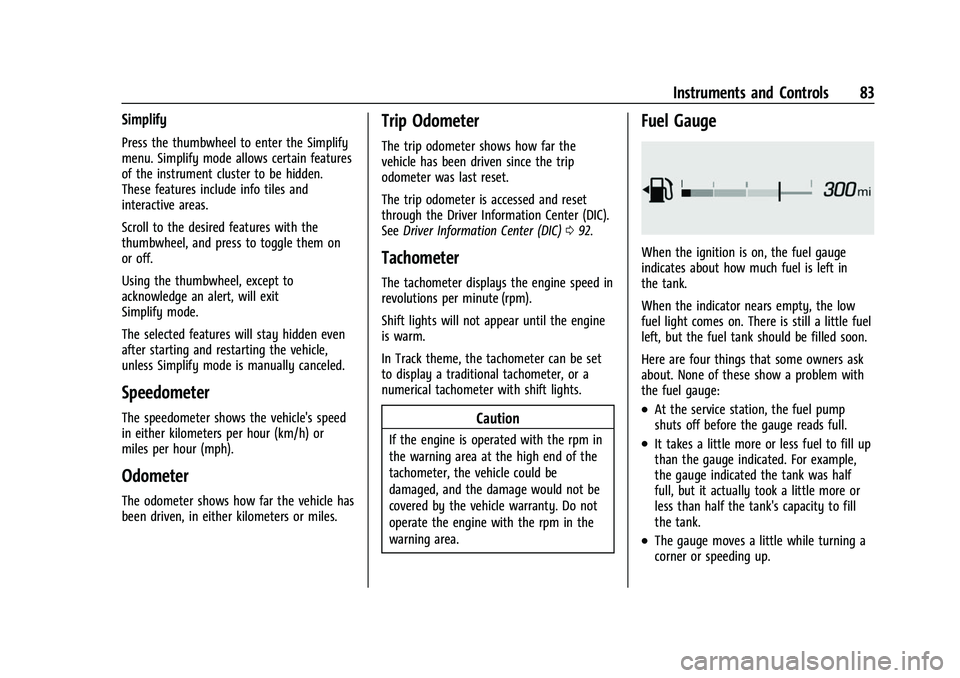
Fuel Gauge
When the ignition is on, the fuel gauge
indicates about how much fuel is left in
the tank.
When the indicator nears empty, the low
fuel light comes on. There is still a little fuel
left, but the fuel tank should be filled soon.
Here are four things that some owners ask
about. None of these show a problem with
the fuel gauge:
.At the service station, the fuel pump
shuts off before the gauge reads full.
.It takes a little more or less fuel to fill up
than the gauge indicated. For example,
the gauge indicated the tank was half
full, but it actually took a little more or
less than half the tank's capacity to fill
the tank.
.The gauge moves a little while turning a
corner or speeding up.