2021 CHEVROLET CAMARO brake
[x] Cancel search: brakePage 2 of 16

2
Low Fuel
Traction Control Off
BRAKE Brake System
Cruise Control Set
StabiliTrak Active
StabiliTrak Off
Security
PARK Electric Parking Brake
Service Electric Parking Brake
Lights On Reminder
Airbag Readiness
Check Engine
SYMBOLS
INSTRUMENT PANEL
Interior Lighting Control
Windshield Wipers Lever
Voice Recognition Buttons/Driver Information Center Controls
Audio Next/Previous Favorite Station Controls
Head-Up Display ControlsFMemory Seat ButtonsF
Turn Signal Lever/Exterior Lamps Control
Heated Steering WheelF/Cruise Control Buttons
Power Mirror/Window Controls
Tilt/Telescoping Steering Wheel Lever
Audio Volume Controls
Engine Start/Stop Button
Paddle Shift or Active Rev Match On/OffF
Page 3 of 16

3
Refer to your Owner’s Manual to learn about the information being relayed by the lights, gauges and indicators on the instrument cluster.
See Introduction in your Owner’s Manual.
Driver’s Heated/Ventilated Seat ButtonsF
Infotainment System Touch Screen
Electric Parking Brake Switch
Driver Mode Selector/Stability Control Button
Automatic Climate Controls
Passenger’s Heated/Ventilated Seat ButtonsF
Accessory Power OutletHazard Warning Flashers Button
F Optional equipment
Antilock Brake System
Low Tire Pressure
Door Ajar
Engine Oil Pressure
Charging System
Driver Seat Belt Reminder
2 Passenger Seat Belt Reminder
Page 5 of 16

5
The Remote Keyless Entry transmitter (key fob) must be in the vehicle \
to turn on the ignition.
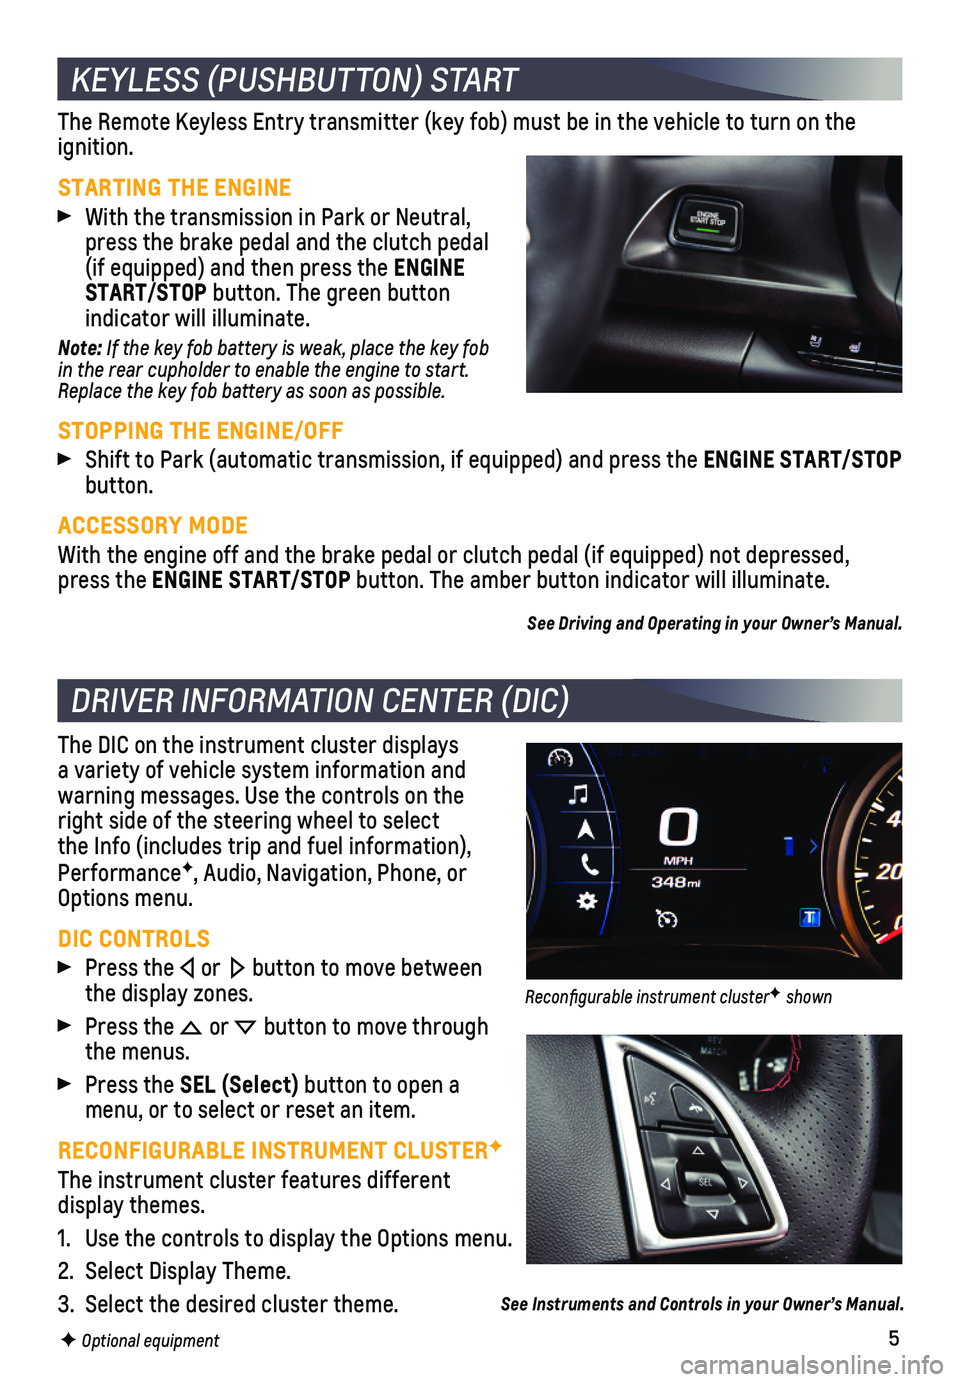
STARTING THE ENGINE
With the transmission in Park or Neutral, press the brake pedal and the clutch pedal (if equipped) and then press the ENGINE START/STOP button. The green button
indicator will illuminate.
Note: If the key fob battery is weak, place the key fob in the rear cupholder to enable the engine to start. Replace the key fob battery as soon as possible.
STOPPING THE ENGINE/OFF
Shift to Park (automatic transmission, if equipped) and press the ENGINE START/STOP button.
ACCESSORY MODE
With the engine off and the brake pedal or clutch pedal (if equipped) \
not depressed, press the ENGINE START/STOP button. The amber button indicator will illuminate.
See Driving and Operating in your Owner’s Manual.
The DIC on the instrument cluster displays a variety of vehicle system information and
warning messages. Use the controls on the right side of the steering wheel to select the Info (includes trip and fuel information), PerformanceF, Audio, Navigation, Phone, or Options menu.
DIC CONTROLS
Press the or button to move between the display zones.
Press the or button to move through the menus.
Press the SEL (Select) button to open a menu, or to select or reset an item.
RECONFIGURABLE INSTRUMENT CLUSTERF
The instrument cluster features different display themes.
1. Use the controls to display the Options menu.
2. Select Display Theme.
3. Select the desired cluster theme.
KEYLESS (PUSHBUTTON) START
DRIVER INFORMATION CENTER (DIC)
F Optional equipment
See Instruments and Controls in your Owner’s Manual.
Reconfigurable instrument clusterF shown
Page 11 of 16

11
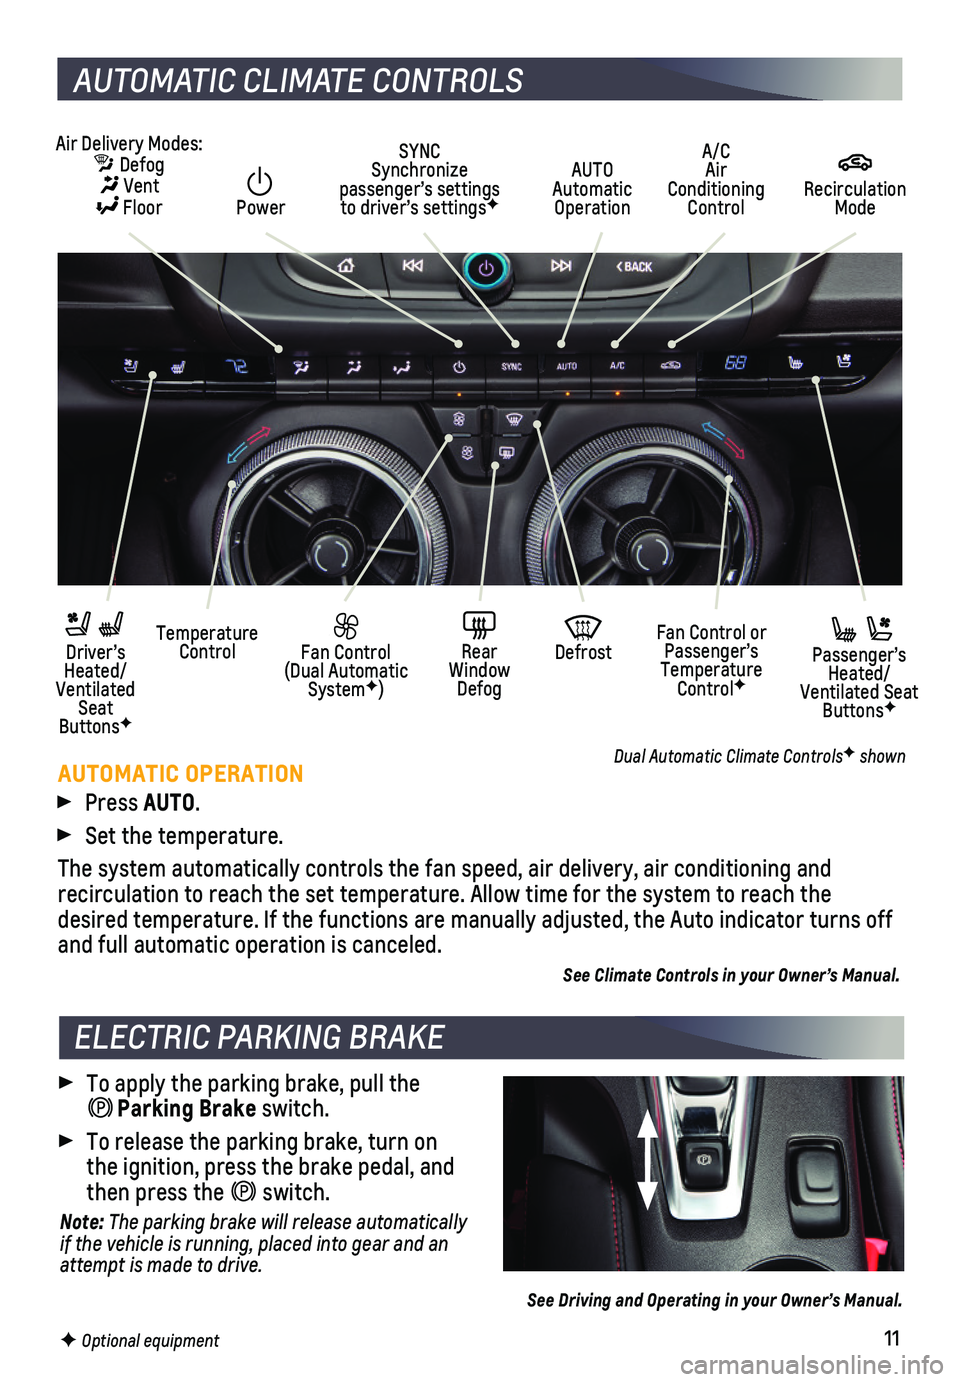
AUTOMATIC CLIMATE CONTROLS
F Optional equipment
Air Delivery Modes: Defog Vent Floor
AUTO Automatic Operation
A/C Air Conditioning Control
Recirculation Mode
Temperature Control Driver’s Heated/Ventilated Seat ButtonsF
Passenger’s Heated/Ventilated Seat ButtonsF
Fan Control (Dual Automatic SystemF)
Fan Control or Passenger’s Temperature ControlF
Rear Window Defog
Defrost
SYNC Synchronize passenger’s settings to driver’s settingsF Power
AUTOMATIC OPERATION
Press AUTO.
Set the temperature.
The system automatically controls the fan speed, air delivery, air condi\
tioning and recirculation to reach the set temperature. Allow time for the system to\
reach the desired temperature. If the functions are manually adjusted, the Auto in\
dicator turns off and full automatic operation is canceled.
See Climate Controls in your Owner’s Manual.
Dual Automatic Climate ControlsF shown
To apply the parking brake, pull the Parking Brake switch.
To release the parking brake, turn on the ignition, press the brake pedal, and then press the switch.
Note: The parking brake will release automatically if the vehicle is running, placed into gear and an attempt is made to drive.
See Driving and Operating in your Owner’s Manual.
ELECTRIC PARKING BRAKE
Page 12 of 16

12
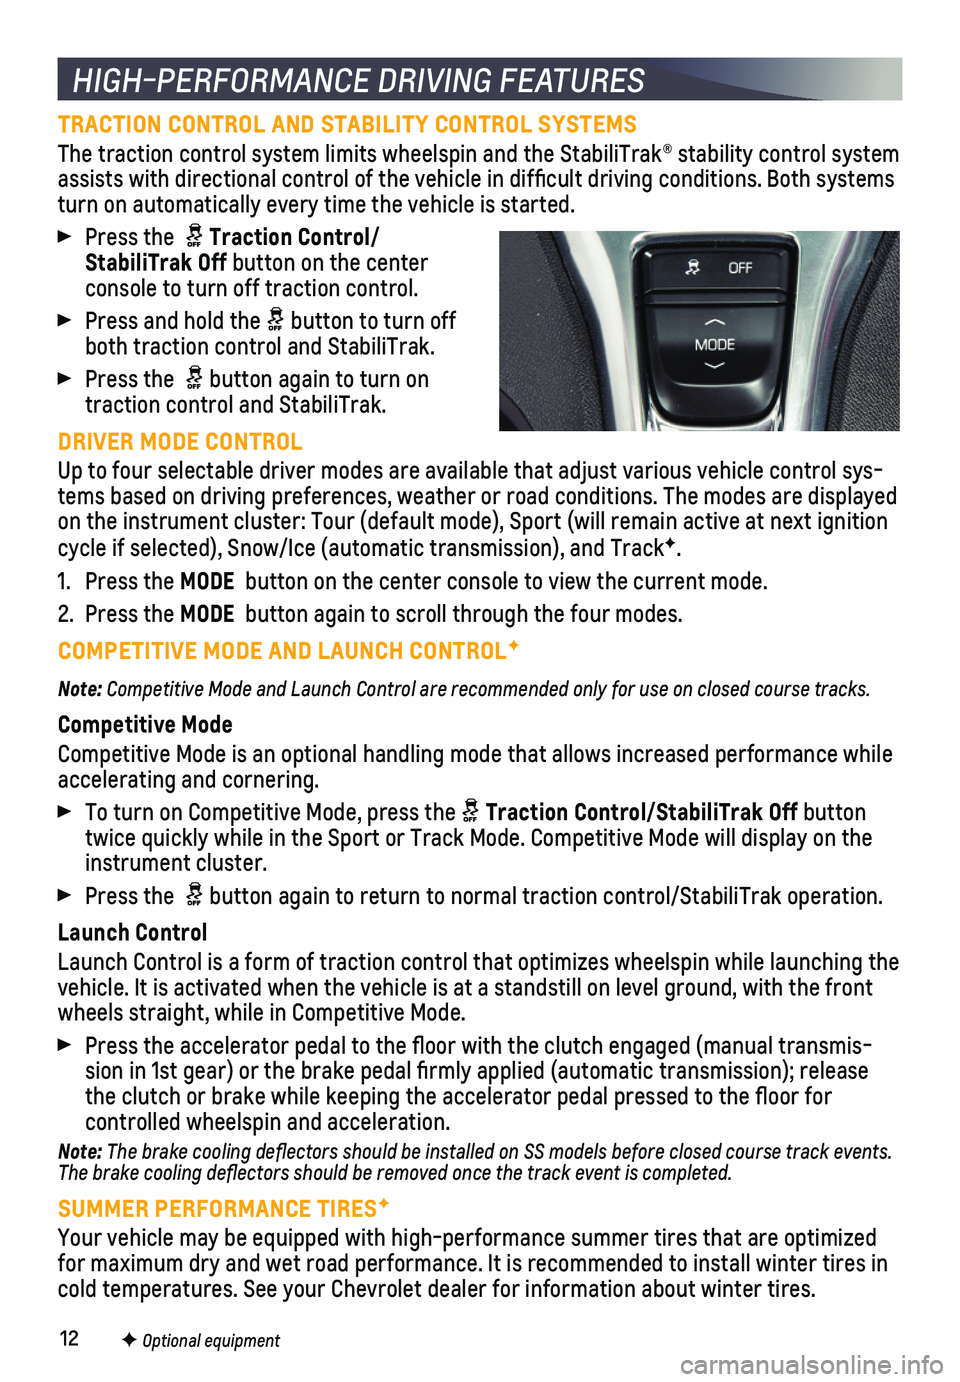
TRACTION CONTROL AND STABILITY CONTROL SYSTEMS
The traction control system limits wheelspin and the StabiliTrak® sta\
bility control system assists with directional control of the vehicle in difficult driving c\
onditions. Both systems turn on automatically every time the vehicle is started.
Press the Traction Control/StabiliTrak Off button on the center console to turn off traction control.
Press and hold the button to turn off both traction control and StabiliTrak.
Press the button again to turn on traction control and StabiliTrak.
DRIVER MODE CONTROL
Up to four selectable driver modes are available that adjust various veh\
icle control sys-tems based on driving preferences, weather or road conditions. The modes\
are displayed on the instrument cluster: Tour (default mode), Sport (will remain ac\
tive at next ignition cycle if selected), Snow/Ice (automatic transmission), and TrackF.
1. Press the MODE button on the center console to view the current mode.
2. Press the MODE button again to scroll through the four modes.
COMPETITIVE MODE AND LAUNCH CONTROLF
Note: Competitive Mode and Launch Control are recommended only for use on closed course tracks.
Competitive Mode
Competitive Mode is an optional handling mode that allows increased perf\
ormance while
accelerating and cornering.
To turn on Competitive Mode, press the Traction Control/StabiliTrak Off button twice quickly while in the Sport or Track Mode. Competitive Mode will di\
splay on the instrument cluster.
Press the button again to return to normal traction control/StabiliTrak operation\
.
Launch Control
Launch Control is a form of traction control that optimizes wheelspin wh\
ile launching the vehicle. It is activated when the vehicle is at a standstill on level gr\
ound, with the front wheels straight, while in Competitive Mode.
Press the accelerator pedal to the floor with the clutch engaged (man\
ual transmis-sion in 1st gear) or the brake pedal firmly applied (automatic trans\
mission); release the clutch or brake while keeping the accelerator pedal pressed to the fl\
oor for
controlled wheelspin and acceleration.
Note: The brake cooling deflectors should be installed on SS models before closed course track events. The brake cooling deflectors should be removed once the track event is\
completed.
SUMMER PERFORMANCE TIRESF
Your vehicle may be equipped with high-performance summer tires that are\
optimized for maximum dry and wet road performance. It is recommended to install w\
inter tires in cold temperatures. See your Chevrolet dealer for information about winte\
r tires.
HIGH-PERFORMANCE DRIVING FEATURES
F Optional equipment
Page 13 of 16

13
AUTOMATIC TRANSMISSION PERFORMANCE
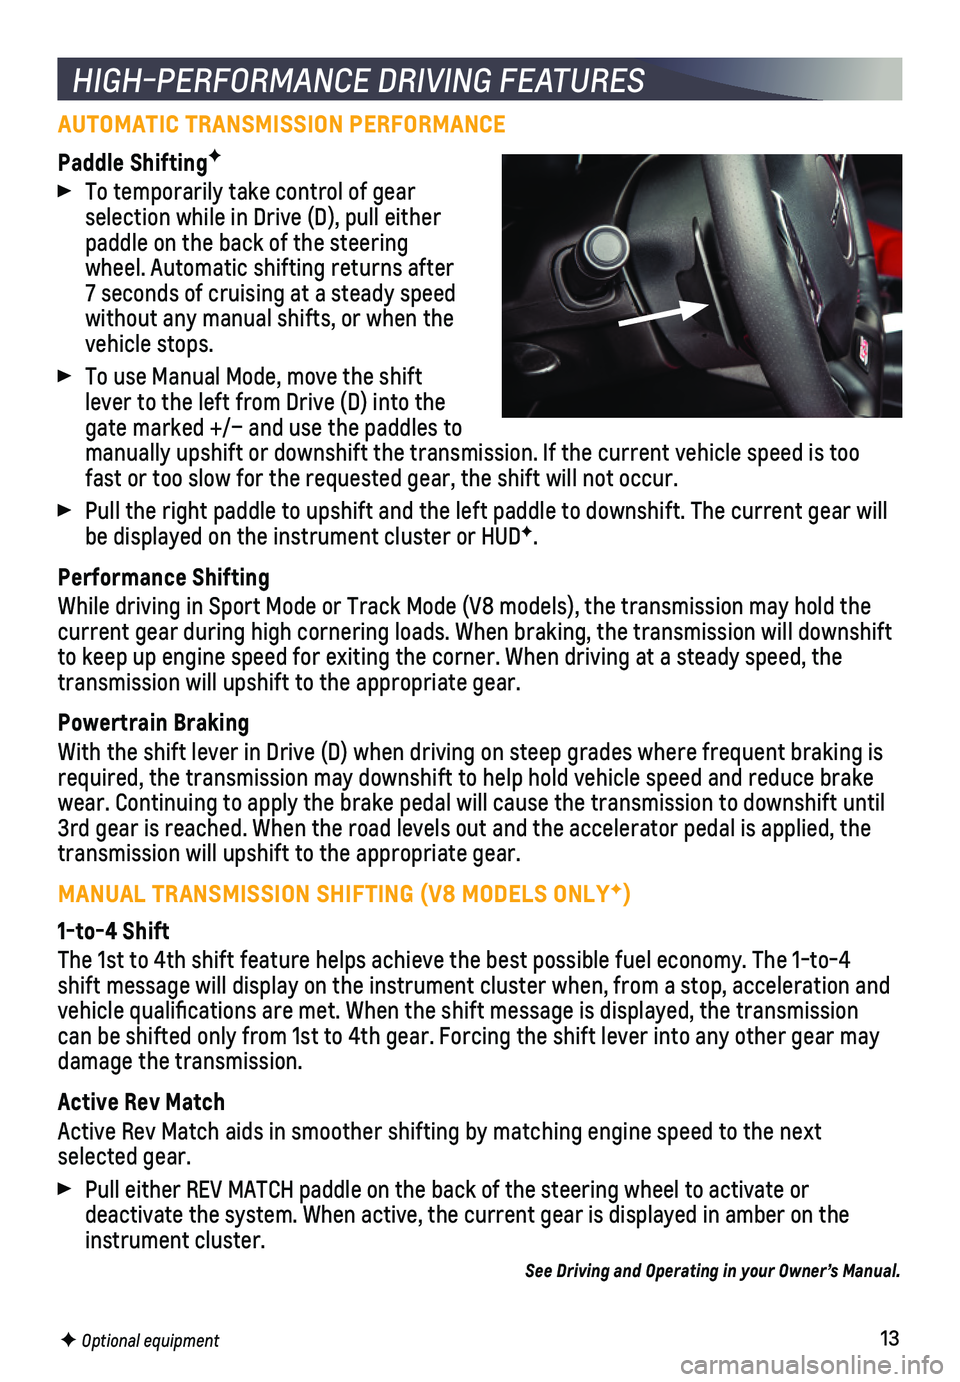
Paddle ShiftingF
To temporarily take control of gear selection while in Drive (D), pull either paddle on the back of the steering wheel. Automatic shifting returns after 7 seconds of cruising at a steady speed without any manual shifts, or when the vehicle stops.
To use Manual Mode, move the shift lever to the left from Drive (D) into the gate marked +/– and use the paddles to manually upshift or downshift the transmission. If the current vehicle s\
peed is too fast or too slow for the requested gear, the shift will not occur.
Pull the right paddle to upshift and the left paddle to downshift. The c\
urrent gear will be displayed on the instrument cluster or HUDF.
Performance Shifting
While driving in Sport Mode or Track Mode (V8 models), the transmissio\
n may hold the current gear during high cornering loads. When braking, the transmission\
will downshift to keep up engine speed for exiting the corner. When driving at a steady\
speed, the transmission will upshift to the appropriate gear.
Powertrain Braking
With the shift lever in Drive (D) when driving on steep grades where f\
requent braking is required, the transmission may downshift to help hold vehicle speed and \
reduce brake wear. Continuing to apply the brake pedal will cause the transmission to\
downshift until 3rd gear is reached. When the road levels out and the accelerator pedal \
is applied, the transmission will upshift to the appropriate gear.
MANUAL TRANSMISSION SHIFTING (V8 MODELS ONLYF)
1-to-4 Shift
The 1st to 4th shift feature helps achieve the best possible fuel econom\
y. The 1-to-4 shift message will display on the instrument cluster when, from a stop, \
acceleration and vehicle qualifications are met. When the shift message is displayed, t\
he transmission can be shifted only from 1st to 4th gear. Forcing the shift lever into a\
ny other gear may
damage the transmission.
Active Rev Match
Active Rev Match aids in smoother shifting by matching engine speed to t\
he next selected gear.
Pull either REV MATCH paddle on the back of the steering wheel to activa\
te or
deactivate the system. When active, the current gear is displayed in amb\
er on the instrument cluster.
See Driving and Operating in your Owner’s Manual.
HIGH-PERFORMANCE DRIVING FEATURES
F Optional equipment