2021 AUDI Q2 car stand
[x] Cancel search: car standPage 285 of 364

Airbag system
Airbag system
Description of airbag
system
General notes on airbag system
The airbag is an integral part of the car's passive
safety system.
In conjunction with the three-point seat belts,
the airbag system gives the front occupants
addi
tional protection for the head and chest in the
event of a severe frontal collision.
In a severe side collision the side airbags and the
head-protection airbags reduce the risk of injury
to the occupants
•=>
A-
In addition to their normal function of protecting
the occupants in a collision, the seat belts also
hold them in a position where the airbags can in
flate properly and provide maximum protection.
The airbag system will only work with the
igni
tion on. The airbag system is monitored electron
ically; the airbag warning lamp indicates whether
the system is functioning properly.
The main parts of the airbag system are:
-The electronic monitoring system (control unit
and sensors)
- The two front airbags
- The front side airbags
-The head-protection airbags
- The indicator Lamp
Q
in the instrument cluster
There is a fault in the airbag system if the
warning lamp
- does not come on when the ignition is switched
on.
- does not go out about 4 seconds after the
igni
tion is switched on.
- goes out and then comes on again after the ig
nition is switched on.
- comes on or flickers while the car is moving.
CO
< o rN
iv
rN
t-H
o <
A WARNING
- The airbags are not a substitute for the seat
belts;
they are an integral part of the car's
overall passive safety system. The airbags
can only offer effective protection if the oc
cupants are wearing their seat belts. For
this reason it is very important to wear the
seat belts at all times
^>page
275, Why is it
so important to use seat belts?.
The seat belts and airbags can only provide
maximum protection if the occupants are
seated correctly
^>page
58, Front seats.
•
If you do not wear a seat belt, if you lean
forward,
or are not seated correctly while
the vehicle is in motion, you are at greater
risk of injury should the airbag system be
triggered in an accident.
Components of the airbag system are loca
ted in various parts of the vehicLe. If repairs
to other vehicle components make it neces
sary to perform work on the airbag system
or to remove or install parts of the airbag
system,
this may cause damage to the air-
bag system. As a result, the airbags may not
inflate correctly or may not be triggered at
all in an accident situation. For this reason,
you should always have the work carried out
by a qualified workshop.
If a fault should occur in the airbag system,
have the system checked immediately by a
qualified workshop. Otherwise the system
may fail to trigger in an accident.
Do not attempt to modify components of
the airbag system in
anyway.
Never make any alterations to the front
bumper
or
the body.
Do not remove the front seats.
The airbag system can only be activated
once;
if the airbag has been triggered, the
system must be replaced. Should the airbag
system or airbag modules have to be re
placed,
the qualified workshop carrying out
the replacement will document all details.
•
If any repair work is required
or
the airbag
and restraint systems have to be replaced,
have the work carried out by your authorised
Audi dealer or a qualified workshop which
adheres to the Audi factory standards. This
will minimise the risk of injury.
If you sell the vehicle, remember to pass on
the complete Service Wallet to the new
owner. If any of the airbags have been
281
Page 297 of 364

Checking and topping up fluids
Preparations
Applies to: vehicles with selective catalytic reduction
CO
<
O
rN
iv
rN
i—i
00
Fig.
241 Vehicle as seen from the rear right: Unscrewing
the AdBlue cap
The AdBlue filler neck is located immediately be
side the diesel filler neck. Add at least the
amount of AdBlue displayed in the instrument
cluster. If
you
do not refill this amount of
fluid,
the system may not detect that the tank has
been refilled and it may not be possible to restart
the engine. You can refill with a maximum of 12
litres.
Important: A message in the instrument cluster
display informs you if
you
need to refill AdBlue.
•
Park the vehicle on a level surface.
•
Switch off the ignition.
• Open the tank flap
<^>page
290.
•
Unscrew the cap on the filler neck
anti-clock
wise
^>Fig.
241.
*•
Refill AdBlue from a filler nozzle
^>page
293,
canister
^>page
294 or bottle
^>page
294.
A WARNING
AdBlue can cause irritation to the
skin,
eyes,
and respiratory organs. Wash thoroughly with
clean water should you come into contact
with this
fluid.
Seek medical assistance if nee
ded.
© CAUTION
- Use only
AdBLue
that complies with the ISO
22241-1 standard. Do not mix AdBlue with
additives and do not dilute it with water.
- AdBlue must not be added to the diesel
tank, and diesel must not be added to the
AdBlue tank. Never start the engine if you
fill up with the wrong type of
fuel,
as this
could damage the tank system and the en
gine.
Obtain professional assistance.
-AdBlue attacks surfaces such as paintwork,
plastic veneer and carpets. Remove spilt
flu
id as soon as possible with a damp cloth and
plenty of water. If the AdBlue has already
solidified,
use warm water and a sponge.
Residues of AdBlue solidify after
a
while if
they are not removed and can damage the
affected surface.
- Do not keep refill bottles or canisters in the
vehicle, as AdBlue can leak and damage the
vehicle interior.
- Keep AdBlue away from clothing. Wash
thoroughly with clean water should you
come into contact with this
fluid.
\J
Note
Please follow the AdBlue manufacturer's in
structions for storage and use.
Refilling AdBlue from a filler nozzle
Applies to: vehicles with selective catalytic reduction
•
Open the tank flap
^>page
290.
*•
Unscrew the cap on the filler neck
anti-clock
wise
^>page
293, Fig. 241.
*•
Fill up with AdBlue until the first time the filler
nozzle cuts off the supply
•=>(]}.
•
Put the tank cap back on
opage
294, After re
filling.
CAUTION
- The handle of the filler nozzle must point
downwards when filling the tank. Otherwise
the filler nozzle will not cut off the supply
automatically
^0
in Preparations on
page 293.
- You should stop refilling the first time the
filler nozzle automatically cuts off the sup
ply. Otherwise the level of AdBlue in the
tank may be too high and AdBlue could
overflow
<=>©
in Preparations on page 293.
293
Page 303 of 364
Checking and topping up fluids
CO
<
O
rN
iv
rN
i—i
o <
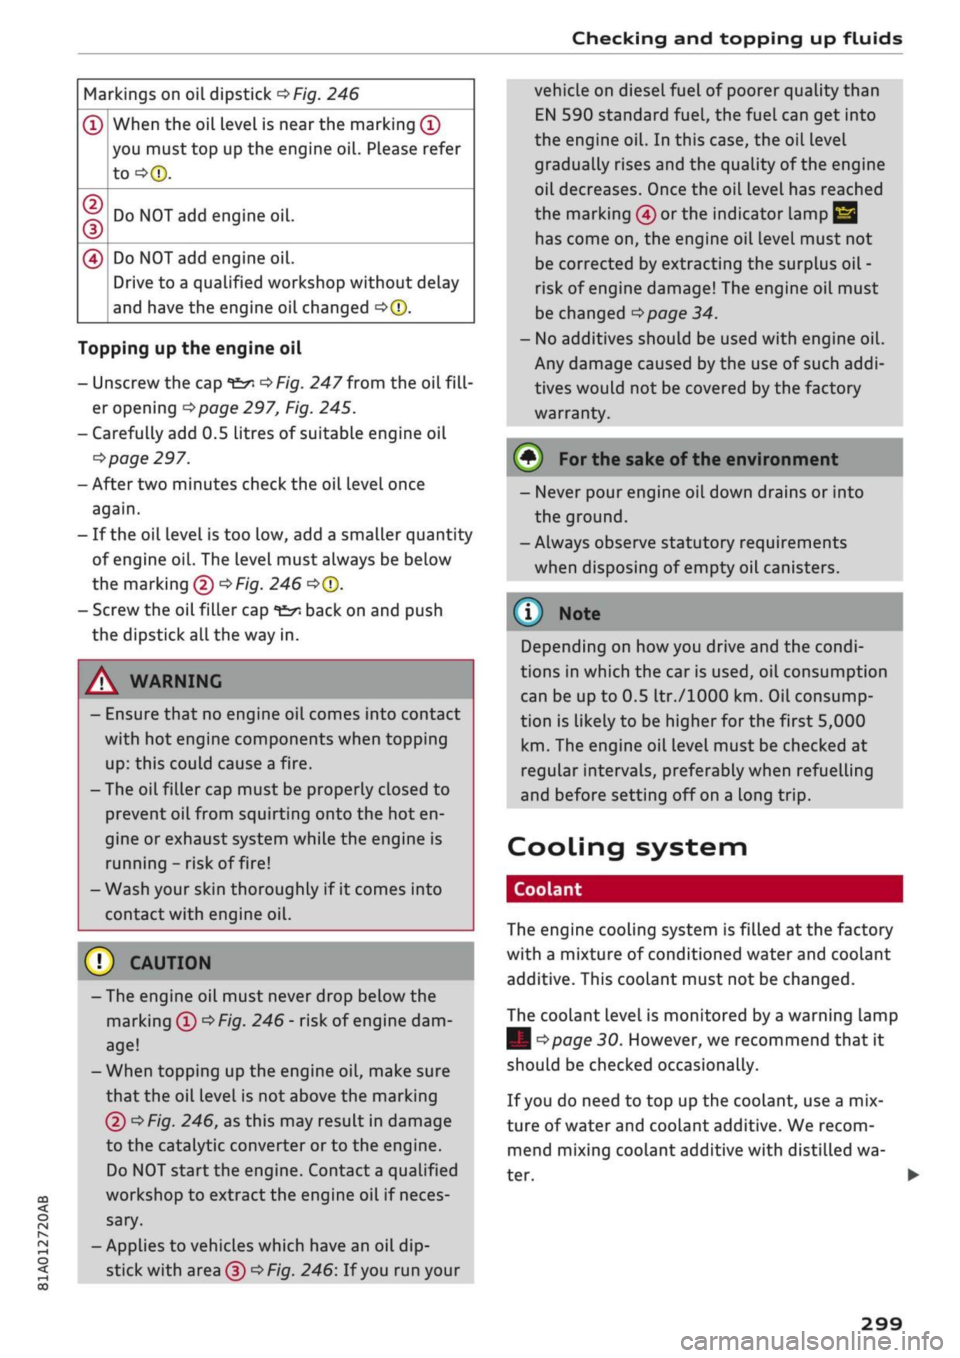
Markings on oil dipstick
^>Fig.
246
®
CD
(D
0
When the oil level is near the marking
(Î)
you must top up the engine oil. Please refer
to-=>®.
Do NOT add engine oil.
Do NOT add engine oil.
Drive to a qualified workshop without delay
and have the engine oil changed
•=>©.
Topping up the engine oil
- Unscrew the cap
"fc^
^>Fig.
247 from the
oilfill
er opening
^>page
297, Fig. 245.
-Carefully add 0.5 Litres of suitable engine oil
^>
page 297.
- After two minutes check the oil level once
again.
- If the oil level is too low, add a smaller quantity
of engine oil. The level must always be below
the marking (5)
<^Fig.
246
<=>©.
- Screw the oil filler cap
*£/;
back on and push
the dipstick all the way in.
A WARNING
- Ensure that no engine oil comes into contact
with hot engine components when topping
up:
this could cause a fire.
- The oil filler cap must be properly closed to
prevent oil from squirting onto the hot en
gine or exhaust system while the engine is
running - risk of fire!
- Wash your skin thoroughly if it comes into
contact with engine oil.
- The engine oil must never drop below the
marking®
^>Fig.
246- risk of engine dam
age!
- When topping up the engine oil, make sure
that the oil level is not above the marking
@
^Fig.
246, as this may result in damage
to the catalytic converter or to the engine.
Do NOT start the engine. Contact a qualified
workshop to extract the engine oil if neces
sary.
- Applies to vehicles which have an oil
dip
stick with area
(3)^
Fig. 246: If you run your
vehicle on diesel fuel of poorer quality than
EN 590 standard
fuel,
the fuel can get into
the engine oil. In this case, the oil level
gradually rises and the quality of the engine
oil decreases. Once the oil level has reached
the marking
@
or the indicator lamp
E
has come on, the engine oil level must not
be corrected by extracting the surplus oil -
risk
of engine damage! The engine oil must
be changed
^>page
34.
- No additives should be used with engine oil.
Any damage caused by the use of such
addi
tives would not be covered by the factory
warranty.
© For the sake of the environmen
- Never pour engine oil down drains or into
the ground.
-Always observe statutory requirements
when disposing of empty oil canisters.
© Note
Depending on
how
you drive and the condi
tions in which the car is used, oil consumption
can be up to 0.5
Itr./lOOO
km. Oil consump
tion is likely to be higher for the first 5,000
km.
The engine oil Level must be checked at
regular intervals, preferably when refuelling
and before setting off on a long trip.
Cooling system
Coolant
The engine cooling system is filled at the factory
with a mixture of conditioned water and coolant
additive. This coolant must not be changed.
The coolant level is monitored by a warning lamp
|
<^page
30. However, we recommend that it
should be checked occasionally.
If you do need to top up the coolant, use a mix
ture of water and coolant additive. We recom
mend mixing coolant additive with distilled wa
ter.
299
Page 306 of 364

Checking and topping up fluids
the reservoir in certain circumstances and
cause damage to the vehicle.
- Brake fluid must not be allowed to come in
to contact with the vehicle's body, other
wise it will attack the paintwork.
©
For the sake of the environment
1?
Batteries contain toxic substances including
sulphuric acid and
lead.
PLease contact a
qualified workshop if
you
have any questions.
Battery
General warnings for batteries
Because of the complexity of the power supply,
any battery work, such as disconnection, replace
ment, etc. must be carried out by
a
qualified
workshop
^A-
The term "vehicle battery" refers to the 12 Volt
battery in your vehicle.
Explanation of warnings on vehicle battery:
m
Wear safety glasses!
Battery acid is extremely corrosive. Wear
protective gloves and safety glasses.
A
Keep open flames, sparks, uncovered
Lights and lit cigarettes away from the
battery!
A highly explosive mixture of gases may
~\
be given off when the battery is under
charge!
Keep children away from batteries and
battery
acid.
A WARNING
Any work on the batteries and electrical sys
tem in your vehicLe entails a risk of injury and
chemical burns in addition to danger of
acci
dent or fire. For this reason, you must have
the work carried out by a qualified workshop.
©
CA UTION
If the car is left standing for long periods,
protect the battery from frost. The battery
will be damaged irreparably if it is allowed to
freeze
^>page
303, Charging the vehicle
bat
tery.
Vehicle battery
The
term "vehicle battery" refers to the 12 Volt
battery in your vehicle.
If the vehicle is not used for long periods
If
you
do not drive your vehicle for a period of
several days or weeks, the power management
will gradually shut off the on-board systems one
by one, or reduce the amount of current they are
using.
This limits the amount of power consumed
and helps to ensure reliable starting even after a
long period
^>page
149. Certain convenience fea
tures,
such as interior lighting or electric seat ad
justment, may not be available. These functions
will be restored when you switch on the ignition
and start the engine.
Even though some systems are deactivated auto
matically, certain electrical equipment continues
to draw current even when the ignition is off. If
the vehicLe is left standing for long periods, this
can result in total battery discharge. If the
vehi
cle battery is allowed to discharge completely, an
internal
chemicaL
reaction damages the battery
irreparably. To avoid this, the vehicle battery
should be recharged at Least once a month
^>page
303. PLease contact a qualified workshop
if
you
have any questions.
Winter conditions
Cold weather is very hard on the vehicle battery.
The starting capacity may be reduced as a result.
For this reason, you should have the vehicle bat
tery checked by
a
qualified workshop before the
start of winter.
302
Page 310 of 364

Wheels
DOT ...2216...
means, for example, that the tyre was produced
in the 22nd week of 2016.
Audi Genuine Tyres
Audi Genuine Tyres with the marking "AO" are
specially matched to your Audi. When used prop
erly, these tyres meet the highest standards in
safety and handling. Your specialist retailer will
be glad to provide more information.
Tyre wear / damage
A
WARNING
- Use only tyre/rim combinations and match
ing wheel bolts approved by Audi. Otherwise
damage to the vehicLe and an accident could
result.
- For technical reasons, it is not possible to
use wheels from other vehicles. In certain
cases, it is not even possible to use wheels
from another vehicle of the same model.
- It is very important to ensure that the tyres
you have chosen have adequate clearance.
When selecting replacement tyres, do not
rely entirely on the nominal tyre size
marked on the tyre; with some makes of
tyre the effective tyre size can differ signifi
cantly from the nominal dimensions, even
though the tyres have the same size desig
nation.
Inadequate tyre clearance can result
in damage to the tyres or the vehicle, caus
ing a serious safety risk.
- Avoid running the car on tyres that are more
than 6 years old. If
you
have no alternative,
you should drive slowly and with extra care
at all times.
- The use of run-flat tyres on your vehicle is
NOT authorised! Unauthorised use can cause
an accident or damage your vehicLe.
- If wheel trims are fitted after the car is pur
chased,
ensure that there is an adequate
flow of air for cooling the brakes - risk of ac
cident!
Fig.
252 Tyre tread: Tread wear indicators
Tyre wear
Inspect the tyres regularly for damage.
- The wear on under or over-inflated tyres is
sig
nificantly higher.
- Fast cornering, heavy acceleration and hard
braking all increase tyre wear.
- If
you
notice excessive tyre wear, have the
wheel alignment checked by a qualified work
shop.
- Have your tyres rebalanced if steering wheel vi
brations indicate an imbalance. Otherwise, the
tyres and other parts of the vehicLe may wear
faster.
Tread wear indicators
The original tyres on your vehicle have 1.6 mm
high tread wear indicators
^>Fig.
252 running
across the tread at regular intervals. The letters
"TWI"
or triangles on the sidewall indicate the
positions of the tread wear indicators.
The minimum tread
depth1)
is reached
at
the lat
est when the tread is worn down to the tread
wear indicators. Replace the tyres with new ones
Changing wheels round
Wheels should be changed round regularly to en
sure that the wear is equal on all tyres. Fit the
wheels from the rear axle on the front axle and
vice-versa. All the tyres will then last for about
the same time.
x)
Please observe the applicable regulations in the country in
which you are travelling.
306
Page 313 of 364

Wheels
CO
< o rN
iv
rN
i—i
o < 00
All-weather tyres can also be used instead of
winter tyres. Please note that winter tyres
with the
A
symbol are required by law during
the winter season in some countries.
Snow chains
Snow chains will improve braking ability as well
as traction in winter conditions.
• Snow chains can be used on the front wheels
only. This also applies to vehicles with four-
wheel drive*.
•
Check that the snow chains are correctly seated
after driving for
a
few yards; follow the instruc
tions given by the manufacturer.
•
Keep your speed below 50 km/h. Please ob
serve the applicable local regulations.
Only use snow chains with fine-pitch links. The
links must not protrude more than 13.5 mm
from the tyres (including tensioner).
You must remove the snow chains on roads which
are free of snow; otherwise the vehicLe handling
may be impaired and the tyres may be damaged.
For technical reasons snow chains may only be
used on tyres with certain wheel rim/tyre combi
nations.
Rim size
6.0]xl6 (steel)
Rim offset Tyre size
43 mm 205/60 R16
A WARNING
UnsuitabLe
or incorrectly mounted snow
chains can cause you to lose control of the ve
hicLe-
risk
of accident!
© CAUTION
Snow chains can damage the rim/hubcap* if
they make direct contact with it. Remove the
hubcaps* beforehand. Use snow chains which
have a protective coating.
© Note
When driving with snow chains, it may help to
switch on off-road mode
^page
146.
Low-profile tyres
Applies to: vehicles with low-profile tyres
Your vehicLe is fitted with low-profile tyres* as
standard equipment. Low-profile tyres have a
lower sidewall and provide a wider tread surface
and rim diameter than other wheel/tyre combi
nations. This makes the car's handling more
agile.
However, the ride may be Less comfortable
on poor-quality roads and tracks, and rolling
noise may be louder.
Low-profile tyres can be damaged more quickly
than standard tyres, for example by heavy jolts,
potholes, manhole covers, speed humps and
kerbs.
It is therefore particularly important to
ensure that they are inflated to the correct pres
sure
o
page 307.
Drive with particular care on poor-quality roads
to ensure that you do not damage the rims and
tyres.
Make sure to check your wheels regularly (every
3,000 km) for damage such as blisters/tears on
the tyre sidewalls or deformations/cracks on the
rims.
After a heavy jolt, or if any damage occurs, you
should have the rims and tyres checked and if
necessary replaced by
a
qualified workshop.
Tyre wear occurs more quickly on low-profile
tyres than on standard tyres.
Summer tyres are not suitable for cold condi
tions,
snow or ice. Use winter or all-season tyres
when driving in these conditions
^>page
308.
Tyre pressure loss
indicator
Tyre pressure loss indicator lamp
Applies to: vehicles with tyre pressure loss indicator
The
tyre pressure loss indicator in the instrument
cluster informs the driver if the tyre pressure is
too low or a system malfunction has occurred.
The tyre pressure loss indicator makes use of the
ABS sensors to compare the rolling circumfer
ence and the vibration of the tyres. If changes in
the inflation pressure are detected on one or •
309
Page 327 of 364

Mobility
A WARNING
CO
rN
IV
rN
•-i
00
- Make sure the jack* is stable. If the ground
underneath the jack* is slippery or soft, the
jack can slip or sink in - risk of injury!
- Use only the jack* supplied with your vehicle
to raise the vehicle. If
you
use
a
jack from a
different vehicle, your vehicle may slip off
the
jack - risk of injury!
- Apply the jack* only at the jacking points lo
cated behind the markings on the door sill
and align it properly. Otherwise there is a
risk of injury since
the
jack* can slip off
sud
denly if it is not properly engaged.
-The height of the parked vehicle can change
as a result of variations in loading.
- Never start the engine when the vehicle is
on the jack - risk of accident!
- If work has to be done under the vehicle, en
sure that it is
safely
supported on suitable
stands - risk of injury!
© CAUTION
The vehicle must not be lifted up on its sills.
Only apply the jack*
at
the jacking points loca
ted behind the markings on the door
sill.
Oth
erwise your vehicle could be damaged.
Taking off / putting on the wheel
Fig.
264 Wheel: Hexagonal socket for turning wheel bolts
Fig.
265 Wheel: Mounting pin in wheel bolt hole nearest
to the top
Taking off the wheel
• Using the hexagonal socket in the screwdriver
handle (provided in the vehicle's tool kit), un
screw the top wheel bolt and place it on a clean
surface
<=>Fig.
264.
• Screw in the mounting pin (provided in the ve
hicle's tool kit) by hand in place of the wheel
boit*Fig.
265.
• Then unscrew the other wheel bolts.
• Take off the wheel
*(£).
The mounting pin
stays where it is.
Putting on the wheel
When putting on a tyre with directional tread
pattern,
refer to
*page
324.
• Put on the wheel, using the mounting pin to
guide it into place
<=>([).
• Screw in the wheel bolts and tighten them
lightly using the hexagonal socket.
• Then unscrew the mounting pin and tighten the
remaining wheel bolt lightly.
• Carefully lower the car with the jack*.
• Tighten the wheel bolts in diagonal sequence
with the box spanner.
The wheel bolts should be clean and turn easily.
Before putting on the wheel, inspect the condi
tion of the wheel and hub mounting surfaces.
These surfaces must be clean before mounting
the wheel.
A WARNING
Do not use the hexagonal socket in the screw
driver handle to tighten the wheel bolts. It is
323
Page 344 of 364

Accessories
and
modifications
to the
vehicle
Accessories
and
modifi
cations
to the
vehicle
Accessories,
replacement parts
and
repairs
Always
ask
your dealer
or
specialist retailer
for
advice before purchasing accessories
and
re
placement parts.
Your
car is
designed
to
offer
a
high standard
of
active and passive safety. For this reason,
we
rec
ommend that you ask your Audi dealer
for
advice
before fitting accessories
or
replacement parts.
Audi dealers have
the
latest information from
the manufacturer and
can
recommend accesso
ries and replacement parts which
are
suitable
for
your requirements. They can also answer
any
questions you might have regarding official
regu
lations.
We recommend you
to
use only Audi accessories
and Audi Genuine Parts. Audi has tested these
products
for
suitability, reliability and safety.
Audi dealers have
the
necessary experience
and
facilities
to
ensure that
the
parts
are
installed
properly.
Although
the
market
is
constantly scrutinised,
Audi
cannot
judge
or
assume responsibility
for
the reliability, safety and suitability
of
non-genu
ine products
-
even though
in
some instances,
these parts
may
have been approved
by
an
offi
cially recognised technical testing authority
or
accompanied
by
an official approval certificate.
Any retro-fitted equipment which has a direct
ef
fect on
the
vehicle and/or
the
way
it is
driven
(e.g.
cruise control system
or
electronically-con
trolled suspension) must
be
approved
for
use
in
your vehicle and bear
the e
mark
(the
European
Union's approval symbol).
If any additional electrical components are fit
ted which
do not
serve
to
controL
the
vehicLe
it
self
(for
instance a refrigerator box, laptop
or
ventilator
fan,
etc.), these must bear the C€ mark
(manufacturer conformity declaration
in the Eu
ropean Union).
A,
WARNING
Never attach accessories (such
as cup
holders
or telephone brackets)
to the
surfaces cover
ing
the
airbag units
or the
areas around
the
airbags: this could cause injury
if
the airbag
is
triggered.
Modifications
Modifications must always
be
carried
out
accord
ing
to our
specifications.
Unauthorised modifications
to the
electronic
components, software, wiring
or
data transfer
in
the vehicLe may cause malfunctioning. Due
to the
way
the
electronic components
are
linked togeth
er
in
networks, other systems
may be
affected
by
the faults. This can seriously impair safety, lead
to excessive wear
of
components,
and
also inva
lidate
the
type approval
for
your vehicle.
You will appreciate that your Audi dealer cannot
be held liable
for
any damage caused
by
modifi
cations and/or work performed incorrectly.
We recommend that
all
work should
be
per
formed
by
an Audi workshop using Audi Genuine
Parts.
/K
WARNING
- Incorrectly performed modifications
or
oth
er work
on
your vehicLe can lead
to
malfunc
tions and cause accidents.
-
Do not
use an additional
or
replacement
number plate holder other than
the
original
one fitted
at the
front
of
the vehicle.
Radio transmitters
and
business equipment
Transmitters
An external aerial
is
required
in
order
to
operate
radio equipment inside
the
vehicle. The maxi
mum range
of
the equipment can only
be
ach
ieved with
an
external aerial.
Retrofit installations
of
radio transmitters
in the
vehicle
are
subject
to
official approval and can
af
fect
the
type approval
for
your vehicle.
In •
340