2021 Abarth 124 Spider lock
[x] Cancel search: lockPage 207 of 224

Displays the station list (ensemble
and station). Select “Update List”
to update the station list. Select
“Select Ensemble” to select the
ensemble you want to display.
Displays the favorites list. Press
and hold to store the currently
tuned station to the favorites list.
Searches your desired station
from the station list. Tunes to
each station in the station list for
10 seconds. Select again when
your desired station is tuned. If
the station list is not available, it
switches to the station list update
screen. Perform the station list
updating.
Switches the TA mode on and
off.
/Returns to the
previous/goes to the next
station. Touch and hold to
return to the top station in
the previous/next ensemble.
Displays the DAB radio setting
screen.
Displays sound settings to adjust
audio quality level.
SETTINGS
NOTE Depending on the grade and
specification, the screen display may
differ.
Select the
icon on the home screen
to display the Settings screen. Switch
the tab and select the setting item you
want to change.
You can customize settings in the setup
display as follows:
“Display”: refer to “Volume/Display/
Sound controls” paragraph in Radio 7”
supplement;
“Sound”: refer to “Volume/Display/
Sound controls” paragraph in Radio 7”
supplement;
“Clock”: “Adjust Time”, “GPS Sync”,
“Time Format”, “Time Zone Select”,
“Daylight Savings Time”;
“Vehicle”: rain sensing Wiper/Door
Lock/Other;
“Devices”: selectBluetooth®
or
“Network Management”;
“System”: “Tool Tips”, “Language”,
“Temperature”, “Distance”, “Music
Database Update”, “Factory Reset”,
“About (agreements and disclaimers)”,
“About (version Information)”
AUX / USB / iPod MODE
Audio can be heard from the vehicle's
speakers by connecting a commercially
available portable audio unit to the
auxiliary jack. A commercially-available,non-impedance (3.5 Ø) stereo mini plug
lead is required.
In addition, audio can be played from
the vehicle audio device by connecting
a USB device or an iPod to the USB
port fig. 168 (1= USB ports/2=
auxiliary jack).
How to connect USB port / auxiliary
jack
Connecting a device: if there is a
cover on the AUX jack or USB port,
remove the cover. Connect the
connector on the device to the USB
port.
Connecting with a connector lead:if
there is a cover on the AUX jack or USB
port, remove the cover. Connect the
device plug/connector lead to the
auxiliary jack/USB port
16806020700-122-001
205
Page 210 of 224

NAVIGATION
SD CARD
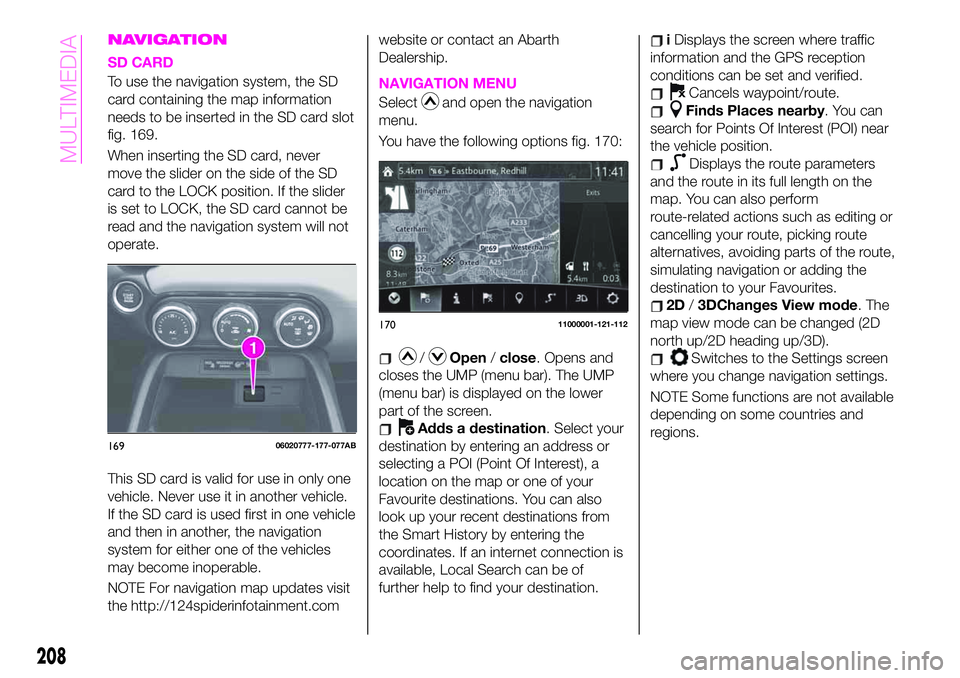
To use the navigation system, the SD
card containing the map information
needs to be inserted in the SD card slot
fig. 169.
When inserting the SD card, never
move the slider on the side of the SD
card to the LOCK position. If the slider
is set to LOCK, the SD card cannot be
read and the navigation system will not
operate.
This SD card is valid for use in only one
vehicle. Never use it in another vehicle.
If the SD card is used first in one vehicle
and then in another, the navigation
system for either one of the vehicles
may become inoperable.
NOTE For navigation map updates visit
the http://124spiderinfotainment.comwebsite or contact an Abarth
Dealership.NAVIGATION MENU
Selectand open the navigation
menu.
You have the following options fig. 170:
/Open/close. Opens and
closes the UMP (menu bar). The UMP
(menu bar) is displayed on the lower
part of the screen.
Adds a destination. Select your
destination by entering an address or
selecting a POI (Point Of Interest), a
location on the map or one of your
Favourite destinations. You can also
look up your recent destinations from
the Smart History by entering the
coordinates. If an internet connection is
available, Local Search can be of
further help to find your destination.
iDisplays the screen where traffic
information and the GPS reception
conditions can be set and verified.
Cancels waypoint/route.
Finds Places nearby. You can
search for Points Of Interest (POI) near
the vehicle position.
Displays the route parameters
and the route in its full length on the
map. You can also perform
route-related actions such as editing or
cancelling your route, picking route
alternatives, avoiding parts of the route,
simulating navigation or adding the
destination to your Favourites.
2D/3DChanges View mode. The
map view mode can be changed (2D
north up/2D heading up/3D).
Switches to the Settings screen
where you change navigation settings.
NOTE Some functions are not available
depending on some countries and
regions.
16906020777-177-077AB
17011000001-121-112
208
MULTIMEDIA
Page 213 of 224

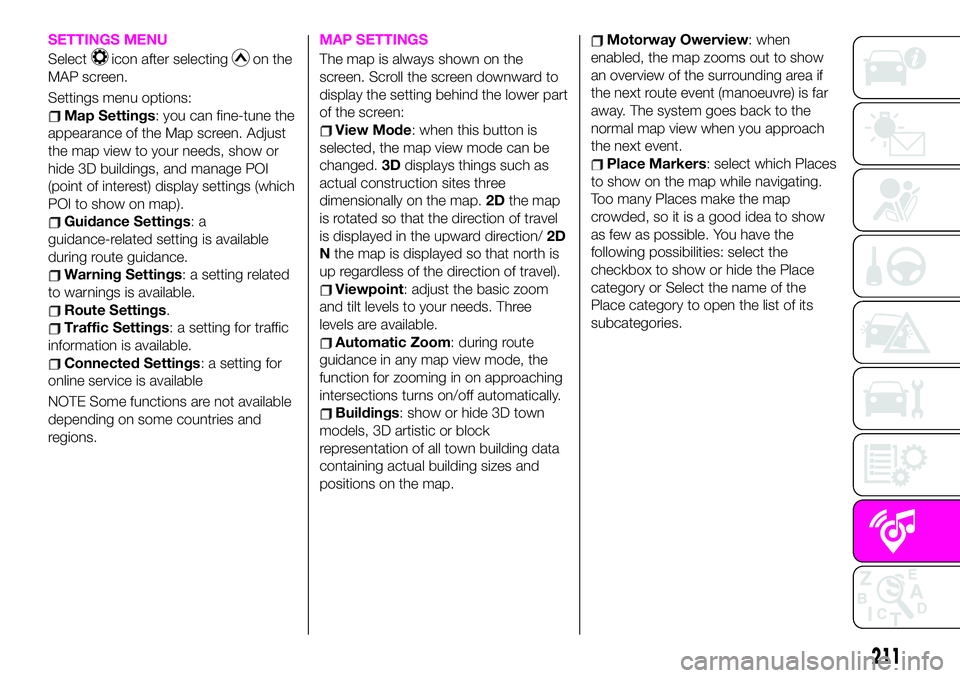
SETTINGS MENU
Selecticon after selectingon the
MAP screen.
Settings menu options:
Map Settings: you can fine-tune the
appearance of the Map screen. Adjust
the map view to your needs, show or
hide 3D buildings, and manage POI
(point of interest) display settings (which
POI to show on map).
Guidance Settings:a
guidance-related setting is available
during route guidance.
Warning Settings: a setting related
to warnings is available.
Route Settings.
Traffic Settings: a setting for traffic
information is available.
Connected Settings: a setting for
online service is available
NOTE Some functions are not available
depending on some countries and
regions.
MAP SETTINGS
The map is always shown on the
screen. Scroll the screen downward to
display the setting behind the lower part
of the screen:
View Mode: when this button is
selected, the map view mode can be
changed.3Ddisplays things such as
actual construction sites three
dimensionally on the map.2Dthe map
is rotated so that the direction of travel
is displayed in the upward direction/2D
Nthe map is displayed so that north is
up regardless of the direction of travel).
Viewpoint: adjust the basic zoom
and tilt levels to your needs. Three
levels are available.
Automatic Zoom: during route
guidance in any map view mode, the
function for zooming in on approaching
intersections turns on/off automatically.
Buildings: show or hide 3D town
models, 3D artistic or block
representation of all town building data
containing actual building sizes and
positions on the map.
Motorway Owerview: when
enabled, the map zooms out to show
an overview of the surrounding area if
the next route event (manoeuvre) is far
away. The system goes back to the
normal map view when you approach
the next event.
Place Markers: select which Places
to show on the map while navigating.
Too many Places make the map
crowded, so it is a good idea to show
as few as possible. You have the
following possibilities: select the
checkbox to show or hide the Place
category or Select the name of the
Place category to open the list of its
subcategories.
211
Page 219 of 224

INDEX
ABS system................73
Accessory socket.............38
Active bonnet................74
Active safety systems...........73
Advanced Keyless Entry System....14
AFS (Adaptive Front Lighting
System)..................27
Attaching the tow hooks........161
Auto-wiper control............29
Automatic climate control system.......................34
Automatic lighting.............25
Automatic transmission.........119
Auxiliary driving systems.........77
Battery (maintenance).........173
Battery charging procedure......176
Battery recharging............176
Bodywork (care and
maintenance).............178
Bonnet....................41
Boot lid...................38
Boot lid (opening).............38
Brake Assist................117
Brake/clutch fluid (level check). . . .173
Checking levels.............171
Child seat installation position.....90
Child-restraint precautions.......86
Child-restraint system suitability
for various seat position.......91Child-restraint system types......89
Climate control system..........31
Coming Home light system.......25
Constant monitoring..........114
Control panel and instruments.....48
Convertible Top (lowering)........42
Convertible Top (Soft Top)........42
Cruise Control..............123
Dashboard..................8
Dead lock device.............16
Dimensions................188
Doors.....................16
Drive selection..............123
Driver Air Bag...............102
DRL (Daytime Running Lights).....24
DSC system................73
Emergency flap opening.......131
Emergency stop signal system. . . .138
Emergency towing............163
Engine...................184
Engine compartment..........171
Engine coolant (level check)......172
Engine oil (level check).........172
Essential information............3
Exterior lights................24
Flash to pass...............25
Fluid capacities..............189
Fluids and lubricants..........190Front fog lights...............25
Fuel consumption and
CO2 emissions............193
Fuel filler cap...............131
Fuse block (engine compartment)......................149
Fuse block (left side of the vehicle)......................152
Fuses (under the bonnet)........148
Fuses (vehicle's left side)........147
Gear lever positions..........119
Gear Shift Indicator............52
Hazard warning lights.........138
Hazard warning lights (control). . . .138
Head restraints...............21
Headlight washer.............30
Headlights..................24
Heated seats................19
Heavy-dute use of the vehicle
(scheduled servicing)........166
High beams.................25
HLA function................80
How the SRS Air bags work......102
How to use this manual..........3
Identification data............183
Ignition switch...............11
Immobilizer system............14
INFO switch.................51
Installing child-restraint systems....95
Interior care................180
Interiors..................180
Page 220 of 224

Internal equipment............38
Jump starting..............159
Jump starting (procedure).......160
Key battery replacement........10
Keyless Entry System...........9
Keys......................9
Lane change signals...........27
Leaving Home Light system.......27
Load limiter (pretensioner)........85
Maintaining the finish.........179
Maintenance monitor...........53
Manual climate control system.....32
Manual transmission..........118
Mechanical Limited Slip
Differential................79
Message indicated on display.....71
Mirrors....................22
Multimedia.................195
Navigation................208
Occupant protection systems.....81
Odometer/Trip meter...........50
Outside mirrors...............22
Owner maintenance precautions . . .165
Paintwork (preserving).........178
Parking...................116
Parking brake...............117
Parking Sensor System.........129
Passenger Air Bag............102Passenger occupant classification
system.................107
Passive Entry................17
Performance...............192
Periodic checks (scheduled
servicing)................166
Power mirrors...............23
Power window lock switch.......37
Power windows..............36
Prescriptions for handling the
vehicle at the end of its life.....194
Pretensioners................85
Push button start positions.......11
Radio 3”.................197
Radio 7”..................202
Read this carefully..............2
Rear camera (ParkView rear
backup camera)...........133
Rear fog lights...............26
Refuelling procedure..........131
Refuelling the vehicle..........131
Replacing a bulb.............139
Replacing a tire..............177
Replacing exterior light bulbs.....142
Replacing fuses.............147
Rims and tires..............185
Rims and tires provided........186
SBA system (Seat Belt Alert)......84
Scheduled servicing plan.......167Seat belt precautions...........82
Seat belt pretensioner and load
limiting systems.............85
Seat Belt pretensioners.........102
Seat belts..................82
Seat belts (fastening/unfastening)}.......................82
Seats.....................19
Seats (manual adjustment).......19
Seats and fabric parts (cleaning) . . .181
Shift-lock override (automatic
gearbox)................120
Shift-lock system (automatic
gearbox)................120
Side Air Bags...............103
Snow chains...............177
Speed limiter...............126
SPORT mode...............123
Starting the engine.........11,116
Steering wheel...............21
Supplementary restraint system
(SRS) - Air bag............100
Symbols....................3
TCS (Traction Control System).....73
Theft deterrent system..........15
Tips, controls and general
information...............196
Tire service kit..............154
Tires rotation (recommendations) . .177
Tool storage................154
Towing the vehicle............161
INDEX