2020 YAMAHA TRICITY 300 ignition
[x] Cancel search: ignitionPage 8 of 114

Table of contentsSafety information ............................ 1-1
Further safe-riding points ............... 1-5
Description ....................................... 2-1
Left view ......................................... 2-1
Right view ....................................... 2-2
Controls and instruments ............... 2-3
Smart key system ........................... 3-1
Smart key system ........................... 3-1
Operating range of the smart key system......................................... 3-2
Handling of the smart key and mechanical keys ......................... 3-3
Smart key ....................................... 3-4
Replacing the smart key battery..... 3-6
Main switch .................................... 3-7
Stan din g assist ................................. 4-1
Standing assist ............................... 4-1
Instrument an d control functions ... 5-1
Indicator lights and warning
lights............................................ 5-1
Multi-function meter unit ................ 5-3
Handlebar switches ........................ 5-8
Front brake lever .......................... 5-10
Brake pedal .................................. 5-10
Rear brake lever ........................... 5-11
Parking brake lever ....................... 5-12
ABS .............................................. 5-12 Traction control system ................ 5-13
Fuel tank cap ................................ 5-15
Fuel ............................................... 5-16
Fuel tank overflow hose ................ 5-18
Catalytic converter ........................ 5-18
Storage compartment ................... 5-18
Adjusting the shock absorber
assemblies ................................. 5-20
Auxiliary DC jack ........................... 5-20
Sidestand ...................................... 5-21
Ignition circuit cut-off system ....... 5-22
For your safety – pre-operation
checks ............................................... 6-1
Operation an d important ri din g
points ................................................. 7-1
Engine break-in ............................... 7-1
Starting the engine .......................... 7-2
Starting off ...................................... 7-3
Acceleration and deceleration ........ 7-3
Braking ............................................ 7-3
Tips for reducing fuel consumption ................................ 7-4
Parking ............................................ 7-4
Perio dic maintenance an d
a d justment ........................................ 8-1
Tool kit ............................................ 8-2
Periodic maintenance charts .......... 8-3 Periodic maintenance chart for the
emission control system ............. 8-3
General maintenance and lubrication chart .......................... 8-4
Removing and installing the
panel............................................ 8-9
Checking the spark plug............... 8-10
Canister ........................................ 8-11
Engine oil and oil filter element..... 8-12
Why Yamalube.............................. 8-14
Final transmission oil .................... 8-14
Coolant ......................................... 8-15
Air filter and V-belt case air filter elements .................................... 8-17
Checking the throttle grip free play ............................................ 8-21
Valve clearance............................. 8-21
Tires .............................................. 8-22
Cast wheels .................................. 8-23
Checking the front brake lever
free play..................................... 8-24
Checking the rear brake lever free play..................................... 8-24
Checking the parking brake ......... 8-25
Checking the front and rear brake pads ................................ 8-25
Checking the brake fluid level ...... 8-26
Changing the brake fluid .............. 8-27
Checking the V-belt ...................... 8-27
Checking and lubricating the cables ........................................ 8-28UBX9E0E0.book Page 1 Monday, January 20, 2020 10:54 AM
Page 47 of 114

Instrument and control functions
5-16
5
WARNING
EWA11092
Make sure that the fuel tank cap is
properly closed after filling fuel.
Leakin g fuel is a fire hazar d.
EAU13213
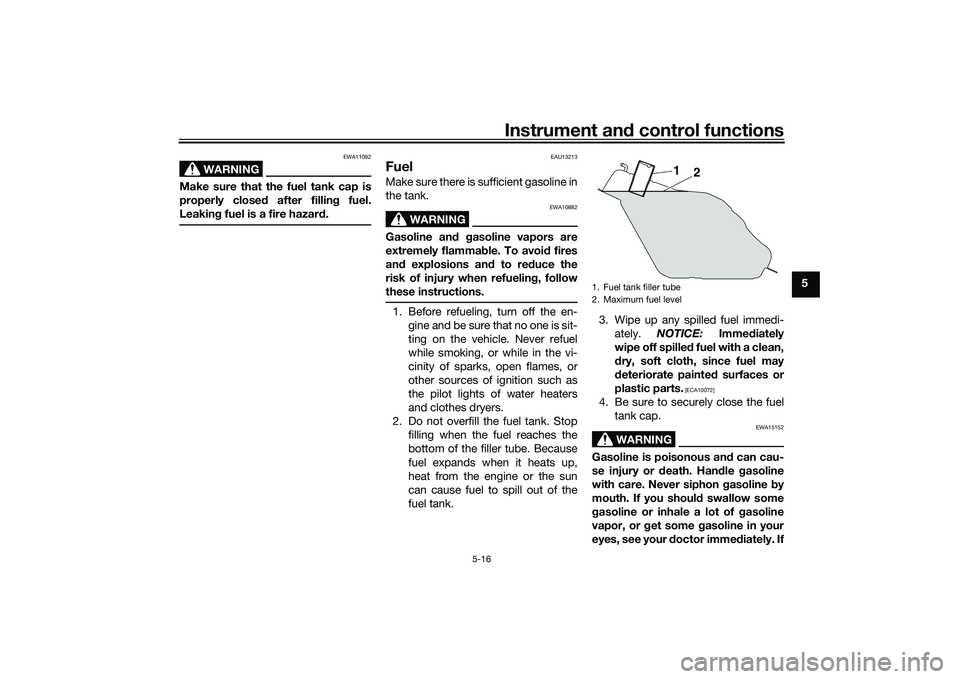
FuelMake sure there is sufficient gasoline in
the tank.
WARNING
EWA10882
Gasoline an d gasoline vapors are
extremely flammab le. To avoid fires
an d explosions an d to re duce the
risk of injury when refueling , follow
these instructions.1. Before refueling, turn off the en- gine and be sure that no one is sit-
ting on the vehicle. Never refuel
while smoking, or while in the vi-
cinity of sparks, open flames, or
other sources of ignition such as
the pilot lights of water heaters
and clothes dryers.
2. Do not overfill the fuel tank. Stop filling when the fuel reaches the
bottom of the filler tube. Because
fuel expands when it heats up,
heat from the engine or the sun
can cause fuel to spill out of the
fuel tank. 3. Wipe up any spilled fuel immedi-
ately. NOTICE: Immediately
wipe off spille d fuel with a clean,
d ry, soft cloth, since fuel may
d eteriorate painte d surfaces or
plastic parts.
[ECA10072]
4. Be sure to securely close the fuel tank cap.
WARNING
EWA15152
Gasoline is poisonous an d can cau-
se injury or death. Han dle gasoline
with care. Never siphon gasoline by
mouth. If you shoul d swallow some
g asoline or inhale a lot of gasoline
vapor, or g et some gasoline in your
eyes, see your d octor immediately. If1. Fuel tank filler tube
2. Maximum fuel level
1
2
UBX9E0E0.book Page 16 Monday, January 20, 2020 10:54 AM
Page 52 of 114

Instrument and control functions
5-21
5 4. Insert the accessory plug into the
auxiliary DC jack.
5. Turn the main switch on, and start the engine. (See page 7-2.)
6. Turn the accessory on.
WARNING
EWA14361
To prevent electrical shock or short-
circuiting , make sure that the cap is
installe d when the auxiliary DC jack
is not bein g use d.
EAU15306
Si destan dThe sidestand is located on the left
side of the frame. Raise the sidestand
or lower it with your foot while holding
the vehicle upright.TIPThe built-in sidestand switch is part of
the ignition circuit cut-off system,
which cuts the ignition in certain situa-
tions. (See the following section for an
explanation of the ignition circuit cut-
off system.)
WARNING
EWA10242
The vehicle must not be ri dden with
the si destan d d own, or if the si de-
stan d cannot b e properly moved up
(or does not stay up), otherwise the
si destan d coul d contact the groun d
an d d istract the operator, resultin g
in a possi ble loss of control.
Yamaha’s ig nition circuit cut-off
system has been desi gne d to assist
the operator in fulfillin g the respon-
si bility of raisin g the si destan d b e-
fore startin g off. Therefore, check this system reg
ularly and have a
Yamaha dealer repair it if it does not
function properly.
UBX9E0E0.book Page 21 Monday, January 20, 2020 10:54 AM
Page 56 of 114

For your safety – pre-operation checks
6-2
6
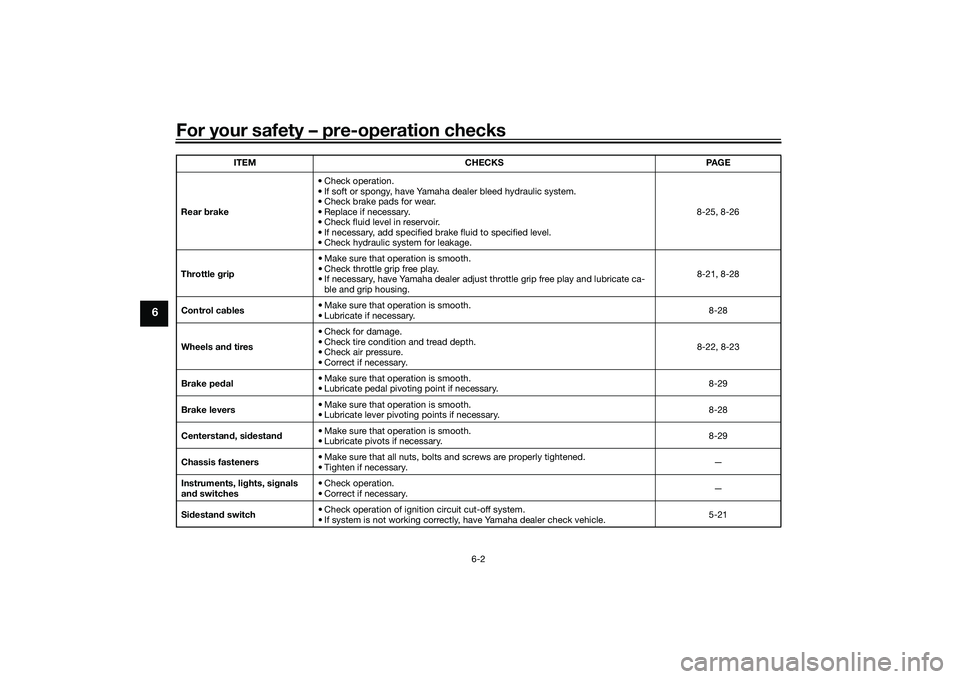
Rear brake • Check operation.
• If soft or spongy, have Yamaha dealer bleed hydraulic system.
• Check brake pads for wear.
• Replace if necessary.
• Check fluid level in reservoir.
• If necessary, add specified brake fluid to specified level.
• Check hydraulic system for leakage. 8-25, 8-26
Throttle g rip • Make sure that operation is smooth.
• Check throttle grip free play.
• If necessary, have Yamaha dealer adjust throttle grip free play and lubricate ca-
ble and grip housing. 8-21, 8-28
Control ca bles • Make sure that operation is smooth.
• Lubricate if necessary. 8-28
Wheels an d tires •Check for damage.
• Check tire condition and tread depth.
• Check air pressure.
• Correct if necessary. 8-22, 8-23
Brake ped al • Make sure that operation is smooth.
• Lubricate pedal pivoting point if necessary.
8-29
Brake levers • Make sure that operation is smooth.
• Lubricate lever pivoting points if necessary.
8-28
Centerstan d, si destan d • Make sure that operation is smooth.
• Lubricate pivots if necessary. 8-29
Chassis fasteners • Make sure that all nuts, bolts and screws are properly tightened.
• Tighten if necessary.
—
Instruments, li ghts, si gnals
an d switches • Check operation.
• Correct if necessary.
—
Si destan d switch • Check operation of ignition circuit cut-off system.
• If system is not working correctly, have Yamaha dealer check vehicle. 5-21
ITEM
CHECKS PAGE
UBX9E0E0.book Page 2 Monday, January 20, 2020 10:54 AM
Page 58 of 114

Operation and important rid ing points
7-2
7
EAU86720
Startin g the eng ineThe ignition circuit cut-off system will
enable starting when the sidestand is
be up.
To start the engine1. Turn the main switch on and set
the engine stop switch to the run
position.
2. Confirm the indicator and warning light(s) come on for a few sec-
onds, and the go off. (See page
5-1.)TIPDo not start the engine if the en-
gine trouble warning light remains
on.
The ABS warning light should
come on and stay on until the ve-
hicle reaches a speed of 10 km/h
(6 mi/h).NOTICE
ECA24110
If a warnin g or in dicator li ght does
not work as d escribed a bove, have a
Yamaha dealer check the vehicle.3. Close the throttle completely. 4. While applying the front or rear
brake, push the start switch.
5. Release the start switch when the engine starts, or after 5 seconds.
Wait 10 seconds before pressing
the switch again to allow battery
voltage to restore.
NOTICE
ECA11043
For maximum en gine life, never ac-
celerate har d when the en gine is
col d!
EAU78221
TIPThis model is equipped with a lean an-
gle sensor to stop the engine in case of
a turnover. In this case, the engine
trouble warning light will come on but
this is not a malfunction. Before re-
starting the engine, turn the main
switch off and then back on to reset the
engine trouble warning light. Failing to
do so will prevent the engine from
starting even though the engine will
crank when pushing the start switch.
UBX9E0E0.book Page 2 Monday, January 20, 2020 10:54 AM
Page 93 of 114
![YAMAHA TRICITY 300 2020 Owners Manual Periodic maintenance an d a djustment
8-33
8
connect the positive lea
d b efore
connectin g the ne gative lea d.
[ECA16842]
4. After installation, make sure that
the battery leads are properly con-
ne YAMAHA TRICITY 300 2020 Owners Manual Periodic maintenance an d a djustment
8-33
8
connect the positive lea
d b efore
connectin g the ne gative lea d.
[ECA16842]
4. After installation, make sure that
the battery leads are properly con-
ne](/manual-img/51/51928/w960_51928-92.png)
Periodic maintenance an d a djustment
8-33
8
connect the positive lea
d b efore
connectin g the ne gative lea d.
[ECA16842]
4. After installation, make sure that
the battery leads are properly con-
nected to the battery terminals.NOTICE
ECA16531
Always keep the b attery charged .
Storin g a dischar ged battery can
cause permanent battery damag e.
EAU89081
Replacin g the fusesThe main fuse and the fuse boxes,
which contain the fuses for the individ-
ual circuits, are located behind panel A.
(See page 8-9.)TIPTo access the main fuse, remove the
starter relay cover as shown.1. Starter relay cover
2. Spare main fuse
3. Main fuse
2 2
3 2
3
1
1. Backup fuse
2. Radiator fan motor fuse
3. Ignition fuse
4. ABS control unit fuse
5. Signaling system fuse
6. Grip warmer fuse
7. Spare fuse
8. Headlight fuse
9. ABS motor fuse
10.ABS solenoid fuse
11.Hazard fuse
12.Auxiliary DC jack fuse
13.Answer back fuse
14.Standing assist battery fuse
15.Standing assist fuse
14157
910111213
7
123465
7
8
UBX9E0E0.book Page 33 Monday, January 20, 2020 10:54 AM
Page 94 of 114

Periodic maintenance an d a djustment
8-34
8 If a fuse is blown, replace it as follows.
1. Turn the main switch off and turn off the electrical circuit in ques-
tion.
2. Remove the blown fuse, and then install a new fuse of the specified
amperage. WARNING! Do not
use a fuse of a hi gher ampera ge
ratin g than recommen ded to
avoi d causin g extensive d am-
a g e to the electrical system an d
possi bly a fire.
[EWA15132]
3. Turn the main switch on and turn
on the electrical circuit in question
to check if the device operates.
4. If the fuse immediately blows again, have a Yamaha dealer
check the electrical system.
Specifie d fuses:
Main fuse:
20.0 A
Grip warmer fuse:
7.5 A
Headlight fuse: 7.5 A
Signaling system fuse: 10.0 A
Ignition fuse:
7.5 A
Radiator fan motor fuse: 7.5 A
Backup fuse: 7.5 A
Hazard fuse:
7.5 A
ABS control unit fuse: 7.5 A
ABS motor fuse: 30.0 A
ABS solenoid fuse:
20.0 A
Answer back fuse: 2.0 A
Auxiliary DC jack fuse: 2.0 A
Standing assist fuse:
7.5 A
Standing assist battery fuse: 20.0 A
UBX9E0E0.book Page 34 Monday, January 20, 2020 10:54 AM
Page 96 of 114

Periodic maintenance an d a djustment
8-36
8
EAU89380
Replacin g the license plate
li g ht bul b1. Remove the license plate light
cover by removing the screws.
2. Remove the license plate light bulb socket (together with the
bulb) by pulling it out. 3. Remove the burnt-out bulb by
pulling it out from the socket.
4. Insert a new bulb into the socket.
5. Install the socket (together with the bulb) by pushing it in.
6. Install the license plate light cover by installing the screws.
EAU60701
Trou bleshootin gAlthough Yamaha vehicles receive a
thorough inspection before shipment
from the factory, trouble may occur
during operation. Any problem in the
fuel, compression, or ignition systems,
for example, can cause poor starting
and loss of power.
The following troubleshooting charts
represent quick and easy procedures
for checking these vital systems your-
self. However, should your vehicle re-
quire any repair, take it to a Yamaha
dealer, whose skilled technicians have
the necessary tools, experience, and
know-how to service the vehicle prop-
erly.
Use only genuine Yamaha replace-
ment parts. Imitation parts may look
like Yamaha parts, but they are often
inferior, have a shorter service life and
can lead to expensive repair bills.
WARNING
EWA15142
When checkin g the fuel system, do
not smoke, an d make sure there are
no open flames or sparks in the ar-
ea, inclu din g pilot li ghts from water
1. License plate light cover
2. Screw
2
1
1. License plate light bulb socket
1. License plate light bulb
1
1
UBX9E0E0.book Page 36 Monday, January 20, 2020 10:54 AM