2020 VOLVO V60 TWIN ENGINE mirror
[x] Cancel search: mirrorPage 110 of 673

||
DISPLAYS AND VOICE CONTROL
* Option/accessory.
108
Function view ‒ vehicle functions that can
be activated or deactivated with one tap. Certain functions, called "trigger func-tions", open windows with settingsoptions. One example is the
Camera. Set-
tings for the head-up display * are also
started from Function view, but adjusted using the right-side steering wheel key-pad.
Home view ‒ the initial view displayed
when the screen is turned on.
App view ‒ shows downloaded apps
(third-party apps) as well as apps for inte- grated functions, such as
FM radio. Tap
an app icon to open that app.
Status bar ‒ current vehicle activities are
shown at the top of the screen. Network and connection information is shown tothe left of the status bar. Media-relatedinformation, the clock and informationabout background activities are shown tothe right.
Top view ‒ pull the tab down to open Top
view. From here, you can access Settings,Owner's manual, Profile and messages
stored in the vehicle. In certain cases, con- textual setting (e.g.
Navigation Settings)
and the contextual Owner's Manual (e.g.
Navigation Manual) can also be accessed
in Top view.
Navigation ‒ takes you to map navigation
with e.g. Sensus Navigation *. Tap the tile
to expand it.
Media ‒ most recently used media-related
apps. Tap the tile to expand it.
Phone ‒ used to access phone-related
functions. Tap the tile to expand it.
Fourth tile ‒ most recently used apps or
vehicle functions not associated with the other tiles. Tap the tile to expand it.
Climate row - information and direct inter- action to set temperature and seat heating for example *. Tap the symbol in the center
of the climate bar to open Climate view and additional setting options.
Related information
Handling the center display (p. 109)
Navigating in the center display's views (p. 112)
Function view in the center display (p. 119)
Apps (p. 460)
Symbols in the center display status bar(p. 121)
Changing settings in the center display'sTop view (p. 129)
Opening contextual setting in the centerdisplay (p. 130)
Owner's Manual in the center display(p. 17)
Media player (p. 479)
Phone (p. 495)
Climate system controls (p. 211)
Turning off and adjusting the volume ofthe center display system sounds(p. 128)
Changing the appearance of the centerdisplay (p. 128)
Changing system language (p. 129)
Changing system units of measurement(p. 129)
Cleaning the center display (p. 619)
Messages in the center display (p. 137)
4
In right-hand drive vehicles, these views are mirror images of the ones shown here.
Page 130 of 673

||
DISPLAYS AND VOICE CONTROL
128
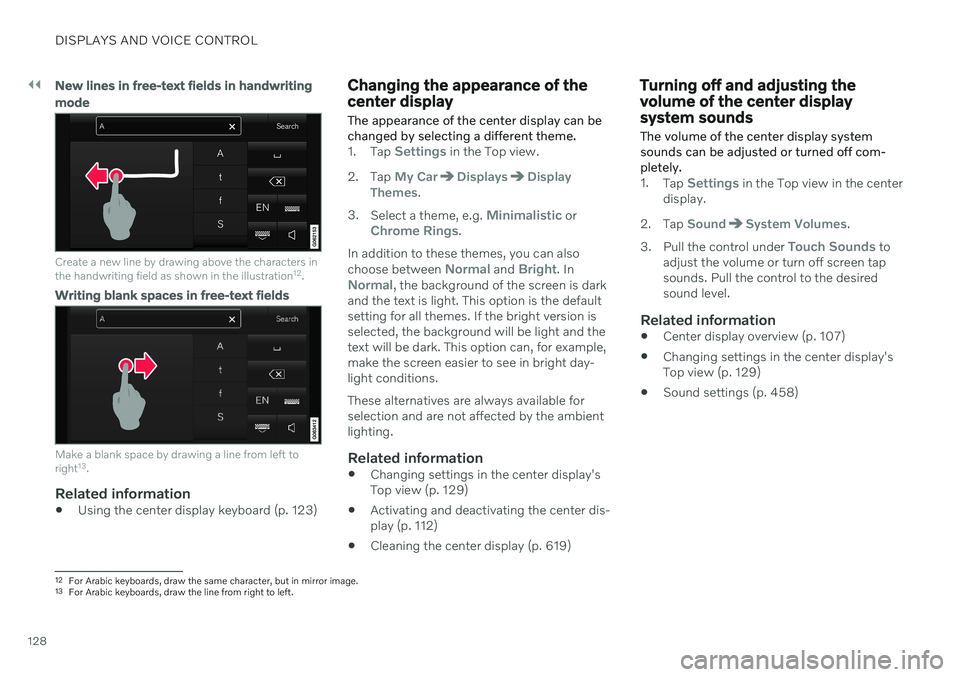
New lines in free-text fields in handwriting mode
Create a new line by drawing above the characters in the handwriting field as shown in the illustration12
.
Writing blank spaces in free-text fields
Make a blank space by drawing a line from left to right 13
.
Related information
Using the center display keyboard (p. 123)
Changing the appearance of the center display The appearance of the center display can be changed by selecting a different theme.
1.
Tap Settings in the Top view.
2. Tap
My CarDisplaysDisplay
Themes.
3. Select a theme, e.g.
Minimalistic orChrome Rings.
In addition to these themes, you can also choose between
Normal and Bright. InNormal, the background of the screen is dark
and the text is light. This option is the default setting for all themes. If the bright version isselected, the background will be light and thetext will be dark. This option can, for example,make the screen easier to see in bright day-light conditions. These alternatives are always available for selection and are not affected by the ambientlighting.
Related information
Changing settings in the center display'sTop view (p. 129)
Activating and deactivating the center dis-play (p. 112)
Cleaning the center display (p. 619)
Turning off and adjusting the volume of the center displaysystem sounds
The volume of the center display system sounds can be adjusted or turned off com-pletely.
1. Tap Settings in the Top view in the center
display.
2. Tap
SoundSystem Volumes.
3. Pull the control under
Touch Sounds to
adjust the volume or turn off screen tap sounds. Pull the control to the desiredsound level.
Related information
Center display overview (p. 107)
Changing settings in the center display'sTop view (p. 129)
Sound settings (p. 458)
12
For Arabic keyboards, draw the same character, but in mirror image.
13 For Arabic keyboards, draw the line from right to left.
Page 134 of 673

DISPLAYS AND VOICE CONTROL
* Option/accessory.
132
Table of settings in the center display
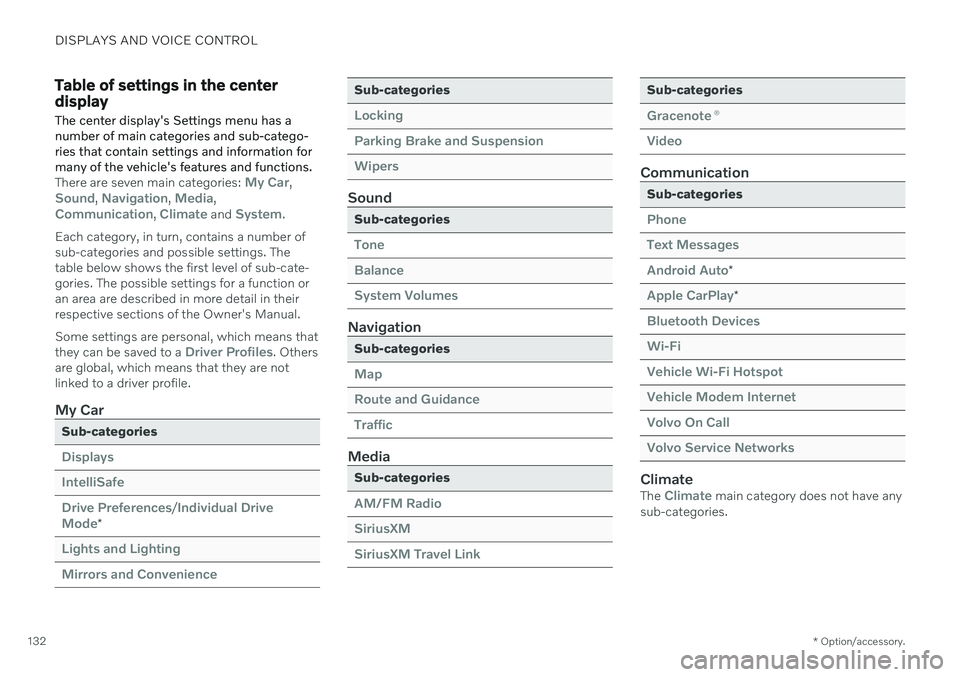
The center display's Settings menu has a number of main categories and sub-catego-ries that contain settings and information formany of the vehicle's features and functions.
There are seven main categories: My Car,Sound, Navigation, Media,Communication, Climate and System.
Each category, in turn, contains a number of sub-categories and possible settings. Thetable below shows the first level of sub-cate-gories. The possible settings for a function oran area are described in more detail in theirrespective sections of the Owner's Manual. Some settings are personal, which means that they can be saved to a
Driver Profiles. Others
are global, which means that they are not linked to a driver profile.
My Car
Sub-categories
Displays IntelliSafeDrive Preferences
/Individual Drive
Mode*
Lights and Lighting Mirrors and Convenience
Sub-categories
Locking Parking Brake and SuspensionWipers
Sound
Sub-categories
Tone BalanceSystem Volumes
Navigation
Sub-categories
Map Route and GuidanceTraffic
Media
Sub-categories
AM/FM Radio SiriusXMSiriusXM Travel Link
Sub-categories
Gracenote ®
Video
Communication
Sub-categories
Phone Text MessagesAndroid Auto
*
Apple CarPlay*
Bluetooth Devices Wi-FiVehicle Wi-Fi Hotspot Vehicle Modem Internet Volvo On Call Volvo Service Networks
ClimateThe Climate main category does not have any
sub-categories.
Page 135 of 673

DISPLAYS AND VOICE CONTROL
* Option/accessory.133
System
Sub-categories
Driver Profile Date and TimeSystem Languages and UnitsPrivacy and DataKeyboard LayoutsVoice Control
*
Factory Reset System Information
Related information
Center display overview (p. 107)
Changing settings in the center display's Top view (p. 129)
Resetting center display settings (p. 131)
Driver profiles
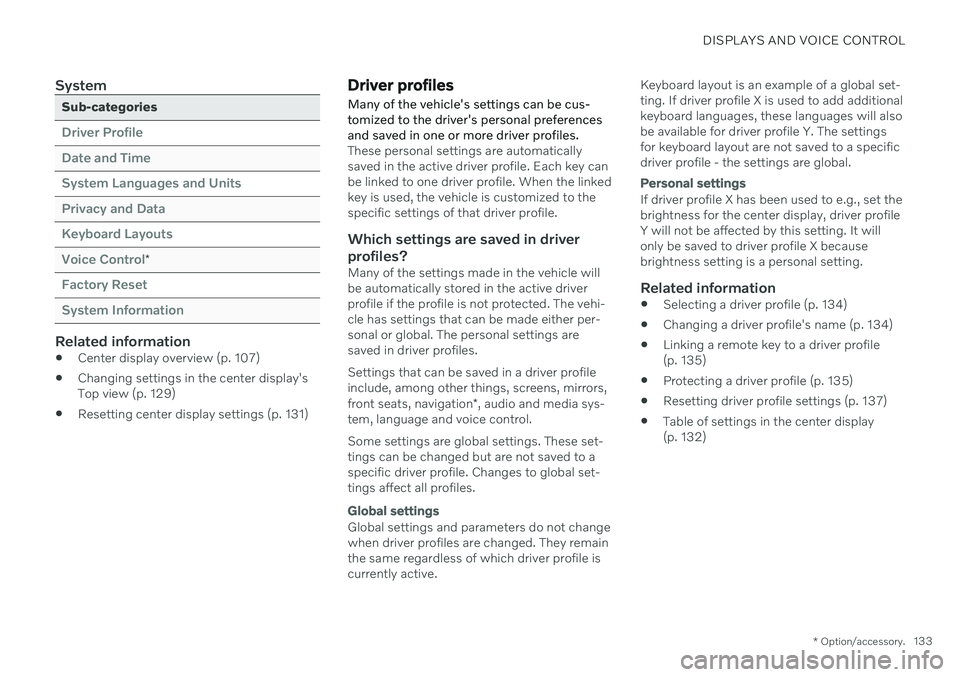
Many of the vehicle's settings can be cus- tomized to the driver's personal preferencesand saved in one or more driver profiles.
These personal settings are automatically saved in the active driver profile. Each key canbe linked to one driver profile. When the linkedkey is used, the vehicle is customized to thespecific settings of that driver profile.
Which settings are saved in driver
profiles?
Many of the settings made in the vehicle willbe automatically stored in the active driverprofile if the profile is not protected. The vehi-cle has settings that can be made either per-sonal or global. The personal settings aresaved in driver profiles. Settings that can be saved in a driver profile include, among other things, screens, mirrors, front seats, navigation *, audio and media sys-
tem, language and voice control. Some settings are global settings. These set- tings can be changed but are not saved to aspecific driver profile. Changes to global set-tings affect all profiles.
Global settings
Global settings and parameters do not change when driver profiles are changed. They remainthe same regardless of which driver profile iscurrently active. Keyboard layout is an example of a global set-ting. If driver profile X is used to add additionalkeyboard languages, these languages will alsobe available for driver profile Y. The settingsfor keyboard layout are not saved to a specificdriver profile - the settings are global.
Personal settings
If driver profile X has been used to e.g., set the brightness for the center display, driver profileY will not be affected by this setting. It willonly be saved to driver profile X becausebrightness setting is a personal setting.
Related information
Selecting a driver profile (p. 134)
Changing a driver profile's name (p. 134)
Linking a remote key to a driver profile(p. 135)
Protecting a driver profile (p. 135)
Resetting driver profile settings (p. 137)
Table of settings in the center display(p. 132)
Page 144 of 673

||
DISPLAYS AND VOICE CONTROL
* Option/accessory.
142
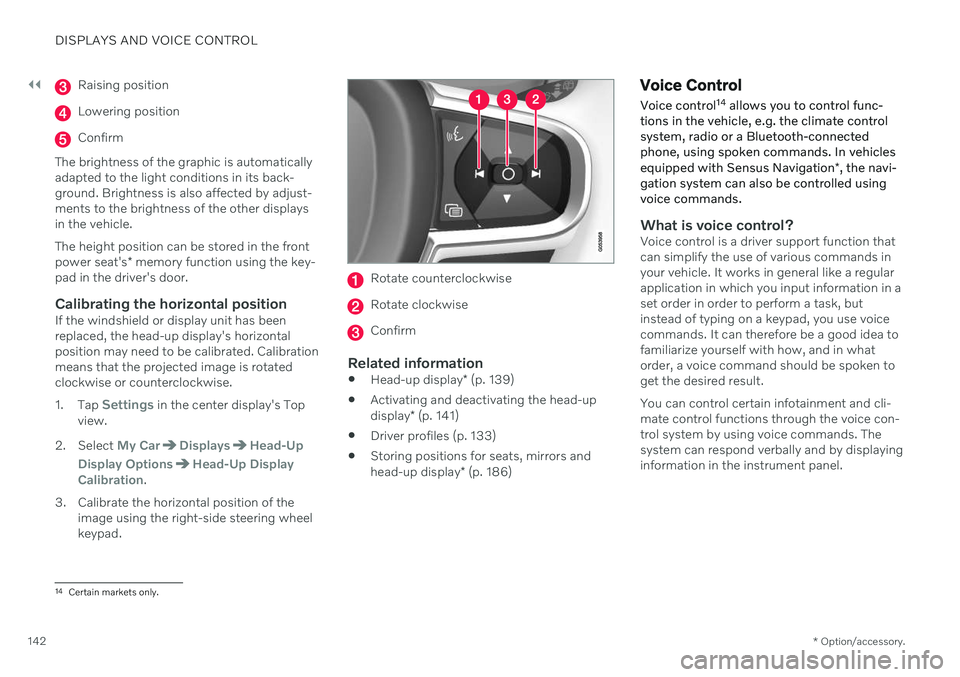
Raising position
Lowering position
Confirm
The brightness of the graphic is automatically adapted to the light conditions in its back-ground. Brightness is also affected by adjust-ments to the brightness of the other displaysin the vehicle. The height position can be stored in the front power seat's * memory function using the key-
pad in the driver's door.
Calibrating the horizontal positionIf the windshield or display unit has been replaced, the head-up display's horizontalposition may need to be calibrated. Calibrationmeans that the projected image is rotatedclockwise or counterclockwise. 1. Tap
Settings in the center display's Top
view.
2. Select
My CarDisplaysHead-Up
Display Options
Head-Up Display
Calibration.
3. Calibrate the horizontal position of the image using the right-side steering wheel keypad.
Rotate counterclockwise
Rotate clockwise
Confirm
Related information
Head-up display
* (p. 139)
Activating and deactivating the head-up display
* (p. 141)
Driver profiles (p. 133)
Storing positions for seats, mirrors andhead-up display
* (p. 186)
Voice Control
Voice control 14
allows you to control func-
tions in the vehicle, e.g. the climate control system, radio or a Bluetooth-connectedphone, using spoken commands. In vehicles equipped with Sensus Navigation *, the navi-
gation system can also be controlled using voice commands.
What is voice control?Voice control is a driver support function that can simplify the use of various commands inyour vehicle. It works in general like a regularapplication in which you input information in aset order in order to perform a task, butinstead of typing on a keypad, you use voicecommands. It can therefore be a good idea tofamiliarize yourself with how, and in whatorder, a voice command should be spoken toget the desired result. You can control certain infotainment and cli- mate control functions through the voice con-trol system by using voice commands. Thesystem can respond verbally and by displayinginformation in the instrument panel.
14 Certain markets only.
Page 164 of 673

||
LIGHTING
* Option/accessory.
162 Briefly press the button on the light to turn on or off the reading lights. To adjust the bright-ness, press and hold the button.
Glove compartment lightingThe glove compartment lighting comes on orgoes off when the glove compartment isopened or closed.
Vanity mirror lighting
*The vanity mirror lighting comes on or goes offwhen the cover over the mirror is opened orclosed.
Ground lighting*The ground lighting comes on or goes offwhen a door is opened or closed.
Doorsill lightingThe doorsill lighting comes on or goes offwhen a door is opened or closed.
Cargo compartment lightingThe cargo compartment lighting comes on orgoes off when the cargo compartment isopened or closed.
Ambient LightingThe ambient lighting comes on when thedoors are opened and goes out when the vehi-cle is locked. Ambient lighting brightness canbe adjusted in the center display and also fine-tuned using the thumb wheel in the dash-board.
Mood lighting*The vehicle is equipped with LEDs that pro-vide faint lighting in various colors. This light-ing is on when the engine is running. Moodlighting can be adjusted in the center displayand also fine-tuned using the thumb wheel inthe dashboard.
Lighting in the door storage compartments
Lighting in the door storage compartments comes on when the doors are opened andgoes out when the vehicle is locked. Thebrightness can be adjusted using the thumbwheel in the dashboard.
Lighting in the tunnel console's front
cup holder
The lighting in front console cup holdersswitches on when the vehicle is unlocked andoff when the vehicle is locked. The brightnesscan be adjusted using the thumb wheel in thedashboard.
Related information
Adjusting interior lighting (p. 162)
Lighting control and panel (p. 150)
Ignition modes (p. 403)
Passenger compartment interior (p. 558)
Adjusting interior lighting
Illumination in the vehicle varies depending on ignition mode. The interior lighting can beadjusted with a thumb wheel in the dash-board and certain light functions can also beadjusted via the center display.
The thumb wheel on the dashboard to the left of thesteering wheel can be usedto adjust the brightness ofthe display lighting, instru-ment lights, ambient lighting and mood lighting *.
Adjust ambient decor lighting1.
Tap Settings in the Top view in the center
display.
2. Tap
My CarLights and LightingInterior Lighting.
3. Choose from among the following set- tings:
Under
Ambient Light Intensity, selectOff, Low or High.
Under
Ambient Light Level, selectReduced or Full.
Adjusting mood lighting
*The vehicle is equipped with several LEDs that provide faint lighting in various colors. Thislighting is on when the engine is running.
Page 168 of 673

WINDOWS, GLASS AND MIRRORS
* Option/accessory.
166
Windows, glass and mirrors The vehicle is equipped with several different types of windows, glass and mirrors. Some ofthe windows in the car are laminated.
The windshield has laminated glass. Lamina- ted glass is also available as on option forsome other glass surfaces. Laminated glass isreinforced, which provides better protectionagainst break-ins and improved soundproofingin the passenger compartment. The panoramic roof * also has laminated glass.
The symbol shows the windows containing lamina- ted glass. 1
Related information
Pinch protection for windows and sun cur- tains (p. 166)
Panoramic roof
* (p. 172)
Power windows (p. 167)
Rearview/door mirrors (p. 169)
Head-up display
* (p. 139)
Using the windshield wipers (p. 176)
Using the windshield and headlight wash-ers (p. 179)
Activating and deactivating the heatedrear window and door mirrors (p. 217)
Pinch protection for windows and sun curtains All power windows and sun curtains
* have a
pinch protection function that is triggered if anything blocks them while they are openingor closing.
If pinch protection is activated, movement will stop and then retract automatically to approx.50 mm (2 inches) from the point at which itwas blocked (or to full ventilation position). It is still possible to override pinch protection when closing is interrupted (e.g. due to ice) bypressing and holding down the control in thesame direction. If there is any problem with the pinch protec- tion, a rest procedure can be tested.
WARNING
If the starter battery is disconnected, the function for automatic opening and closingmust be reset to function correctly. A resetis required in order for the pinch protectionto work.
Related information
Reset procedure for pinch protection (p. 167)
Operating the power windows (p. 168)
Operating the panoramic roof
* (p. 173)
1
Does not apply to windshield and panoramic roof *, which are always laminated and therefore do not have this symbol.
Page 169 of 673

WINDOWS, GLASS AND MIRRORS
* Option/accessory.167
Reset procedure for pinch protection
If you experience any problems with the elec- trical functions for the power windows, youcan try to perform a reset.
WARNING
If the starter battery is disconnected, the function for automatic opening and closingmust be reset to function correctly. A resetis required in order for the pinch protectionto work.
If the problem persists or if it affects the pan- oramic roof, contact a workshop 2
.
Resetting a power window
1. Start with the window in the closed posi-
tion.
2. Then move the control in manual mode three times upward toward the closed position.
> The system will be automatically acti-vated.
Related information
Pinch protection for windows and sun cur- tains (p. 166)
Operating the power windows (p. 168)
Power windows Every door has a control panel for the power windows. The driver's door has controls foroperating all windows and for activating thechild safety locks.
Driver's door control panel.
Electric child safety locks
* that deactivate
the controls in the rear doors to prevent the doors or windows from being openedfrom the inside.
Rear window controls.
Front window controls.
WARNING
Children, other passengers or objects can be trapped by the moving parts.
Always operate the windows with cau- tion.
Do not allow children to play with theoperating controls.
Never leave a child alone in the vehicle.
Remember to always cut the current tothe power windows by setting thevehicle's electrical system to ignitionmode
0 and then taking the remote
key with you when leaving the vehicle.
Never stick objects or body parts outthrough the windows, even if the vehi-cle electrical system is completelyturned off.
Related information
Operating the power windows (p. 168)
Pinch protection for windows and sun cur-tains (p. 166)
Reset procedure for pinch protection(p. 167)
2
An authorized Volvo workshop is recommended.