Page 446 of 655

||
STARTING AND DRIVING
* Option/accessory.
444
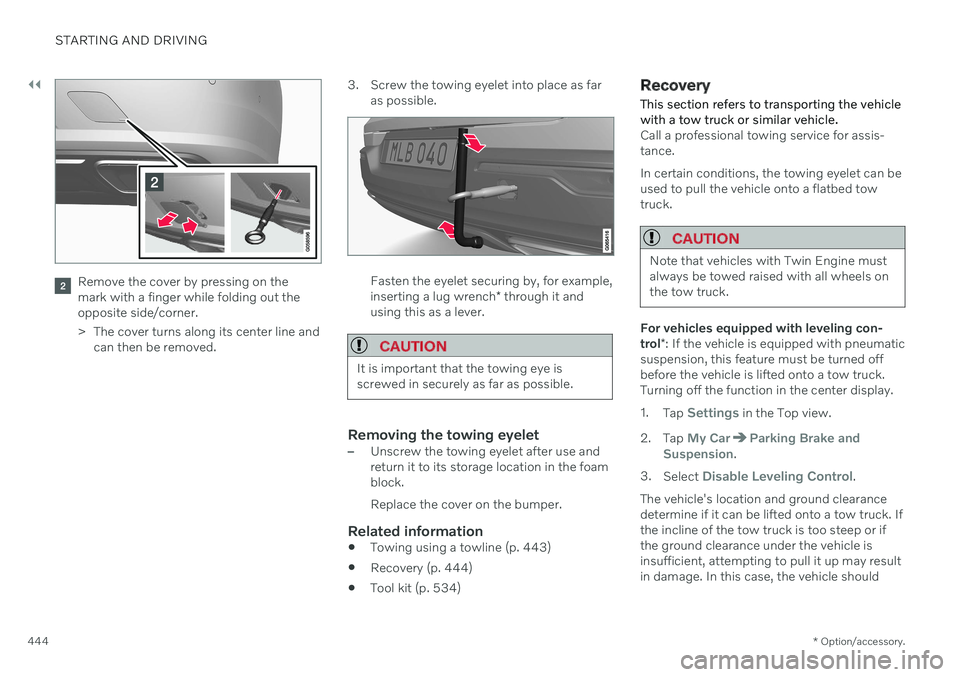
Remove the cover by pressing on the mark with a finger while folding out theopposite side/corner.
> The cover turns along its center line and
can then be removed. 3. Screw the towing eyelet into place as far
as possible.Fasten the eyelet securing by, for example, inserting a lug wrench * through it and
using this as a lever.
CAUTION
It is important that the towing eye is screwed in securely as far as possible.
Removing the towing eyelet–Unscrew the towing eyelet after use and return it to its storage location in the foamblock. Replace the cover on the bumper.
Related information
Towing using a towline (p. 443)
Recovery (p. 444)
Tool kit (p. 534)
Recovery
This section refers to transporting the vehicle with a tow truck or similar vehicle.
Call a professional towing service for assis- tance. In certain conditions, the towing eyelet can be used to pull the vehicle onto a flatbed towtruck.
CAUTION
Note that vehicles with Twin Engine must always be towed raised with all wheels onthe tow truck.
For vehicles equipped with leveling con- trol *: If the vehicle is equipped with pneumatic
suspension, this feature must be turned off before the vehicle is lifted onto a tow truck.Turning off the function in the center display. 1. Tap
Settings in the Top view.
2. Tap
My CarParking Brake and
Suspension.
3. Select
Disable Leveling Control.
The vehicle's location and ground clearance determine if it can be lifted onto a tow truck. Ifthe incline of the tow truck is too steep or ifthe ground clearance under the vehicle isinsufficient, attempting to pull it up may resultin damage. In this case, the vehicle should
Page 541 of 655

WHEELS AND TIRES
}}
* Option/accessory.539
4. Tighten the wheel bolts in a crisscross pat-
tern (as shown in illustration). It is impor- tant that the wheel bolts are securelytightened. Tighten to 140 Nm (103 ft. lbs.).Use a torque wrench to check torque.
5. Press the plastic covers onto the wheel bolts.
6. Check the tire inflation pressure and store the new inflation pressure in the tire pres- sure monitoring system *.
WARNING
The wheel bolts may need to be tightened again several days after a wheel change.Temperature fluctuations and vibrationscan cause them to loosen slightly.
NOTE
After inflating a tire, always replace the valve cap to help prevent valve damagecaused by gravel, dirt, etc.
Use plastic valve caps only. Metal capscould corrode and become difficult toremove.
Related information
When changing wheels (p. 534)
Hoisting the vehicle (p. 569)
Jack
* (p. 535)
Tool kit (p. 534)
Removing a wheel (p. 536)
Saving a new inflation pressure in the monitoring system
* (p. 531)
Checking tire pressure (p. 527)
Spare wheel 13
The spare wheel is a Temporary Spare and can be used to temporarily replace a punc- tured tire on one of the vehicle's regularwheels.
The spare tire is only intended for temporary use. Replace it with a normal wheel as soon aspossible. The driving characteristics of the vehicle change and ground clearance reduces whenthe spare wheel is used. Do not wash the vehi-cle in an automatic car wash while using theTemporary Spare. The recommended tire pressure must be maintained regardless of at which position thetemporary spare wheel is used on the vehicle. If the spare wheel is damaged, a new one can be purchased from a Volvo retailer.
WARNING
Current legislation prohibits the use of the "Temporary Spare" tire other than as atemporary replacement for a puncturedtire. It must be replaced as soon as possi-ble by a standard tire. Road holding andhandling may be affected with the "Tempo-rary Spare" in use. Do not drive faster than80 km/h (50 mph).
13 Not available on all models.
Page 542 of 655

||
WHEELS AND TIRES
540
WARNING
The vehicle must never be driven with more than one "Temporary Spare" tiremounted.
Driving with a spare wheel may alterthe driving characteristics of the vehi-cle. Replace the spare wheel with anormal wheel as soon as possible.
The spare wheel is smaller than thenormal wheel, which affects the vehi-cle's ground clearance. Watch for highcurbs and do not wash the vehicle inan automatic car wash when a sparewheel is mounted.
Follow the manufacturer's recom-mended tire inflation pressure for thespare wheel.
On all-wheel drive vehicles, the driveon the rear axle can be disconnected.
If the spare wheel is mounted on thefront axle, snow chains must not beused.
The spare wheel must not be repaired.
CAUTION
The vehicle must not be driven with wheels of different dimensions or with a spare tireother than the one that came with the vehi-cle. The use of different size wheels canseriously damage your vehicle's transmis-sion.
Related information
When changing wheels (p. 534)
Recommended tire pressure (p. 529)
Handling spare tires Follow these instructions regarding handling the spare wheel.
This illustration is generic and appearance may vary.
The spare wheel is stored in a bag and should be secured with two straps onto the floor ofthe trunk/cargo compartment when the vehi-cle is being driven. The straps should be strap-ped down crosswise over the wheel, attachedto the load anchoring eyelets and pulled taut. Wheel changing tools are located under the cargo compartment floor.
Related information
Spare wheel (p. 539)
Tool kit (p. 534)
Removing a wheel (p. 536)
Page 629 of 655
SPECIFICATIONS
}}
627
DimensionsThe vehicle's length, height, etc. are shown in the table.
Dimensions mm inches
A Ground clearance A
141 5.6
B Wheelbase 3061 120.5 C Length 5083 200.1
D Load length, floor, folded backrest B2098 82.6
E Load length, floor 1149 45.2 F Height C
1450 57.1Dimensions mm inches
G Load height 435 17.1 H Wheel track, front 1628D
1618 E
1617 F64.1
D
63.7 E
63.7 F
I Wheel track, rear 1629D
1619 E
1618 F64.1
D
63.7 E
63.7 FDimensions mm inches
J Load width, floor 1014 39.9
K Width 1879G
1890 H74.0
G
74.4 H