Page 26 of 283

24Keys, doors and windowsopened. A precondition is that the
setting is activated in the vehicle
personalisation 3 107.
Remote control operation
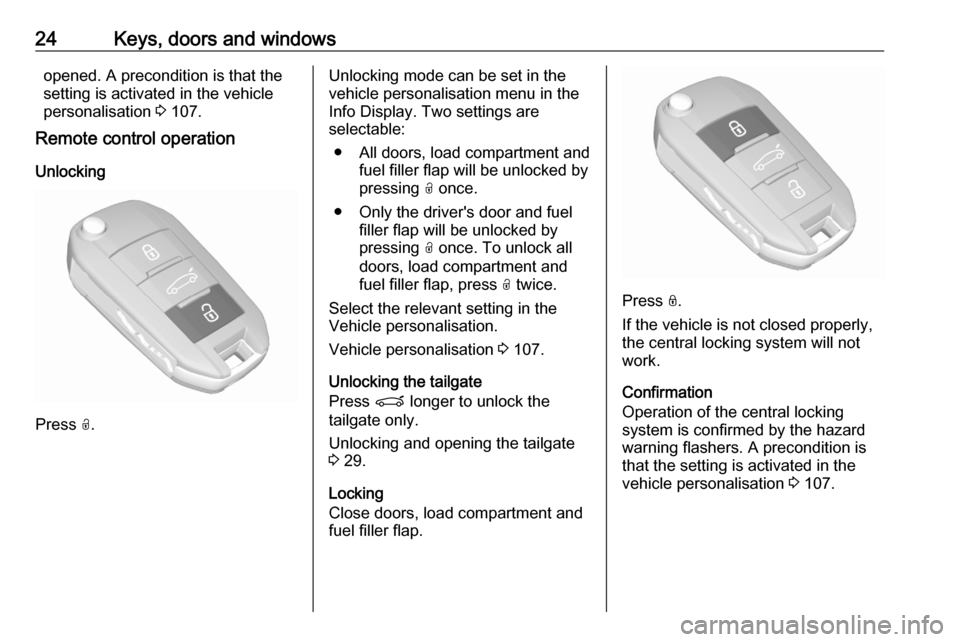
Unlocking
Press O.
Unlocking mode can be set in the
vehicle personalisation menu in the
Info Display. Two settings are
selectable:
● All doors, load compartment and fuel filler flap will be unlocked by
pressing O once.
● Only the driver's door and fuel filler flap will be unlocked by
pressing O once. To unlock all
doors, load compartment and
fuel filler flap, press O twice.
Select the relevant setting in the
Vehicle personalisation.
Vehicle personalisation 3 107.
Unlocking the tailgate
Press P longer to unlock the
tailgate only.
Unlocking and opening the tailgate
3 29.
Locking
Close doors, load compartment and
fuel filler flap.
Press N.
If the vehicle is not closed properly,
the central locking system will not
work.
Confirmation
Operation of the central locking
system is confirmed by the hazard
warning flashers. A precondition is
that the setting is activated in the
vehicle personalisation 3 107.
Page 27 of 283
Keys, doors and windows25Electronic key system operation
The electronic key must be outside
the vehicle, within a range of approx. 1 m of the relevant door side.
Unlocking
Pass a hand behind the door handle
of a front door to unlock the vehicle or
press the tailgate button.
Unlocking mode can be set in the
vehicle personalisation menu in the
Info Display. Two settings are
selectable:
● Only the driver's door and fuel filler flap will be unlocked by
passing a hand behind the
driver's door handle.
● All doors, load compartment and fuel filler flap will be unlocked by
passing a hand behind the
passenger's door handle or by
pressing the tailgate button.
● Only the tailgate will be unlocked
by pressing the tailgate button.
Vehicle personalisation 3 107.
Locking
Press marking of the front door
handles.
Entire vehicle will be locked.
Page 33 of 283

Keys, doors and windows31Hands-free operation
To open or close the tailgate move the
foot below the rear bumper back and
forth in the area below the number plate. Do not hold the foot longer or
move too slow below the bumper. The electronic key must be outside the
vehicle, within a range of approx.
1 m of the tailgate.
Activation or deactivation of hands-
free operation can be set in the menu
Settings I Vehicle in the Info Display.
Info Display 3 102.
Vehicle personalisation 3 107.
9 Danger
Do not touch any vehicle parts
below the vehicle during hands-
free operation. There is a risk of
injury from hot engine parts.
Automatic locking after hands-free
operation
Press button S in the open tailgate,
the whole vehicle will be locked after hands-free closing of the tailgate.
Operation with the tailgate button
To open the tailgate, press the
tailgate button until the tailgate starts
to move. If the vehicle is locked, the
electronic key must be outside the
vehicle, within a range of approx.
1 m of the tailgate.
Page 51 of 283

Seats, restraints49Move front of switch upwards /
downwards.
Backrest inclination
Turn switch forwards / backwards.
Lumbar support, adjustable thigh
support, see manual seat adjustment 3 46.
Memory function for power seat
adjustment
Two different driver's seat settings
can be stored.
Vehicle personalisation 3 107.
Storing memory position
● Adjust driver's seat to desired position.
● Press and hold M and 1 or 2
simultaneously until a chime sounds.
Recall of memory positions
Press and hold 1 or 2 until the stored
seat position has been reached.
Releasing the button during seat
movement cancels the recall.
Safety function
If the driver's seat encounters
resistance during movement, the
recall may stop. After removing the
obstruction, press and hold the
appropriate memory position button
for 2 seconds. Try recalling the
memory position again. If the recall
does not operate, consult a
workshop.
Overload
If the seat setting is electrically
overloaded, the power supply is
automatically cut-off for a short time.
Notice
After an accident in which airbags
have been deployed, the memory
function for each position button will
be deactivated.
Page 70 of 283

68StorageStorageStorage compartments................68
Glovebox ................................... 68
Cupholders ................................ 68
Centre console storage .............69
Load compartment .......................69
Load compartment cover ...........71
Rear floor storage cover ............72
Lashing eyes ............................. 73
Safety net .................................. 73
Warning triangle ........................75
First aid kit ................................. 75
Roof rack system .........................75
Roof rack ................................... 75
Loading information .....................76Storage compartments9Warning
Do not store heavy or sharp
objects in the storage
compartments. Otherwise, the
storage compartment lid could
open and vehicle occupants could be injured by objects being thrown
around in the event of hard
braking, a sudden change in
direction or an accident.
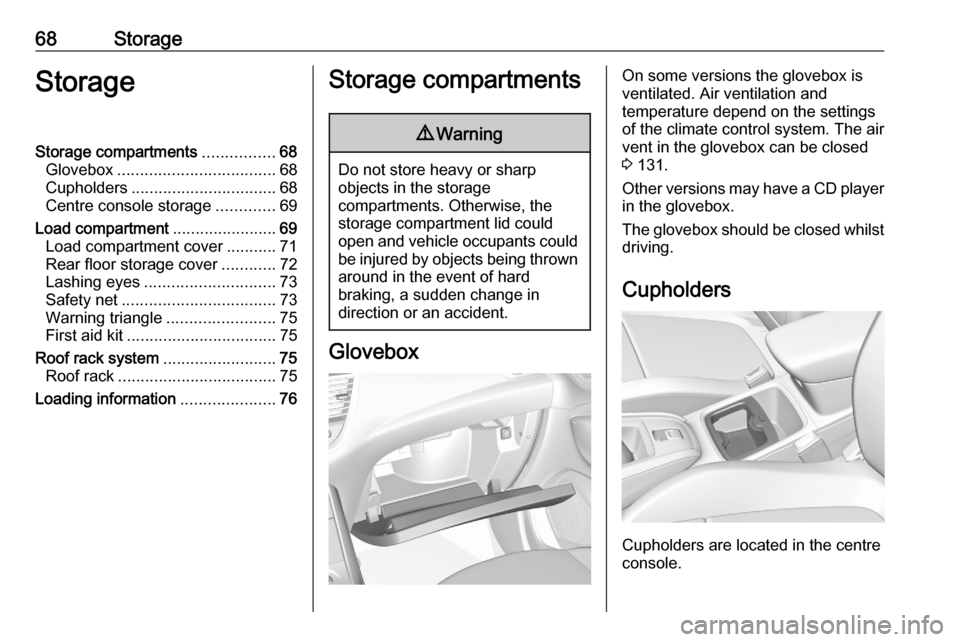
Glovebox
On some versions the glovebox is
ventilated. Air ventilation and
temperature depend on the settings
of the climate control system. The air
vent in the glovebox can be closed
3 131.
Other versions may have a CD player
in the glovebox.
The glovebox should be closed whilst driving.
Cupholders
Cupholders are located in the centre
console.
Page 85 of 283

Instruments and controls83Outside temperatureA drop in temperature is indicated
immediately and a rise in temperature
after a time delay.
Illustration shows an example.
If outside temperature drops to 3 °C,
a warning message is displayed in the Driver Information Centre.
9 Warning
The road surface may already be
icy even though the display
indicates a few degrees above 0
°C.
Clock
Date and time are shown in the Info
Display.
Info Display 3 102.
Graphic Info Display Press MENU to open the menu page.
Select ˆ.
Select Display configuration .
Select Date and time adjustment .
Set successively the respective
values for date and time by using the
four way switch. Confirm with OK.
7'' Colour Info Display
Press ; and then select Settings.
Select Time and Date to display the
respective submenu.
Set Time Format
To select the desired time format,
touch 12h or 24h .
Set Date Format
To select the desired date format,
select Set Date Format and choose
between the available options in the
submenu.
Page 86 of 283

84Instruments and controlsAuto Set
To choose whether time and date are
to be set automatically or manually,
select Auto Set .
For time and date to be set
automatically, select On - RDS.
For time and date to be set manually, select Off - Manual . If Auto Set is set
to Off - Manual , the submenu items
Set Time and Set Date become
available.
Set time and date
To adjust the time and date settings, select Set Time or Set Date .
Touch + or - to adjust the settings.
8'' Colour Info Display
Press SET and then select
OPTIONS .
Select Setting the time-date .
To change the time and date formats, select the respective tabs and then
select the desired formats.
By default the displayed time and
date are automatically adjusted by
the system.
To manually adjust the displayed time
and date:
Select the Time tab.
Set Synchronization with GPS (UTC)
to Off and then select the Time field
to set the desired time.
Select the Date tab and then select
the Date: field to set the desired date.
Power outlets
A 12 V power outlet is located behind
the storage cover. Press cover to
open.
Page 105 of 283

Instruments and controls103The Info Displays can indicate:● time 3 83
● outside temperature 3 83
● date 3 83
● Infotainment system, see description in the Infotainment
manual
● indication of rear view camera 3 188
● indication of panoramic view system 3 185
● indication of parking assist instructions 3 176
● navigation, see description in the
Infotainment manual
● vehicle and system messages 3 106
● settings for vehicle personalisation 3 107
● indication of the current powerflow within the hybrid
system
● indication of the average fuel and
power consumption● settings for programmable charging 3 197
● settings for eSave function
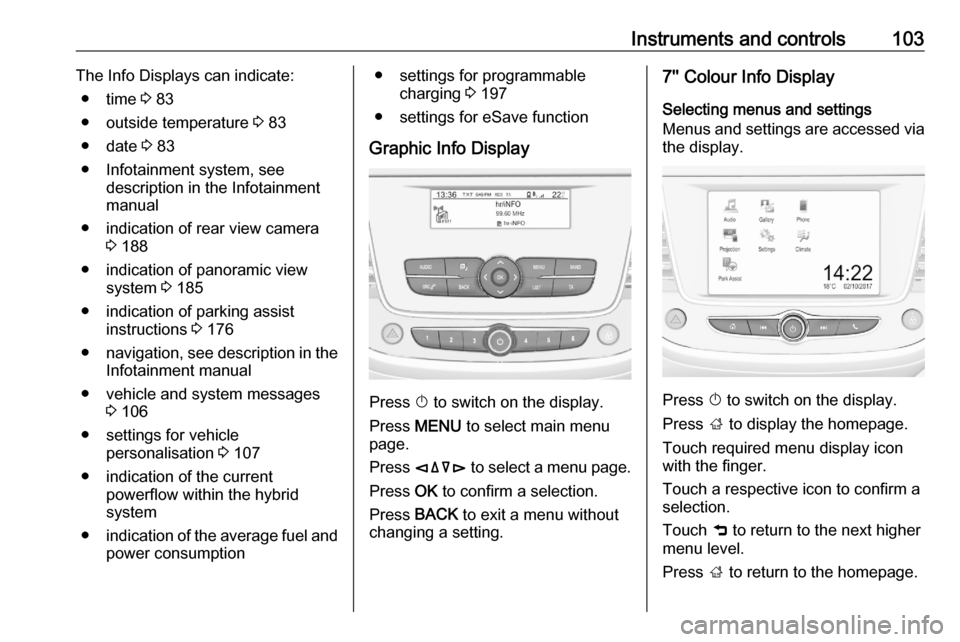
Graphic Info Display
Press X to switch on the display.
Press MENU to select main menu
page.
Press èäåé to select a menu page.
Press OK to confirm a selection.
Press BACK to exit a menu without
changing a setting.
7'' Colour Info Display
Selecting menus and settings
Menus and settings are accessed via
the display.
Press X to switch on the display.
Press ; to display the homepage.
Touch required menu display icon
with the finger.
Touch a respective icon to confirm a
selection.
Touch 9 to return to the next higher
menu level.
Press ; to return to the homepage.