Page 9 of 103
Introduction91 AUDIOOpen audio menu:
Radio ..................................... 23
External devices (USB,
Bluetooth) .............................. 28
2 NAV
Display embedded
navigation map .....................33
3 6
Open phone menu ................49
4 ).......................................... 12
If switched off: switch
power on / off
If switched on: mute system
Turn: adjust volume
5 SET
Open settings menu ..............16
6 d
Open apps menu ..................3177
Open vehicle settings
menu, see Owner's Manual
8 Info Display
Home menu will be
displayed by a 3-finger
touch on screen
Page 11 of 103
Introduction111).......................................... 12
If switched off: switch
power on / off
If switched on: mute system
Turn: adjust volume
2 Info Display
Home menu will be
displayed by a 3-finger
touch on screen
3 h
Open climate menu if
available, see Owner's Manual
4 c
Display embedded
navigation map .....................33
5 b
Open audio menu:
Radio ..................................... 23
External devices (USB,
Bluetooth) .............................. 28
6 a
Open phone menu ................497d
Open apps menu ..................31
8 _
Open vehicle settings
menu, see Owner's ManualSteering wheel controls
1 SRC (Source)
Select audio source,
confirm selection with A...... 12
Long press: mute system
2 c / d
Select next / previous
preset radio station when
radio active ............................ 23
or select next / previous
track / picture when
external devices active .........28
Page 15 of 103
Introduction15Press d to display the main menu of
the apps mode.
Touch Apple CarPlay or
Android Auto . A menu with different
selectable apps is displayed.
For a detailed description 3 31.
Settings
Press : and then select Audio
settings to display the respective
menu.
For a detailed description 3 16.
Press : and then OPTIONS to
display a menu for various system-
related settings.
For a detailed description 3 16.
Vehicle settings
Select _ to open a menu for various
vehicle-related settings.
Vehicle settings are described in the
Owner's Manual.
Page 16 of 103
16Basic operationBasic operationBasic operation............................ 16
Tone settings ............................... 19
Volume settings ........................... 19
System settings ........................... 20Basic operation
The display of the Infotainment
system has a touch-sensitive surface
that allows direct interaction with the
displayed menu controls.Caution
Do not use pointed or hard items
like ballpoint pens, pencils or
similar for touch screen operation.
Menu operation
Selecting or activating a screen
button or menu item
Touch a screen button or menu item.
Notice
Most icons displayed in a menu, like e or d in the illustrated example,
serve as screen buttons that initiate
certain actions if you touch them.
The corresponding system function is
activated, a message is shown, or a
submenu with further options is
displayed.
3 and A / OK screen buttons
When operating the menus, touch
3 in the respective submenu to
return to the next higher menu level.
Page 17 of 103

Basic operation17When no 3 screen button is
displayed, you are on the top level of
the respective menu.
After selecting menu items or
performing settings in a menu, touch
A / OK to confirm your settings.
Otherwise all performed selections or
settings will be lost.
Shortcuts to important menus
The texts and icons displayed in the
top bar, of e.g. the navigation main
menu, serve as shortcuts to some
important menus. For example, touch
the station name to open the station
list menu.
Scrolling a list
If there are more items available than
presentable on the screen, the list
must be scrolled.
To scroll through a list of menu items, you may optionally:
● Place your finger anywhere on the screen and move it upwards
or downwards.
Notice
Constant pressure must be applied
and the finger must be moved at a
constant speed.
● Touch S or R at the top or
bottom of the scroll bar.
● Touch anywhere on the guiding line of the scroll bar.
● Move the slider of the scroll bar up and down with your finger.
Updating a list
Touch U to manually update, e.g.,
station lists, contacts lists or
destination lists.
Input fields and keyboards
Input fields are indicated by >.
Touch the input field to open a
keyboard for text or number input.
Page 19 of 103

Basic operation19Tone settings
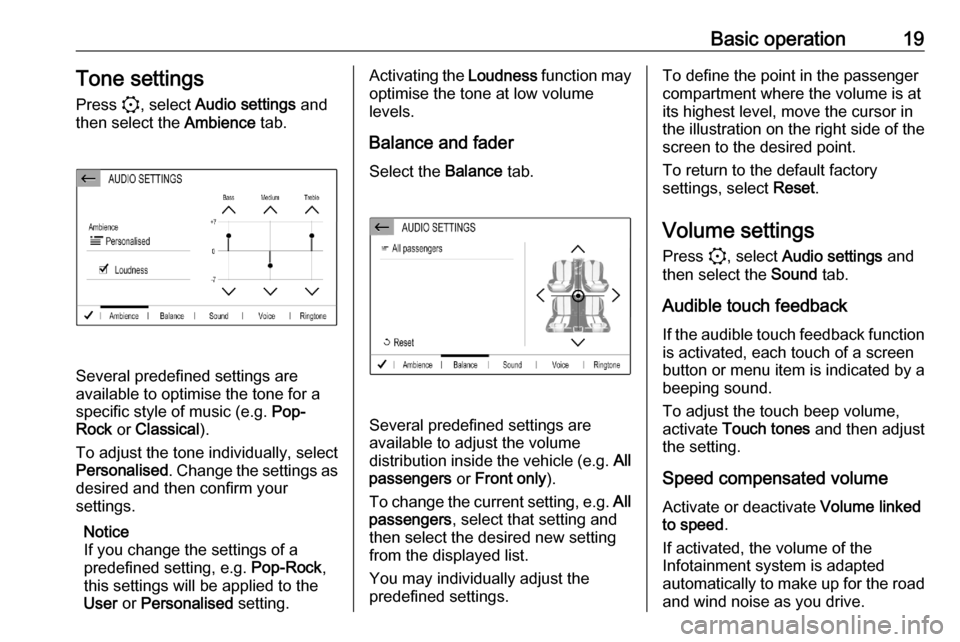
Press :, select Audio settings and
then select the Ambience tab.
Several predefined settings are
available to optimise the tone for a
specific style of music (e.g. Pop-
Rock or Classical ).
To adjust the tone individually, select
Personalised . Change the settings as
desired and then confirm your
settings.
Notice
If you change the settings of a
predefined setting, e.g. Pop-Rock,
this settings will be applied to the
User or Personalised setting.
Activating the Loudness function may
optimise the tone at low volume
levels.
Balance and fader
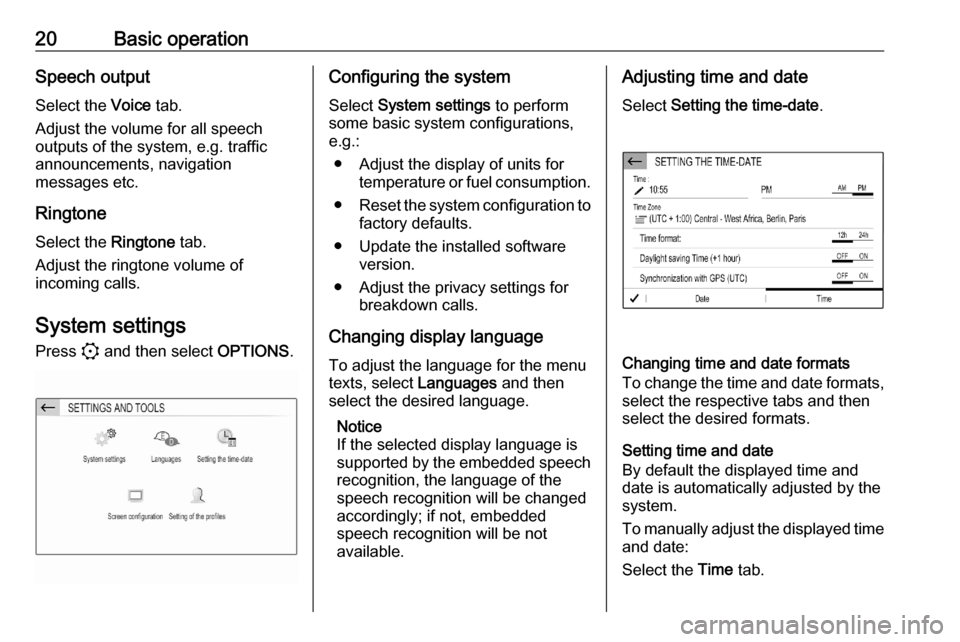
Select the Balance tab.
Several predefined settings are
available to adjust the volume
distribution inside the vehicle (e.g. All
passengers or Front only ).
To change the current setting, e.g. All
passengers , select that setting and
then select the desired new setting
from the displayed list.
You may individually adjust the
predefined settings.
To define the point in the passenger
compartment where the volume is at
its highest level, move the cursor in
the illustration on the right side of the
screen to the desired point.
To return to the default factory
settings, select Reset.
Volume settings Press :, select Audio settings and
then select the Sound tab.
Audible touch feedback
If the audible touch feedback function is activated, each touch of a screen
button or menu item is indicated by a
beeping sound.
To adjust the touch beep volume,
activate Touch tones and then adjust
the setting.
Speed compensated volume Activate or deactivate Volume linked
to speed .
If activated, the volume of the
Infotainment system is adapted
automatically to make up for the road
and wind noise as you drive.
Page 20 of 103

20Basic operationSpeech output
Select the Voice tab.
Adjust the volume for all speech
outputs of the system, e.g. traffic
announcements, navigation
messages etc.
Ringtone
Select the Ringtone tab.
Adjust the ringtone volume of
incoming calls.
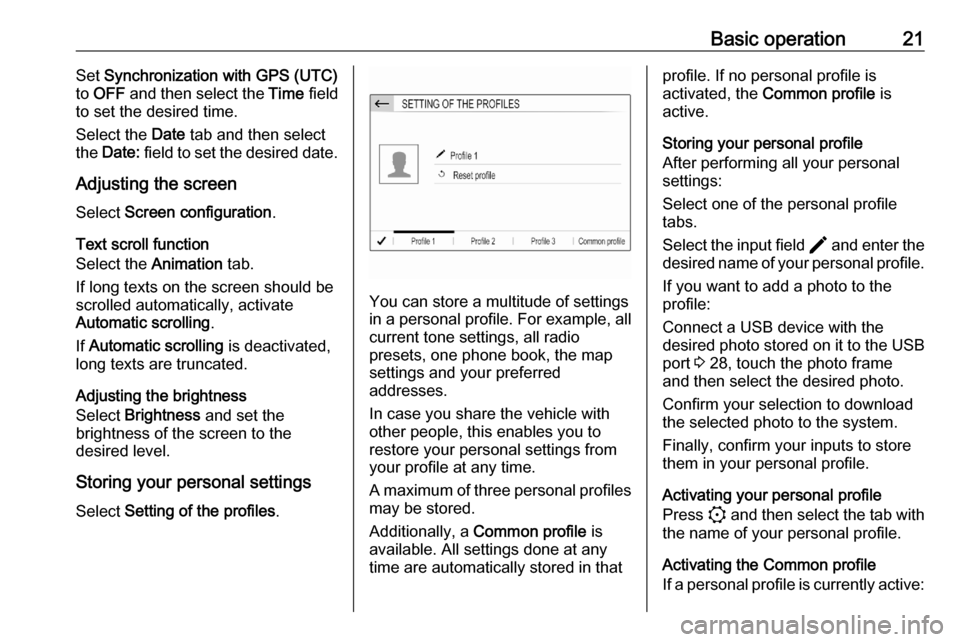
System settings Press : and then select OPTIONS.Configuring the system
Select System settings to perform
some basic system configurations,
e.g.:
● Adjust the display of units for temperature or fuel consumption.
● Reset the system configuration to
factory defaults.
● Update the installed software version.
● Adjust the privacy settings for breakdown calls.
Changing display language To adjust the language for the menu
texts, select Languages and then
select the desired language.
Notice
If the selected display language is
supported by the embedded speech
recognition, the language of the
speech recognition will be changed
accordingly; if not, embedded
speech recognition will be not
available.Adjusting time and date
Select Setting the time-date .
Changing time and date formats
To change the time and date formats, select the respective tabs and then
select the desired formats.
Setting time and date
By default the displayed time and
date is automatically adjusted by the
system.
To manually adjust the displayed time
and date:
Select the Time tab.
Page 21 of 103

Basic operation21Set Synchronization with GPS (UTC)
to OFF and then select the Time field
to set the desired time.
Select the Date tab and then select
the Date: field to set the desired date.
Adjusting the screen
Select Screen configuration .
Text scroll function
Select the Animation tab.
If long texts on the screen should be
scrolled automatically, activate
Automatic scrolling .
If Automatic scrolling is deactivated,
long texts are truncated.
Adjusting the brightness
Select Brightness and set the
brightness of the screen to the
desired level.
Storing your personal settings
Select Setting of the profiles .
You can store a multitude of settings
in a personal profile. For example, all
current tone settings, all radio
presets, one phone book, the map
settings and your preferred
addresses.
In case you share the vehicle with other people, this enables you to
restore your personal settings from
your profile at any time.
A maximum of three personal profiles may be stored.
Additionally, a Common profile is
available. All settings done at any
time are automatically stored in that
profile. If no personal profile is
activated, the Common profile is
active.
Storing your personal profile
After performing all your personal
settings:
Select one of the personal profile
tabs.
Select the input field > and enter the
desired name of your personal profile.
If you want to add a photo to the
profile:
Connect a USB device with the
desired photo stored on it to the USB
port 3 28, touch the photo frame
and then select the desired photo.
Confirm your selection to download
the selected photo to the system.
Finally, confirm your inputs to store
them in your personal profile.
Activating your personal profile
Press : and then select the tab with
the name of your personal profile.
Activating the Common profile
If a personal profile is currently active: