Page 121 of 418
121
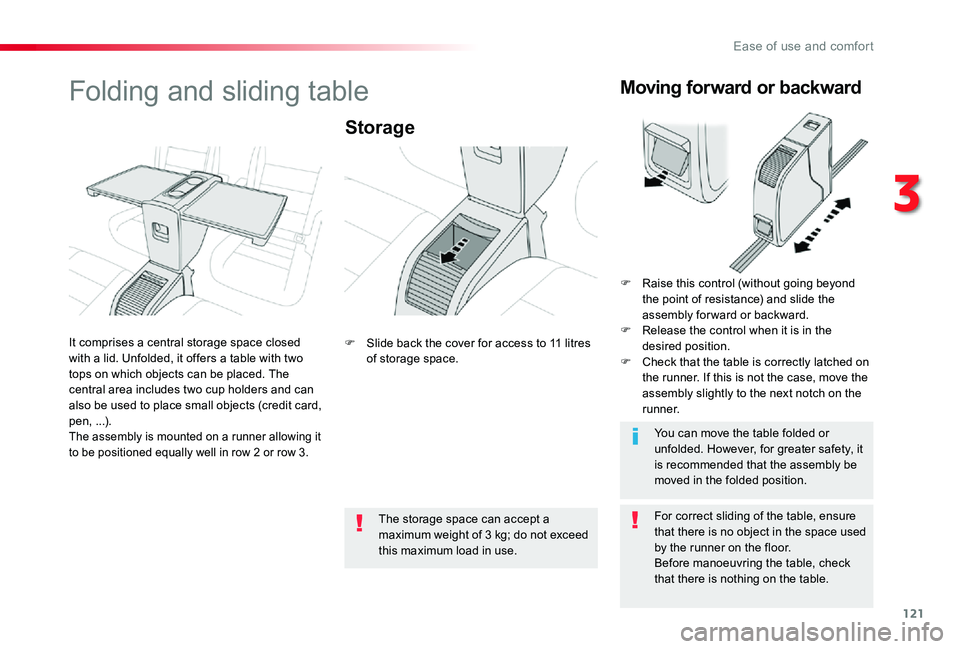
Folding and sliding table
Storage
For correct sliding of the table, ensure that there is no object in the space used by the runner on the floor.Before manoeuvring the table, check that there is nothing on the table.
The storage space can accept a maximum weight of 3 kg; do not exceed
this maximum load in use.
You can move the table folded or unfolded. However, for greater safety, it is recommended that the assembly be moved in the folded position.
It comprises a central storage space closed with a lid. Unfolded, it offers a table with two tops on which objects can be placed. The central area includes two cup holders and can also be used to place small objects (credit card, pen, ...).The assembly is mounted on a runner allowing it
to be positioned equally well in row 2 or row 3.
F Slide back the cover for access to 11 litres of storage space.
Moving forward or backward
F Raise this control (without going beyond the point of resistance) and slide the assembly for ward or backward.F Release the control when it is in the desired position.F Check that the table is correctly latched on the runner. If this is not the case, move the assembly slightly to the next notch on the r u n n e r.
3
Ease of use and comfort
Page 123 of 418
123
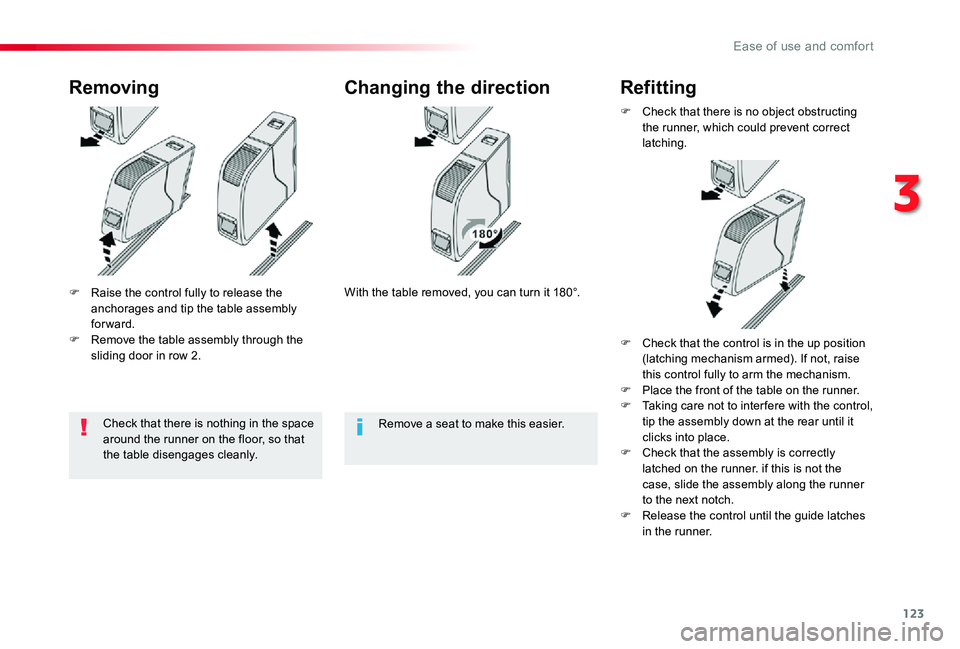
F Raise the control fully to release the anchorages and tip the table assembly forward.F Remove the table assembly through the sliding door in row 2.
RemovingChanging the direction
With the table removed, you can turn it 180°.
F Check that there is no object obstructing the runner, which could prevent correct latching.
Refitting
Remove a seat to make this easier.Check that there is nothing in the space around the runner on the floor, so that
the table disengages cleanly.
F Check that the control is in the up position (latching mechanism armed). If not, raise this control fully to arm the mechanism.F Place the front of the table on the runner.F Taking care not to inter fere with the control, tip the assembly down at the rear until it clicks into place.F Check that the assembly is correctly latched on the runner. if this is not the case, slide the assembly along the runner to the next notch.F Release the control until the guide latches in the runner.
3
Ease of use and comfort
Page 140 of 418
140
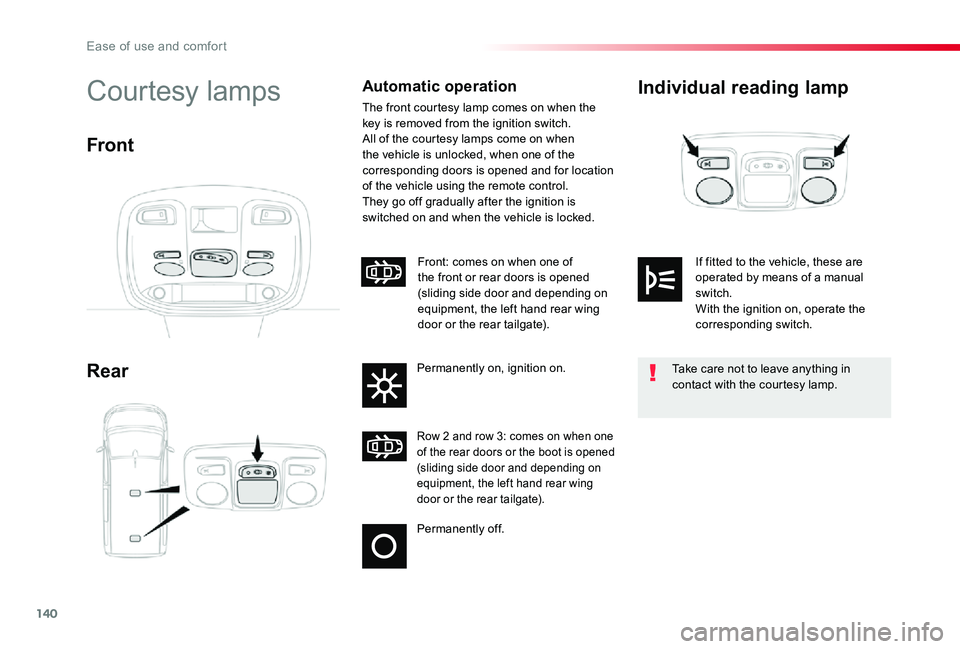
Individual reading lamp
Rear
Courtesy lampsAutomatic operation
The front courtesy lamp comes on when the key is removed from the ignition switch.All of the courtesy lamps come on when the vehicle is unlocked, when one of the corresponding doors is opened and for location of the vehicle using the remote control.They go off gradually after the ignition is switched on and when the vehicle is locked.
Front
Permanently off.
Row 2 and row 3: comes on when one of the rear doors or the boot is opened (sliding side door and depending on equipment, the left hand rear wing door or the rear tailgate).
Front: comes on when one of the front or rear doors is opened (sliding side door and depending on equipment, the left hand rear wing door or the rear tailgate).
Permanently on, ignition on.Take care not to leave anything in contact with the courtesy lamp.
If fitted to the vehicle, these are operated by means of a manual switch.With the ignition on, operate the corresponding switch.
Ease of use and comfort
Page 190 of 418
190
Manual child lock
Locking
Unlocking
Mechanical system to prevent opening of the sliding side door using its interior lever.
Electric child lock
Remote control system to prevent opening of the rear doors (sliding side door(s), rear wing doors with glass or rear tailgate) using their interior controls.
The indicator lamp in the button comes on, accompanied by a message to confirm that the child lock is on.This indicator lamp remains on until the child lock is switched off.It is still possible to open the doors from the outside.
The indicator lamp in the button goes off, accompanied by a message to confirm that the child lock is off.This indicator lamp remains off while the child lock is switched off.
Switching on
F With the ignition on, press this button.
F With the ignition on, press this button again.
Switching off
F Turn the control on the edge of the side door upwards.
F Turn the control on the edge of the side door downwards.
Safety
Page 191 of 418
191
Child lock on rear
windows
This mechanical system prevents opening of the left and/or right rear side windows.
F Lock /unlock the system using the remote control or the back-up key of the Smart Entry & Start System.
Any other status of the indicator lamp indicates a fault with the electric child lock.Have it checked by an authorized Toyota dealer or repairer, or another duly qualified and equipped professional.
In the event of a serious impact, the electric child lock is deactivated (child lock off) automatically.
This system is independent and in no circumstances does it take the place of the central locking control.Do not drive with the sliding side door open.Check the status of the child lock each time you switch on the ignition.Always remove the key from the ignition when leaving the vehicle, even for a short time.
5
Safety
Page 215 of 418

215
Going into engine
START mode
START mode is invoked automatically in certain temporary conditions (examples: battery charge, engine temperature, braking assistance, air conditioning setting) to assure correct operation of the system and mainly when:- you open the driver's door,- you open a sliding side door,- you unfasten the driver's seat belt,- the speed of the vehicle exceeds 15 mph (25 km/h) or 2 mph (3 km/h) (depending on the engine) with a manual gearbox,- the speed of the vehicle exceeds 2 mph (3 km/h) with an automatic gearbox.
Special cases: START invoked automatically
In this case the "ECO" warning lamp flashes for a few seconds, then goes of f.
This operation is perfectly normal.
If your vehicle has a manual gearbox, the "ECO" indicator lamp goes off in the instrument panel and the engine restarts automatically when you fully depress the clutch pedal.
If your vehicle has an automatic gearbox, the "ECO" lamp goes off in the instrument panel
and the engine restarts automatically when:- you release the brake pedal with the gear selector in position D or M,- you are in position N with the brake pedal released and you move the gear selector to position D or M,- you engage reverse.
If your vehicle has an electronic gearbox, the "ECO" lamp goes off in the instrument panel and the engine restarts automatically when:- you release the brake pedal with the gear selector in position A ou M,- you are in position N with the brake pedal released and you move the gear selector to position A or M,- you enegage reverse.
Special cases: STOP mode not available
STOP mode is not invoked in certain temporary conditions (examples: battery charge, engine temperature, braking assistance, ambient temperature) to assure correct operation of the system and mainly when:- the vehicle is on a steep slope (rising or falling),- the driver's door is open,- a sliding side door is open,- the driver's seat belt is not fastened,- the vehicle has not exceeded 6 mph (10 km/h) since the last engine start by the driver,- the electric parking brake is applied or being applied,- the engine is needed to maintain a comfortable temperature in the passenger compartment,- demisting is active.
In this case, the "ECO" warning lamp flashes for a few seconds then goes of f.
This operation is perfectly normal.
6
Driving
Page 262 of 418
262
Low fuel level
When the low fuel level in the tank is reached, this warning lamp comes on in the instrument panel, accompanied by an audible warning and a message.
Fuel supply cut-off
Your vehicle is equipped with a safety device which cuts off the fuel supply in the event of a collision.
When it first comes on, less than 8 litres of fuel remain in the tank.You must refuel as soon as possible to avoid
running out.
If you have put in the wrong fuel for your vehicle, you must have have the tank drained and refilled with the correct fuel before you star t the engine.
Your vehicle is fitted with a catalytic converter, a device which helps to reduce the level of harmful emissions in the exhaust gases.
Diesel misfuel
prevention
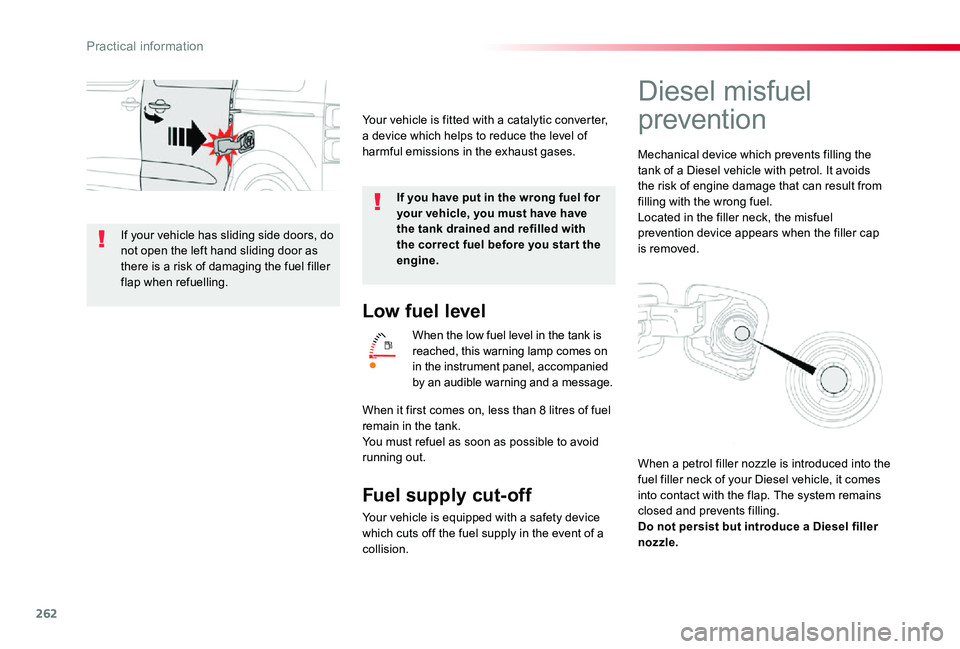
Mechanical device which prevents filling the tank of a Diesel vehicle with petrol. It avoids the risk of engine damage that can result from filling with the wrong fuel.Located in the filler neck, the misfuel prevention device appears when the filler cap is removed.
When a petrol filler nozzle is introduced into the fuel filler neck of your Diesel vehicle, it comes into contact with the flap. The system remains closed and prevents filling.Do not persist but introduce a Diesel filler nozzle.
If your vehicle has sliding side doors, do not open the left hand sliding door as there is a risk of damaging the fuel filler flap when refuelling.
Practical information
Page 343 of 418
343
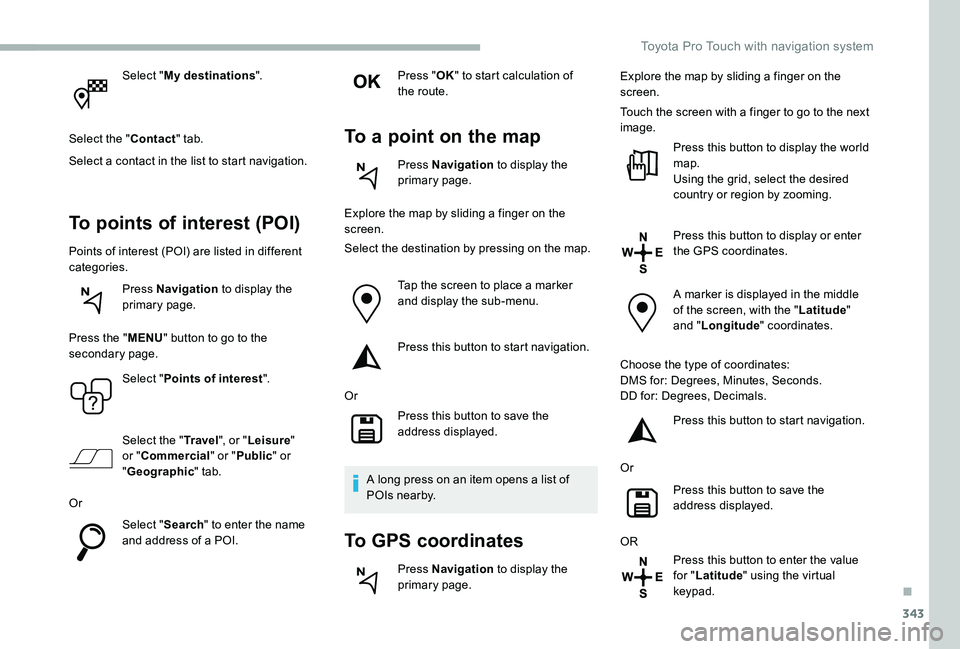
Select "My destinations".
Select the "Contact" tab.
Select a contact in the list to start navigation.
To points of interest (POI)
Points of interest (POI) are listed in different categories.
Press Navigation to display the primary page.
Press the "MENU" button to go to the secondary page.
Select "Points of interest".
Select the "Tr a v e l", or "Leisure" or "Commercial" or "Public" or "Geographic" tab.
Or
Select "Search" to enter the name and address of a POI.
Press "OK" to start calculation of the route.
To a point on the map
Press Navigation to display the primary page.
Explore the map by sliding a finger on the screen.
Select the destination by pressing on the map.
Tap the screen to place a marker and display the sub-menu.
Press this button to start navigation.
Or
Press this button to save the address displayed.
A long press on an item opens a list of POIs nearby.
To GPS coordinates
Press Navigation to display the primary page.
Explore the map by sliding a finger on the screen.
Touch the screen with a finger to go to the next image.
Press this button to display the world map.Using the grid, select the desired country or region by zooming.
Press this button to display or enter
the GPS coordinates.
A marker is displayed in the middle of the screen, with the "Latitude" and "Longitude" coordinates.
Choose the type of coordinates:DMS for: Degrees, Minutes, Seconds.DD for: Degrees, Decimals.
Press this button to start navigation.
Or
Press this button to save the address displayed.
OR
Press this button to enter the value for "Latitude" using the virtual keypad.
.
Toyota Pro Touch with navigation system