2020 TOYOTA PROACE VERSO steering wheel
[x] Cancel search: steering wheelPage 256 of 418

256
"Standard view"
"180° view""Zoom view" (reconstructed)
The camera records the surroundings during a manoeuvre in order to create a reconstruction of the view from above the rear of the vehicle in its close surroundings, allowing the vehicle to be manoeuvred among the obstacles nearby.This view is available with AUTO view or by selecting of the view in the change view menu.
180° view makes it possible to reverse out of a parking space while being able to see the arrival of vehicles, pedestrians or cyclists.This view is not recommended for carrying out a complete manoeuvre.It is made up of the following:
The area to the rear of your vehicle is displayed in the screen.The blue outline represents the width of your vehicle (with mirrors): its orientation depends on the position of the steering wheel.The red line represents a distance of 30 cm from the rear bumper and the two blue lines, 1 m and 2 m respectively.
Rear views
Engage reverse gear to activate the camera, located on the rear tailgate or rear door.
The rear parking sensors also provide information on the vehicle's surroundings.Obstacles may appear further away than they are in reality.It is important to check the side views
using the mirrors during the manoeuvre.
Driving
Page 259 of 418
259
Tyre Pressure WarningReinitialisation
Before reinitialising the system, ensure that the pressures of the four tyres are correct for the use of the vehicle and in line with the recommendations on the tyre pressure label.The tyre pressure warning alert can only be relied on if the reinitialisation of the system has been done with the pressures in the four tyres correctly adjusted.The tyre pressure warning system does not give a warning if a pressure is incorrect at the time of reinitialisation.
This is given by fixed illumination of this warning lamp, accompanied by an audible signal and, depending on equipment, the display of a message.
It is necessary to reinitialise the system every time one or more tyre pressures are adjusted, and after changing one or more wheels.
F Reduce speed immediately, avoid excessive steering movements and sudden braking.F Stop the vehicle as soon as it is safe to do so.
F In the event of a puncture, use the temporary puncture repair kit or the spare wheel (depending on equipment),orF if you have a compressor, such as the one in the temporary puncture repair kit, check the pressures of the four tyres when cold,orF if it is not possible to make this check immediately, drive carefully at reduced speed.
The loss of pressure detected does not always cause visible bulging of the tyre. Do not satisfy yourself with just a visual check.The alert is maintained until the system is reinitialised.
Initialisation of the system is done with the ignition on and the vehicle stationary.
The new pressure settings registered are considered to be reference values by the system.
6
Driving
Page 286 of 418
286
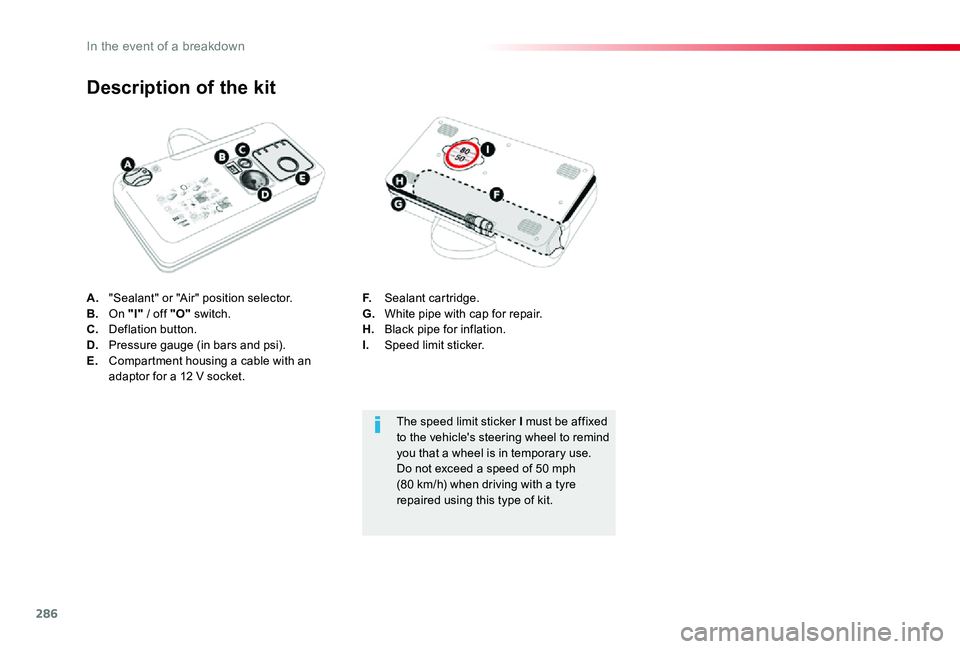
A. "Sealant" or "Air" position selector.B. On "I" / off "O" switch.C. Deflation button.D. Pressure gauge (in bars and psi).E. Compartment housing a cable with an adaptor for a 12 V socket.
Description of the kit
F. Sealant cartridge.G. White pipe with cap for repair.H. Black pipe for inflation.I. Speed limit sticker.
The speed limit sticker I must be affixed to the vehicle's steering wheel to remind you that a wheel is in temporary use.Do not exceed a speed of 50 mph (80 km/h) when driving with a tyre repaired using this type of kit.
In the event of a breakdown
Page 321 of 418
321
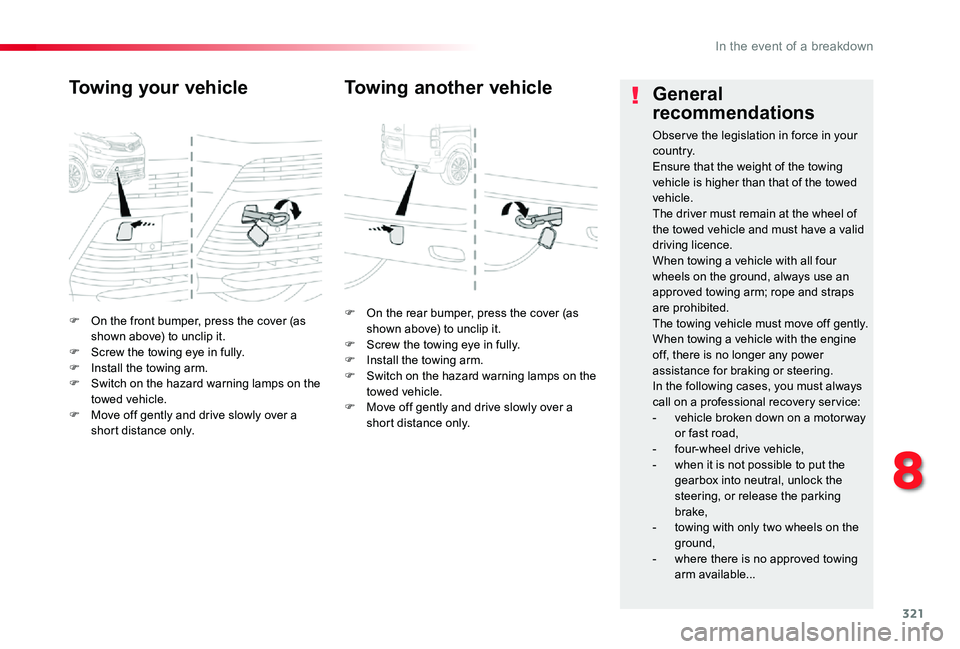
F On the front bumper, press the cover (as shown above) to unclip it.F Screw the towing eye in fully.F Install the towing arm.F Switch on the hazard warning lamps on the towed vehicle.F Move off gently and drive slowly over a short distance only.
Towing your vehicle
F On the rear bumper, press the cover (as shown above) to unclip it.F Screw the towing eye in fully.F Install the towing arm.F Switch on the hazard warning lamps on the towed vehicle.F Move off gently and drive slowly over a short distance only.
Towing another vehicleGeneral
recommendations
Obser ve the legislation in force in your c o u nt r y.Ensure that the weight of the towing vehicle is higher than that of the towed vehicle.The driver must remain at the wheel of the towed vehicle and must have a valid
driving licence.When towing a vehicle with all four wheels on the ground, always use an approved towing arm; rope and straps are prohibited.The towing vehicle must move off gently.When towing a vehicle with the engine off, there is no longer any power assistance for braking or steering.In the following cases, you must always call on a professional recovery ser vice:- vehicle broken down on a motor way or fast road,- four-wheel drive vehicle,- when it is not possible to put the gearbox into neutral, unlock the
steering, or release the parking brake,- towing with only two wheels on the ground,
- where there is no approved towing arm available...
8
In the event of a breakdown
Page 331 of 418

331
Toyota Pro Touch with
navigation system
GPS navigation -
Applications - Multimedia
audio system - Bluetooth®
telephone
The various functions and settings described differ according to the version and configuration of the vehicle.
For safety reasons and because they require continued attention on the part of the driver, the following operations must be carried out with the vehicle stationary and the ignition switched off:- Using a smartphone.- Pairing a Bluetooth mobile phone to the hands-free Bluetooth system of the audio system.- Smartphone connection operations for CarPlay®, MirrorLinkTM or Android Auto (certain applications interrupt their display when the vehicle starts to move again).- Watching a video (the video stops when the vehicle starts to move again).- The configuration of profiles.
The system is protected in such a way that it will only operate in the vehicle.The display of the message Energy Economy Mode signals that a change to standby is imminent.
First steps
With the engine running, a press mutes the sound.With the ignition off, a press turns the system on.
Increase or decrease the volume using the wheel or the "plus" or "minus" buttons (depending on the equipment).
Use the menu buttons on either side of or below the touch screen for access to the menus, then press the virtual buttons in the touch screen.
Depending on the model, use the "Source" or "Menu" buttons to access the rolling menus, then press the virtual buttons in the touch screen.
Display the rolling menus at any time by pressing the screen briefly with three fingers.
All of the touch areas of the screen are white.Press the back arrow to go back a level.Press "OK" to confirm.
ContentsFirst steps 331Steering mounted controls 332Menus 333Voice commands 334Navigation 342Connected navigation 344Applications 347Radio 350DAB (Digital Audio Broadcasting) radio 352Media 352Telephone 354Frequently asked questions 360
.
Toyota Pro Touch with navigation system
Page 332 of 418
332
The touch screen is of the "capacitive" type.To clean the screen, use a soft, non-abrasive cloth (e.g. spectacles cloth) with no additional product.Do not use sharp objects on the screen.Do not touch the screen with wet hands.
Certain information is displayed permanently in the side bars or in the upper bar of the touch screen (depending on equipment):- Reminder of the air conditioning information (depending on version), and direct access to the corresponding menu.- Go directly to the selection of the audio source, to the list of radio stations (or list of titles depending on the source).- Go to the "Notifications" of messages, emails, map updates and, depending on the services, the navigation notifications.- Go to the settings for the touch screen and the digital instrument panel.
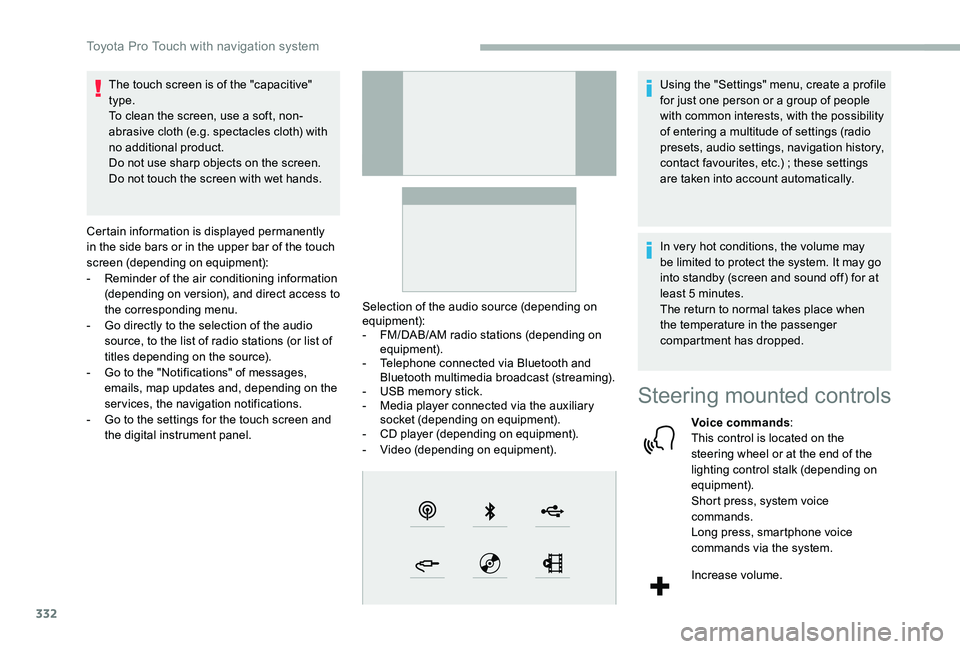
Selection of the audio source (depending on equipment):- FM/DAB/AM radio stations (depending on equipment).- Telephone connected via Bluetooth and Bluetooth multimedia broadcast (streaming).- USB memory stick.- Media player connected via the auxiliary socket (depending on equipment).- CD player (depending on equipment).- Video (depending on equipment).
Using the "Settings" menu, create a profile for just one person or a group of people with common interests, with the possibility of entering a multitude of settings (radio presets, audio settings, navigation history, contact favourites, etc.) ; these settings are taken into account automatically.
In very hot conditions, the volume may be limited to protect the system. It may go into standby (screen and sound off) for at least 5 minutes.The return to normal takes place when the temperature in the passenger compartment has dropped.
Steering mounted controls
Voice commands:This control is located on the steering wheel or at the end of the lighting control stalk (depending on equipment).Short press, system voice commands.Long press, smartphone voice commands via the system.
Increase volume.
Toyota Pro Touch with navigation system
Page 334 of 418
334
21,518,5
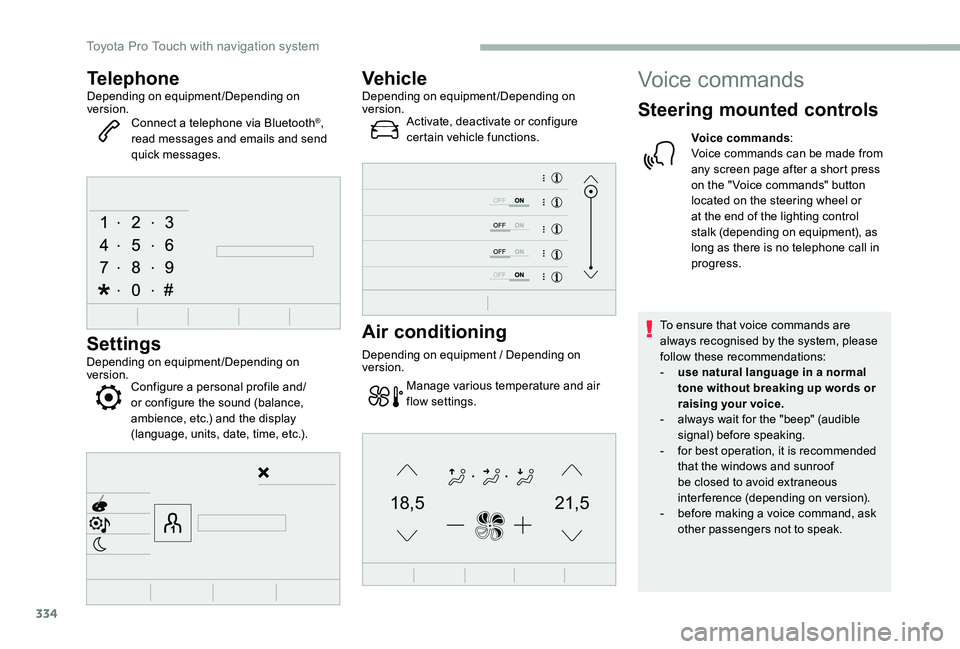
TelephoneDepending on equipment/Depending on version.Connect a telephone via Bluetooth®, read messages and emails and send quick messages.
Settings
Depending on equipment/Depending on version.Configure a personal profile and/or configure the sound (balance, ambience, etc.) and the display (language, units, date, time, etc.).
VehicleDepending on equipment/Depending on version.Activate, deactivate or configure certain vehicle functions.
Air conditioning
Depending on equipment / Depending on version.
Manage various temperature and air flow settings.
Voice commands
Steering mounted controls
Voice commands:Voice commands can be made from any screen page after a short press on the " Voice commands" button located on the steering wheel or at the end of the lighting control stalk (depending on equipment), as long as there is no telephone call in progress.
To ensure that voice commands are always recognised by the system, please follow these recommendations:- use natural language in a normal tone without breaking up words or raising your voice.- always wait for the "beep" (audible signal) before speaking.- for best operation, it is recommended that the windows and sunroof be closed to avoid extraneous interference (depending on version).- before making a voice command, ask other passengers not to speak.
Toyota Pro Touch with navigation system
Page 367 of 418
367
To y o t a P r o To u c h
Multimedia audio system -
Applications - Bluetooth®
telephone
The various functions and settings described differ according to the version and configuration of the vehicle.
For safety reasons and because they require continued attention on the part of the driver, the following operations must be carried out with the vehicle stationary and the ignition on:- Using a smartphone.- Pairing a Bluetooth mobile phone to the hands-free Bluetooth system of the car radio.- Smartphone connection operations for CarPlay®, MirrorLinkTM or Android Auto (certain applications interrupt their display when the vehicle starts to move again).- The configuration of profiles.
The system is protected in such a way that it will only operate in the vehicle.The display of the message Energy Economy Mode signals that a change to standby is imminent.
First steps
With the engine running, a press mutes the sound.With the ignition off, a press turns the system on.
Increase or decrease the volume using the wheel or the "plus" or "minus" buttons (depending on the equipment).
Use the buttons on either side of or below the touch screen for access to the menus, then press the virtual buttons in the touch screen.
Depending on the model, use the "Source" or "Menu" buttons on the left of the touch screen for access to the menus, then press the virtual buttons in the touch screen.
At all times it is possible to display the rolling menus by pressing the screen briefly with three fingers.
All of the touch areas of the screen are white.For pages with multiple tabs at the bottom of
the screen, it is possible to switch between pages either by tapping the tab for the desired page, or by using a finger, sliding the pages to the left or to the right.Press in the grey zone to go back up a level or to confirm.
ContentsFirst steps 367Steering mounted controls 368Menus 369Applications 371R adi o 371DAB (Digital Audio Broadcasting) radio 373M e d i a 3 74Telephone 376Frequently asked questions 382
.
Toyota Pro Touch