2020 TOYOTA PROACE CITY VERSO headlamp
[x] Cancel search: headlampPage 65 of 272
65
Lighting and visibility
4
Malfunction
In the event of a malfunction of the sunshine sensor, the lighting comes on and this warning lamp is displayed in the instrument panel, accompanied by an audible signal and/or a message.Contact a TOYOTA dealer or a qualified workshop.
WARNI NG
In fog or snow, the sunshine sensor may detect sufficient light. In this case, the lighting will not come on automatically.Do not cover the sunshine sensor, located on the dashboard or at the top of the windscreen behind the rear view mirror (depending on equipment); the associated functions would no longer be controlled.
Daytime running lamps /
Sidelamps
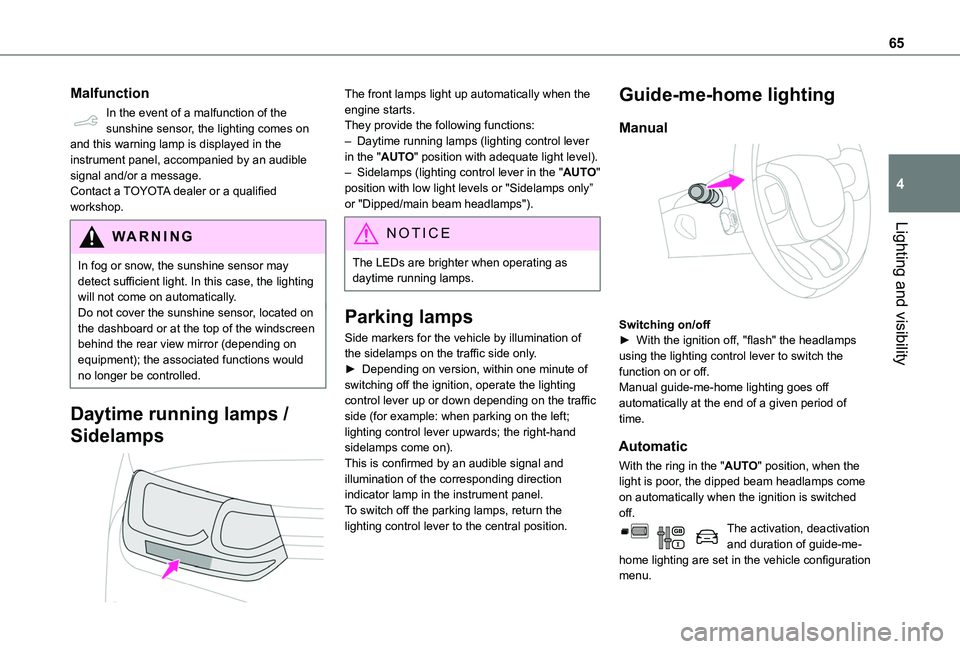
The front lamps light up automatically when the engine starts.They provide the following functions:– Daytime running lamps (lighting control lever in the "AUTO" position with adequate light level).– Sidelamps (lighting control lever in the "AUTO" position with low light levels or "Sidelamps only” or "Dipped/main beam headlamps").
NOTIC E
The LEDs are brighter when operating as daytime running lamps.
Parking lamps
Side markers for the vehicle by illumination of the sidelamps on the traffic side only.► Depending on version, within one minute of switching off the ignition, operate the lighting control lever up or down depending on the traffic side (for example: when parking on the left; lighting control lever upwards; the right-hand sidelamps come on).This is confirmed by an audible signal and illumination of the corresponding direction indicator lamp in the instrument panel.To switch off the parking lamps, return the lighting control lever to the central position.
Guide-me-home lighting
Manual
Switching on/off► With the ignition off, "flash" the headlamps using the lighting control lever to switch the function on or off.Manual guide-me-home lighting goes off automatically at the end of a given period of time.
Automatic
With the ring in the "AUTO" position, when the light is poor, the dipped beam headlamps come on automatically when the ignition is switched off.The activation, deactivation and duration of guide-me-home lighting are set in the vehicle configuration menu.
Page 66 of 272
66
Automatic exterior welcome
lighting
With the "Automatic headlamp illumination" function activated, when the light is poor, the sidelamps and dipped beam headlamps come on automatically when the vehicle is unlocked.Activation, deactivation and the duration of the exterior welcome lighting are set in the vehicle configuration menu.
Automatic headlamp
dipping
This system automatically changes between dipped and main beam headlamps according to the brightness and driving conditions, using a camera located at the top of the windscreen.
WARNI NG
This system is a driving aid.The driver remains responsible for the vehicle's lighting, its correct use for the prevailing conditions of light, visibility and traffic, and for observation of driving and vehicle regulations.
NOTIC E
The system will be operational as soon as you exceed 25 km/h (16 mph).If the speed drops below 15 km/h (9 mph), the system no longer operates.
Activation/Deactivation
Activation and deactivation are done via the vehicle
configuration menu.When deactivated, the lighting system changes to "automatic illumination of headlamps" mode.The state of the system stays in the memory when switching off the ignition.
Operation
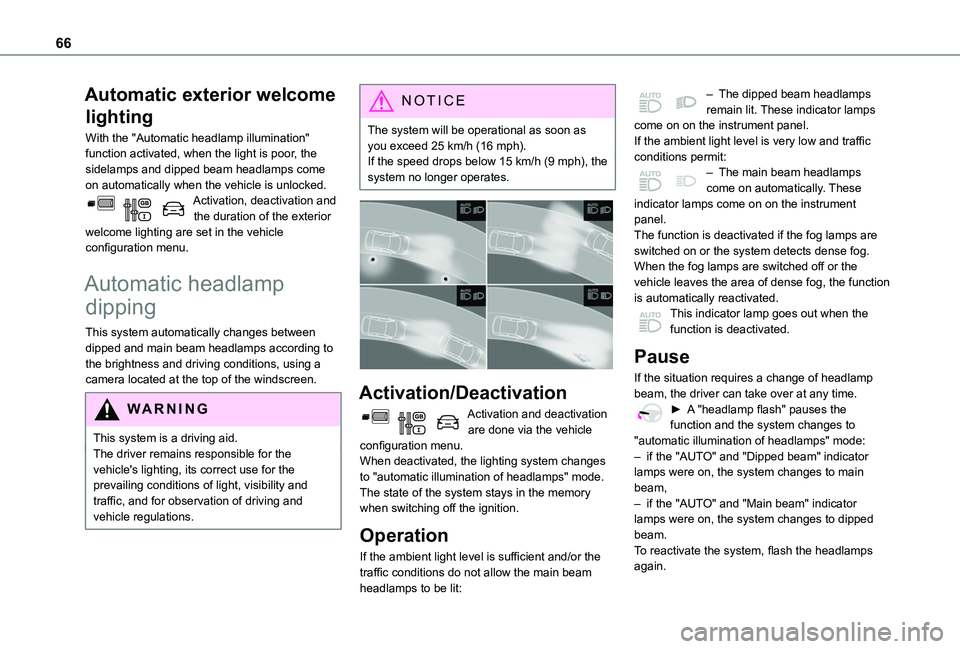
If the ambient light level is sufficient and/or the traffic conditions do not allow the main beam headlamps to be lit:
– The dipped beam headlamps remain lit. These indicator lamps come on on the instrument panel.If the ambient light level is very low and traffic conditions permit:– The main beam headlamps come on automatically. These indicator lamps come on on the instrument panel.The function is deactivated if the fog lamps are switched on or the system detects dense fog.When the fog lamps are switched off or the vehicle leaves the area of dense fog, the function is automatically reactivated.This indicator lamp goes out when the function is deactivated.
Pause
If the situation requires a change of headlamp beam, the driver can take over at any time.► A "headlamp flash" pauses the function and the system changes to "automatic illumination of headlamps" mode:
– if the "AUTO" and "Dipped beam" indicator lamps were on, the system changes to main beam,– if the "AUTO" and "Main beam" indicator lamps were on, the system changes to dipped beam.To reactivate the system, flash the headlamps again.
Page 67 of 272
67
Lighting and visibility
4
NOTIC E
The system may suffer interference or not work correctly:– under conditions of poor visibility (snow, heavy rain, etc.),– if the windscreen in front of the camera is dirty, misted or obscured (for example, by a sticker, etc.),– if the vehicle is facing highly reflective signs.When the system detects thick fog, it temporarily deactivates the function.The system is not able to detect:– road users that do not have their own lighting, such as pedestrians,– vehicles whose lighting is obscured (for example: vehicles running behind a safety barrier on a motorway),– vehicles at the top or bottom of a steep slope, on winding roads, on crossroads.
WARNI NG
Clean the windscreen regularly, particularly the area in front of the camera.The internal surface of the windscreen can also become misted around the camera. In humid and cold weather, demist the windscreen regularly.Do not allow snow to accumulate on the bonnet or roof of the vehicle as this could obstruct the detection camera.
Headlamp beam height
adjustment
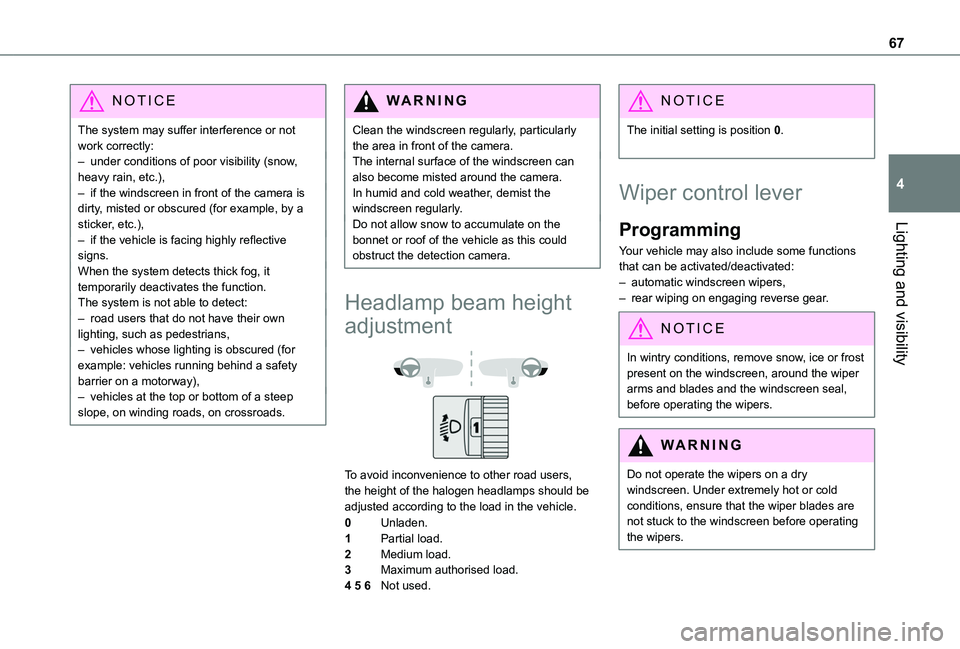
To avoid inconvenience to other road users, the height of the halogen headlamps should be adjusted according to the load in the vehicle.
0Unladen.
1Partial load.
2Medium load.
3Maximum authorised load.
4 5 6Not used.
NOTIC E
The initial setting is position 0.
Wiper control lever
Programming
Your vehicle may also include some functions that can be activated/deactivated:– automatic windscreen wipers,– rear wiping on engaging reverse gear.
NOTIC E
In wintry conditions, remove snow, ice or frost present on the windscreen, around the wiper arms and blades and the windscreen seal, before operating the wipers.
WARNI NG
Do not operate the wipers on a dry windscreen. Under extremely hot or cold conditions, ensure that the wiper blades are not stuck to the windscreen before operating the wipers.
Page 96 of 272
96
In case of towing
WARNI NG
Driving with a trailer places greater demands on the towing vehicle and requires extra care from the driver.
NOTIC E
Respect the maximum towable weights.At altitude: reduce the maximum load by 10% per 1,000 metres (3,280 ft) of altitude; the density of the air decreases with altitude and the performance of the engine reduces.
WARNI NG
New vehicle: do not pull a trailer before having driven at least 1,000 kilometres (620 miles).
NOTIC E
If the outside temperature is high, let the engine idle for 1 to 2 minutes after the vehicle comes to a stop, to help it to cool.
Before setting off
Nose weight
► Distribute the load in the trailer so that the heaviest items are as close as possible to the axle and the nose weight (at the point where it joins your vehicle) approaches the maximum permitted without exceeding it.
Tyres
► Check the tyre pressures of the towing vehicle and of the trailer, observing the recommended pressures.
Lighting
► Check the electrical signalling on the trailer and the headlamp beam height of your vehicle.
NOTIC E
If a genuine TOYOTA towing device is used, the rear parking sensors will be deactivated automatically to avoid the audible signal.
When driving
Cooling
Towing a trailer uphill increases the temperature of the coolant. The maximum towable load depends on the gradient and the exterior temperature. The cooling capacity of the fan does not increase with engine speed.► Reduce speed and lower the engine speed, so as to limit the heating-up.
In all cases, pay attention to the coolant temperature.If this warning lamp and the STOP warning lamp come on, stop the vehicle and switch off the engine as soon as possible.
Brakes
Braking distances are increased when towing a trailer. To avoid overheating of the brakes, the use of engine braking is recommended.
Side wind
Bear in mind the increased susceptibility to the wind that the vehicle will have.
Anti-theft protection
Electronic immobiliser
The remote control contains an electronic chip which has a special code. When the ignition is switched on, this code must be recognised in order for starting to be possible.A few seconds after switching off the ignition,
this system locks the engine control system, therefore preventing the engine from being started in the event of a break-in.In the event of a fault, you are informed by illumination of this warning lamp, an audible signal and a message on the screen.The vehicle will not start; contact a TOYOTA dealer as soon as possible.
Page 115 of 272
11 5
Driving
6
NOTIC E
Manoeuvring aidsThe driver must always check the surroundings of the vehicle before and during the whole manoeuvre, in particular using the mirrors.
WARNI NG
RadarThe operation of the radar as well as the associated functions may be impaired through the accumulation of dirt (mud, frost, etc.), in certain difficult weather conditions (very heavy rain, snow) or if the bumper is damaged.If the front bumper is to be repainted, contact a TOYOTA dealer or a qualified workshop; certain types of paint could interfere with the operation of the radar.
WARNI NG
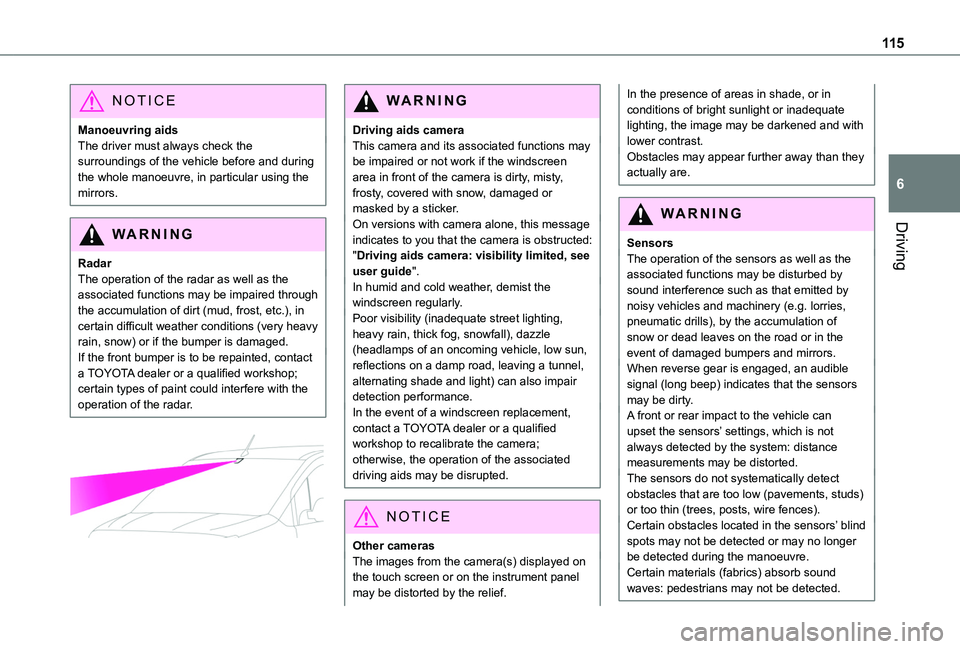
Driving aids cameraThis camera and its associated functions may be impaired or not work if the windscreen area in front of the camera is dirty, misty, frosty, covered with snow, damaged or masked by a sticker.On versions with camera alone, this message indicates to you that the camera is obstructed: "Driving aids camera: visibility limited, see user guide".In humid and cold weather, demist the windscreen regularly.Poor visibility (inadequate street lighting, heavy rain, thick fog, snowfall), dazzle (headlamps of an oncoming vehicle, low sun, reflections on a damp road, leaving a tunnel, alternating shade and light) can also impair detection performance.In the event of a windscreen replacement, contact a TOYOTA dealer or a qualified workshop to recalibrate the camera;
otherwise, the operation of the associated driving aids may be disrupted.
NOTIC E
Other camerasThe images from the camera(s) displayed on the touch screen or on the instrument panel may be distorted by the relief.
In the presence of areas in shade, or in conditions of bright sunlight or inadequate lighting, the image may be darkened and with lower contrast.Obstacles may appear further away than they actually are.
WARNI NG
SensorsThe operation of the sensors as well as the associated functions may be disturbed by sound interference such as that emitted by noisy vehicles and machinery (e.g. lorries, pneumatic drills), by the accumulation of snow or dead leaves on the road or in the event of damaged bumpers and mirrors.When reverse gear is engaged, an audible signal (long beep) indicates that the sensors may be dirty.A front or rear impact to the vehicle can upset the sensors’ settings, which is not
always detected by the system: distance measurements may be distorted.The sensors do not systematically detect obstacles that are too low (pavements, studs) or too thin (trees, posts, wire fences).Certain obstacles located in the sensors’ blind spots may not be detected or may no longer be detected during the manoeuvre.Certain materials (fabrics) absorb sound waves: pedestrians may not be detected.
Page 128 of 272
128
WARNI NG
If any of the following malfunctions occurs, do not use the system:– Following an impact on the windscreen close to the camera.– Brake lamps not working.
WARNI NG
If the vehicle has undergone any of the following modifications, do not use the system:– Carrying long objects on roof bars or a roof rack.– Towing.– Front end of the vehicle modified (for example by adding long-range headlamps or painting the front bumper).
Malfunction
In the event of a cruise control malfunction, dashes are displayed instead of the cruise control speed setting.This warning lamp comes on, accompanied by an audible signal and an onscreen message, to indicate a system malfunction.Have the system checked by a TOYOTA dealer or a qualified workshop.
NOTIC E
The adaptive cruise control deactivates automatically if the use of a “space-saver” type spare wheel is detected or in the event of a malfunction of the lateral brake lamps or trailer brake lamps (for approved trailers).
Memorising speeds
This function, used only for the speed limiter and programmable cruise control, lets you save speed settings that will subsequently be proposed for the purpose of configuring these two systems.You can memorise multiple speed settings for each of the two systems.By default, some speed settings are already memorised.
WARNI NG
As a safety measure, the driver must only change speed settings when stationary.
Changing a speed setting
In the Driving / Vehicle touch screen menu, select "Driving functions" then "Memorised speed settings".
"MEM" button
With this button, you can select a memorised speed setting to use with the speed limiter or the programmable cruise control.For more information on the Speed limiter or Programmable cruise control, refer to the corresponding section.
Active Safety Brake with
Collision Risk Alert and
Intelligent emergency
braking assistance
Refer to the General recommendations on the use of driving and manoeuvring aids.
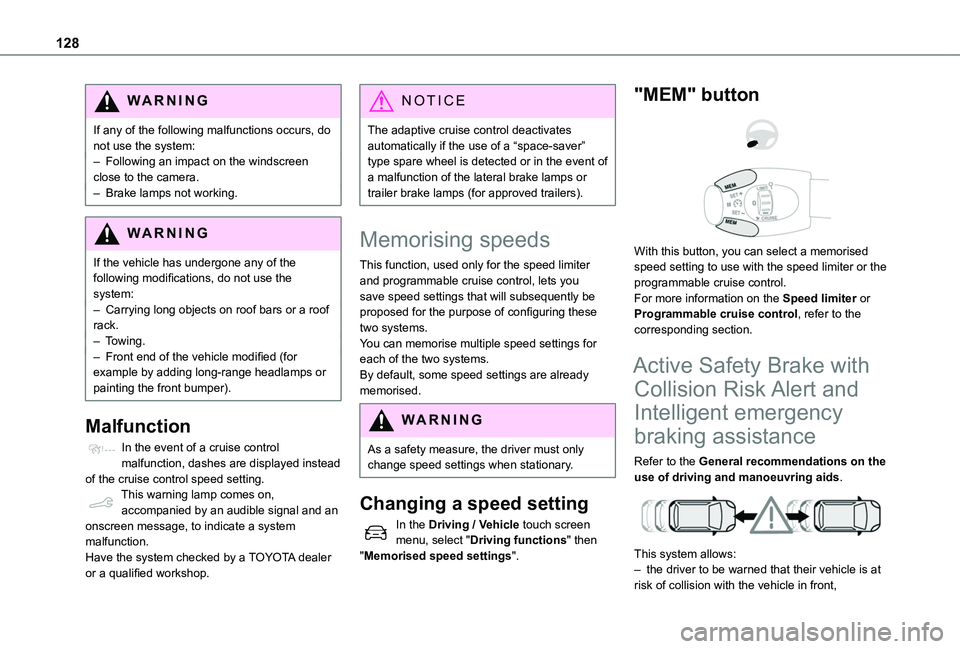
This system allows:– the driver to be warned that their vehicle is at risk of collision with the vehicle in front,
Page 137 of 272
137
Driving
6
– the driver's seat belt is unfastened and their door is opened.
NOTIC E
As soon as the speed of the vehicle drops below 65 km/h (40 mph), the system goes into standby.The driving time is counted again once the speed is above 65 km/h (40 mph).
Driver Attention Warning
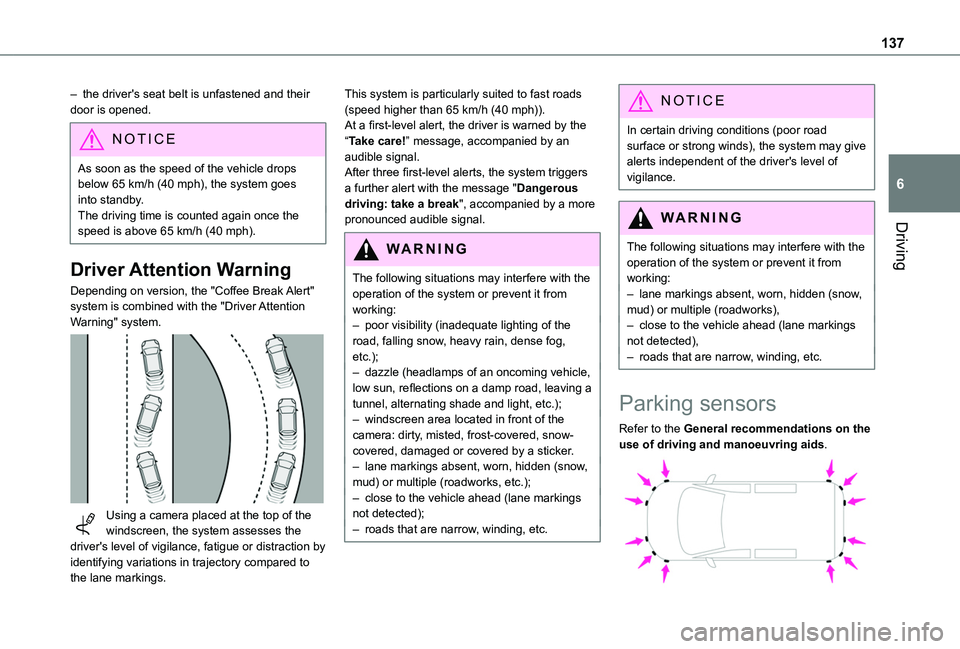
Depending on version, the "Coffee Break Alert" system is combined with the "Driver Attention Warning" system.
Using a camera placed at the top of the windscreen, the system assesses the
driver's level of vigilance, fatigue or distraction by identifying variations in trajectory compared to the lane markings.
This system is particularly suited to fast roads (speed higher than 65 km/h (40 mph)).At a first-level alert, the driver is warned by the “Take care!” message, accompanied by an audible signal.After three first-level alerts, the system triggers a further alert with the message "Dangerous driving: take a break", accompanied by a more pronounced audible signal.
WARNI NG
The following situations may interfere with the operation of the system or prevent it from working:– poor visibility (inadequate lighting of the road, falling snow, heavy rain, dense fog, etc.);– dazzle (headlamps of an oncoming vehicle, low sun, reflections on a damp road, leaving a tunnel, alternating shade and light, etc.);– windscreen area located in front of the camera: dirty, misted, frost-covered, snow-covered, damaged or covered by a sticker.– lane markings absent, worn, hidden (snow, mud) or multiple (roadworks, etc.);– close to the vehicle ahead (lane markings not detected);– roads that are narrow, winding, etc.
NOTIC E
In certain driving conditions (poor road surface or strong winds), the system may give alerts independent of the driver's level of vigilance.
WARNI NG
The following situations may interfere with the operation of the system or prevent it from working:– lane markings absent, worn, hidden (snow, mud) or multiple (roadworks),– close to the vehicle ahead (lane markings not detected),– roads that are narrow, winding, etc.
Parking sensors
Refer to the General recommendations on the use of driving and manoeuvring aids.
Page 151 of 272
151
Practical information
7
Towing device with quickly
detachable towball
No tools are required to install or remove this genuine towing device.
NOTIC E
Trailers with LED lamps are not compatible with the wiring harness of this device.
Fitting
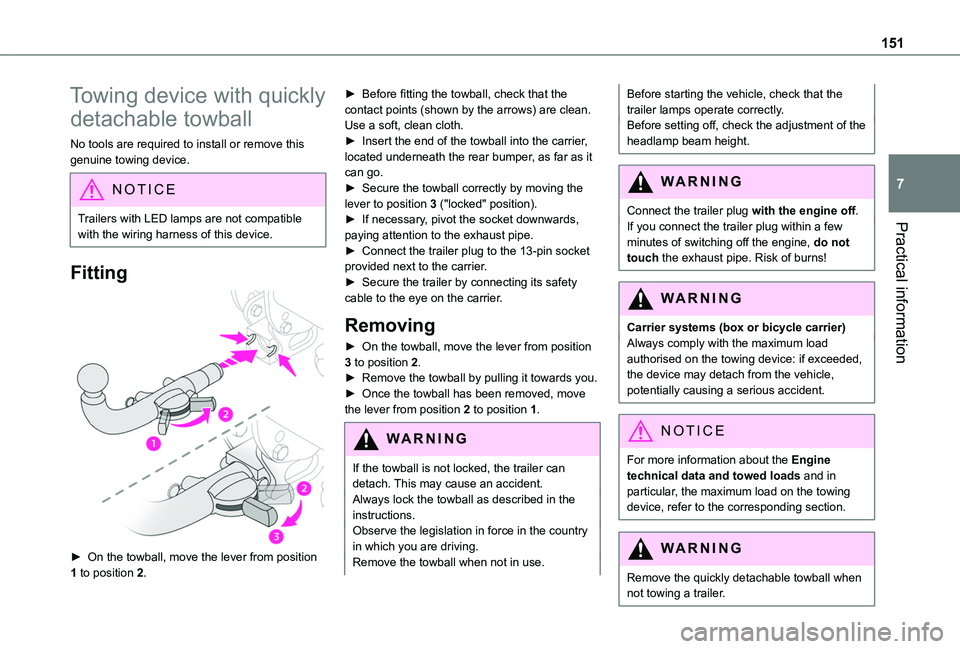
► On the towball, move the lever from position 1 to position 2.
► Before fitting the towball, check that the contact points (shown by the arrows) are clean. Use a soft, clean cloth.► Insert the end of the towball into the carrier, located underneath the rear bumper, as far as it can go.► Secure the towball correctly by moving the lever to position 3 ("locked" position).► If necessary, pivot the socket downwards, paying attention to the exhaust pipe.► Connect the trailer plug to the 13-pin socket provided next to the carrier.► Secure the trailer by connecting its safety cable to the eye on the carrier.
Removing
► On the towball, move the lever from position 3 to position 2.► Remove the towball by pulling it towards you.► Once the towball has been removed, move the lever from position 2 to position 1.
WARNI NG
If the towball is not locked, the trailer can detach. This may cause an accident.Always lock the towball as described in the instructions.Observe the legislation in force in the country in which you are driving.Remove the towball when not in use.
Before starting the vehicle, check that the trailer lamps operate correctly.Before setting off, check the adjustment of the headlamp beam height.
WARNI NG
Connect the trailer plug with the engine off.If you connect the trailer plug within a few minutes of switching off the engine, do not
touch the exhaust pipe. Risk of burns!
WARNI NG
Carrier systems (box or bicycle carrier)Always comply with the maximum load authorised on the towing device: if exceeded, the device may detach from the vehicle, potentially causing a serious accident.
NOTIC E
For more information about the Engine technical data and towed loads and in particular, the maximum load on the towing device, refer to the corresponding section.
WARNI NG
Remove the quickly detachable towball when not towing a trailer.