Page 44 of 272

44
Steering wheel
adjustment
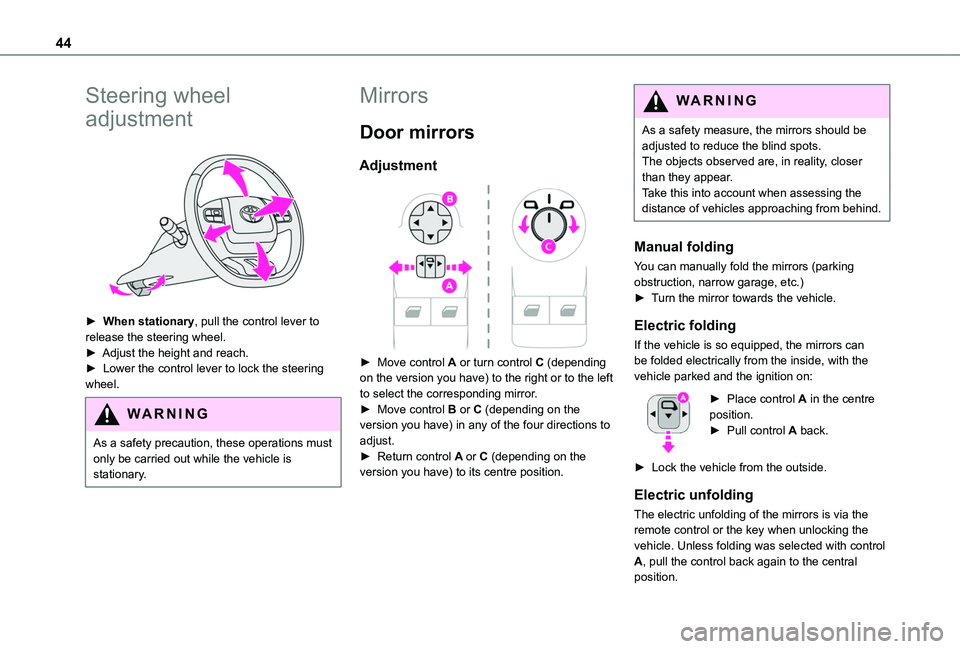
► When stationary, pull the control lever to release the steering wheel.► Adjust the height and reach.► Lower the control lever to lock the steering wheel.
WARNI NG
As a safety precaution, these operations must only be carried out while the vehicle is stationary.
Mirrors
Door mirrors
Adjustment
► Move control A or turn control C (depending on the version you have) to the right or to the left to select the corresponding mirror.► Move control B or C (depending on the version you have) in any of the four directions to adjust.
► Return control A or C (depending on the version you have) to its centre position.
WARNI NG
As a safety measure, the mirrors should be adjusted to reduce the blind spots.The objects observed are, in reality, closer than they appear.Take this into account when assessing the distance of vehicles approaching from behind.
Manual folding
You can manually fold the mirrors (parking obstruction, narrow garage, etc.)► Turn the mirror towards the vehicle.
Electric folding
If the vehicle is so equipped, the mirrors can be folded electrically from the inside, with the vehicle parked and the ignition on:
► Place control A in the centre position.► Pull control A back.
► Lock the vehicle from the outside.
Electric unfolding
The electric unfolding of the mirrors is via the remote control or the key when unlocking the vehicle. Unless folding was selected with control A, pull the control back again to the central position.
Page 50 of 272

50
It also allows a smartphone to be connected by MirrorLinkTM, Android Auto® or CarPlay®, enabling certain smartphone applications to be used on the touch screen.For best results, use a cable made or approved by the device manufacturer.These applications can be managed using the steering mounted controls or the audio system controls.
220 V/50 Hz socket
AC 220V
50Hz 120W
It is located on the side of the central storage compartment.This socket (max. power: 150 W) operates with the engine running, and with the Stop & Start system in STOP mode.► Lift the protective cover.► Check that the green indicator lamp is on.► Connect your multimedia or other electrical device (telephone charger, laptop computer, CD-DVD player, bottle warmer, etc.).In the event of a malfunction, the green indicator lamp flashes.
Have the socket checked by a TOYOTA dealer or a qualified workshop.
WARNI NG
Connect only one device at a time to the socket (do not use extension leads or multi-socket adapters).Connect only devices with class II insulation (shown on the device).
Do not use metal-cased devices (e.g. electric shaver, etc.).
NOTIC E
As a safety measure, if power consumption is high and power is required by the vehicle's electrical system (due to severe weather conditions, electrical overload, etc.), power to the socket may be cut off, in which case the green indicator lamp goes off.
Wireless smartphone
charger
It allows wireless charging of a portable device such as a smartphone, using the magnetic induction principle, in accordance with the Qi 1.1 standard.The portable device to be charged must be compatible with the Qi standard, either by design or by using a compatible holder or shell.The charging area is identified by the Qi symbol.The charger works with the engine running and with the Stop & Start system in STOP mode.Charging is managed by the smartphone.With Keyless Entry and Starting, the charger’s operation may be briefly disrupted when a door is opened or the ignition is switched off.
Charging
► With the charging area clear, place a device in its centre.
When the portable device is detected, the charger’s indicator lamp lights up green. It
Page 51 of 272

51
Ease of use and comfort
3
remains lit for the whole time that the battery is being charged.
WARNI NG
The system is not designed to charge multiple devices simultaneously.
WARNI NG
Do not leave any metal objects (coins, keys, vehicle remote control, etc.) in the charging area while a device is being charged, due to the risk of overheating or interrupting the charging process.
Operating check
The state of the indicator lamp allows the operation of the charger to be monitored.
State of the indicator lampMeaning
OffEngine switched off.No compatible devices detected.
Charging finished.
State of the indicator lampMeaning
Fixed greenCompatible device detected.Charging.
Flashing orangeForeign object detected in the charging zone.Device not well centred in the charging zone.
Fixed orangeFault with the device's battery meter.Device battery temperature too high.Charger malfunction.
If the indicator lamp is lit orange:– remove the device, then place it back in the centre of the charging zone.or– remove the device and try again in a quarter of an hour.If the problem persists, have the system checked by a TOYOTA dealer or a qualified workshop.
Load retaining partition
On the floor, behind the front seats, a vertical partition protects the driver and front passengers against the risk of load movement.Steel or glazed partitions separate the loading area from the cab.
WARNI NG
When washing your vehicle, never clean the inside directly using a water jet.
Page 66 of 272
66
Courtesy lamp
Automatic switching on/off
The front courtesy lamp comes on when the key is removed from the ignition switch.All courtesy lamps come on when the vehicle is unlocked, when one of the corresponding doors is opened and when locating the vehicle using the remote control. They fade to off after the ignition is switched on and when the vehicle is locked.
WARNI NG
Take care not to allow objects to come into contact with the courtesy lamp.
Type 1
Always lit, ignition on.
Lights up when one of the front or rear doors is opened.Always off.
Type 2
Front: comes on when one of the front or rear doors is opened (sliding side door and depending on equipment, left-hand side-hinged door or tailgate).Always lit, ignition on.
Always off.
Individual reading lamp
If fitted to the vehicle, these are switched on and off by means of a manual switch.With the ignition on, operate the corresponding switch.
Page 89 of 272

89
Safety
5
WARNI NG
Installing a booster seatThe chest part of the seat belt must be positioned on the child's shoulder without touching the neck.Ensure that the lap part of the seat belt passes correctly over the child's thighs.Use a booster seat with backrest, equipped with a belt guide at shoulder level.
WARNI NG
Additional protectionsTo prevent accidental opening of the doors and rear windows, use the "Child lock".Take care not to open the rear windows by more than one third.To protect young children from the rays of the sun, fit side blinds on the rear windows.As a safety precaution, do not leave:– a child alone and unattended in a vehicle,– a child or an animal in a vehicle which is exposed to the sun, with the windows closed,– the keys within reach of children inside the vehicle.
Child seat at the rear
Row 2
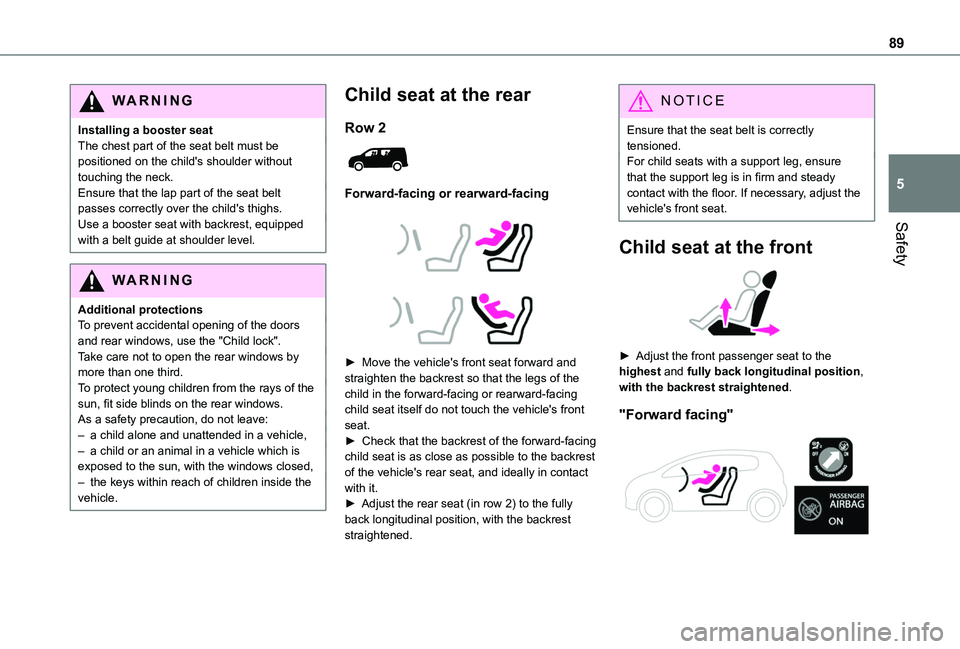
Forward-facing or rearward-facing
► Move the vehicle's front seat forward and straighten the backrest so that the legs of the child in the forward-facing or rearward-facing child seat itself do not touch the vehicle's front seat.► Check that the backrest of the forward-facing child seat is as close as possible to the backrest of the vehicle's rear seat, and ideally in contact with it.► Adjust the rear seat (in row 2) to the fully back longitudinal position, with the backrest straightened.
NOTIC E
Ensure that the seat belt is correctly tensioned.For child seats with a support leg, ensure that the support leg is in firm and steady contact with the floor. If necessary, adjust the vehicle's front seat.
Child seat at the front
► Adjust the front passenger seat to the highest and fully back longitudinal position, with the backrest straightened.
"Forward facing"
Page 91 of 272

91
Safety
5
Deactivating/Reactivating the front
passenger airbag
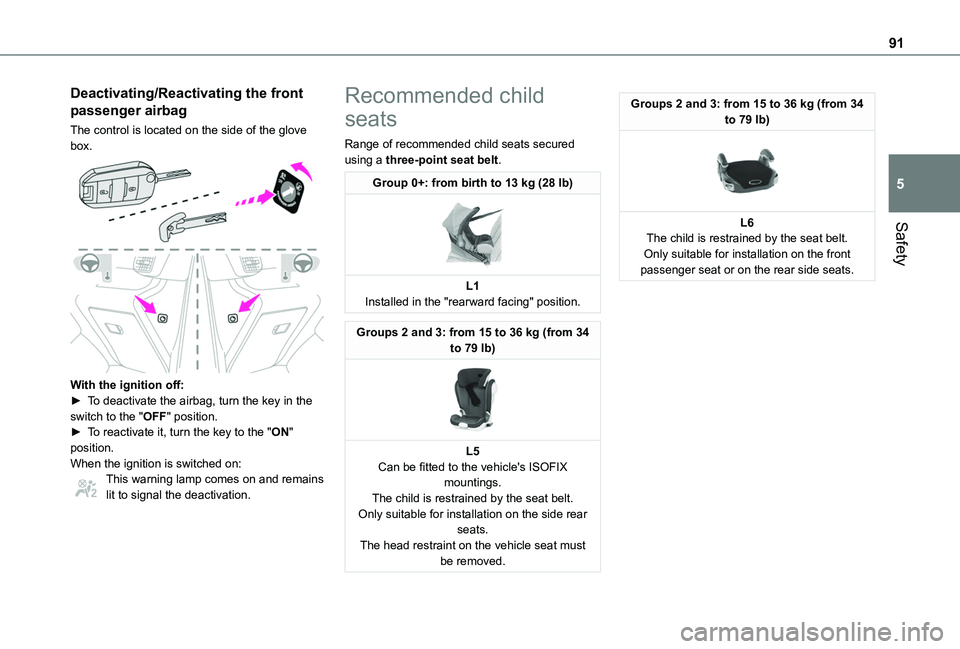
The control is located on the side of the glove box.
With the ignition off:► To deactivate the airbag, turn the key in the switch to the "OFF" position. ► To reactivate it, turn the key to the "ON" position.When the ignition is switched on:This warning lamp comes on and remains lit to signal the deactivation.
Recommended child
seats
Range of recommended child seats secured using a three-point seat belt.
Group 0+: from birth to 13 kg (28 lb)
L1Installed in the "rearward facing" position.
Groups 2 and 3: from 15 to 36 kg (from 34 to 79 lb)
L5Can be fitted to the vehicle's ISOFIX mountings.The child is restrained by the seat belt.Only suitable for installation on the side rear seats.The head restraint on the vehicle seat must be removed.
Groups 2 and 3: from 15 to 36 kg (from 34 to 79 lb)
L6The child is restrained by the seat belt.Only suitable for installation on the front passenger seat or on the rear side seats.
Page 93 of 272

93
Safety
5
Key
(a) Refer to the current legislation in the country in which you are drivin\
g before placing a child in this seat position.(b) Group 0: from birth to 10 kg (22 lb). Carrycots and "car" infant carriers must not be installed on the f\
ront passenger seat(s).(c) Universal child seat: child seat suitable for installation in all vehic\
les using the seat belt.U Seat position suitable for installing a child seat secured using the se\
at belt and universally approved for rearward-facing and/or forward-faci\
ng use.UF Seat position suitable for installing a child seat secured using a seat\
belt and universally approved for forward-facing use.X Seat position not suitable for installing a child seat for the stated w\
eight class.
Manual child lock
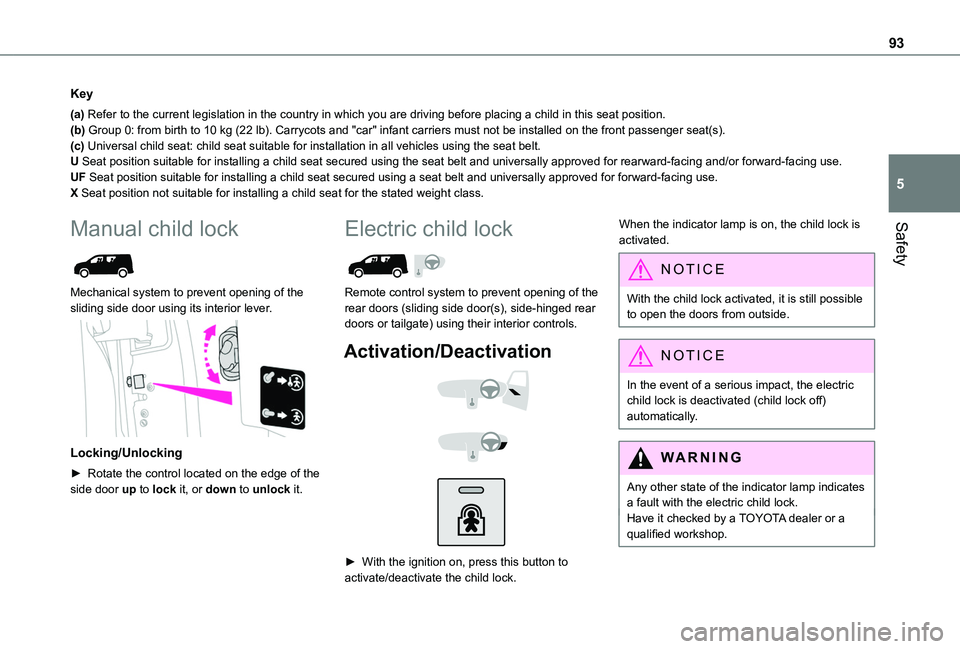
Mechanical system to prevent opening of the sliding side door using its interior lever.
Locking/Unlocking
► Rotate the control located on the edge of the side door up to lock it, or down to unlock it.
Electric child lock
Remote control system to prevent opening of the rear doors (sliding side door(s), side-hinged rear doors or tailgate) using their interior controls.
Activation/Deactivation
► With the ignition on, press this button to activate/deactivate the child lock.
When the indicator lamp is on, the child lock is activated.
NOTIC E
With the child lock activated, it is still possible to open the doors from outside.
NOTIC E
In the event of a serious impact, the electric child lock is deactivated (child lock off) automatically.
WARNI NG
Any other state of the indicator lamp indicates a fault with the electric child lock.Have it checked by a TOYOTA dealer or a qualified workshop.
Page 94 of 272
94
WARNI NG
This system is independent and in no circumstances does it take the place of the central locking control.Do not drive with the sliding side door open.Check the status of the child lock each time you switch on the ignition.Always remove the key from the ignition when leaving the vehicle, even for a short time.