2020 TOYOTA PROACE CITY engine
[x] Cancel search: enginePage 29 of 272
29
Access
2
NOTIC E
If your vehicle is fitted with an alarm, pressing and holding the locking button enables the windows to be closed. The window stops in position when you release the button.
WARNI NG
Driving with the doors locked could make it more difficult for the emergency services to enter the vehicle in an emergency.As a safety measure, never leave the vehicle, even for a short time, without taking the remote control with you.
If a door is not properly closed (except the right-hand door with side-hinged rear doors):– when the vehicle is stationary and engine running, this warning lamp comes on, accompanied by a warning message for a few seconds, – when the vehicle is moving (at speeds above 10 km/h (6 mph)), this warning lamp comes on, accompanied by an audible signal and a warning message for a few seconds.
Deadlocking
WARNI NG
Deadlocking renders the exterior and interior door controls inoperative.It also deactivates the manual central control button.Therefore, never leave anyone inside the vehicle when it is deadlocked.
With the key
► To deadlock the vehicle, turn the key in the driver's door lock towards the rear of the vehicle.► Then within five seconds, turn the key towards the rear again.
With the remote control
► To deadlock the vehicle, press this button.► Then press this button again within five seconds after locking.
NOTIC E
At the same time, depending on version, the electric door mirrors fold in.
NOTIC E
If your vehicle is fitted with an alarm, pressing and holding the locking button enables the windows to be closed. The window stops in position when you release the button.
With the Keyless Entry and Starting
on your person
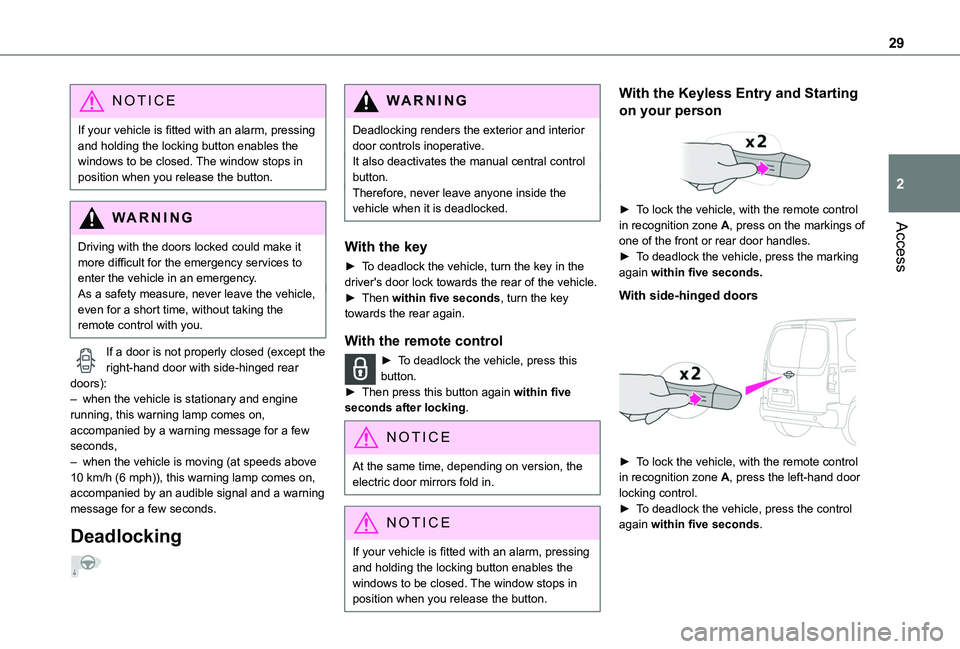
► To lock the vehicle, with the remote control in recognition zone A, press on the markings of one of the front or rear door handles.► To deadlock the vehicle, press the marking again within five seconds.
With side-hinged doors
► To lock the vehicle, with the remote control in recognition zone A, press the left-hand door locking control.► To deadlock the vehicle, press the control again within five seconds.
Page 38 of 272
38
Locking the vehicle with full
alarm system
Activation
► Switch off the engine and exit the vehicle.► Lock the vehicle using the remote control or the "Keyless Entry and Starting" system.The monitoring system is active: the red indicator lamp in the button flashes every second and the direction indicators come on for about 2 seconds.
NOTIC E
Following an instruction to lock the vehicle, the exterior perimeter monitoring is activated after 5 seconds and the interior volumetric and anti-tilt monitoring after 45 seconds.
NOTIC E
If an opening (door, boot or bonnet) is not closed properly, the vehicle is not locked but the exterior perimeter monitoring will be activated after 45 seconds at the same time as the interior volumetric and anti-tilt monitoring.
Deactivation
► Press the unlocking button on the remote control.
or► Unlock the vehicle with the Keyless Entry and Starting system.The monitoring system is deactivated: the indicator lamp in the button goes off and the direction indicators flash for about 2 seconds.
NOTIC E
When the vehicle automatically locks itself
again (as happens if a door or the boot is not opened within 30 seconds of unlocking), the monitoring system is also reactivated automatically.
Locking the vehicle
with exterior perimeter
monitoring only
Disable volumetric and anti-tilt monitoring to avoid unwanted alarm triggering in certain cases, such as:– Slightly open window or sunroof. – Washing the vehicle.– Changing a wheel.– Towing your vehicle.– Transport on a ship or ferry.
Deactivating the interior volumetric
and anti-tilt monitoring
► Switch off the ignition and within 10 seconds press the alarm button until its red indicator lamp is on fixed.► Get out of the vehicle.► Immediately lock the vehicle using the remote control or the "Keyless Entry and Starting" system.Only the exterior perimeter monitoring is activated; the red indicator lamp in the button flashes every second.
NOTIC E
To be taken into account, the deactivation must be carried out every time the ignition is switched off.
Reactivating the interior volumetric
and anti-tilt monitoring
► Deactivate the perimeter monitoring by unlocking the vehicle with the remote control or the Keyless Entry and Starting system.The indicator lamp in the button goes off.► Reactivate all monitoring by locking the vehicle with the remote control or the Keyless Entry and Starting system.The red indicator lamp in the button once again flashes every second.
Page 43 of 272
43
Ease of use and comfort
3
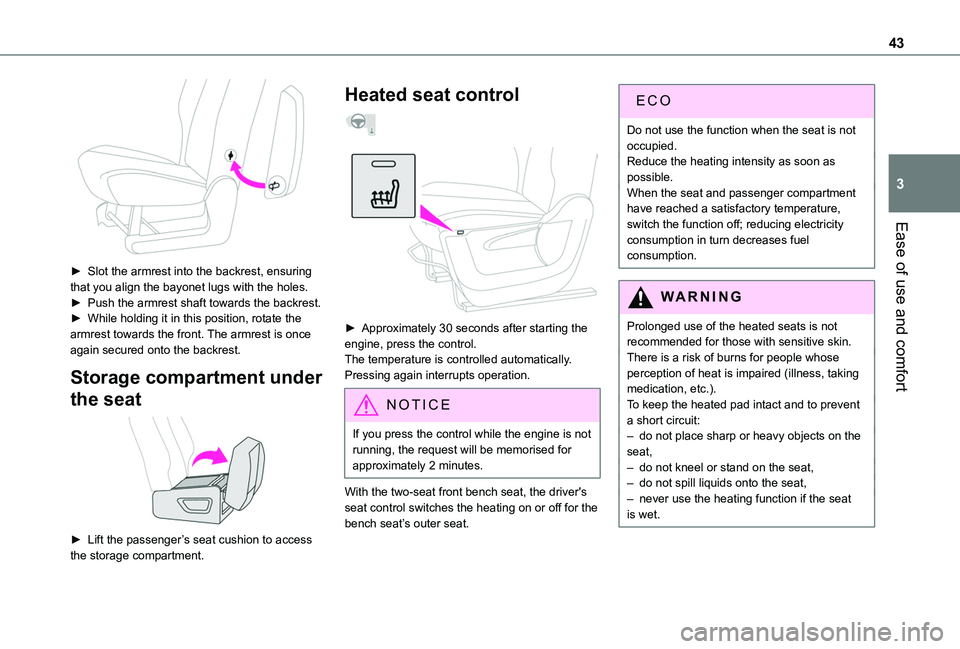
► Slot the armrest into the backrest, ensuring that you align the bayonet lugs with the holes.► Push the armrest shaft towards the backrest.► While holding it in this position, rotate the armrest towards the front. The armrest is once again secured onto the backrest.
Storage compartment under
the seat
► Lift the passenger’s seat cushion to access
the storage compartment.
Heated seat control
► Approximately 30 seconds after starting the engine, press the control.The temperature is controlled automatically.Pressing again interrupts operation.
NOTIC E
If you press the control while the engine is not running, the request will be memorised for approximately 2 minutes.
With the two-seat front bench seat, the driver's seat control switches the heating on or off for the bench seat’s outer seat.
ECO
Do not use the function when the seat is not occupied.Reduce the heating intensity as soon as possible.When the seat and passenger compartment have reached a satisfactory temperature, switch the function off; reducing electricity consumption in turn decreases fuel consumption.
WARNI NG
Prolonged use of the heated seats is not recommended for those with sensitive skin.There is a risk of burns for people whose perception of heat is impaired (illness, taking medication, etc.).To keep the heated pad intact and to prevent a short circuit:– do not place sharp or heavy objects on the
seat,– do not kneel or stand on the seat,– do not spill liquids onto the seat,– never use the heating function if the seat is wet.
Page 50 of 272

50
It also allows a smartphone to be connected by MirrorLinkTM, Android Auto® or CarPlay®, enabling certain smartphone applications to be used on the touch screen.For best results, use a cable made or approved by the device manufacturer.These applications can be managed using the steering mounted controls or the audio system controls.
220 V/50 Hz socket
AC 220V
50Hz 120W
It is located on the side of the central storage compartment.This socket (max. power: 150 W) operates with the engine running, and with the Stop & Start system in STOP mode.► Lift the protective cover.► Check that the green indicator lamp is on.► Connect your multimedia or other electrical device (telephone charger, laptop computer, CD-DVD player, bottle warmer, etc.).In the event of a malfunction, the green indicator lamp flashes.
Have the socket checked by a TOYOTA dealer or a qualified workshop.
WARNI NG
Connect only one device at a time to the socket (do not use extension leads or multi-socket adapters).Connect only devices with class II insulation (shown on the device).
Do not use metal-cased devices (e.g. electric shaver, etc.).
NOTIC E
As a safety measure, if power consumption is high and power is required by the vehicle's electrical system (due to severe weather conditions, electrical overload, etc.), power to the socket may be cut off, in which case the green indicator lamp goes off.
Wireless smartphone
charger
It allows wireless charging of a portable device such as a smartphone, using the magnetic induction principle, in accordance with the Qi 1.1 standard.The portable device to be charged must be compatible with the Qi standard, either by design or by using a compatible holder or shell.The charging area is identified by the Qi symbol.The charger works with the engine running and with the Stop & Start system in STOP mode.Charging is managed by the smartphone.With Keyless Entry and Starting, the charger’s operation may be briefly disrupted when a door is opened or the ignition is switched off.
Charging
► With the charging area clear, place a device in its centre.
When the portable device is detected, the charger’s indicator lamp lights up green. It
Page 51 of 272

51
Ease of use and comfort
3
remains lit for the whole time that the battery is being charged.
WARNI NG
The system is not designed to charge multiple devices simultaneously.
WARNI NG
Do not leave any metal objects (coins, keys, vehicle remote control, etc.) in the charging area while a device is being charged, due to the risk of overheating or interrupting the charging process.
Operating check
The state of the indicator lamp allows the operation of the charger to be monitored.
State of the indicator lampMeaning
OffEngine switched off.No compatible devices detected.
Charging finished.
State of the indicator lampMeaning
Fixed greenCompatible device detected.Charging.
Flashing orangeForeign object detected in the charging zone.Device not well centred in the charging zone.
Fixed orangeFault with the device's battery meter.Device battery temperature too high.Charger malfunction.
If the indicator lamp is lit orange:– remove the device, then place it back in the centre of the charging zone.or– remove the device and try again in a quarter of an hour.If the problem persists, have the system checked by a TOYOTA dealer or a qualified workshop.
Load retaining partition
On the floor, behind the front seats, a vertical partition protects the driver and front passengers against the risk of load movement.Steel or glazed partitions separate the loading area from the cab.
WARNI NG
When washing your vehicle, never clean the inside directly using a water jet.
Page 52 of 272
52
Stowing rings
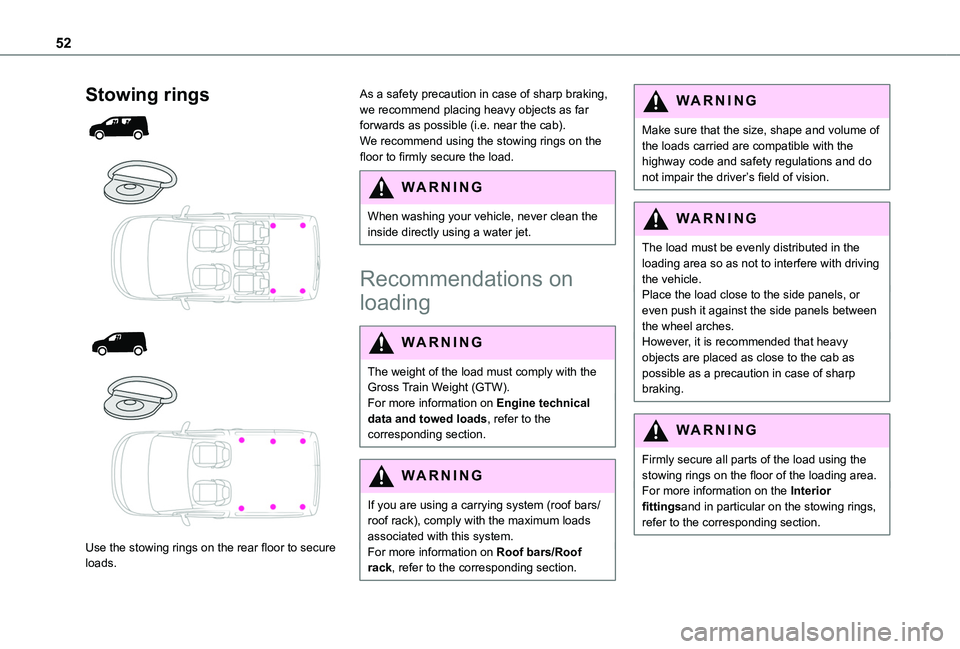
Use the stowing rings on the rear floor to secure loads.
As a safety precaution in case of sharp braking, we recommend placing heavy objects as far forwards as possible (i.e. near the cab).We recommend using the stowing rings on the floor to firmly secure the load.
WARNI NG
When washing your vehicle, never clean the inside directly using a water jet.
Recommendations on
loading
WARNI NG
The weight of the load must comply with the Gross Train Weight (GTW).For more information on Engine technical data and towed loads, refer to the corresponding section.
WARNI NG
If you are using a carrying system (roof bars/roof rack), comply with the maximum loads associated with this system.For more information on Roof bars/Roof rack, refer to the corresponding section.
WARNI NG
Make sure that the size, shape and volume of the loads carried are compatible with the highway code and safety regulations and do not impair the driver’s field of vision.
WARNI NG
The load must be evenly distributed in the loading area so as not to interfere with driving the vehicle.Place the load close to the side panels, or even push it against the side panels between the wheel arches.However, it is recommended that heavy objects are placed as close to the cab as possible as a precaution in case of sharp braking.
WARNI NG
Firmly secure all parts of the load using the stowing rings on the floor of the loading area.For more information on the Interior fittingsand in particular on the stowing rings, refer to the corresponding section.
Page 58 of 272

58
NOTIC E
The protective cover may be left in place after use.
NOTIC E
Regularly check the condition of the protective cover.
When signs of wear and tear appear, contact a TOYOTA dealer to have it replaced by a protective cover that meets the specifications and qualities required by TOYOTA and your vehicle.
Heating and Ventilation
Advice
NOTIC E
Using the ventilation and air conditioning system► To ensure that air is distributed evenly, keep the external air intake grilles at the base of the windscreen, the nozzles, the vents, the air outlets and the air extractor in the boot
free from obstructions.
► Do not cover the sunshine sensor located on the dashboard; this sensor is used to regulate the automatic air conditioning system.► Operate the air conditioning system for at least 5 to 10 minutes once or twice a month to keep it in perfect working order.► If the system does not produce cold air, switch it off and contact a TOYOTA dealer or a qualified workshop.When towing the maximum load on a steep gradient in high temperatures, switching off the air conditioning increases the available engine power, enhancing the towing capacity.
WARNI NG
Avoid driving for too long with the ventilation off or with prolonged operation of interior air recirculation. Risk of misting and deterioration of the air quality!
If the interior temperature is very high after the vehicle has stood for a long time in the sunshine, air the passenger compartment for a few moments.
Put the air flow control at a setting high enough to quickly change the air in the passenger compartment.
NOTIC E
Condensation created by the air conditioning results in a discharge of water underneath the vehicle. This is perfectly normal.
NOTIC E
Servicing the ventilation and air
conditioning system► Ensure that the passenger compartment filter is in good condition and have the filter elements replaced regularly.We recommend using a composite passenger compartment filter. Thanks to its special active additive, this type of filter helps to purify the air breathed by the occupants and keep the passenger compartment clean (by reducing allergic symptoms, unpleasant odours and greasy deposits).► To ensure correct operation of the air conditioning system, have it checked according to the recommendations in the Maintenance and Warranty Guide.
Contains R134A fluorinated greenhouse gasesDepending on version and country of sale, the air conditioning system may contain R134A fluorinated greenhouse gases.
Page 59 of 272
59
Ease of use and comfort
3
NOTIC E
Stop & StartThe heating and air conditioning systems only operate when the engine is running.Temporarily deactivate the Stop & Start system to maintain a comfortable temperature in the passenger compartment.For more information on the Stop & Start, refer to the corresponding section.
Heating
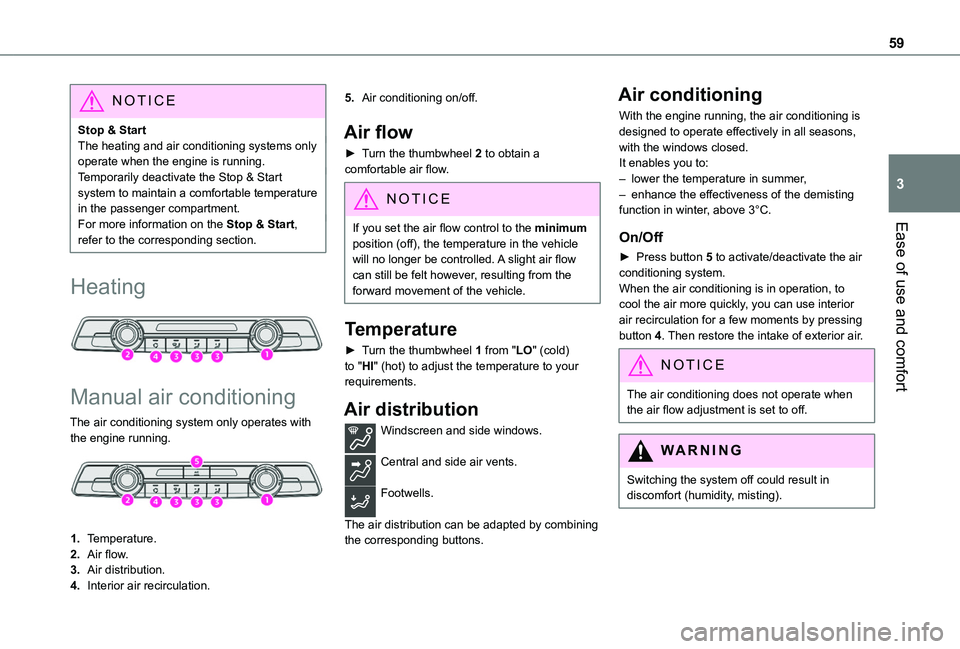
Manual air conditioning
The air conditioning system only operates with the engine running.
1.Temperature.
2.Air flow.
3.Air distribution.
4.Interior air recirculation.
5.Air conditioning on/off.
Air flow
► Turn the thumbwheel 2 to obtain a comfortable air flow.
NOTIC E
If you set the air flow control to the minimum
position (off), the temperature in the vehicle will no longer be controlled. A slight air flow can still be felt however, resulting from the forward movement of the vehicle.
Temperature
► Turn the thumbwheel 1 from "LO" (cold) to "HI" (hot) to adjust the temperature to your requirements.
Air distribution
Windscreen and side windows.
Central and side air vents.
Footwells.
The air distribution can be adapted by combining the corresponding buttons.
Air conditioning
With the engine running, the air conditioning is designed to operate effectively in all seasons, with the windows closed.It enables you to:– lower the temperature in summer,– enhance the effectiveness of the demisting function in winter, above 3°C.
On/Off
► Press button 5 to activate/deactivate the air conditioning system.When the air conditioning is in operation, to cool the air more quickly, you can use interior air recirculation for a few moments by pressing button 4. Then restore the intake of exterior air.
NOTIC E
The air conditioning does not operate when the air flow adjustment is set to off.
WARNI NG
Switching the system off could result in discomfort (humidity, misting).