2020 TOYOTA PROACE CITY spare wheel
[x] Cancel search: spare wheelPage 132 of 272
132
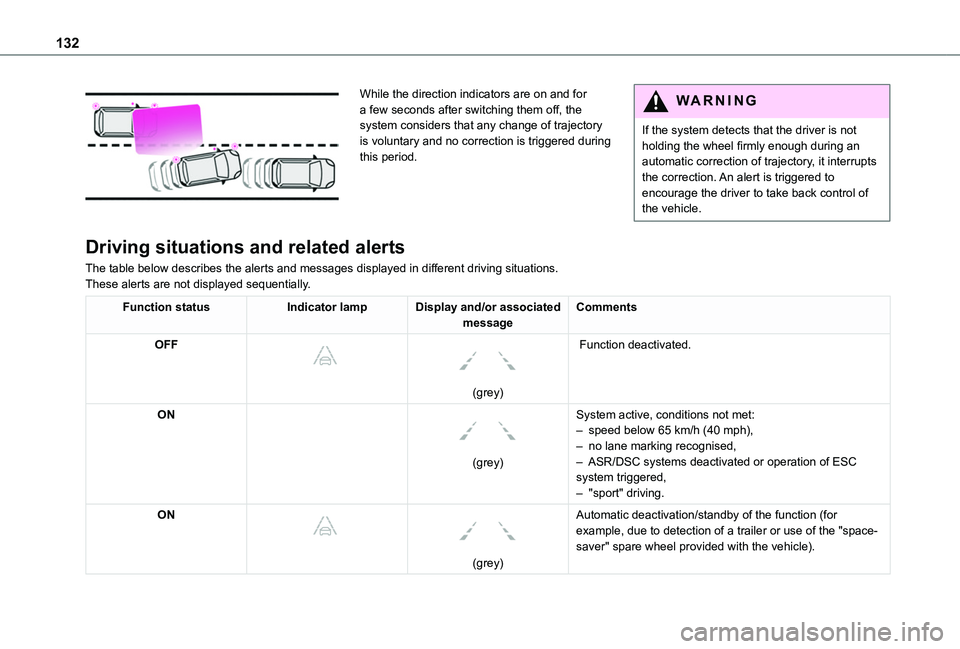
While the direction indicators are on and for a few seconds after switching them off, the system considers that any change of trajectory is voluntary and no correction is triggered during this period.
WARNI NG
If the system detects that the driver is not holding the wheel firmly enough during an automatic correction of trajectory, it interrupts the correction. An alert is triggered to encourage the driver to take back control of the vehicle.
Driving situations and related alerts
The table below describes the alerts and messages displayed in different driving situations.These alerts are not displayed sequentially.
Function statusIndicator lampDisplay and/or associated messageComments
OFF
(grey)
Function deactivated.
ON
(grey)
System active, conditions not met:– speed below 65 km/h (40 mph),
– no lane marking recognised,– ASR/DSC systems deactivated or operation of ESC system triggered,– "sport" driving.
ON
(grey)
Automatic deactivation/standby of the function (for example, due to detection of a trailer or use of the "space-saver" spare wheel provided with the vehicle).
Page 133 of 272
133
Driving
6
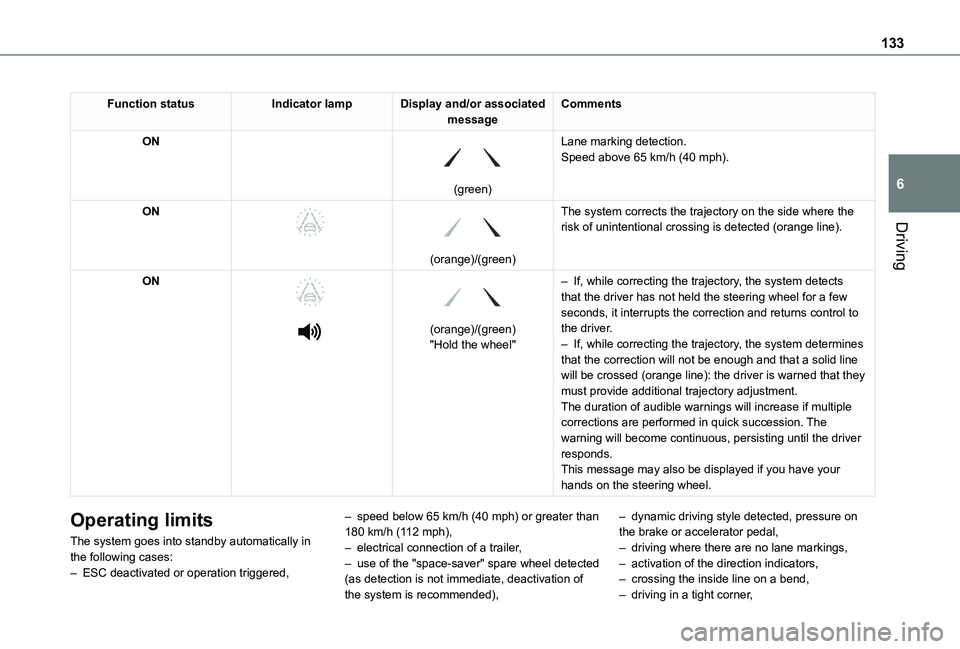
Function statusIndicator lampDisplay and/or associated messageComments
ON
(green)
Lane marking detection.Speed above 65 km/h (40 mph).
ON
(orange)/(green)
The system corrects the trajectory on the side where the risk of unintentional crossing is detected (orange line).
ON
(orange)/(green)"Hold the wheel"
– If, while correcting the trajectory, the system detects that the driver has not held the steering wheel for a few seconds, it interrupts the correction and returns control to the driver.– If, while correcting the trajectory, the system determines that the correction will not be enough and that a solid line will be crossed (orange line): the driver is warned that they must provide additional trajectory adjustment.The duration of audible warnings will increase if multiple corrections are performed in quick succession. The warning will become continuous, persisting until the driver responds.This message may also be displayed if you have your hands on the steering wheel.
Operating limits
The system goes into standby automatically in the following cases:– ESC deactivated or operation triggered,
– speed below 65 km/h (40 mph) or greater than 180 km/h (112 mph),– electrical connection of a trailer,– use of the "space-saver" spare wheel detected (as detection is not immediate, deactivation of the system is recommended),
– dynamic driving style detected, pressure on the brake or accelerator pedal,– driving where there are no lane markings,– activation of the direction indicators,– crossing the inside line on a bend,– driving in a tight corner,
Page 146 of 272
146
Operation
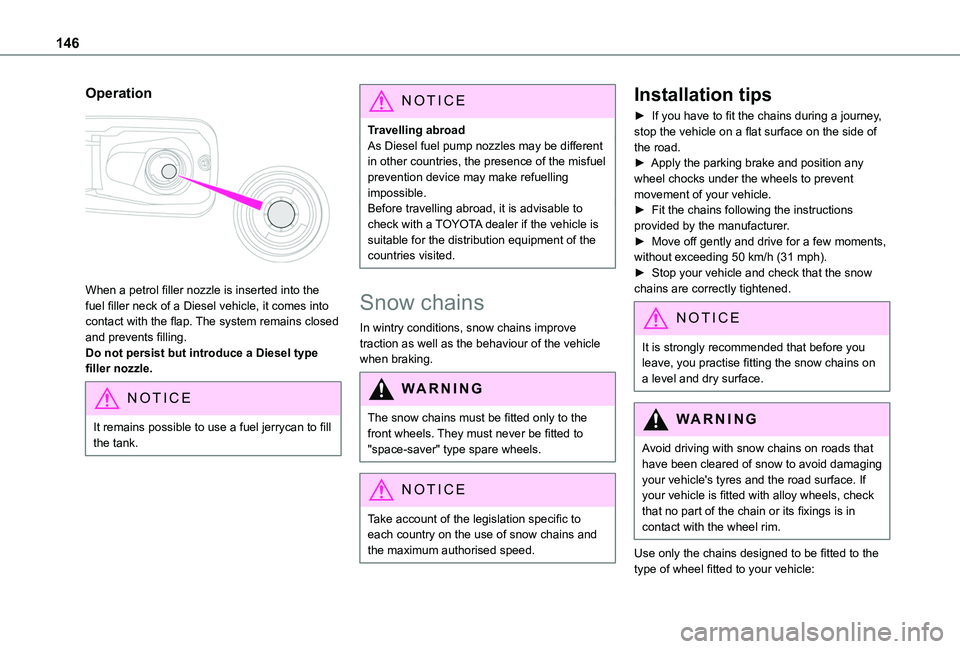
When a petrol filler nozzle is inserted into the fuel filler neck of a Diesel vehicle, it comes into contact with the flap. The system remains closed and prevents filling.Do not persist but introduce a Diesel type filler nozzle.
NOTIC E
It remains possible to use a fuel jerrycan to fill the tank.
NOTIC E
Travelling abroadAs Diesel fuel pump nozzles may be different in other countries, the presence of the misfuel prevention device may make refuelling impossible.Before travelling abroad, it is advisable to check with a TOYOTA dealer if the vehicle is suitable for the distribution equipment of the countries visited.
Snow chains
In wintry conditions, snow chains improve traction as well as the behaviour of the vehicle when braking.
WARNI NG
The snow chains must be fitted only to the front wheels. They must never be fitted to "space-saver" type spare wheels.
NOTIC E
Take account of the legislation specific to each country on the use of snow chains and
the maximum authorised speed.
Installation tips
► If you have to fit the chains during a journey, stop the vehicle on a flat surface on the side of the road.► Apply the parking brake and position any wheel chocks under the wheels to prevent movement of your vehicle.► Fit the chains following the instructions provided by the manufacturer.► Move off gently and drive for a few moments, without exceeding 50 km/h (31 mph).► Stop your vehicle and check that the snow chains are correctly tightened.
NOTIC E
It is strongly recommended that before you leave, you practise fitting the snow chains on a level and dry surface.
WARNI NG
Avoid driving with snow chains on roads that have been cleared of snow to avoid damaging your vehicle's tyres and the road surface. If your vehicle is fitted with alloy wheels, check that no part of the chain or its fixings is in contact with the wheel rim.
Use only the chains designed to be fitted to the type of wheel fitted to your vehicle:
Page 156 of 272
156
Brake pads
Brake wear depends on the style of driving, particularly in the case of vehicles used in town, over short distances. It may be necessary to have the condition of the brakes checked, even between vehicle services.Unless there is a leak in the circuit, a drop in the brake fluid level indicates that the brake pads are worn.
NOTIC E
After washing the vehicle, moisture, or in wintry conditions, ice can form on the brake discs and pads: braking efficiency may be reduced. Gently dab the brakes to dry and defrost them.
Brake disc wear
For information on checking brake disc wear, contact a TOYOTA dealer or a qualified workshop.
Manual parking brake
If you notice excessive brake lever travel or decreased effectiveness, the parking brake must be adjusted, even between two services.This system must be checked by a TOYOTA dealer or a qualified workshop.
Electric parking brake
This system does not require any routine servicing. However, in the event of a problem, do not hesitate to have the system checked by a TOYOTA dealer or a qualified workshop.
NOTIC E
For more information on the Electric parking
brake, refer to the corresponding section.
Particle filter (Diesel)
When the particle filter is approaching saturation, this warning lamp comes on temporarily, accompanied by a message warning of the risk of filter clogging.As soon as the traffic conditions permit, regenerate the filter by driving at a speed of at least 60 km/h (37 mph) until the warning lamp goes off.
NOTIC E
If the warning lamp stays on, this indicates a low Diesel additive level.For more information on Checking levels, refer to the corresponding section.
NOTIC E
Following prolonged operation of the vehicle at very low speed or at idle, you may, in exceptional circumstances, notice the emission of water vapour at the exhaust while accelerating. This has no impact on the vehicle’s behaviour or the environment.
NOTIC E
New vehicleDuring the first few particle filter regeneration operations, you may notice a "burning" smell. This is perfectly normal.
Wheels and tyres
The inflation pressure of all tyres, including the spare wheel, must be checked on "cold” tyres.The pressures indicated on the tyre pressure label are valid for "cold" tyres. If you have driven for more than 10 minutes or more than 10 km (6 miles) at over 50 km/h (31 mph), add 0.3 bar (30 kPa) to the values indicated on the label.
WARNI NG
Under-inflation increases fuel consumption. Non-compliant tyre pressure causes premature wear on tyres and has an adverse
Page 162 of 272
162
Running out of fuel
(Diesel)
On vehicles fitted with Diesel engines, the fuel system must be primed if you run out of fuel.If the engine does not start first time, do not keep trying, but start the procedure again from the beginning.
NOTIC E
For more information on Misfuel prevention (Diesel), refer to the corresponding section.
With Euro 6.2/6.3 engines
► Switch on the ignition (without starting the engine).► Wait around 1 minute and switch off the ignition.► Operate the starter motor to start the engine.If the engine does not start at the first attempt, do not keep trying, but restart the procedure.
Tool kit
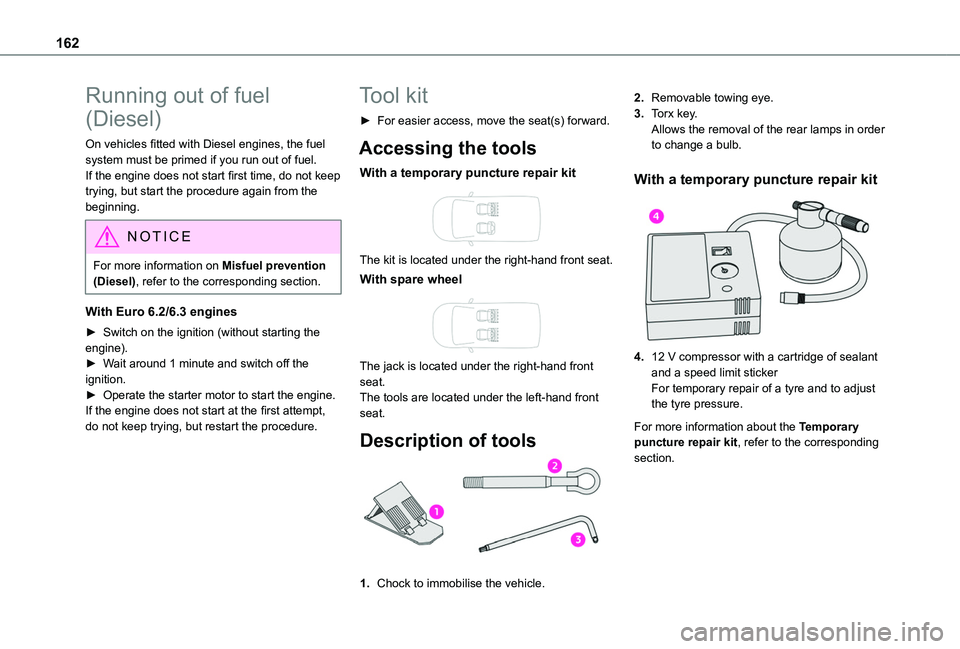
► For easier access, move the seat(s) forward.
Accessing the tools
With a temporary puncture repair kit
The kit is located under the right-hand front seat.
With spare wheel
The jack is located under the right-hand front seat.The tools are located under the left-hand front seat.
Description of tools
1.Chock to immobilise the vehicle.
2.Removable towing eye.
3.Torx key.Allows the removal of the rear lamps in order to change a bulb.
With a temporary puncture repair kit
4.12 V compressor with a cartridge of sealant and a speed limit stickerFor temporary repair of a tyre and to adjust the tyre pressure.
For more information about the Temporary puncture repair kit, refer to the corresponding section.
Page 163 of 272
163
In the event of a breakdown
8
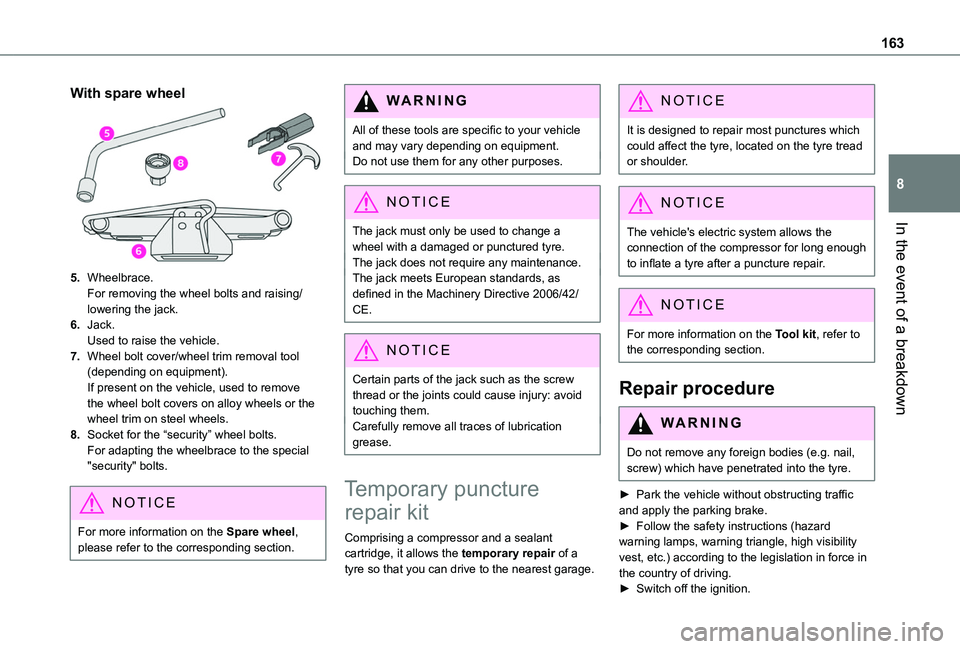
With spare wheel
5.Wheelbrace.For removing the wheel bolts and raising/lowering the jack.
6.Jack.Used to raise the vehicle.
7.Wheel bolt cover/wheel trim removal tool (depending on equipment).If present on the vehicle, used to remove the wheel bolt covers on alloy wheels or the wheel trim on steel wheels.
8.Socket for the “security” wheel bolts.For adapting the wheelbrace to the special "security" bolts.
NOTIC E
For more information on the Spare wheel, please refer to the corresponding section.
WARNI NG
All of these tools are specific to your vehicle and may vary depending on equipment.Do not use them for any other purposes.
NOTIC E
The jack must only be used to change a
wheel with a damaged or punctured tyre.The jack does not require any maintenance.The jack meets European standards, as defined in the Machinery Directive 2006/42/CE.
NOTIC E
Certain parts of the jack such as the screw thread or the joints could cause injury: avoid touching them.Carefully remove all traces of lubrication grease.
Temporary puncture
repair kit
Comprising a compressor and a sealant
cartridge, it allows the temporary repair of a tyre so that you can drive to the nearest garage.
NOTIC E
It is designed to repair most punctures which could affect the tyre, located on the tyre tread or shoulder.
NOTIC E
The vehicle's electric system allows the connection of the compressor for long enough to inflate a tyre after a puncture repair.
NOTIC E
For more information on the Tool kit, refer to the corresponding section.
Repair procedure
WARNI NG
Do not remove any foreign bodies (e.g. nail, screw) which have penetrated into the tyre.
► Park the vehicle without obstructing traffic and apply the parking brake.► Follow the safety instructions (hazard warning lamps, warning triangle, high visibility vest, etc.) according to the legislation in force in the country of driving.► Switch off the ignition.
Page 165 of 272
165
In the event of a breakdown
8
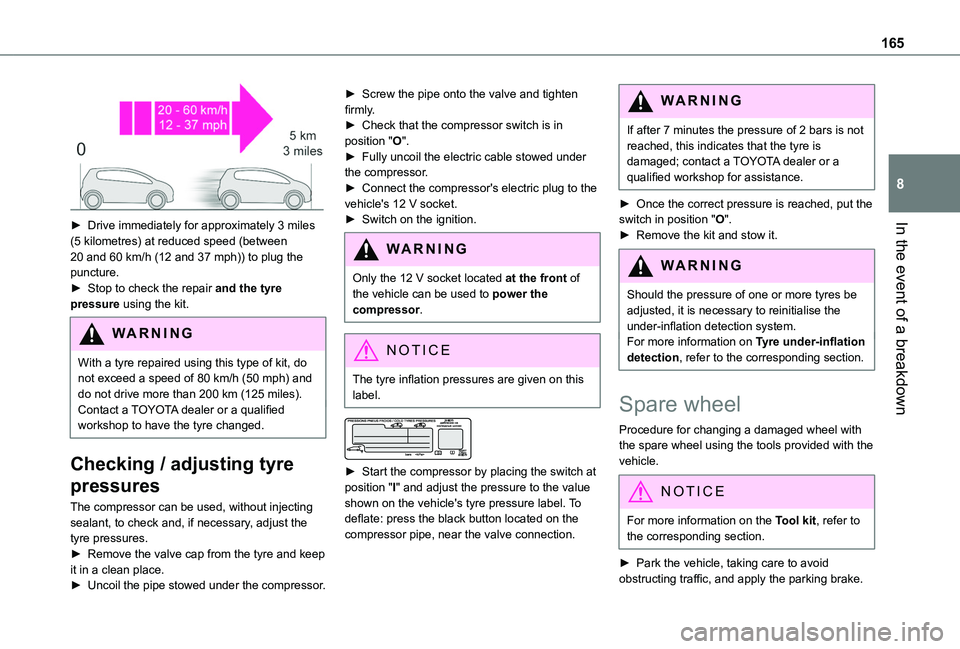
► Drive immediately for approximately 3 miles (5 kilometres) at reduced speed (between 20 and 60 km/h (12 and 37 mph)) to plug the puncture.► Stop to check the repair and the tyre pressure using the kit.
WARNI NG
With a tyre repaired using this type of kit, do not exceed a speed of 80 km/h (50 mph) and do not drive more than 200 km (125 miles).Contact a TOYOTA dealer or a qualified workshop to have the tyre changed.
Checking / adjusting tyre
pressures
The compressor can be used, without injecting sealant, to check and, if necessary, adjust the tyre pressures.► Remove the valve cap from the tyre and keep it in a clean place.► Uncoil the pipe stowed under the compressor.
► Screw the pipe onto the valve and tighten firmly.► Check that the compressor switch is in position "O".► Fully uncoil the electric cable stowed under the compressor.► Connect the compressor's electric plug to the vehicle's 12 V socket.► Switch on the ignition.
WARNI NG
Only the 12 V socket located at the front of the vehicle can be used to power the compressor.
NOTIC E
The tyre inflation pressures are given on this label.
► Start the compressor by placing the switch at position "I" and adjust the pressure to the value shown on the vehicle's tyre pressure label. To deflate: press the black button located on the compressor pipe, near the valve connection.
WARNI NG
If after 7 minutes the pressure of 2 bars is not reached, this indicates that the tyre is damaged; contact a TOYOTA dealer or a qualified workshop for assistance.
► Once the correct pressure is reached, put the switch in position "O".► Remove the kit and stow it.
WARNI NG
Should the pressure of one or more tyres be adjusted, it is necessary to reinitialise the under-inflation detection system.For more information on Tyre under-inflation detection, refer to the corresponding section.
Spare wheel
Procedure for changing a damaged wheel with
the spare wheel using the tools provided with the vehicle.
NOTIC E
For more information on the Tool kit, refer to the corresponding section.
► Park the vehicle, taking care to avoid obstructing traffic, and apply the parking brake.
Page 166 of 272
166
► Follow the safety instructions (hazard warning lamps, warning triangle, wearing high visibility vest, etc.) according to the legislation in force in the country where you are driving.► Switch off the ignition.
Access to the spare wheel
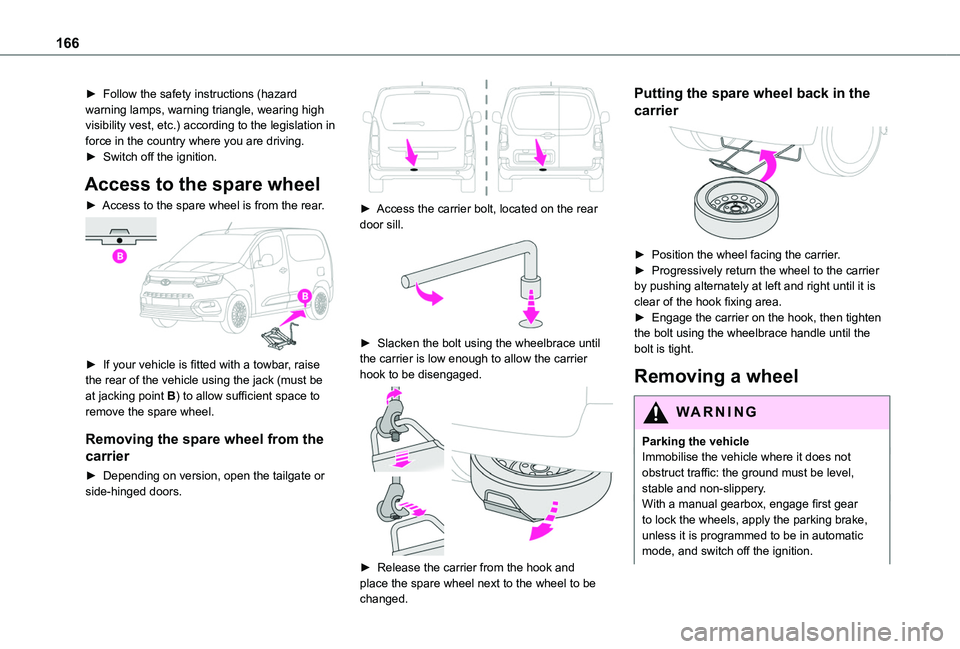
► Access to the spare wheel is from the rear.
► If your vehicle is fitted with a towbar, raise the rear of the vehicle using the jack (must be at jacking point B) to allow sufficient space to remove the spare wheel.
Removing the spare wheel from the
carrier
► Depending on version, open the tailgate or side-hinged doors.
► Access the carrier bolt, located on the rear door sill.
► Slacken the bolt using the wheelbrace until the carrier is low enough to allow the carrier hook to be disengaged.
► Release the carrier from the hook and place the spare wheel next to the wheel to be changed.
Putting the spare wheel back in the
carrier
► Position the wheel facing the carrier.► Progressively return the wheel to the carrier by pushing alternately at left and right until it is clear of the hook fixing area.► Engage the carrier on the hook, then tighten the bolt using the wheelbrace handle until the bolt is tight.
Removing a wheel
WARNI NG
Parking the vehicleImmobilise the vehicle where it does not obstruct traffic: the ground must be level, stable and non-slippery.With a manual gearbox, engage first gear to lock the wheels, apply the parking brake, unless it is programmed to be in automatic
mode, and switch off the ignition.