2020 TOYOTA PROACE CITY run flat
[x] Cancel search: run flatPage 2 of 272
2
■Overview
Labels 4
■Eco-driving
Eco-coaching 8
1Instruments
Instrument Panel 9Warning and indicator lamps 11Indicators 16Trip computer 21Setting the date and time 22
2Access
Electronic key with remote control function and built-in key, 23Back-up procedures 30Central locking / unlocking 32Doors 34General recommendations for the sliding side
doors 35Rear roof flap 36Alarm 37Electric windows 39Tilting rear door windows 40
3Ease of use and comfort
General recommendations for the seats 41Front seats 41
Steering wheel adjustment 44
Mirrors 442-seat front bench seat 45Rear bench seat 47Interior fittings 48Extenso cabin 53Crew cab 55Heating and Ventilation 58Heating 59Manual air conditioning 59Dual-zone automatic air conditioning 60Front demisting - defrosting 62Rear screen and/or door mirrors demisting - defrosting 63Additional heating/ventilation system 63
4Lighting and visibility
Lighting control lever 67Direction indicators 68Automatic illumination of headlamps 68Daytime running lamps / Sidelamps 69Parking lamps 69Automatic headlamp dipping 70
Headlamp beam height adjustment 71Wiper control lever 71Changing a wiper blade 73Automatic wiping 74
5Safety
General safety recommendations 75Emergency or assistance call 75Hazard warning lamps 78
Horn 78Electronic stability control (ESC) 78Advanced Grip Control 80Hill Assist Descent Control 82Seat belts 83Airbags 85Child seats 88Deactivating the front passenger airbag 90Manual child lock 93Electric child lock 93
6Driving
Driving recommendations 95Starting/switching off the engine 97Manual parking brake 100Electric parking brake 101Hill start assist 1045-speed manual gearbox 1046-speed manual gearbox 105Automatic gearbox 105Gear efficiency indicator 109Stop & Start 109
Under-inflation detection 111Head-up display 11 3Driving and manoeuvring aids - General recommendations 11 4Speed Limit Recognition and Recommendation 11 6Speed limiter 11 9Cruise control - particular recommendations 121Programmable cruise control 122
Adaptive Cruise Control 124
Page 13 of 272

13
Instruments
1
If manual application and release commands are not working, the electric parking brake control lever is faulty.The automatic functions must be used at all times and are automatically re-enabled in the event of a control lever fault.Carry out (2).
Low fuel level
/2
1 1Fixed (warning lamp or LED) and needle in the red zone (depending on version), accompanied by an audible signal and a message.The audible signal and the message are repeated with increasing frequency as the fuel level drops towards zero.When it first comes on there remains less than 6 litres of fuel in the tank.Refuel without delay to avoid running out of fuel.Never drive until completely empty, this could damage the emission control and injection systems.
Presence of water in diesel filter
Fixed (with LCD symbols instrument panel).The diesel filter contains water.Risk of damage to the injection system : carry out (2) without delay.
Engine self-diagnosis systemFlashing.The engine management system has a fault.
There is a risk that the catalytic converter will be destroyed.Carry out (2) without fail.Fixed.The emission control system has a fault.The warning lamp should go off when the engine is started.Carry out (3) quickly.Fixed.A minor engine fault has been detected.Carry out (3).Fixed.A major engine fault has been detected.Carry out (1) and then (2).
Diesel engine pre-heatingFixed.The period of illumination depends on the climatic conditions.The ignition is on.Wait until the warning lamp goes off before starting.
If the engine does not start, switch the ignition off and then on, wait until the indicator lamp goes off again, then start the engine.
Under-inflationFixed, accompanied by an audible signal and a message.The pressure in one or more wheels is too low.Check the pressure of the tyres as soon as possible.
Reinitialise the detection system after adjusting the pressure.Under-inflation warning lamp flashing then fixed and Service warning lamp fixed.The tyre pressure monitoring system is faulty.Under-inflation detection is no longer monitored.Check the tyre pressures as soon as possible and carry out (3).
Anti-lock braking system (ABS)Fixed.The anti-lock braking system has a fault.The vehicle retains conventional braking.Drive carefully at moderate speed, then carry out (3).
Collision Risk Alert / Active Safety BrakeFixed, accompanied by the display of a message.The system has been deactivated via the vehicle configuration menu.Flashing.The system is operating.
The vehicle brakes briefly so as to reduce the speed of collision with the vehicle ahead.Fixed, accompanied by a message and an audible signal.The system has a fault.Carry out (3).Fixed.The system has a fault.If these warning lamps come on after the engine is switched off and then restarted, carry out (3).
Page 100 of 272
100
Switching on the ignition
with Keyless Entry and
Starting
With the Keyless Entry and Starting system’s electronic key inside the vehicle, pressing the "START/STOP" button, with no action on the pedals, allows the ignition to be switched on.► Pressing this button again switches off the ignition and allows the vehicle to be locked.
Back-up starting with
Keyless Entry and Starting
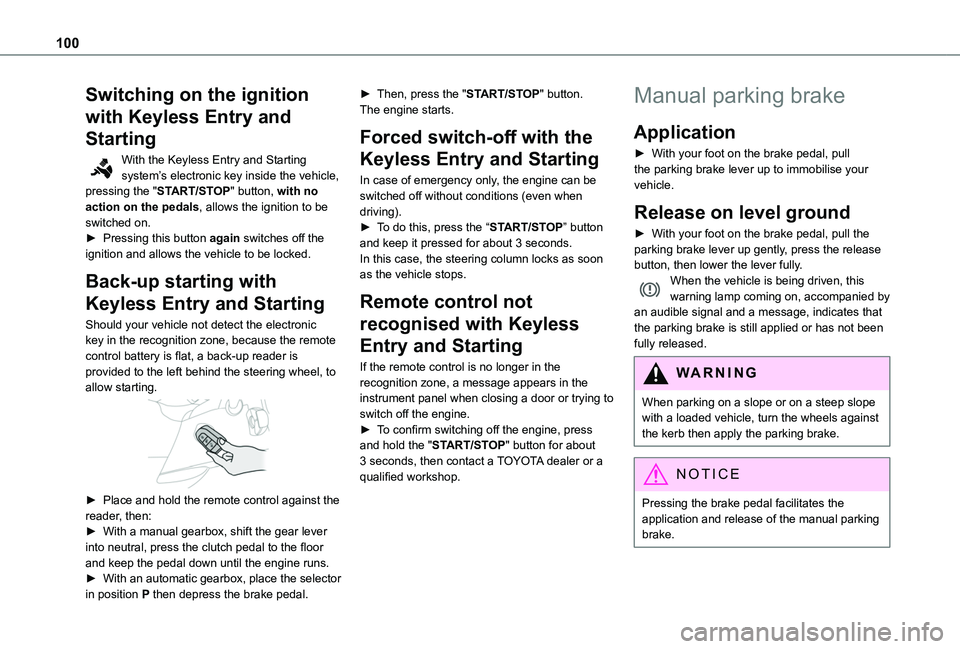
Should your vehicle not detect the electronic key in the recognition zone, because the remote control battery is flat, a back-up reader is provided to the left behind the steering wheel, to allow starting.
► Place and hold the remote control against the reader, then:► With a manual gearbox, shift the gear lever into neutral, press the clutch pedal to the floor and keep the pedal down until the engine runs.► With an automatic gearbox, place the selector in position P then depress the brake pedal.
► Then, press the "START/STOP" button.The engine starts.
Forced switch-off with the
Keyless Entry and Starting
In case of emergency only, the engine can be switched off without conditions (even when driving).► To do this, press the “START/STOP” button and keep it pressed for about 3 seconds.In this case, the steering column locks as soon as the vehicle stops.
Remote control not
recognised with Keyless
Entry and Starting
If the remote control is no longer in the recognition zone, a message appears in the instrument panel when closing a door or trying to switch off the engine.► To confirm switching off the engine, press
and hold the "START/STOP" button for about 3 seconds, then contact a TOYOTA dealer or a qualified workshop.
Manual parking brake
Application
► With your foot on the brake pedal, pull the parking brake lever up to immobilise your vehicle.
Release on level ground
► With your foot on the brake pedal, pull the parking brake lever up gently, press the release button, then lower the lever fully.When the vehicle is being driven, this warning lamp coming on, accompanied by an audible signal and a message, indicates that the parking brake is still applied or has not been fully released.
WARNI NG
When parking on a slope or on a steep slope with a loaded vehicle, turn the wheels against the kerb then apply the parking brake.
NOTIC E
Pressing the brake pedal facilitates the application and release of the manual parking brake.
Page 109 of 272
109
Driving
6
and from N to R. This will not cause any damage to the gearbox.Do not exceed 100 km/h (60 mph), local speed restrictions permitting.Have it checked by a TOYOTA dealer or a qualified workshop.
WARNI NG
There is a risk of damage to the gearbox:
– if you press the accelerator and brake pedals at the same time (braking or acceleration must be done only with the right foot),– if you force the selector from position P to another position when the battery is flat.
EC O
To reduce fuel consumption when stationary for long periods with the engine running (traffic jam, etc.), position the selector on N and apply the parking brake.
WARNI NG
If your vehicle has an automatic gearbox, do not try to start the engine by pushing the vehicle.
Gear efficiency indicator
(Depending on engine.)This system helps reduce fuel consumption by recommending the most appropriate gear.
Operation
Depending on the driving situation and the vehicle's equipment, the system may advise to skip one or more gears.Gear shift recommendations should not be considered compulsory. In fact, the road layout, the traffic density and safety remain the deciding factors when choosing the best gear. The driver therefore remains responsible for deciding whether or not to follow the indications issued by the system.This function cannot be deactivated.
NOTIC E
With an automatic gearbox, the system is only active in manual operation.
The information appears in the instrument panel, in the form of an ascending or descending arrow and the recommended gear.
NOTIC E
The system adapts its gear shift recommendation according to the driving conditions (slope, load, etc.) and the driver’s
requirements (power, acceleration, braking, etc.).The system never suggests:– engaging first gear;– engaging reverse.
Stop & Start
The Stop & Start function puts the engine temporarily into standby - STOP mode - during phases when the vehicle is stopped (red lights, queues, etc.). The engine restarts automatically - START mode - as soon as the driver wishes to move off again.Primarily designed for urban use, the function is intended to reduce fuel consumption and exhaust emissions as well as the noise level when stationary.The function does not affect the functionalities of the vehicle, in particular the braking.
WARNI NG
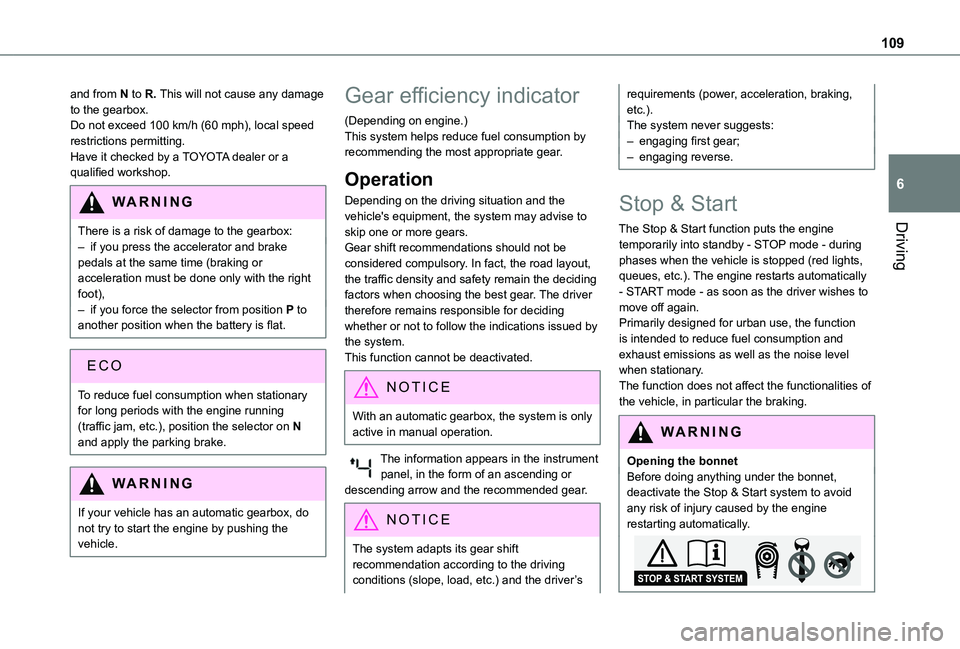
Opening the bonnetBefore doing anything under the bonnet, deactivate the Stop & Start system to avoid any risk of injury caused by the engine restarting automatically.
Page 113 of 272
11 3
Driving
6
With audio system or touch screen
With the vehicle stationary, the system is reinitialised via the vehicle configuration menu.
Malfunction
These warning lamps come on in the event of a malfunction.In this case, the tyre under-inflation monitoring function is no longer performed.Have the system checked by a TOYOTA dealer or a qualified workshop.
Head-up display
This system projects various information onto a smoked projection blade situated in the driver's field of vision, enabling them to drive without taking their eyes off the road.
Information displayed
during operation
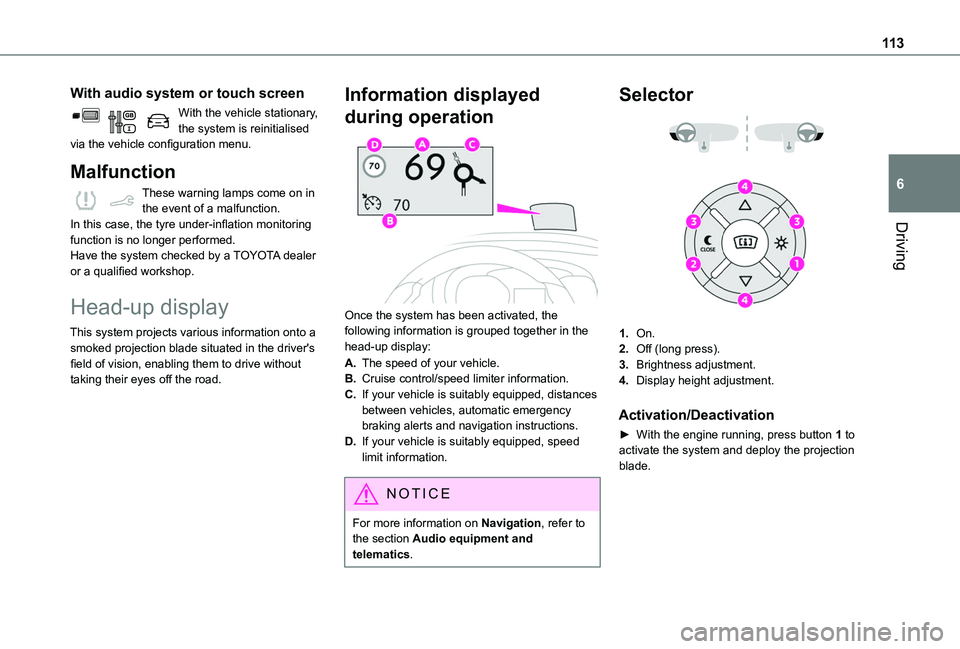
Once the system has been activated, the following information is grouped together in the head-up display:
A.The speed of your vehicle.
B.Cruise control/speed limiter information.
C.If your vehicle is suitably equipped, distances between vehicles, automatic emergency braking alerts and navigation instructions.
D.If your vehicle is suitably equipped, speed limit information.
NOTIC E
For more information on Navigation, refer to the section Audio equipment and
telematics.
Selector
1.On.
2.Off (long press).
3.Brightness adjustment.
4.Display height adjustment.
Activation/Deactivation
► With the engine running, press button 1 to
activate the system and deploy the projection blade.
Page 150 of 272
150
If the mass on board the vehicle exceeds the maximum authorised weight, this indicator lamp comes on.
Malfunction
Display of the malfunction in the loading area
After the measurement is triggered from the loading area, the LEDs of the 3 buttons flash simultaneously for about 3 seconds and then go out.Contact a TOYOTA dealer or a qualified workshop.
Information displayed on the instrument panel
These warning lamps come on, together with a message.Contact a TOYOTA dealer or a qualified workshop.
Energy economy mode
System which manages the duration of use of certain functions to conserve a sufficient level of charge in the battery.After switching off the engine and for a maximum cumulative period of around 40 minutes, you can continue to use functions such as the audio and telematics system, the wipers, the dipped beam headlamps, the courtesy lamps, etc.
Switching to the mode
A message indicating that the vehicle has switched to economy mode is displayed on the instrument panel screen and the active functions are put on standby.
NOTIC E
If a telephone call is in progress at the time, it will be maintained for around 10 minutes using your audio system’s hands-free system.
Exiting the mode
These functions will be automatically reactivated the next time the vehicle is used.In order to restore the use of these functions immediately, start the engine and let it run:– for less than 10 minutes, to use the equipment for approximately 5 minutes,– for more than 10 minutes, to use the equipment for approximately 30 minutes.
Let the engine run for the duration specified to ensure that the battery charge is sufficient.Do not repeatedly and continuously restart the engine in order to charge the battery.
WARNI NG
A flat battery prevents the engine from starting.For more information on the 12 V battery,
refer to the corresponding section.
Load reduction mode
System that manages the use of certain functions according to the level of charge remaining in the battery.When the vehicle is being driven, the load reduction function temporarily deactivates certain functions, such as the air conditioning and the heated rear screen.The deactivated functions are reactivated automatically as soon as conditions permit.
Roof bars / Roof rack
WARNI NG
RecommendationsDistribute the load uniformly, taking care to avoid overloading one of the sides.
Page 158 of 272
158
Supply of AdBlue®
It is recommended that the AdBlue® be topped up as soon as the first alert is issued indicating that the reserve level has been reached.
WARNI NG
In order to ensure that the SCR system operates correctly:– Use only AdBlue® fluid that meets the ISO 22241 standard.– Never transfer AdBlue® to another container: it would lose its purity.– Never dilute AdBlue® with water.
You can obtain AdBlue® from a TOYOTA dealer or in a qualified workshop.
NOTIC E
You can also visit a service station equipped with AdBlue® pumps specially designed for private vehicles.
WARNI NG
Never top up from an AdBlue® dispenser reserved for heavy goods vehicles.
Storage recommendations
AdBlue® freezes at about -11°C and deteriorates above +25°C. Containers should be stored in a cool area and protected from direct sunlight.Under these conditions, the fluid can be kept for at least a year.If the fluid has frozen, it can be used once it has completely thawed out in the ambient air.
WARNI NG
Never store AdBlue® containers in your vehicle.
Precautions for use
AdBlue® is a urea-based solution. This fluid is non-flammable, colourless and odourless (when kept in a cool place).In the event of contact with the skin, wash the affected area with soap and running water. In the event of contact with the eyes, immediately rinse the eyes with large amounts of water or with an eye wash solution for at least 15 minutes. Seek medical attention if you feel a persistent burning sensation or irritation.If swallowed, immediately wash out the mouth with clean water and then drink plenty of water.In certain conditions (high temperature, for example), the risk of release of ammonia cannot be excluded: do not inhale the fluid. Ammonia vapours have an irritant effect on mucous membranes (eyes, nose and throat).
WARNI NG
Store AdBlue® out of the reach of children, in its original container.
Procedure
Before starting the top-up procedure, ensure that the vehicle is parked on a flat and level surface.In wintry conditions, ensure that the temperature of the vehicle is above -11 °C. Otherwise the AdBlue® may be frozen and so cannot be poured into its tank. Park the vehicle in a warmer area for a few hours to allow the top-up to be carried out.
WARNI NG
Never put the AdBlue® into the Diesel fuel tank.
WARNI NG
If any AdBlue® is splashed, or if there are any spillages on the bodywork, rinse immediately with cold water or wipe with a damp cloth.If the fluid has crystallised, clean it off using a sponge and hot water.
Page 178 of 272
178
► Connect the red cable to the (+) terminal of flat battery A (at the metal elbow), then to the (+) terminal of backup battery B or the booster.► Connect one end of the green or black cable to the (-) terminal of backup battery B or the booster (or to an earth point on the assisting vehicle).► Connect the other end of the green or black cable to earth point C on the broken down vehicle.► Start the engine of the assisting vehicle and leave it running for a few minutes.► Operate the starter on the broken down vehicle and let the engine run.If the engine does not start straight away, switch off the ignition and wait a few moments before trying again.► Wait for it to return to idle.► Disconnect the jump leads in reverse order.► Allow the engine to run for at least 30 minutes, by driving or with the vehicle stationary, so that the battery reaches an adequate state of charge.
WARNI NG
To disconnect, proceed in reverse order.
NOTIC E
Some functions, including Stop & Start, are not available if the battery is not sufficiently charged.
Charging the battery using a
battery charger
For optimum service life of the battery, it is essential to maintain an adequate state of charge.In some circumstances, it may be necessary to charge the battery:– using the vehicle mainly for short journeys;– if the vehicle is to be taken off the road for several weeks.Contact a TOYOTA dealer or a qualified workshop.
WARNI NG
To charge the vehicle's battery yourself, use only a charger compatible with lead-acid batteries with a nominal voltage of 12 V.
WARNI NG
Follow the instructions provided by the
manufacturer of the charger.Never reverse polarities.
NOTIC E
It is not necessary to disconnect the battery.
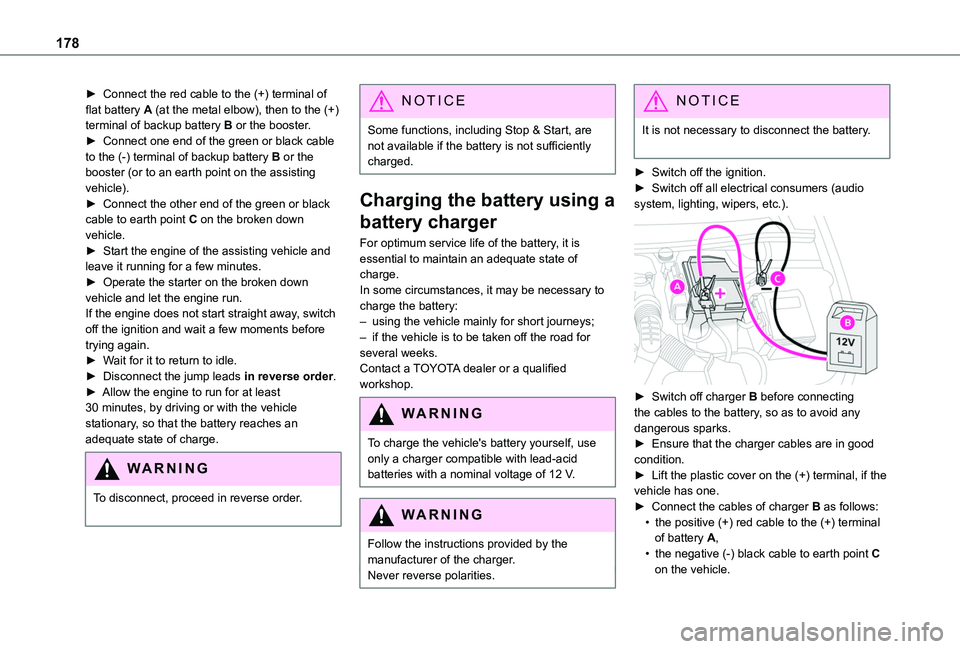
► Switch off the ignition.► Switch off all electrical consumers (audio system, lighting, wipers, etc.).
► Switch off charger B before connecting the cables to the battery, so as to avoid any dangerous sparks.► Ensure that the charger cables are in good
condition.► Lift the plastic cover on the (+) terminal, if the vehicle has one.► Connect the cables of charger B as follows:• the positive (+) red cable to the (+) terminal of battery A,• the negative (-) black cable to earth point C on the vehicle.