Page 234 of 744
2343-3. Adjusting the seats
HILUX_OM_OM0K321E_(EE)
Front seats
Manual seat (separated type)
Seat position adjustment lever
Seatback angle adjustment
lever
Vertical height adjustment lever
(if equipped for driver’s seat
only)
Manual seat (bench type)
Seat position adjustment lever
(driver’s seat only)
Seatback angle adjustment
lever
Adjustment procedure
1
2
3
1
2
Page 235 of 744

2353-3. Adjusting the seats
3
Operation of each component
HILUX_OM_OM0K321E_(EE)
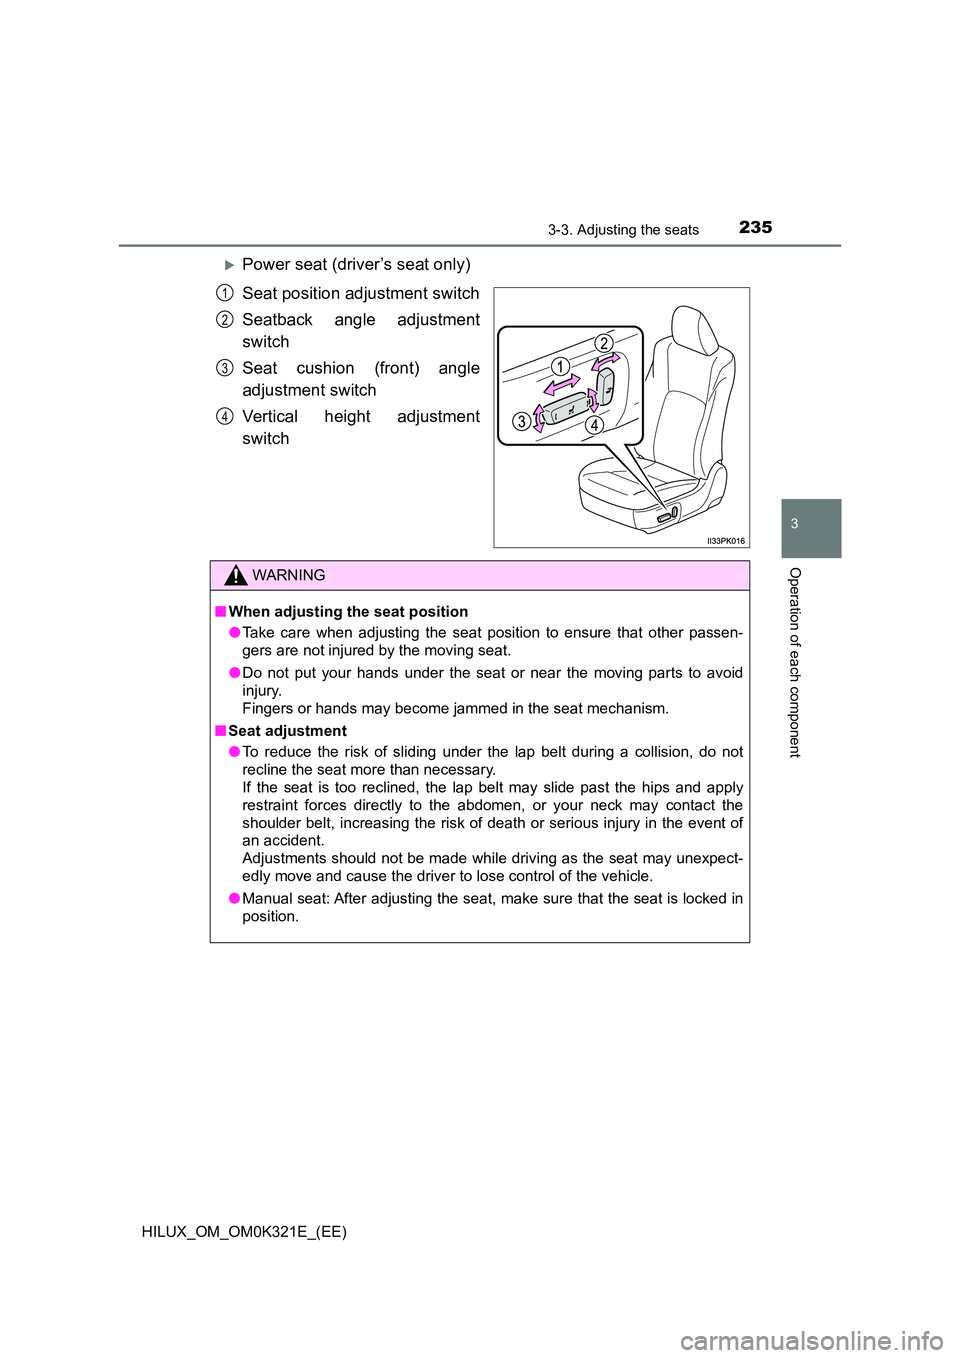
Power seat (driver’s seat only)
Seat position adjustment switch
Seatback angle adjustment
switch
Seat cushion (front) angle
adjustment switch
Vertical height adjustment
switch
1
2
3
4
WARNING
■ When adjusting the seat position
● Take care when adjusting the seat position to ensure that other passen-
gers are not injured by the moving seat.
● Do not put your hands under the seat or near the moving parts to avoid
injury.
Fingers or hands may become jammed in the seat mechanism.
■ Seat adjustment
● To reduce the risk of sliding under the lap belt during a collision, do not
recline the seat more than necessary.
If the seat is too reclined, the lap belt may slide past the hips and apply
restraint forces directly to the abdomen, or your neck may contact the
shoulder belt, increasing the risk of death or serious injury in the event of
an accident.
Adjustments should not be made while driving as the seat may unexpect-
edly move and cause the driver to lose control of the vehicle.
● Manual seat: After adjusting the seat, make sure that the seat is locked in
position.
Page 240 of 744
2403-3. Adjusting the seats
HILUX_OM_OM0K321E_(EE)
■Removing the head restraints
■ Installing the head restraints
■ Adjusting the height of the head restraints
■ Adjusting the rear center seat head restraint (if equipped)
Always raise the head restraint one level from the stowed position when
using.
Pull the head restraint up while pressing
the lock release button.
Align the head restraint with the installa-
tion holes and push it down to the lock
position.
Press and hold the lock release button
when lowering the head restraint.
Make sure that the head restraints are
adjusted so that the center of the head
restraint is closest to the top of your ears.
Lock release
button
Lock release
button
Page 244 of 744
2443-4. Adjusting the steering wheel and mirrors
HILUX_OM_OM0K321E_(EE)
Inside rear view mirror
The height of the rear view mirror can be adjusted to suit your driving
posture.
Adjust the height of the rear view
mirror by moving it up and down.
Reflected light from the headlights of vehicles behind can be reduced
by operating the lever.
Normal position
Anti-glare position
The rear view mirror’s position can be adjusted to enable suffi-
cient confirmation of the rear view.
Adjusting the height of rear view mirror
Anti-glare function
1
2
WARNING
Do not adjust the position of the mirror while driving.
Doing so may lead to mishandling of the vehicle and cause an accident,
resulting in death or serious injury.
Page 348 of 744

3484-5. Using the driving support systems
HILUX_OM_OM0K321E_(EE)
• If a vehicle ahead is a motorcycle
• If a vehicle ahead is narrow, such as a personal mobility vehicle
• If a preceding vehicle has a small rear end, such as an unloaded truck
• If a vehicle ahead is carrying a load which protrudes past its rear bumper
• If a vehicle ahead is irregularly shaped, such as a tractor or side car
• If a vehicle ahead is a child sized bicycle, a bicycle that is carrying a large
load, a bicycle ridden by more than one person, or a uniquely shaped
bicycle (bicycle with a child seat, tandem bicycle, etc.)
• If a pedestrian/or the riding height of a bicyclist ahead is shorter than
approximately 3.2 ft. (1 m) or taller than approximately 6.5 ft. (2 m)
• If a pedestrian/bicyclist is wearing oversized clothing (a rain coat, long
skirt, etc.), making their silhouette obscure
• If a pedestrian is bending forward or squatting or bicyclist is bending for-
ward
• If a pedestrian/bicyclist is moving fast
• If a pedestrian is pushing a stroller, wheelchair, bicycle or other vehicle
• When driving in inclement weather such as heavy rain, fog, snow or a
sandstorm
• When driving through steam or smoke
• When the surrounding area is dim, such as at dawn or dusk, or while at
night or in a tunnel, making a detectable object appear to be nearly the
same color as its surroundings
• When driving in a place where the surrounding brightness changes sud-
denly, such as at the entrance or exit of a tunnel
• After the engine has started the vehicle has not been driven for a certain
amount of time
• While making a left/right turn and for a few seconds after making a left/
right turn
• While driving on a curve and for a few seconds after driving on a curve
• If your vehicle is skidding
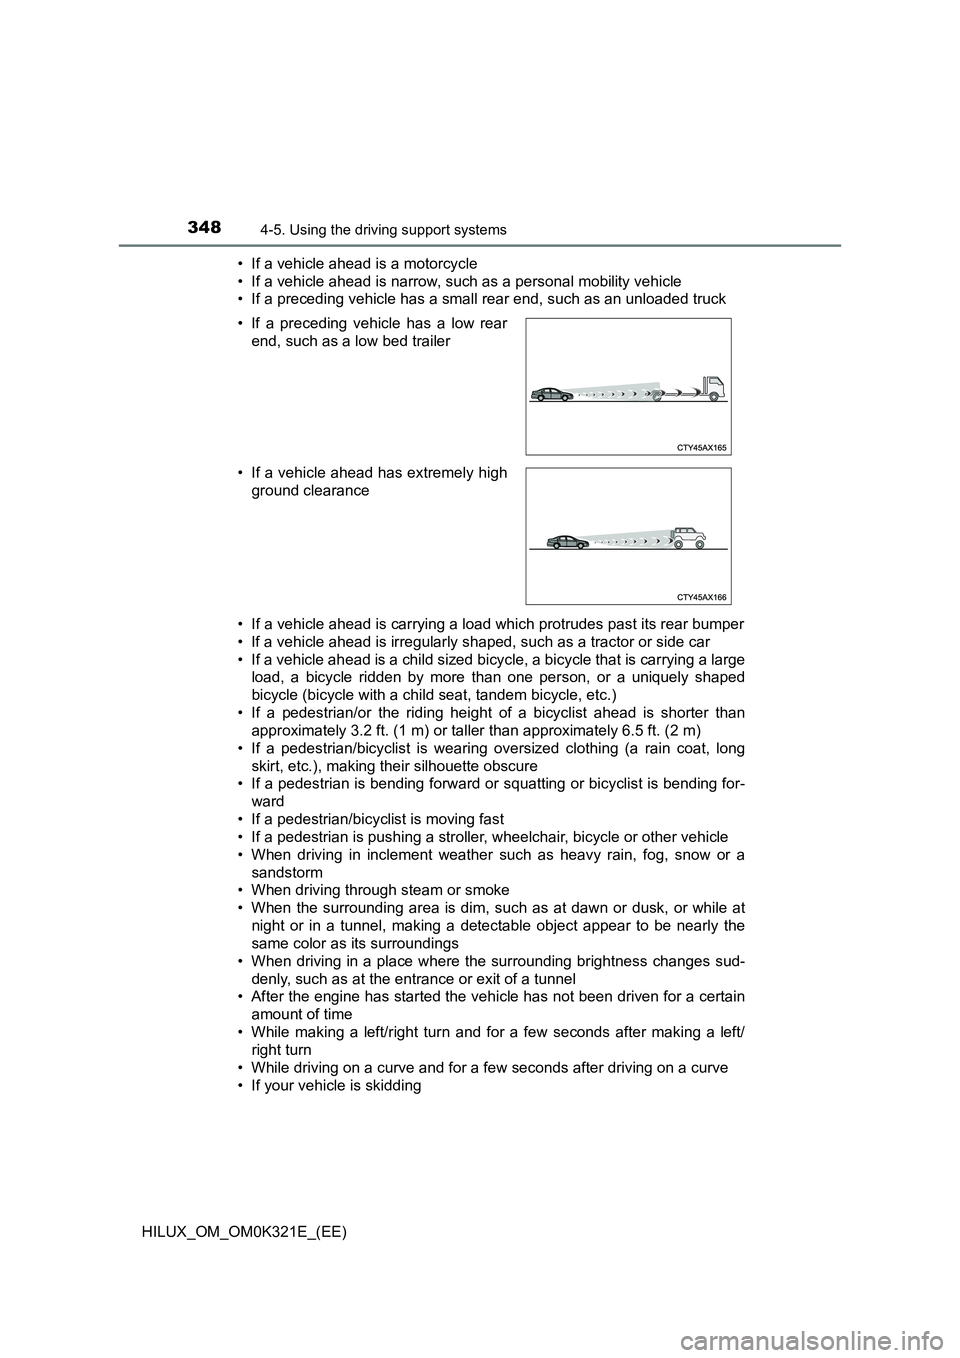
• If a preceding vehicle has a low rear
end, such as a low bed trailer
• If a vehicle ahead has extremely high
ground clearance
Page 651 of 744

6518-2. Steps to take in an emergency
HILUX_OM_OM0K321E_(EE)
8
When trouble arises
WARNING
■Using the tire jack
Improper use of the tire jack may cause the vehicle to suddenly fall off the
jack, leading to death or serious injury.
● Do not use the tire jack for any purpose other than replacing tires or install-
ing and removing tire chains.
● Only use the tire jack that comes with this vehicle for replacing a flat tire.
Do not use it on other vehicles, and do not use other tire jacks for replac-
ing tires on this vehicle.
● Make sure the tire jack can be moved properly.
● Always check that the tire jack is securely set to the correct jack up point.
● Do not put any part of your body under the vehicle while it is supported by
the jack.
● Do not start or run the engine while your vehicle is supported by the jack.
● Do not raise the vehicle while someone is inside.
● When raising the vehicle, do not put an object on or under the jack.
● Do not raise the vehicle to a height greater than that required to replace
the tire.
● Use a jack stand if it is necessary to get under the vehicle.
Take particular care when lowering the vehicle to ensure that no one work-
ing on or near the vehicle may be injured.
■ Using the jack handle
Insert the square head securely until you hear a click to prevent the exten-
sion parts from coming apart unexpectedly.
● Do not continue jacking up once the yel-
low caution line has appeared.Ye l l o w
caution line
Page 686 of 744

6869-1. Specifications
HILUX_OM_OM0K321E_(EE)
Maintenance data (fuel, oil level, etc.)
*1: Unladen vehicle
*2: With tailgate type A (P. 195)
*3: With tailgate type B (P. 195)
*4: With exterior type A*7
*5: With exterior type B*7
*6: With exterior type C*7
*7: See “How to identify exterior type” to check the type of your vehicle.
( P. 687)
*8: Without side step
*9: With side step
*10: With 205R16C tires
*11: With 225/70R17C tires
*12: With 265/65R17 or 265/60R18 tires
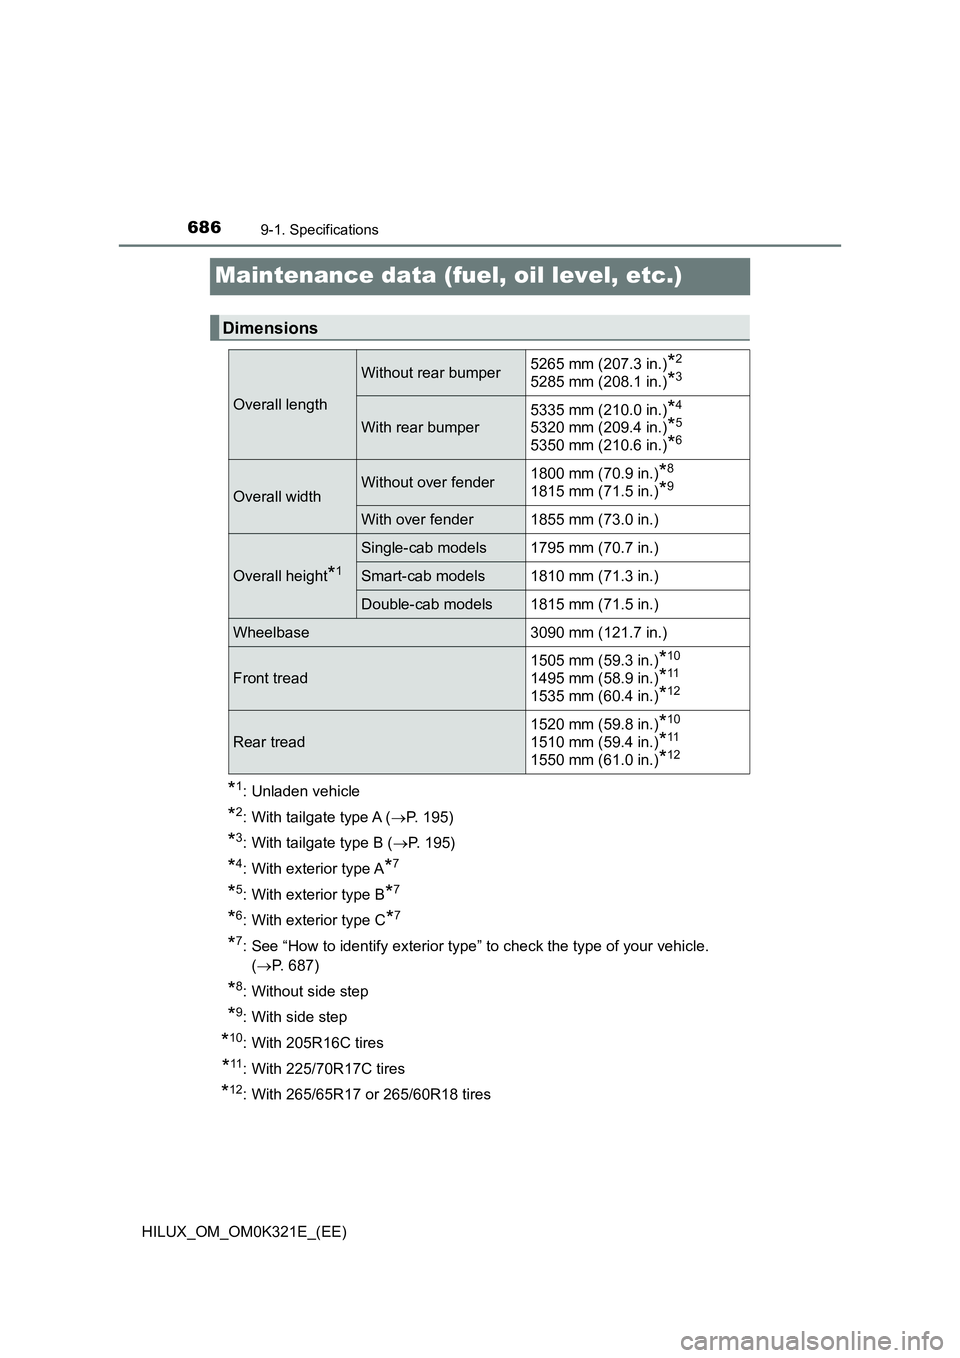
Dimensions
Overall length
Without rear bumper 5265 mm (207.3 in.)*2
5285 mm (208.1 in.)*3
With rear bumper
5335 mm (210.0 in.)*4
5320 mm (209.4 in.)*5
5350 mm (210.6 in.)*6
Overall widthWithout over fender 1800 mm (70.9 in.)*8
1815 mm (71.5 in.)*9
With over fender 1855 mm (73.0 in.)
Overall height*1
Single-cab models 1795 mm (70.7 in.)
Smart-cab models 1810 mm (71.3 in.)
Double-cab models 1815 mm (71.5 in.)
Wheelbase 3090 mm (121.7 in.)
Front tread
1505 mm (59.3 in.)*10
1495 mm (58.9 in.)*11
1535 mm (60.4 in.)*12
Rear tread
1520 mm (59.8 in.)*10
1510 mm (59.4 in.)*11
1550 mm (61.0 in.)*12