Page 579 of 744
5797-3. Do-it-yourself maintenance
HILUX_OM_OM0K321E_(EE)
7
Maintenance and care
If there are not lines on the side of the battery:
Check the fluid level as follows.
Remove the vent plug.
Check the fluid level by look-
ing directly at the cell.
If the fluid level is low, add dis-
tilled water.
Put the vent plug back on and close it securely.
■Adding distilled water (vehicles with maintenance type bat-
tery)
Remove the vent plug.
Add distilled water.
Put the vent plug back on and close it securely.
1
Low O.K.2
3
1
2
3
Page 589 of 744

5897-3. Do-it-yourself maintenance
HILUX_OM_OM0K321E_(EE)
7
Maintenance and care
Close the AdBlue™ tank cap.
Turn the cap until you hear a
click.
Check that the engine starts.
The way of refilling may differ from those shown in the illustration.
■ When refilling AdBlue™
After refilling AdBlue™, the engine may take a few seconds longer than nor-
mal to start.
6
NOTICE
■ When refilling AdBlue™
Observe the following precautions.
Failure to do so may result in damage to the vehicle parts, paint, etc.
● Do not use urea solution other than AdBlue™.
● If AdBlue™ comes into contact with any painted surfaces on the vehicle,
immediately wash the affected areas with water.
● If AdBlue™ is spilled inside the engine compartment, immediately wipe it
with a wet cloth.
■ When refilling AdBlue™ with the refilling equipment
Observe the following precautions to prevent AdBlue™ overflowing from the
AdBlue™ tank:
● Securely insert the nozzle into the AdBlue™ filler neck.
● Stop filling the tank after the nozzle automatically clicks off.
● Do not top off the AdBlue™ tank.
■ When storing AdBlue™ containers
Observe the following precautions.
Failure to do so may result in damage to vehicle parts, paint, etc., and
changes in the chemical compounds of AdBlue™ may cause unpleasant
odors.
● Do not leave AdBlue™ containers inside the vehicle.
● Tightly seal AdBlue™ containers and store them in a cool, dry location
with good ventilation and no exposure to direct sunlight.
7
Page 610 of 744
6107-3. Do-it-yourself maintenance
HILUX_OM_OM0K321E_(EE)
■Headlight high beams (vehicles with LED headlights)
Unplug the connector while
depressing the lock release.
Turn the bulb base counter-
clockwise.
Replace the light bulb, and
install the bulb base.
Align the 3 tabs on the light bulb
with the mounting, and insert.
Turn and secure the bulb
base.
1
2
3
4
Page 617 of 744
6177-3. Do-it-yourself maintenance
HILUX_OM_OM0K321E_(EE)
7
Maintenance and care
Turn and secure the bulb base.
Install the connector
Shake the bulb base gently to
check that it is not loose, turn
the front fog lights on once and
visually confirm that no light is
leaking through the mounting.
When installing the fender liner, screws and clips, reverse the
removing procedure in steps and .
5
6
7
12
Page 618 of 744
6187-3. Do-it-yourself maintenance
HILUX_OM_OM0K321E_(EE)
■Stop/tail lights, rear turn signal lights and back-up lights or
rear fog light (if equipped)
Remove the securing bolts
and pull the unit sideways to
remove.
Turn the bulb base counter-
clockwise.
Stop/tail light
Rear turn signal light
Back-up light or rear fog
light
Remove the light bulb.
Stop/tail light
Rear turn signal light
Back-up light or rear fog
light
When installing, reverse the steps listed.
1
2
1
2
3
3
1
2
3
4
Page 620 of 744

6207-3. Do-it-yourself maintenance
HILUX_OM_OM0K321E_(EE)
■Replacing the following bulbs
If any of the lights listed below has burnt out, have it replaced by
any authorized Toyota retailer or Toyota authorized repairer, or any
reliable repairer.
● Headlight low beams (vehicles with LED headlights)
● Front position lights/daytime running lights (vehicles with LED
headlights)
● Side turn signal lights
● LED front fog lights (if equipped)
● High mounted stoplight (if equipped)
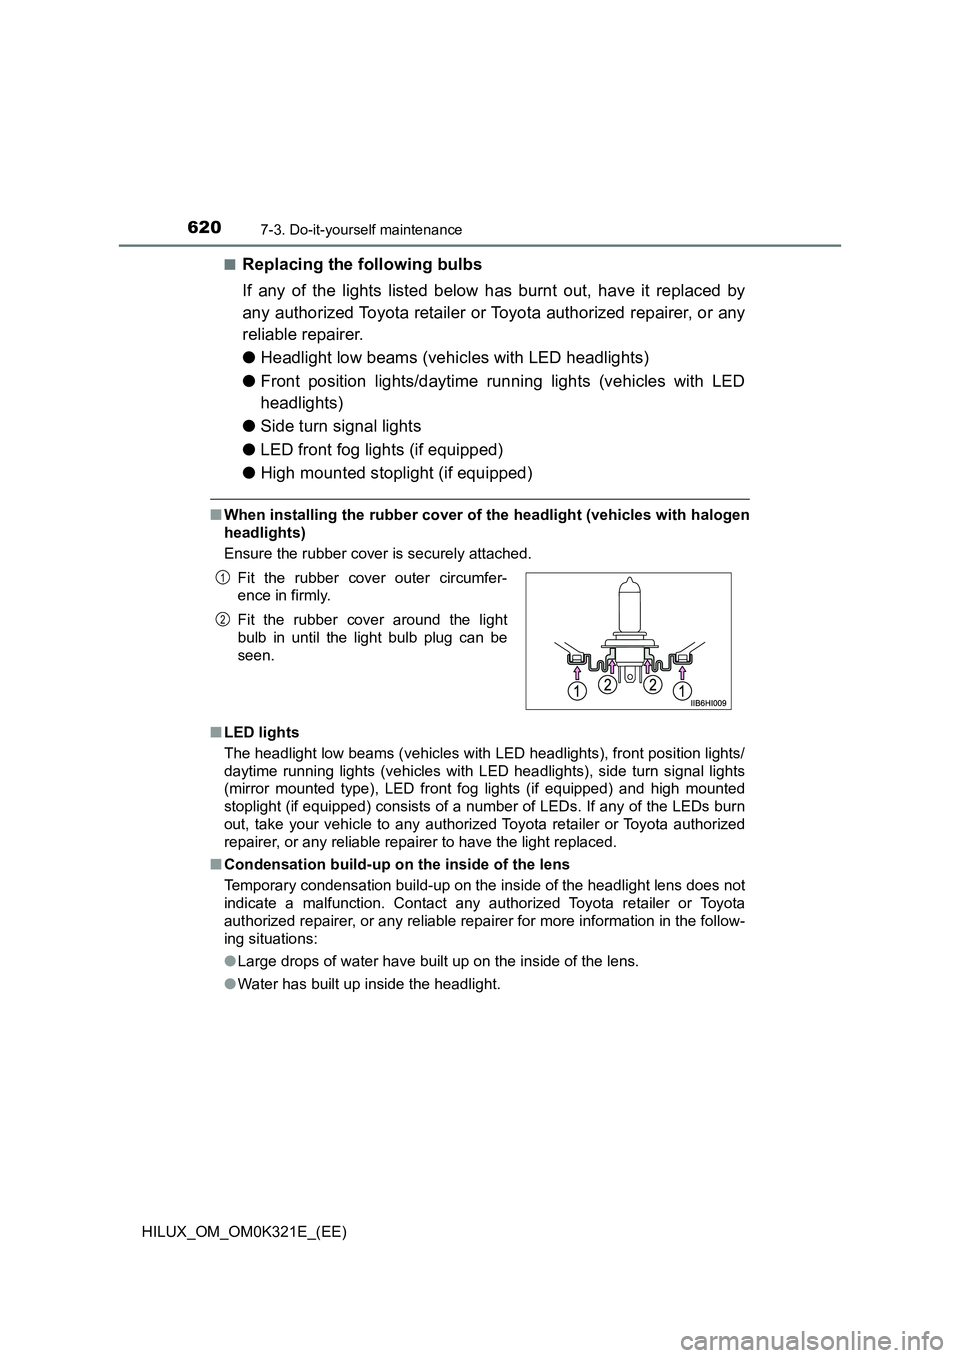
■When installing the rubber cover of the headlight (vehicles with halogen
headlights)
Ensure the rubber cover is securely attached.
■ LED lights
The headlight low beams (vehicles with LED headlights), front position lights/
daytime running lights (vehicles with LED headlights), side turn signal lights
(mirror mounted type), LED front fo g lights (if equipped) and high mounted
stoplight (if equipped) consists of a number of LEDs. If any of the LEDs burn
out, take your vehicle to any authorized Toyota retailer or Toyota authorized
repairer, or any reliable repairer to have the light replaced.
■ Condensation build-up on the inside of the lens
Temporary condensation build-up on the inside of the headlight lens does not
indicate a malfunction. Contact any authorized Toyota retailer or Toyota
authorized repairer, or any reliable repairer for more information in the follow-
ing situations:
● Large drops of water have built up on the inside of the lens.
● Water has built up inside the headlight.
Fit the rubber cover outer circumfer-
ence in firmly.
Fit the rubber cover around the light
bulb in until the light bulb plug can be
seen.
1
2
Page 621 of 744

6217-3. Do-it-yourself maintenance
HILUX_OM_OM0K321E_(EE)
7
Maintenance and care
WARNING
■Replacing light bulbs
● Turn off the lights. Do not attempt to replace the bulb immediately after
turning off the lights.
The bulbs become very hot and may cause burns.
● Do not touch the glass portion of the light bulb with bare hands. When it is
unavoidable to hold the glass portion, use and hold with a clean dry cloth
to avoid getting moisture and oils on the bulb.
Also, if the bulb is scratched or dropped, it may blow out or crack.
● Fully install light bulbs and any parts used to secure them. Failure to do so
may result in heat damage, fire, or water entering the headlight unit. This
may damage the headlights or cause condensation to build up on the lens.
● Do not attempt to repair or disassemble light bulbs, connectors, electric
circuits or component parts.
Doing so may result in death or serious injury due to electric shock.
■ To prevent damage or fire
● Make sure bulbs are fully seated and locked.
● Check the wattage of the bulb before installing to prevent heat damage.
Page 625 of 744

6258-1. Essential information
HILUX_OM_OM0K321E_(EE)
8
When trouble arises
If your vehicle has to be stopped in an
emergency
Steadily step on the brake pedal with both feet and firmly depress it.
Do not pump the brake pedal repeatedly as this will increase the effort
required to slow the vehicle.
Shift the shift lever to N.
If the shift lever is shifted to N
After slowing down, stop the vehicle in a safe place by the road.
Stop the engine.
If the shift lever cannot be shifted to N
Keep depressing the brake pedal with both feet to reduce vehicle
speed as much as possible.
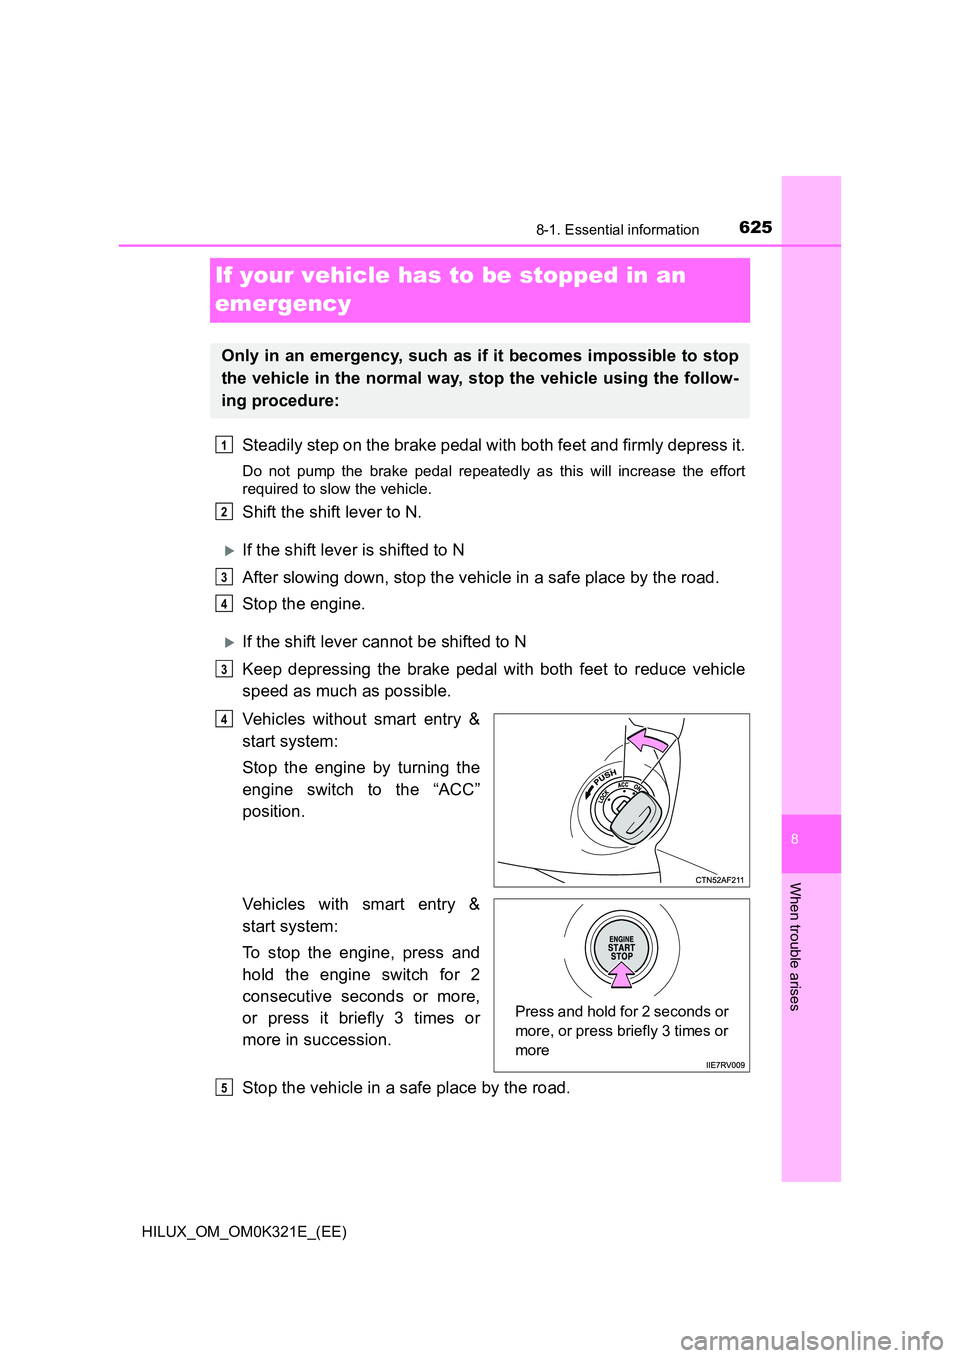
Vehicles without smart entry &
start system:
Stop the engine by turning the
engine switch to the “ACC”
position.
Vehicles with smart entry &
start system:
To stop the engine, press and
hold the engine switch for 2
consecutive seconds or more,
or press it briefly 3 times or
more in succession.
Stop the vehicle in a safe place by the road.
Only in an emergency, such as if it becomes impossible to stop
the vehicle in the normal way, stop the vehicle using the follow-
ing procedure:
1
2
3
4
3
4
Press and hold for 2 seconds or
more, or press briefly 3 times or
more
5