Page 454 of 596
4546-3. Do-it-yourself maintenance
4RUNNER (U)
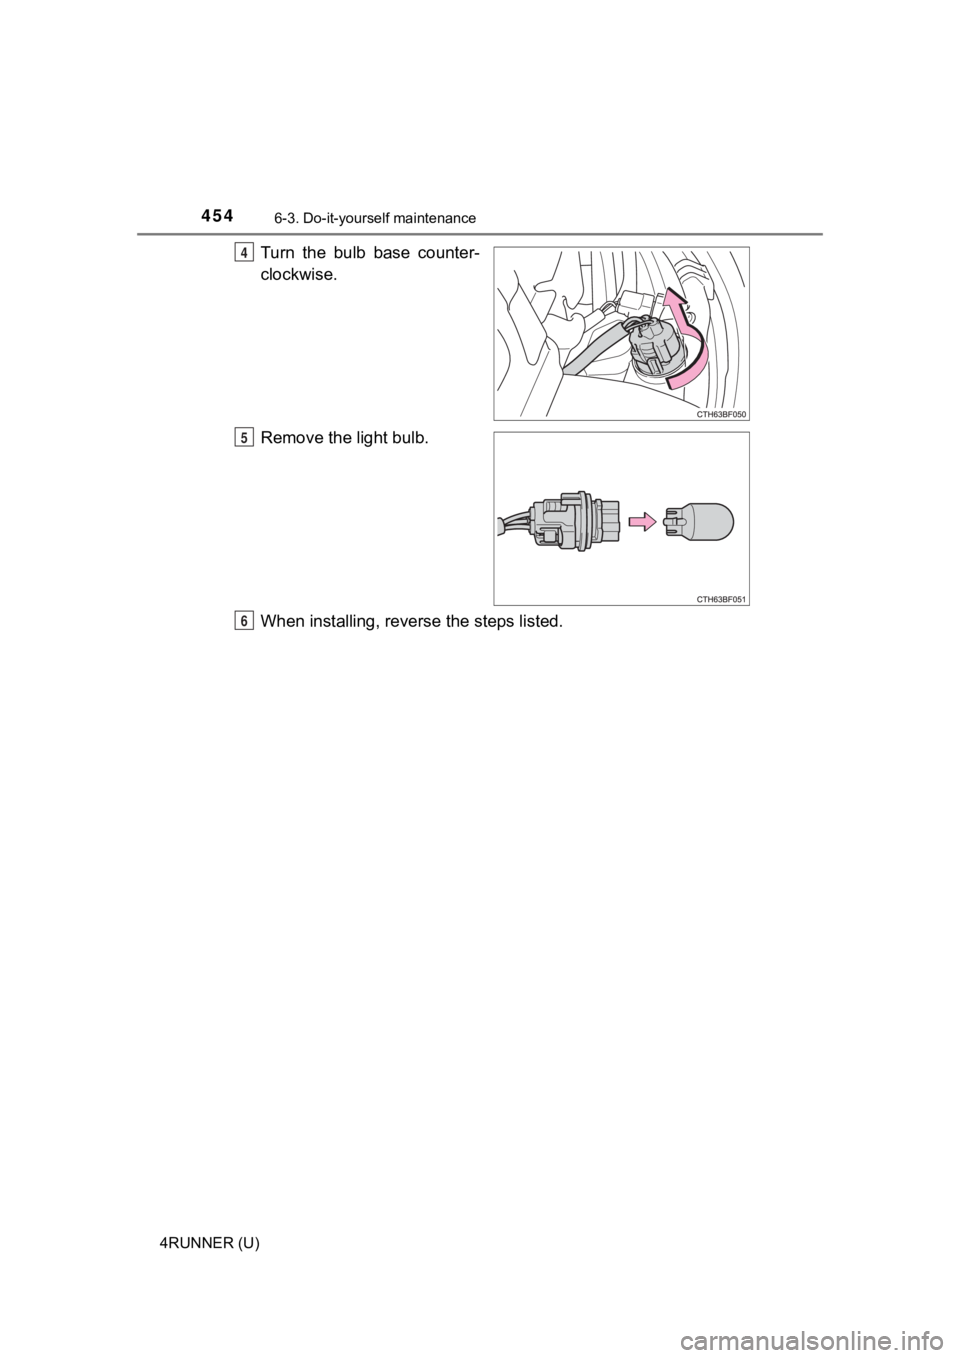
Turn the bulb base counter-
clockwise.
Remove the light bulb.
When installing, reverse the steps listed.4
5
6
Page 455 of 596
4556-3. Do-it-yourself maintenance
6
Maintenance and care
4RUNNER (U)■
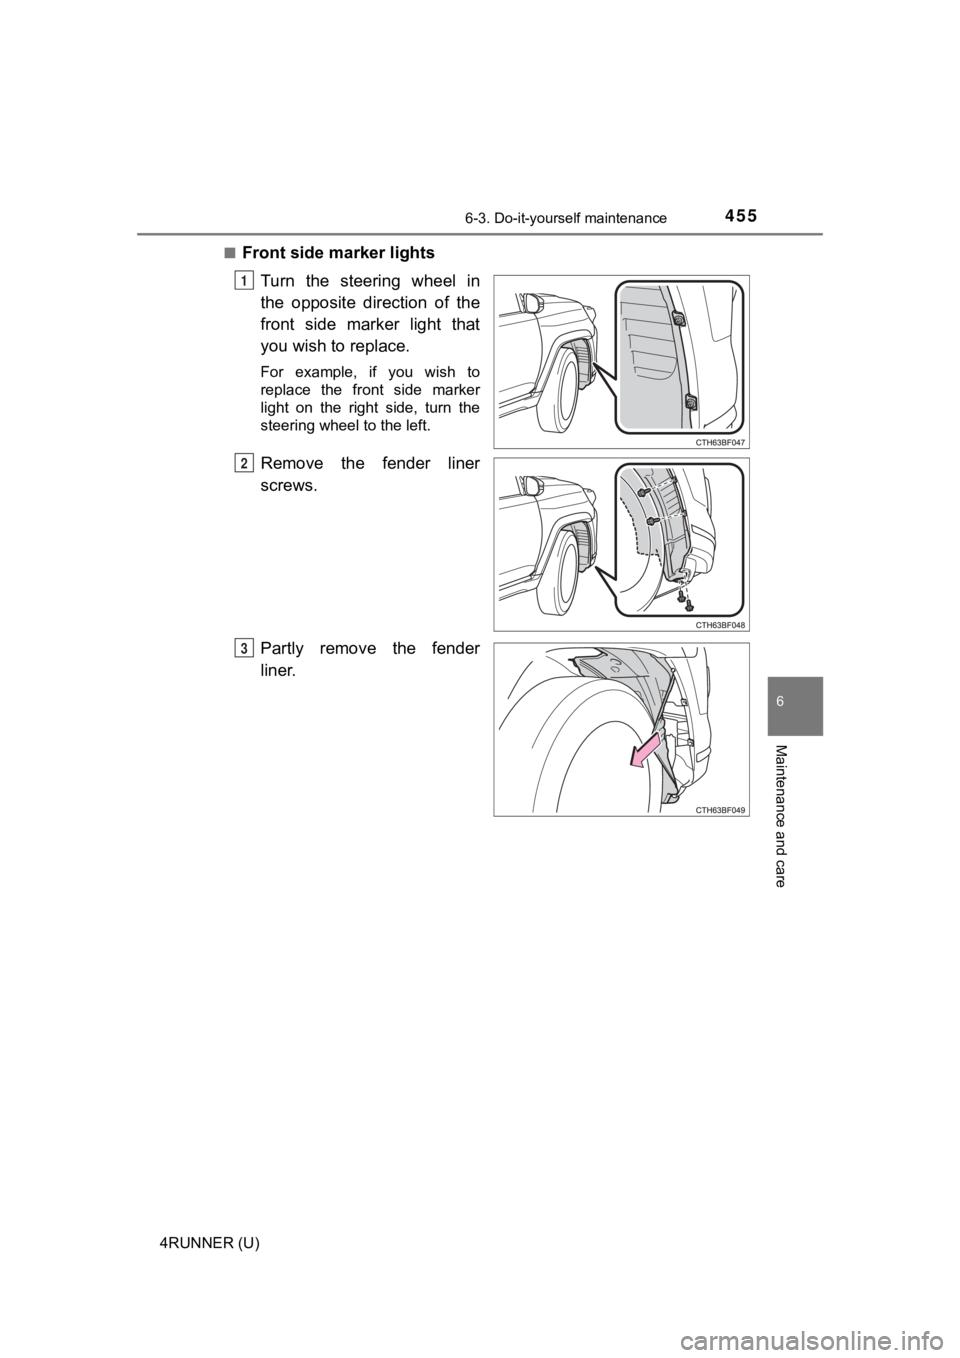
Front side marker lights
Turn the steering wheel in
the opposite direction of the
front side marker light that
you wish to replace.
For example, if you wish to
replace the front side marker
light on the right side, turn the
steering wheel to the left.
Remove the fender liner
screws.
Partly remove the fender
liner.
1
2
3
Page 456 of 596
4566-3. Do-it-yourself maintenance
4RUNNER (U)
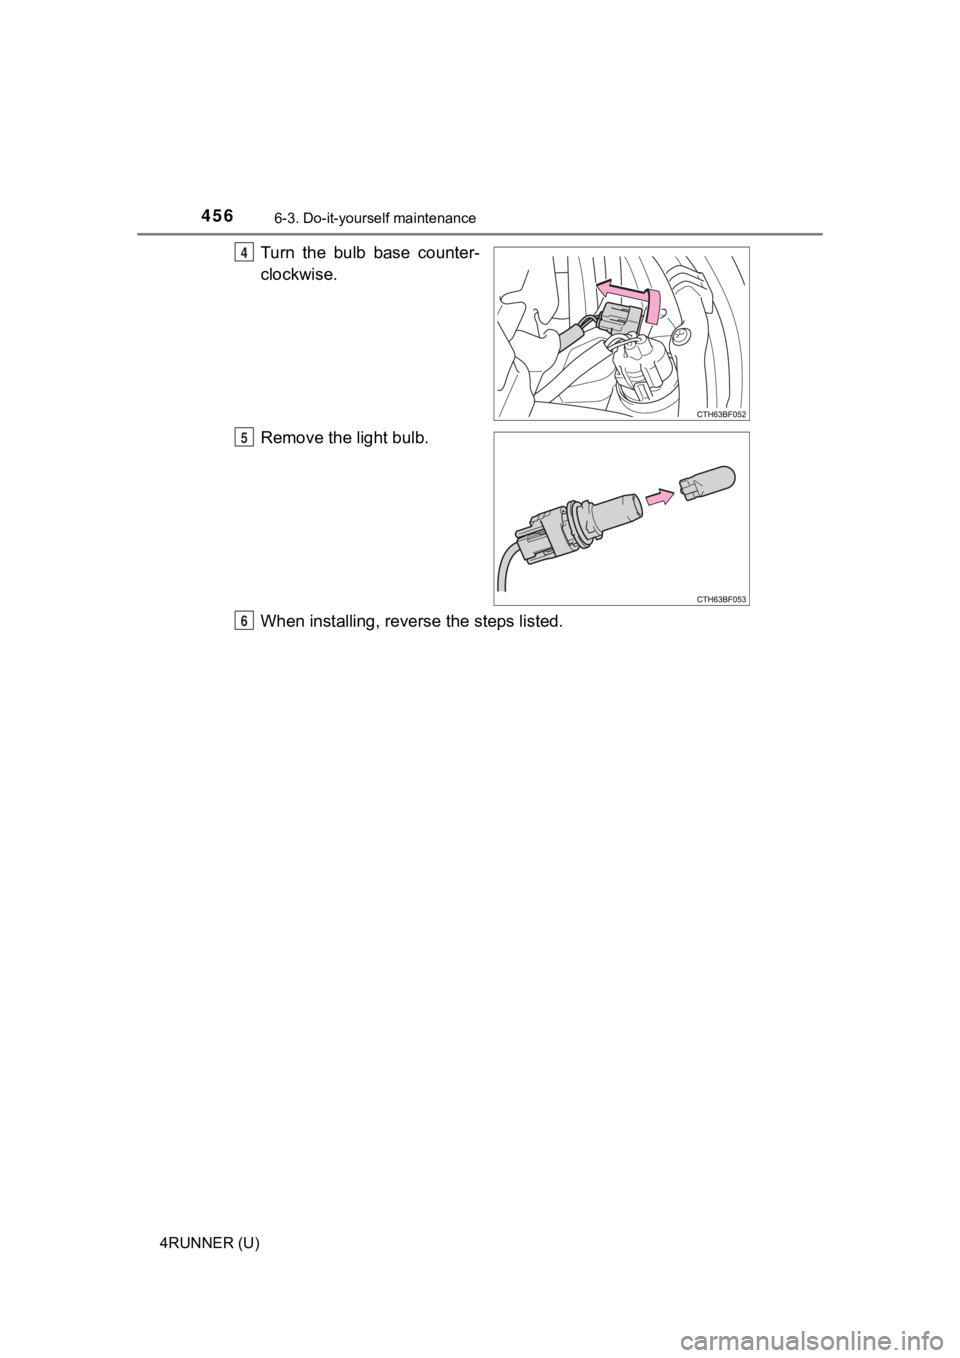
Turn the bulb base counter-
clockwise.
Remove the light bulb.
When installing, reverse the steps listed.4
5
6
Page 457 of 596
4576-3. Do-it-yourself maintenance
6
Maintenance and care
4RUNNER (U)■
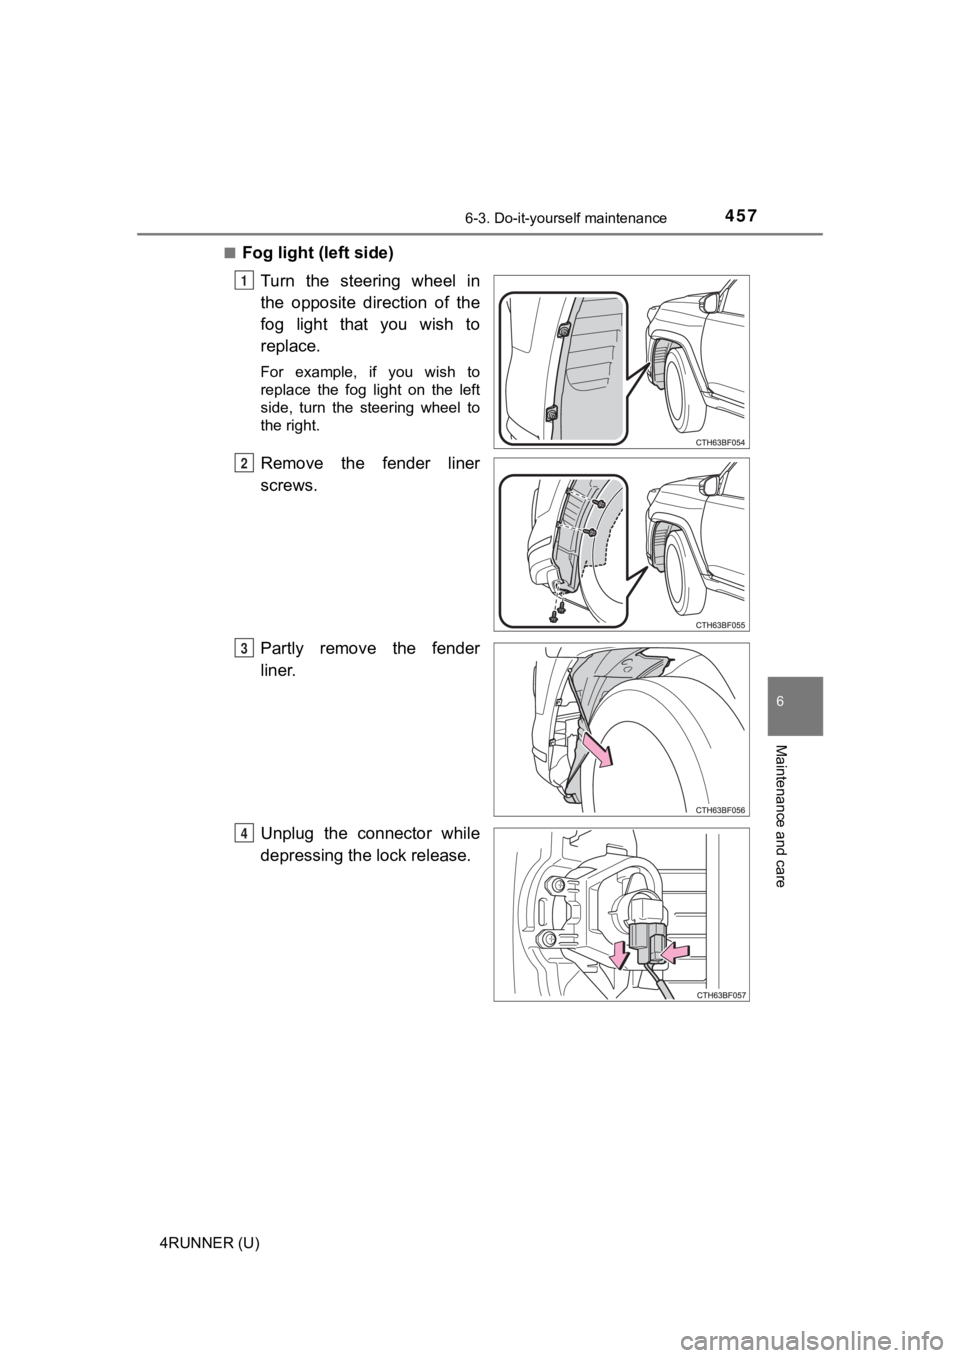
Fog light (left side)
Turn the steering wheel in
the opposite direction of the
fog light that you wish to
replace.
For example, if you wish to
replace the fog light on the left
side, turn the steering wheel to
the right.
Remove the fender liner
screws.
Partly remove the fender
liner.
Unplug the connector while
depressing the lock release.
1
2
3
4
Page 458 of 596
4586-3. Do-it-yourself maintenance
4RUNNER (U)
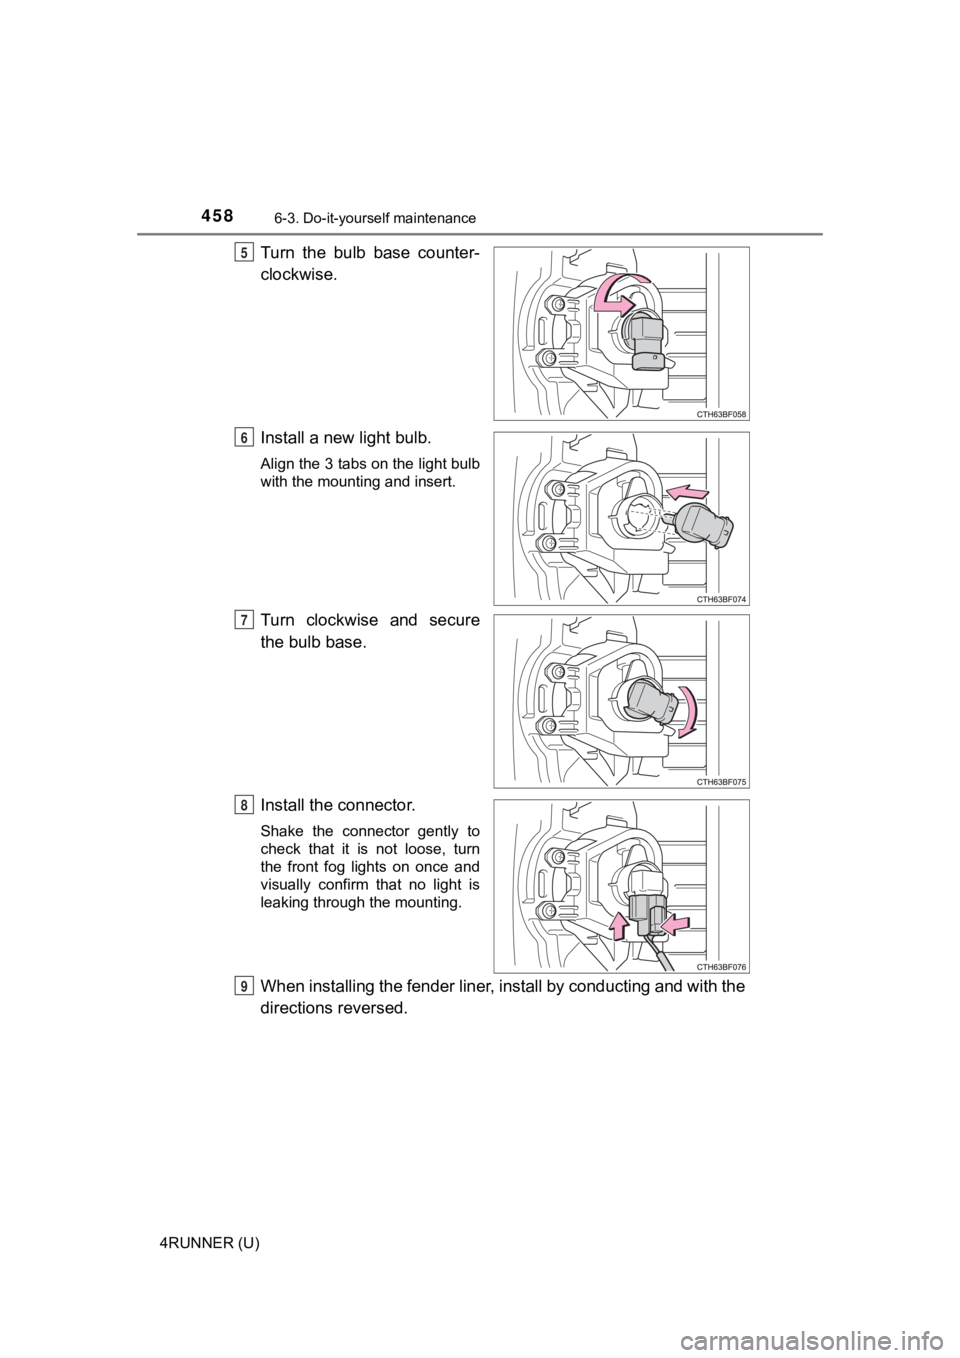
Turn the bulb base counter-
clockwise.
Install a new light bulb.
Align the 3 tabs on the light bulb
with the mounting and insert.
Turn clockwise and secure
the bulb base.
Install the connector.
Shake the connector gently to
check that it is not loose, turn
the front fog lights on once and
visually confirm that no light is
leaking through the mounting.
When installing the fender liner, install by conducting and with the
directions reversed.
5
6
7
8
9
Page 459 of 596
4596-3. Do-it-yourself maintenance
6
Maintenance and care
4RUNNER (U)■
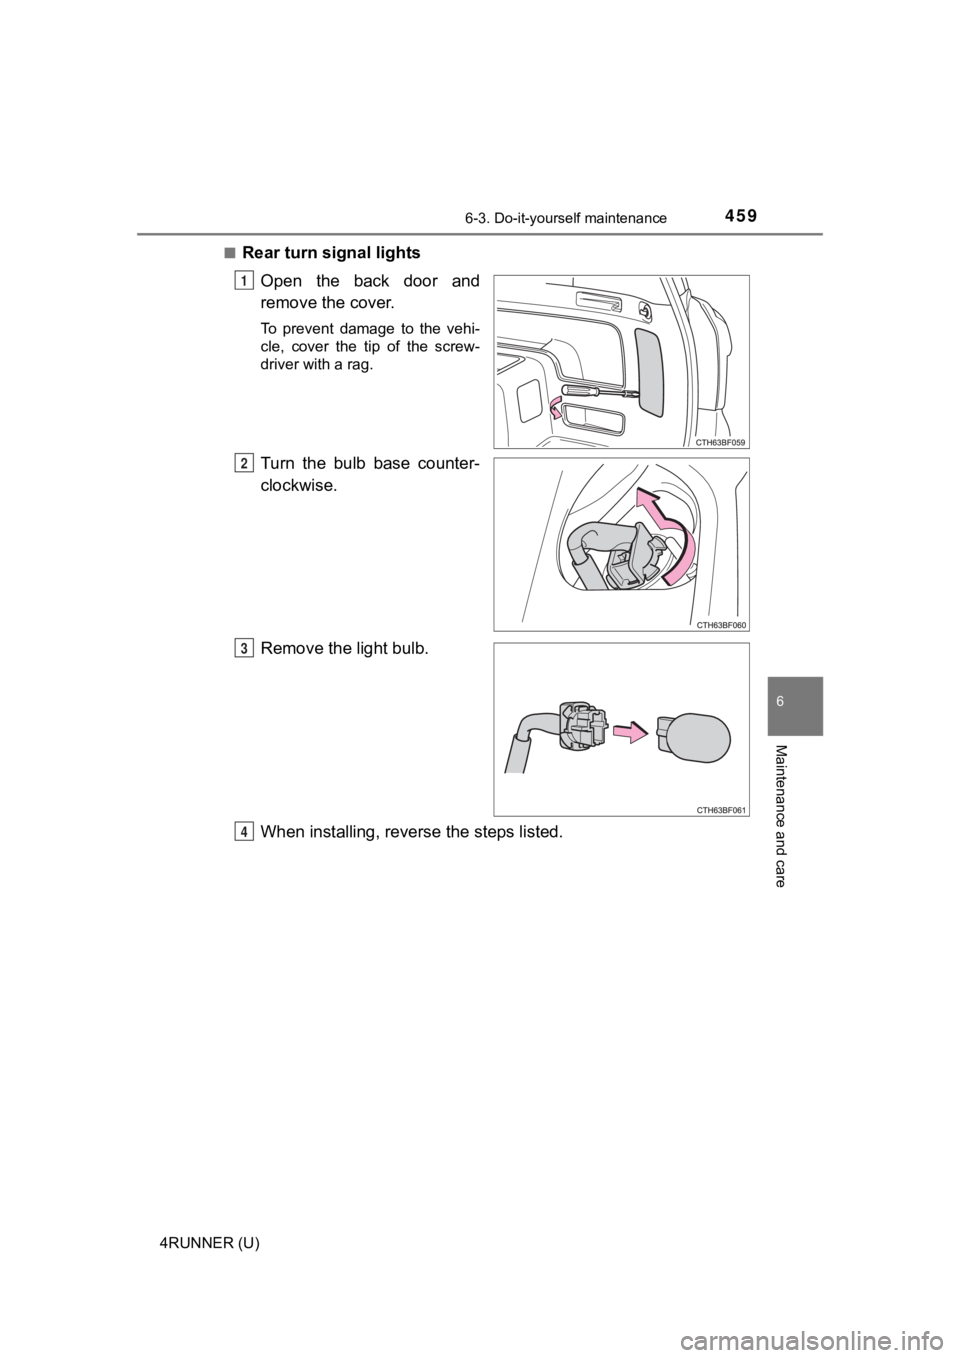
Rear turn signal lights
Open the back door and
remove the cover.
To prevent damage to the vehi-
cle, cover the tip of the screw-
driver with a rag.
Turn the bulb base counter-
clockwise.
Remove the light bulb.
When installing, reverse the steps listed.
1
2
3
4
Page 460 of 596
4606-3. Do-it-yourself maintenance
4RUNNER (U)■
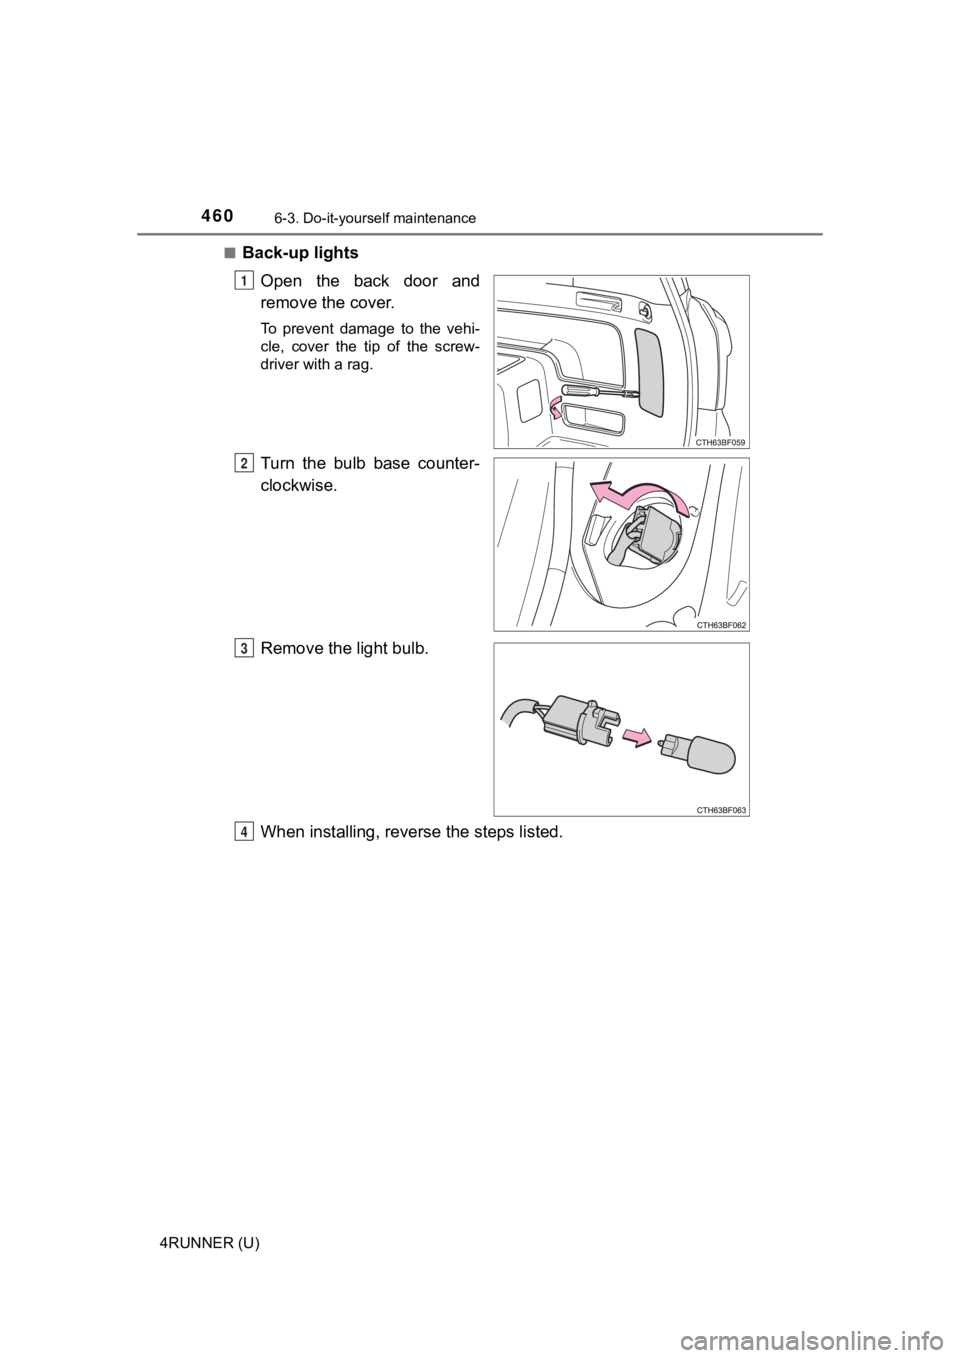
Back-up lights
Open the back door and
remove the cover.
To prevent damage to the vehi-
cle, cover the tip of the screw-
driver with a rag.
Turn the bulb base counter-
clockwise.
Remove the light bulb.
When installing, reverse the steps listed.
1
2
3
4
Page 461 of 596
4616-3. Do-it-yourself maintenance
6
Maintenance and care
4RUNNER (U)■
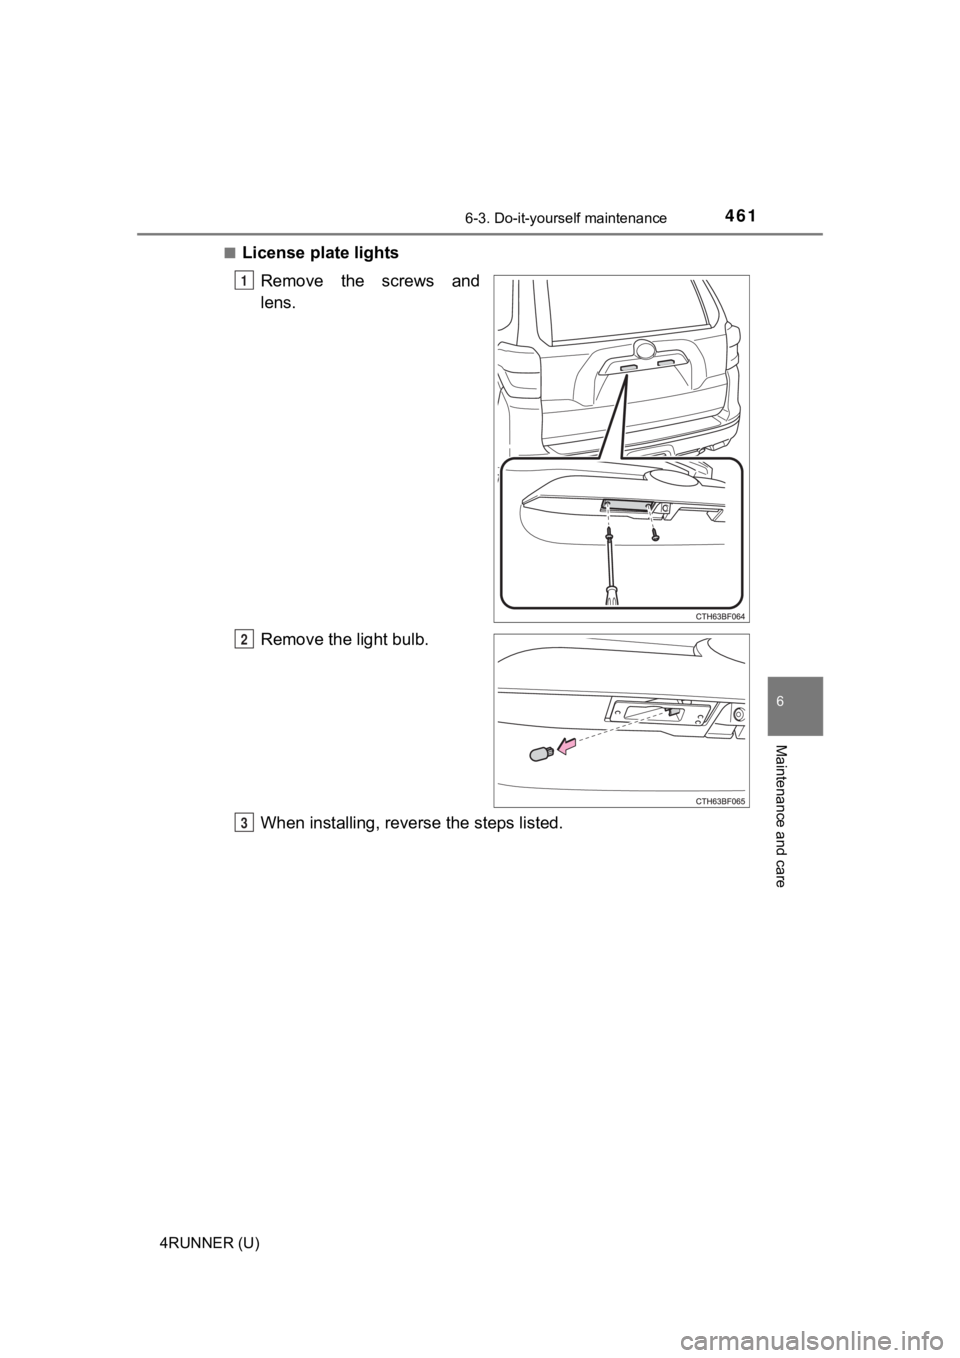
License plate lights
Remove the screws and
lens.
Remove the light bulb.
When installing, reverse the steps listed.
1
2
3