2020 TESLA MODEL 3 warning light
[x] Cancel search: warning lightPage 40 of 220

For dual-strap tethers, position a strap oneach side of the head support.
For single-strap tethers at the outboard
seating positions, run the strap over the outside-facing side of the head support (sameside of the head support as the seat belt
retraction mechanism).
For a single-strap tether in the center seating
position, fully lower the head support (see Raising/Lowering the Rear Center HeadSupport on page 29) and run the strap over
the top center of the head support.
Testing a Child Safety Seat
Before seating a child, always make sure the
child safety seat is not loose:
1. Hold the child safety seat by the belt path
and try to slide the safety seat from side
to side and front to back.
2. If the seat moves more than one inch
(2.5 cm), it is too loose. Tighten the belt or
reconnect the LATCH retained child safety
seat.
3. If you are unable to reduce slack, try a
different seat location or try another child
safety seat.
Child Safety Seat Warnings
Warning: Extreme hazard! Do not seat a
child on the front passenger seat even if
you are using a child safety seat. This seat
has an airbag in front of it. Although this airbag is disabled when Model 3 detects a
lightweight passenger, do not rely on technology to protect your child.Warning: Child restraint systems are
designed to be secured in vehicle seats
by lap belts or the lap belt portion of a lap-shoulder belt. Children could be
endangered in a crash if their child restraints are not properly secured in the
vehicle.Warning: According to collision statistics,
children are safer when properly
restrained in the rear seating positions
than in the front seating positions.Warning: Do not use a forward facing
child safety seat until your child weighs
over 20 lbs (9 kg) and can sit
Child Safety Seats
Seating and Safety Restraints39
Page 67 of 220

Caution: If the brakes are not functioning
properly, stop the vehicle as soon as safety permits and contact Tesla Service.
See Park on page 56 for information on
using the Park button to stop the vehicle
in case of emergency.Warning: Always maintain a safe driving
distance from the vehicle in front of you
and be cautious in hazardous driving
conditions. Do not rely on brake disc
wiping or hydraulic fade compensation to act as a substitute for adequate braking.
Regenerative Braking
Whenever Model 3 is moving and your foot is
off the accelerator, regenerative braking slows
down Model 3 and feeds any surplus energy back to the Battery.
By anticipating your stops and reducing or
removing pressure from the accelerator pedal
to slow down, you can take advantage of regenerative braking to increase driving range.
Of course, this is no substitute for regular braking when needed for safety.
Note: If regenerative braking is aggressively
slowing Model 3 (such as when your foot is
completely off the accelerator pedal at
highway speeds), the brake lights turn on to
alert others that you are slowing down.
Note: Installing winter tires with aggressive
compound and tread design may result in
temporarily-reduced regenerative braking
power. However, your vehicle is designed to continuously recalibrate itself, and after changing tires it will increasingly restore
regenerative braking power after some
moderate-torque straight-line accelerations.
For most drivers this occurs after a short
period of normal driving, but drivers who
normally accelerate lightly may need to use
slightly harder accelerations while the
recalibration is in progress.
Warning: In snowy or icy conditions
Model 3 may experience traction loss
during regenerative braking, particularly
when in the Standard setting and/or not
using winter tires. Tesla recommends
using the Low setting (see To Set the
Regenerative Braking Level on page 66)
in snowy or icy conditions to help maintain vehicle stability.The amount of energy fed back to the Battery
using regenerative braking can depend on the
current state of the Battery and the charge
level setting that you are using. For example,
regenerative braking may be limited if the Battery is already fully charged or if the
ambient temperature is too cold.
Note: If regenerative braking is limited, a
dashed line displays on the energy bar (see
Driving Status on page 63).
To Set the Regenerative Braking Level
You can use the touchscreen to change the
level of regenerative braking:
1. Touch Controls > Driving > Regenerative
Braking .
2. Choose from two levels:
Page 69 of 220

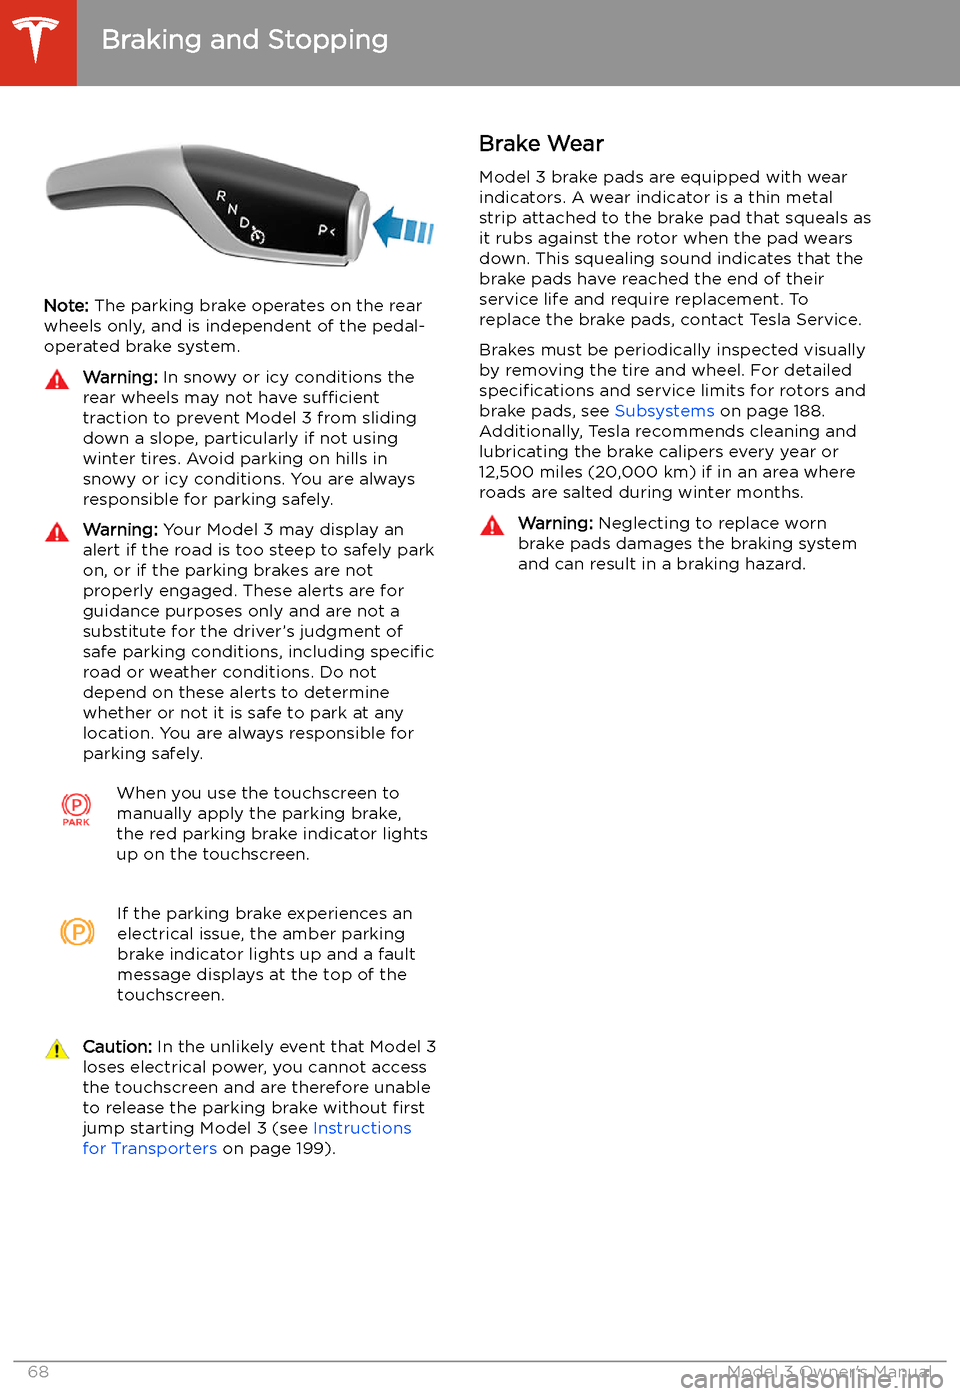
Note: The parking brake operates on the rear
wheels only, and is independent of the pedal-
operated brake system.
Warning: In snowy or icy conditions the
rear wheels may not have sufficient
traction to prevent Model 3 from sliding
down a slope, particularly if not using winter tires. Avoid parking on hills in
snowy or icy conditions. You are always responsible for parking safely.Warning: Your Model 3 may display an
alert if the road is too steep to safely park
on, or if the parking brakes are not
properly engaged. These alerts are for
guidance purposes only and are not a
substitute for the driver’s judgment of safe parking conditions, including specific
road or weather conditions. Do not
depend on these alerts to determine
whether or not it is safe to park at any location. You are always responsible for
parking safely.When you use the touchscreen to
manually apply the parking brake,
the red parking brake indicator lights
up on the touchscreen.If the parking brake experiences an
electrical issue, the amber parking brake indicator lights up and a fault
message displays at the top of the
touchscreen.Caution: In the unlikely event that Model 3
loses electrical power, you cannot access
the touchscreen and are therefore unable to release the parking brake without first
jump starting Model 3 (see Instructions
for Transporters on page 199).Brake Wear
Model 3 brake pads are equipped with wear indicators. A wear indicator is a thin metal
strip attached to the brake pad that squeals as
it rubs against the rotor when the pad wears
down. This squealing sound indicates that the
brake pads have reached the end of their service life and require replacement. To
replace the brake pads, contact Tesla Service.
Brakes must be periodically inspected visually by removing the tire and wheel. For detailed
specifications and service limits for rotors and
brake pads, see Subsystems on page 188.
Additionally, Tesla recommends cleaning and
lubricating the brake calipers every year or
12,500 miles (20,000 km) if in an area where
roads are salted during winter months.Warning: Neglecting to replace worn
brake pads damages the braking system
and can result in a braking hazard.
Braking and Stopping
68Model 3 Owner
Page 83 of 220

performing the procedure, and do not
attempt to use tools or excessive force.
Note: Preemptively applying WD-40 to the
door handle pivot pins can help prevent ice buildup inside your door handle. See Applying
WD-40 to Door Handle Pivot Pins for
instructions.
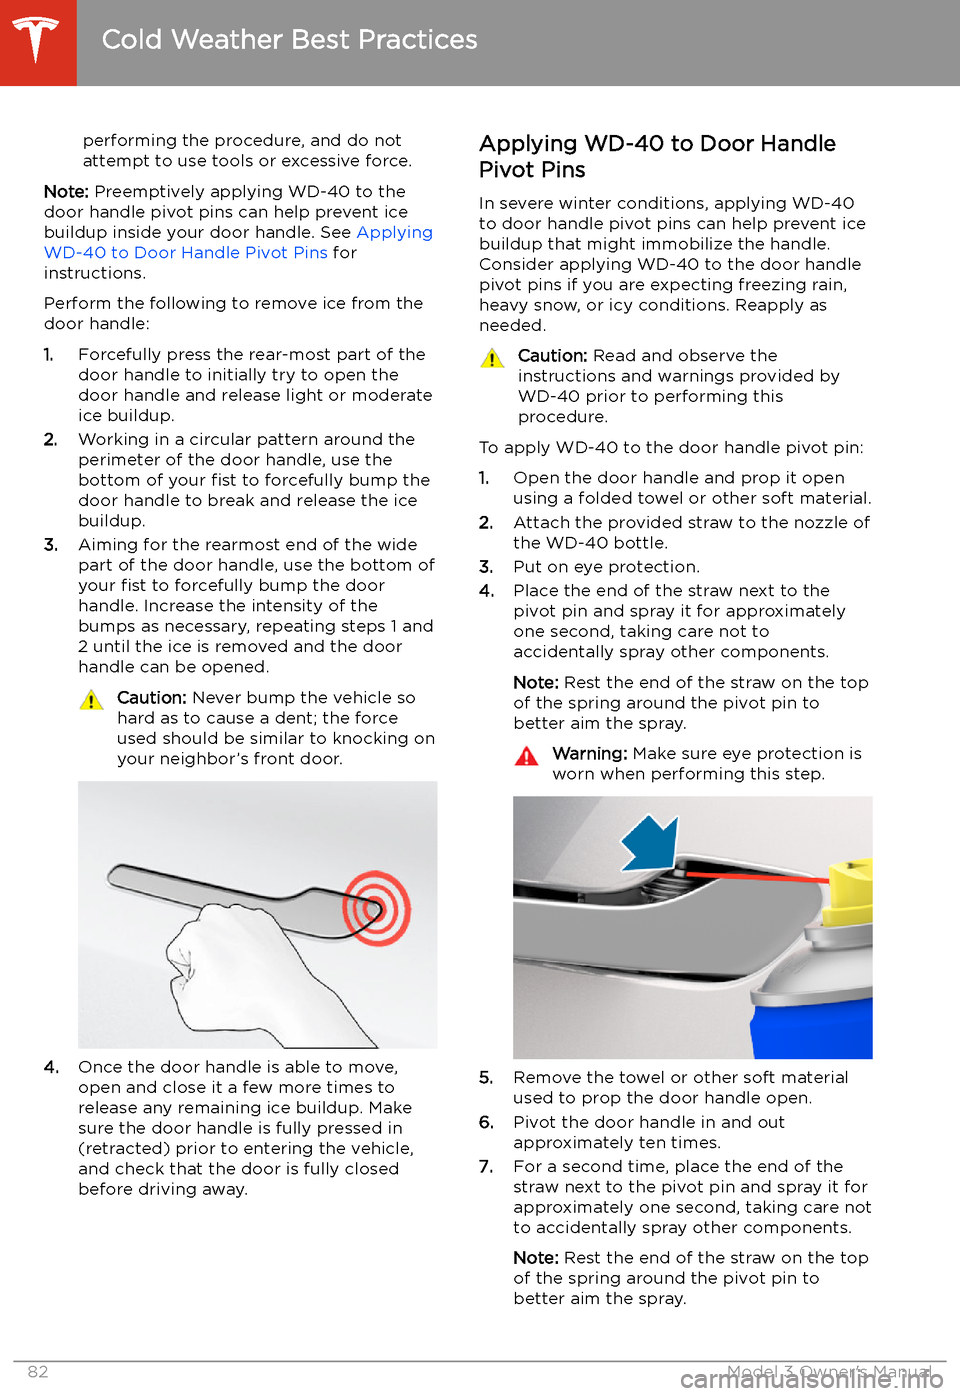
Perform the following to remove ice from the door handle:
1. Forcefully press the rear-most part of the
door handle to initially try to open the
door handle and release light or moderate ice buildup.
2. Working in a circular pattern around the
perimeter of the door handle, use the
bottom of your fist to forcefully bump the
door handle to break and release the ice
buildup.
3. Aiming for the rearmost end of the wide
part of the door handle, use the bottom of
your fist to forcefully bump the door
handle. Increase the intensity of the
bumps as necessary, repeating steps 1 and
2 until the ice is removed and the door
handle can be opened.
Caution: Never bump the vehicle so
hard as to cause a dent; the force
used should be similar to knocking on
your neighbor’s front door.
4. Once the door handle is able to move,
open and close it a few more times to
release any remaining ice buildup. Make
sure the door handle is fully pressed in
(retracted) prior to entering the vehicle,
and check that the door is fully closed
before driving away.
Applying WD-40 to Door Handle
Pivot Pins
In severe winter conditions, applying WD-40
to door handle pivot pins can help prevent ice
buildup that might immobilize the handle.
Consider applying WD-40 to the door handle pivot pins if you are expecting freezing rain,heavy snow, or icy conditions. Reapply as
needed.Caution: Read and observe the
instructions and warnings provided by
WD-40 prior to performing this
procedure.
To apply WD-40 to the door handle pivot pin:
1. Open the door handle and prop it open
using a folded towel or other soft material.
2. Attach the provided straw to the nozzle of
the WD-40 bottle.
3. Put on eye protection.
4. Place the end of the straw next to the
pivot pin and spray it for approximately
one second, taking care not to
accidentally spray other components.
Note: Rest the end of the straw on the top
of the spring around the pivot pin to
better aim the spray.
Warning: Make sure eye protection is
worn when performing this step.
5. Remove the towel or other soft material
used to prop the door handle open.
6. Pivot the door handle in and out
approximately ten times.
7. For a second time, place the end of the
straw next to the pivot pin and spray it for
approximately one second, taking care not
to accidentally spray other components.
Note: Rest the end of the straw on the top
of the spring around the pivot pin to better aim the spray.
Cold Weather Best Practices
82Model 3 Owner
Page 110 of 220

Warning: Keep your hands on the steering
wheel at all times. If the vehicle senses your hands are not on the steering wheel,Model 3 sounds a chime and the hazard
warning lights
Page 159 of 220

wall outlet instead of using energy stored in
the Battery. For example, if you are sitting in
Model 3 and using the touchscreen while
parked and plugged in, Model 3 draws energy
from the wall outlet instead of the Battery.Caution: The connector end of the charge
cable can damage the paint if dropped
onto the vehicle.
During Charging
During charging, the charge port light (the Tesla "T" logo) pulses green, and thetouchscreen displays the charging status. The
frequency at which the charge port light
pulses slows down as the charge level
approaches full. When charging is complete,
the light stops pulsing and is solid green.
Note: If Model 3 is locked, the charge port
light does not light up.
If the charge port light turns red while
charging, a fault is detected. Check the
touchscreen for a message describing the
fault. A fault can occur due to something as
common as a power outage. If a power outage
occurs, charging resumes automatically when
power is restored.
Note: When charging, particularly at high
currents, the refrigerant compressor and fan
operate as needed to keep the Battery cool.
Therefore, it is normal to hear sounds during charging.
Note: Air conditioning performance is
generally not affected by charging. However,
under certain circumstances (for example, you
are charging at high currents during a
particularly warm day), the air coming from
the vents may not be as cool as expected and
a message displays on the touchscreen. This is
normal behavior and ensures that the Battery stays within an optimum temperature range
while charging to support longevity and optimum performance.
Warning: Never spray liquid at a high
velocity (for example, if using a pressure
washer) towards the charge port while
charging. Failure to follow these
instructions can result in serious injury or
damage to the vehicle, charging
equipment, or property.
Stopping Charging
Stop charging at any time by disconnecting
the charge cable or touching Stop Charging
on the touchscreen.
Note: To prevent unauthorized unplugging of
the charge cable, the charge cable latch remains locked and Model 3 must be unlockedor able to recognize your authenticated phone
before you can disconnect the charge cable.
However, in cold ambient temperatures below
41
Page 160 of 220

4.Pull the charge cable from the charge
port.Caution: The release cable is designed for
use only in situations where the charge
cable cannot be released from the charge
port using the usual methods. Continuous
use may result in damage to the release
cable or charging equipment.Warning: Do not perform this procedure
while your vehicle is charging or if any
orange high voltage conductors are
exposed. Failure to follow these
instructions can result in electric shock and serious injury or damage to the
vehicle. If you have any uncertainty as to
how to safely perform this procedure,
contact your closest Service Center.Warning: Do not attempt to remove the
charge cable while simultaneously pulling the release cable. Always pull the release
cable before attempting to remove the
charge cable from the charge port.
Failure to follow these instructions can
result in electric shock and serious injury.
Charge Port Light
Page 171 of 220

TPMS malfunctions can occur for a variety of
reasons, including installing replacement or
alternate tires or wheels that prevent the
TPMS from functioning properly. Always check
the TPMS malfunction indicator light after replacing one or more tires or wheels on yourvehicle to ensure that the replacement tires or
wheels allow the TPMS to continue to function
properly.
Note: If a tire has been replaced or repaired
using a different tire sealant than the one
available from Tesla, and a low tire pressure is
detected, it is possible that the tire sensor has
been damaged. Contact Tesla to have the fault repaired as soon as possible.Seasonal Tire Types
Summer Tires
Your vehicle may be originally equipped with high performance summer tires or all season
tires. Tesla recommends using winter tires if
driving in cold temperatures or on roads
where snow or ice may be present. Contact
Tesla for winter tire recommendations.Warning: In cold temperatures or on snow
or ice, summer tires do not provide
adequate traction. Selecting and installing the appropriate tires for winter conditions
is important to ensure the safety and
optimum performance of your Model 3.
All-Season Tires
Your Model 3 may be originally equipped with all-season tires. These tires are designed to
provide adequate traction in most conditions
year-round, but may not provide the same level of traction as winter tires in snowy or icy
conditions. All-season tires can be identified
by “ALL SEASON" and/or "M+S” (mud and
snow) on the tire sidewall.
Winter Tires
Use winter tires to increase traction in snowy
or icy conditions. When installing winter tires,
always install a complete set of four tires at
the same time. Winter tires must be the same
diameter, brand, construction and tread
pattern on all four wheels. Contact Tesla for
winter tire recommendations.
Winter tires can be identified by a
mountain/snow