2020 Ram ProMaster City interior lights
[x] Cancel search: interior lightsPage 6 of 350

3
EXTERIOR LIGHTS .......................................................... 43
Multifunction Lever ...................................................... 43
Headlights ..................................................................... 43
Daytime Running Lights — If Equipped .................. 43
High Beams .................................................................... 44
Flash-To-Pass ................................................................ 44
Parking Lights ............................................................... 44
Follow Me Home/Headlight Delay ........................... 44
Fog Lights — If Equipped ........................................... 45
Turn Signals.................................................................... 45
Lane Change Assist ....................................................... 45
INTERIOR LIGHTS ............................................................ 46
Courtesy/Interior Lights .............................................. 46
WIPERS AND WASHERS .............................................. 50
Front Wiper Operation ................................................. 50
Rear Wiper Operation — If Equipped........................ 52
CLIMATE CONTROLS ..................................................... 53
Manual Climate Control Overview ............................ 53
Climate Control Functions ........................................... 56
Operating Tips ............................................................... 57
WINDOWS .......................................................................... 60
Power Windows — If Equipped ................................ 60
Window Bar Grates — If Equipped ............................ 63
Wind Buffeting .............................................................. 63
HOOD ...................................................................................64
Opening...........................................................................64
Closing.............................................................................65
CARGO AREA FEATURES ............................................66
Rear Cargo Tie-Downs ................................................66
INTERNAL EQUIPMENT .................................................68
Storage .............................................................................68
Cupholders ....................................................................69
Power Outlets ................................................................70
ROOF RACK — IF EQUIPPED .........................................72
GETTING TO KNOW YOUR INSTRUMENT
PANEL
INSTRUMENT CLUSTER ..................................................75
Instrument Cluster Descriptions .................................76
INSTRUMENT CLUSTER DISPLAY ...............................77
Location And Controls..................................................77
Change Engine Oil — If Equipped ...........................80
Instrument Cluster Display Menu Items....................80
TRIP COMPUTER ...............................................................82
Trip Button......................................................................82
Trip Functions ...............................................................83
Values Displayed ...........................................................83
2020_RAM_PROMASTER_CITY_OM_USA=GUID-7B6A7FCA-79B0-423F-95C5-ED2A949C3D13=1=en=.book Page 3
Page 24 of 350

GETTING TO KNOW YOUR VEHICLE 21
VEHICLE SECURITY ALARM — IF EQUIPPED
The Vehicle Security Alarm monitors the vehicle doors and
ignition for unauthorized operation. When the Vehicle Secu-
rity Alarm is activated, interior switches for door locks are
disabled. The system provides both audible and visible
signals. Every intrusion attempt causes six continuous alarm
cycles. Every alarm cycle lasts for 30 seconds. For 26 seconds,
the horn will sound, and the turn signal lights will flash. For
four seconds, it will pause. After a maximum of 10 alarm
cycles, only the turn signal lights will flash until the next
alarm activation.
To Arm The System
To arm the system, the Vehicle Security Alarm will set when
you use the key fob to lock the doors. If a door or the hood is
not properly shut, the alarm system will not be armed.
To Disarm The System
Use the key fob to unlock the door and disarm the system.
The Vehicle Security Alarm will also disarm if a
programmed Sentry Key is inserted into the ignition switch.
To exit the alarm mode, push the key fob unlock button, or
insert a programmed Sentry Key into the ignition switch.The Vehicle Security Alarm is designed to protect your
vehicle. However, you can create conditions where the
system will give you a false alarm. If one of the previously
described arming sequences has occurred, the Vehicle Secu-
rity Alarm will arm regardless of whether you are in the
vehicle or not. If you remain in the vehicle and open a door,
the alarm will sound. If this occurs, disarm the Vehicle Secu-
rity Alarm.
Rearming Of The System
If the system has not been disabled, the Vehicle Security
Alarm will rearm itself after the 15 additional minutes of
turn lamps flashing. If the condition which initiated the
alarm is still present, the system will ignore that condition
and monitor the remaining doors and ignition.
Security System Manual Override
The Vehicle Security Alarm will not arm/disarm if you lock/
unlock the doors using the manual door lock plunger.
2
2020_RAM_PROMASTER_CITY_OM_USA=GUID-7B6A7FCA-79B0-423F-95C5-ED2A949C3D13=1=en=.book Page 21
Page 49 of 350

46 GETTING TO KNOW YOUR VEHICLE
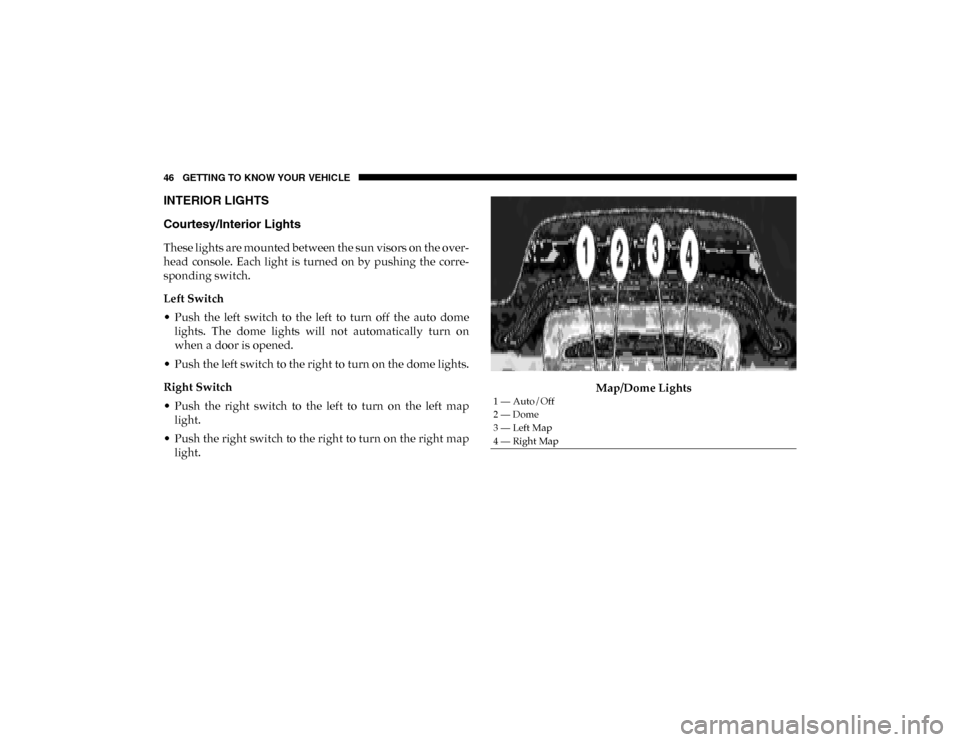
INTERIOR LIGHTS
Courtesy/Interior Lights
These lights are mounted between the sun visors on the over-
head console. Each light is turned on by pushing the corre -
sponding switch.
Left Switch
• Push the left switch to the left to turn off the auto dome lights. The dome lights will not automatically turn on
when a door is opened.
• Push the left switch to the right to turn on the dome lights.
Right Switch
• Push the right switch to the left to turn on the left map light.
• Push the right switch to the right to turn on the right map light. Map/Dome Lights
1 — Auto/Off
2 — Dome
3 — Left Map
4 — Right Map
2020_RAM_PROMASTER_CITY_OM_USA=GUID-7B6A7FCA-79B0-423F-95C5-ED2A949C3D13=1=en=.book Page 46
Page 50 of 350

GETTING TO KNOW YOUR VEHICLE 47
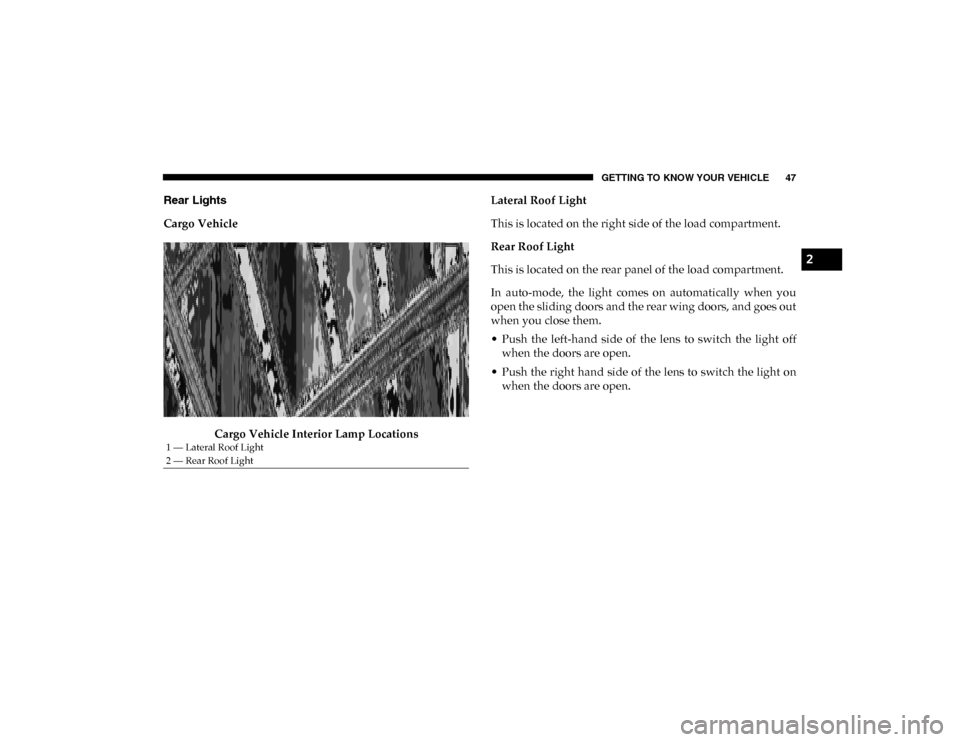
Rear Lights
Cargo VehicleCargo Vehicle Interior Lamp Locations Lateral Roof Light
This is located on the right side of the load compartment.
Rear Roof Light
This is located on the rear panel of the load compartment.
In auto-mode, the light comes on automatically when you
open the sliding doors and the rear wing doors, and goes out
when you close them.
• Push the left-hand side of the lens to switch the light off
when the doors are open.
• Push the right hand side of the lens to switch the light on when the doors are open.
1 — Lateral Roof Light
2 — Rear Roof Light
2
2020_RAM_PROMASTER_CITY_OM_USA=GUID-7B6A7FCA-79B0-423F-95C5-ED2A949C3D13=1=en=.book Page 47
Page 52 of 350

GETTING TO KNOW YOUR VEHICLE 49
Second Row Seating And Rear Roof Lights Operation
In auto-mode, the light comes on automatically when you
open the sliding doors and the rear wing doors, and goes out
when you close them.
• Push the left-hand side of the lens to switch the light offwhen the doors are open.
• Push the right-hand side of the lens to switch the light on when the doors are open.
Interior Light
1 — Off
2 — Auto
3 — On
2
2020_RAM_PROMASTER_CITY_OM_USA=GUID-7B6A7FCA-79B0-423F-95C5-ED2A949C3D13=1=en=.book Page 49
Page 134 of 350

SAFETY 131
Enhanced Accident Response System
In the event of an impact, if the communication network
remains intact, and the power remains intact, depending on
the nature of the event, the ORC will determine whether to
have the Enhanced Accident Response System perform the
following functions:
• Cut off fuel to the engine (if equipped)
• Cut off battery power to the electric motor (if equipped)
• Flash hazard lights as long as the battery has power
• Turn on the interior lights, which remain on as long as thebattery has power or for 15 minutes from the intervention
of the Enhanced Accident Response System
• Unlock the power door locks
Your vehicle may also be designed to perform any of these
other functions in response to the Enhanced Accident
Response System:
• Turn off the Fuel Filter Heater, Turn off the HVAC Blower Motor, Close the HVAC Circulation Door • Cut off battery power to the:
• Engine
• Electric Motor (if equipped)
• Electric Power Steering
• Brake booster
• Automatic transmission gear selector
• Horn
• Front wiper
NOTE:
After an accident, remember to cycle the ignition to the STOP
(OFF/LOCK) position and remove the key from the ignition
switch to avoid draining the battery. Carefully check the
vehicle for fuel leaks in the engine compartment and on the
ground near the engine compartment and fuel tank before
resetting the system and starting the engine. If there are no
fuel leaks or damage to the vehicle electrical devices (e.g.
headlights) after an accident, reset the system by following
the procedure described below. If you have any doubt,
contact an authorized dealer.
4
2020_RAM_PROMASTER_CITY_OM_USA=GUID-7B6A7FCA-79B0-423F-95C5-ED2A949C3D13=1=en=.book Page 131
Page 206 of 350

IN CASE OF EMERGENCY 203
Third Brake Light (Center Mount)
To change the bulb, proceed as follows:
1. For versions with tailgate, loosen the two fasteningscrews and extract the cluster.
2. For versions with swing doors, remove rubber plugs, remove retaining tabs and extract the cluster.
3. For versions with high roof and swing doors, remove the pressure-fit plastic guard and rubber cap using a screw -
driver, release the retaining tags as shown in the figure
and remove the unit.
4. Remove the appropriate tabs and remove the bulb holder.
5. Remove the snap-fitted bulb and replace it.
License Plate Lights
Proceed as follows to replace the bulbs:
1. Disengage the holding tabs and remove the lens by lifting to the left.
2. Remove the bulbs by releasing them from the side contacts; insert the new bulbs and make sure they are
correctly clamped between these contacts.Replacing Interior Bulbs
Dome Lamp With Spot Lights
To change the bulbs, proceed as follows:
1. Remove dome lamp by depressing the tabs, using a suit -
able tool.
Dome Lamp Assembly
6
2020_RAM_PROMASTER_CITY_OM_USA=GUID-7B6A7FCA-79B0-423F-95C5-ED2A949C3D13=1=en=.book Page 203
Page 244 of 350

241
SERVICING AND MAINTENANCE
SCHEDULED SERVICING
Your vehicle is equipped with an automatic oil change indicator
system. The oil change indicator system will remind you that it is
time to take your vehicle in for scheduled maintenance.
Based on engine operation conditions, the oil change indi-
cator message will illuminate. This means that service is
required for your vehicle. Operating conditions such as
frequent short-trips, trailer tow, extended engine idle time,
extremely hot or cold ambient temperatures will influence
when the “Oil Change Required” message is displayed.
Severe Operating Conditions can cause the change oil
message to illuminate as early as 3,500 miles (5,600 km) since
last reset. Have your vehicle serviced as soon as possible,
within the next 500 miles (805 km).
Your authorized dealer will reset the oil change indicator message
after completing the scheduled oil change. If a scheduled oil change
is performed by someone other than your authorized dealer, the
message can be reset by referring to the steps described under “Oil
Change Reset” in “Instrument Cluster Display” in “Getting To
Know Your Instrument Panel” for further information.
NOTE:
Under no circumstances should oil change intervals exceed
10,000 miles (16,000 km), 350 hours of engine run time or
12 months, whichever comes first. The 350 hours of engine run
or idle time is generally only a concern for fleet customers.
Severe Duty All Models
Change Engine Oil at 4,000 miles (6,500 km) or 350 hours of engine
run time if the vehicle is operated in a dusty and off road environ -
ment or is operated predominantly at idle, or only very low engine
RPM. This type of vehicle use is considered Severe Duty.
Once A Month Or Before A Long Trip:
• Check engine oil level.
• Check windshield washer fluid level.
• Check tire pressure and look for unusual wear or damage. Rotate tires at the first sign of irregular wear, even if it
occurs before the oil indicator system turns on.
• Check the fluid levels of the coolant reservoir and brake master cylinder, fill as needed.
• Check function of all interior and exterior lights.
7
2020_RAM_PROMASTER_CITY_OM_USA=GUID-7B6A7FCA-79B0-423F-95C5-ED2A949C3D13=1=en=.book Page 241