2020 Ram 3500 oil pressure
[x] Cancel search: oil pressurePage 400 of 568

398SERVICING AND MAINTENANCE
6.7L DIESEL ENGINE — SIX-SPEED AISIN (AS69RC HD)
1 — Battery 7 — Brake Fluid Reservoir Cap
2 — Engine Coolant Reservoir Cap 8 — Battery
3 — Engine Coolant Pressure Reservoir 9 — Power Distribution Center (Fuses)
4 — Engine Oil Fill 10 — Washer Fluid Reservoir Cap
5 — Engine Oil Dipstick 11 — Power Steering Fluid Reservoir Cap
6 — Automatic Transmission Dipstick 12 — Air Cleaner Filter
20_DJD2_OM_EN_USC_t.book Page 398
Page 401 of 568

SERVICING AND MAINTENANCE399
CHECKING OIL LEVEL — GAS ENGINE
To ensure proper lubrication of your vehicle's
engine, the engine oil must be maintained at the
correct level. Check the oil level at regular
intervals, such as every fuel stop. The best time
to check the engine oil level is about five minutes
after a fully warmed up engine is shut off.
Checking the oil while the vehicle is on level
ground will improve the accuracy of the oil level
readings. Always maintain the oil level within
the SAFE zone on the dipstick. Adding one quart
of oil when the reading is at the bottom of the
SAFE zone will result in a reading at the top of
the safe zone on these engines.
CHECKING OIL LEVEL — DIESEL ENGINE
To ensure proper lubrication of your vehicle's
engine, the engine oil must be maintained at
the correct level. Check the oil level at regular
intervals. The best time to check the oil level is
before starting the engine after it has been parked overnight. When checking oil after
operating the engine, first ensure the engine is
at full operating temperature, then wait for
30 minutes after engine shutdown to check
the oil.
Engine Oil Dipstick
Checking the oil while the vehicle is on level
ground will improve the accuracy of the oil level
readings. Add oil only when the level on the
dipstick is below the “ADD” mark. The total
capacity from the ADD mark to the Full mark is
2 qts (1.9L). Never operate the engine with oil level below
the “ADD” mark or above the upper “SAFE”
mark.
ADDING WASHER FLUID
The fluid reservoir is located under the hood
and should be checked for fluid level at regular
intervals. Fill the reservoir with windshield
washer solvent only (not radiator antifreeze).
When refilling the washer fluid reservoir, take
some washer fluid and apply it to a cloth or
towel and wipe the wiper blades clean. This will
help blade performance.
To prevent freeze-up of your windshield washer
system in cold weather, select a solution or
mixture that meets or exceeds the temperature
range of your climate. This rating information
can be found on most washer fluid containers.
CAUTION!
Overfilling or underfilling will cause oil
aeration or loss of oil pressure. This could
damage your engine.
1 — ADD Range
2 — Full Mark
3 — SAFE Range
CAUTION!
Overfilling or underfilling the crankcase will
cause oil aeration or loss of oil pressure. This
could damage your engine.
7
20_DJD2_OM_EN_USC_t.book Page 399
Page 408 of 568

406SERVICING AND MAINTENANCE
Refrigerant Recovery And Recycling —
R-134a — (If Equipped)
R-134a Air Conditioning Refrigerant is a
hydrofluorocarbon (HFC) that is an
ozone-friendly substance. The manufacturer
recommends that air conditioning service be
performed by an authorized dealer or other
service facilities using recovery and recycling
equipment. NOTE:
Use only manufacturer approved A/C system
PAG compressor oil and refrigerants.
Refrigerant Recovery And Recycling —
R-1234yf — (If Equipped)
R–1234yf Air Conditioning Refrigerant is a
hydrofluoroolefin (HFO) that is endorsed by the
Environmental Protection Agency and is an
ozone-friendly substance with a low
global-warming potential. The manufacturer
recommends that air conditioning service be
performed by an authorized dealer using
recovery and recycling equipment.
NOTE:
Use only manufacturer approved A/C system
PAG compressor oil, and refrigerants.
Cabin Filter Replacement (A/C Air Filter)
Refer to the “Maintenance Plan” for the proper
maintenance intervals.
The cabin air filter is located in the fresh air inlet
behind the glove compartment. Perform the
following procedure to replace the filter:
1. Open the glove compartment and remove
all contents.
2. With the glove compartment door open, remove the glove compartment tension
tether and tether clip by sliding the clip
toward the face of the glove compartment
door. Lift the clip out of glove compartment
door and release into dash panel.
The air conditioning system contains refrig -
erant under high pressure. To avoid risk of
personal injury or damage to the system,
adding refrigerant or any repair requiring
lines to be disconnected should be done by
an experienced technician.
CAUTION!
Do not use chemical flushes in your air
conditioning system as the chemicals can
damage your air conditioning components.
Such damage is not covered by the New
Vehicle Limited Warranty.
WARNING! (Continued)WARNING!
Do not remove the cabin air filter while the
vehicle is running, or while the ignition is in
the ACC or ON/RUN mode. With the cabin air
filter removed and the blower operating, the
blower can contact hands and may propel dirt
and debris into your eyes, resulting in
personal injury.
20_DJD2_OM_EN_USC_t.book Page 406
Page 414 of 568
412SERVICING AND MAINTENANCE
UNDERBODY MOUNTED FUEL FILTER
R
EPLACEMENT — DIESEL ENGINE
NOTE:
Using a fuel filter that does not meet the
manufacturer's filtration and water sepa -
rating requirements can severely impact fuel
system life and reliability.
The underbody mounted filter housing will
cause the engine not to run if:
a. No filter is installed.
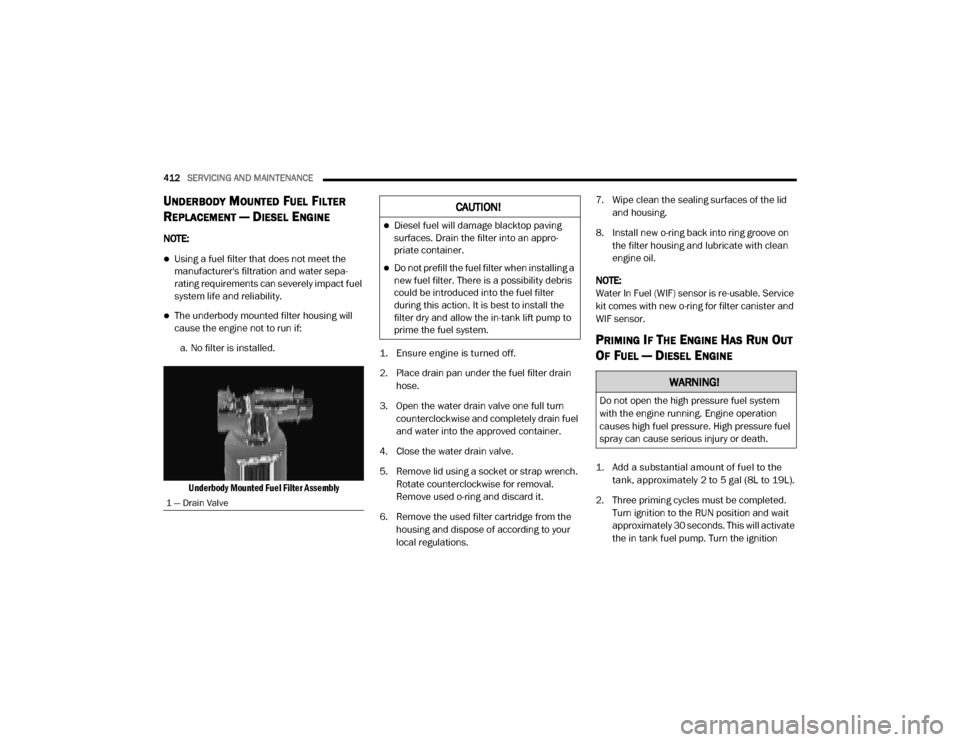
Underbody Mounted Fuel Filter Assembly
1. Ensure engine is turned off.
2. Place drain pan under the fuel filter drain
hose.
3. Open the water drain valve one full turn counterclockwise and completely drain fuel
and water into the approved container.
4. Close the water drain valve.
5. Remove lid using a socket or strap wrench. Rotate counterclockwise for removal.
Remove used o-ring and discard it.
6. Remove the used filter cartridge from the housing and dispose of according to your
local regulations. 7. Wipe clean the sealing surfaces of the lid
and housing.
8. Install new o-ring back into ring groove on the filter housing and lubricate with clean
engine oil.
NOTE:
Water In Fuel (WIF) sensor is re-usable. Service
kit comes with new o-ring for filter canister and
WIF sensor.
PRIMING IF THE ENGINE HAS RUN OUT
O
F FUEL — DIESEL ENGINE
1. Add a substantial amount of fuel to the
tank, approximately 2 to 5 gal (8L to 19L).
2. Three priming cycles must be completed. Turn ignition to the RUN position and wait
approximately 30 seconds. This will activate
the in tank fuel pump. Turn the ignition
1 — Drain Valve
CAUTION!
Diesel fuel will damage blacktop paving
surfaces. Drain the filter into an appro-
priate container.
Do not prefill the fuel filter when installing a
new fuel filter. There is a possibility debris
could be introduced into the fuel filter
during this action. It is best to install the
filter dry and allow the in-tank lift pump to
prime the fuel system.
WARNING!
Do not open the high pressure fuel system
with the engine running. Engine operation
causes high fuel pressure. High pressure fuel
spray can cause serious injury or death.
20_DJD2_OM_EN_USC_t.book Page 412
Page 423 of 568

SERVICING AND MAINTENANCE421
(Continued)
CHARGE AIR COOLER — INTER-COOLER
The charge air cooler is positioned below the
radiator and the air conditioner condenser. Air
enters the engine through the air cleaner and
passes through the turbocharger, where it is
pressurized. This pressurized air rapidly
reaches high temperature. The air is then
directed through a hose to the charge air cooler
and through another hose to the intake
manifold of the engine. The air entering the
engine has been cooled by about 50° to 100°F
(10° to 38°C). This cooling process enables
more efficient burning of fuel resulting in fewer
emissions.
To guarantee optimum performance of the
system, keep the surfaces of the charge air
cooler, condenser and radiator clean and free
of debris. Periodically check the hoses leading
to and from the charge air cooler for cracks or
loose clamps resulting in loss of pressure and
reduced engine performance.
BRAKE SYSTEM
In order to ensure brake system performance,
all brake system components should be
inspected periodically. Refer to the “Maintenance Plan” in this section for the
proper maintenance intervals.
Fluid Level Check — Brake Master Cylinder
The fluid level of the master cylinder should be
checked when performing under the hood
service or immediately if the brake system
warning lamp indicates system failure.
If necessary, add fluid to bring level within the
designated marks on the side of the reservoir of
the brake master cylinder. Be sure to clean the
top of the master cylinder area before removing
cap.
With disc brakes the fluid level can be expected
to fall as the brake linings wear. However, an
unexpected drop in fluid level may be caused by
a leak and a system check should be
conducted.
Refer to “Fluids And Lubricants” in “Technical
Specifications” for further information.
WARNING!
Riding the brakes can lead to brake failure
and possibly a collision. Driving with your foot
resting or riding on the brake pedal can result
in abnormally high brake temperatures,
excessive lining wear, and possible brake
damage. You would not have your full braking
capacity in an emergency.
WARNING!
Use only manufacturer's recommended
brake fluid. Refer to “Fluids And Lubricants”
in “Technical Specifications” for further infor-
mation. Using the wrong type of brake fluid
can severely damage your brake system
and/or impair its performance. The proper
type of brake fluid for your vehicle is also
identified on the original factory installed
hydraulic master cylinder reservoir.
To avoid contamination from foreign matter
or moisture, use only new brake fluid or fluid
that has been in a tightly closed container.
Keep the master cylinder reservoir cap
secured at all times. Brake fluid in a open
container absorbs moisture from the air
resulting in a lower boiling point. This may
cause it to boil unexpectedly during hard or
prolonged braking, resulting in sudden brake
failure. This could result in a collision.
7
20_DJD2_OM_EN_USC_t.book Page 421
Page 441 of 568

SERVICING AND MAINTENANCE439
(Continued)
Life Of Tire
The service life of a tire is dependent upon
varying factors including, but not limited to:
Driving style.
Tire pressure - Improper cold tire inflation
pressures can cause uneven wear patterns
to develop across the tire tread. These
abnormal wear patterns will reduce tread life,
resulting in the need for earlier tire replace -
ment.
Distance driven.
Performance tires, tires with a speed rating of
V or higher, and Summer tires typically have
a reduced tread life. Rotation of these tires
per the vehicle scheduled maintenance is
highly recommended. NOTE:
Wheel valve stem must be replaced as well
when installing new tires due to wear and tear
in existing tires.
Keep dismounted tires in a cool, dry place with
as little exposure to light as possible. Protect
tires from contact with oil, grease, and gasoline.
Replacement Tires
The tires on your new vehicle provide a balance
of many characteristics. They should be
inspected regularly for wear and correct cold
tire inflation pressures. The manufacturer
strongly recommends that you use tires
equivalent to the originals in size, quality and
performance when replacement is needed.
Refer to the paragraph on “Tread Wear
Indicators” in this section. Refer to the Tire and
Loading Information placard or the Vehicle
Certification Label for the size designation of
your tire. The Load Index and Speed Symbol for
your tire will be found on the original equipment
tire sidewall.
See the Tire Sizing Chart example found in the
“Tire Safety Information” section of this manual
for more information relating to the Load Index
and Speed Symbol of a tire. It is recommended to replace the two front tires
or two rear tires as a pair. Replacing just one tire
can seriously affect your vehicle’s handling. If
you ever replace a wheel, make sure that the
wheel’s specifications match those of the
original wheels.
It is recommended you contact an authorized
tire dealer or original equipment dealer with any
questions you may have on tire specifications or
capability. Failure to use equivalent
replacement tires may adversely affect the
safety, handling, and ride of your vehicle.
WARNING!
Tires and the spare tire should be replaced
after six years, regardless of the remaining
tread. Failure to follow this warning can result
in sudden tire failure. You could lose control
and have a collision resulting in serious injury
or death.
WARNING!
Do not use a tire, wheel size, load rating, or
speed rating other than that specified for
your vehicle. Some combinations of unap
-
proved tires and wheels may change
suspension dimensions and performance
characteristics, resulting in changes to
steering, handling, and braking of your
vehicle. This can cause unpredictable
handling and stress to steering and
suspension components. You could lose
control and have a collision resulting in
serious injury or death. Use only the tire and
wheel sizes with load ratings approved for
your vehicle.
7
20_DJD2_OM_EN_USC_t.book Page 439
Page 555 of 568

553
Belts, Seat
..................................................... 210Blind Spot Monitoring.................................... 153Body Builders Guide........................................ 12Body Mechanism Lubrication........................ 414B-Pillar Location............................................. 433Brake Assist System...................................... 145Brake Control System.................................... 145Brake Fluid.......................................... 421, 463Brake System...................................... 421, 452Fluid Check............................................... 421Master Cylinder......................................... 421Parking...................................................... 231Warning Light............................................ 131Brake/Transmission Interlock....................... 235Bulb Replacement......................................... 351Bulbs, Light.......................................... 212, 351
C
Cab Top Clearance Lights.............................. 357Camera.......................................................... 309Camera, AUX........................................ 311, 318Camera, Rear...................................... 309, 312Camper............................................................ 98Capacities, Antifreeze (Engine Coolant)......... 460Capacities, Fluid.................................. 459, 460Caps, Filler Oil (Engine)...................................... 396, 402Radiator (Coolant Pressure)...................... 419Car Washes................................................... 448Carbon Monoxide Warning.................. 209, 456
Cargo Light....................................................... 52Cellular Phone.............................................. 540Center High Mounted Stop Light................... 356Center Seat Storage Compartment.................. 81Charge Air Cooler.......................................... 421Chart, Tire Sizing........................................... 430Check Engine Light (Malfunction
Indicator Light).............................................. 143Checking Your Vehicle For Safety................. 209Checks, Safety.............................................. 209Child Restraint.............................................. 191Child RestraintsBooster Seats........................................... 194Child Seat Installation..................... 202, 204How To Stow An unused ALR Seat Belt.... 201Infant And Child Restraints....................... 192Locating The LATCH Anchorages.............. 199Lower Anchors And Tethers For Children.. 195Older Children And Child Restraints......... 193Seating Positions...................................... 195Clean Air Gasoline......................................... 454CleaningWheels..................................................... 442Climate Control................................................ 57Automatic.................................................... 61Manual........................................................ 57Cold Weather Operation............................... 217Compact Spare Tire...................................... 441Contract, Service.......................................... 549Cooling Pressure Cap (Radiator Cap)............ 419
Cooling System............................................. 417Adding Coolant (Antifreeze)...................... 418Coolant Level................................... 418, 420Cooling Capacity.............................. 459, 460Disposal Of Used Coolant......................... 420Drain, Flush, And Refill............................. 418Inspection................................................. 420Points To Remember................................ 420Pressure Cap............................................ 419Radiator Cap............................................. 419Selection Of Coolant (Antifreeze).... 418, 459, 461, 464Corrosion Protection..................................... 447Cruise Control (Speed Control)............. 280, 282Cruise Light................................................... 141Cupholders.......................................................86Customer Assistance.................................... 548Cybersecurity................................................ 467
D
Daytime Running Lights...................................49Dealer Service............................................... 401Defroster, Rear Window...................................57Defroster, Windshield............................ 57, 210Delay (Intermittent) Wipers..............................55Diagnostic System, Onboard......................... 142Diesel Exhaust Brake.................................... 232Diesel Fuel.................................................... 456Diesel Fuel Requirements............................. 456
11
20_DJD2_OM_EN_USC_t.book Page 553
Page 559 of 568

557
Manual Park Release
............................................. 378Service...................................................... 551Media Hub..................................................... 538Memory Seat................................................... 31Memory Settings............................................. 31Methanol....................................................... 454Mirrors............................................................. 42Electric Powered......................................... 44Heated........................................................ 46Memory....................................................... 31Outside........................................................ 44Rearview..................................... 42, 43, 346Trailer Towing.............................................. 46Modifications/AlterationsVehicle........................................................ 12Monitor, Tire Pressure System....................... 163Mopar Parts................................................... 550MP3 Control.................................................. 538Multi-Function Control Lever............................ 48
N
Navigation System (Uconnect GPS)............... 309New Vehicle Break-In Period.......................... 230Noise ControlMaintenance............................................. 425Tampering Prohibited................................ 426Noise Emission Warranty..................... 425, 426
O
Occupant Restraints..................................... 172Octane Rating, Gasoline (Fuel)..................... 454Off-Pavement Driving (Off-Road).......... 261, 344Off-Road Driving (Off-Pavement).......... 261, 344Oil Change Indicator..................................... 390Oil Filter, Change.......................................... 403Oil Filter, Selection........................................ 403Oil Pressure Light.......................................... 132Oil Reset....................................................... 115Oil, Engine................................... 401, 461, 464Capacity........................................... 459, 460Change Interval........................................ 401Dipstick.................................................... 399Disposal................................................... 403Filter....................................... 403, 461, 464Filter Disposal........................................... 403Identification Logo.................................... 402Materials Added To.................................. 403Pressure Warning Light............................ 132Recommendation............................ 401, 459Synthetic.................................................. 403Viscosity.......................................... 402, 459Onboard Diagnostic System.......................... 142Operating Precautions.................................. 142Operator ManualOwner's Manual..................................12, 551Outside Rearview Mirrors................................ 44
Overdrive....................................................... 244Overdrive OFF Switch.................................... 244Overheating, Engine...................................... 379
P
Paint Care..................................................... 447Panic Alarm......................................................15Parking Brake............................................... 231ParkSense System, Rear...................... 296, 301Passive Entry....................................................28Pedals, Adjustable...........................................42Perform Service Indicator, Reset.................. 390Pets............................................................... 209Pickup Box................................................90, 92Pinch Protection...............................................73Placard, Tire And Loading Information.......... 433PowerDistribution Center (Fuses)....................... 358Door Locks...................................................27Mirrors.........................................................44Outlet (Auxiliary Electrical Outlet)..........86, 88Seats...........................................................35Side Steps...................................................27Sliding Rear Window....................................71Steering.......................................................44Sunroof........................................................72Windows......................................................7011
20_DJD2_OM_EN_USC_t.book Page 557