2020 Ram 2500 full
[x] Cancel search: fullPage 2 of 553
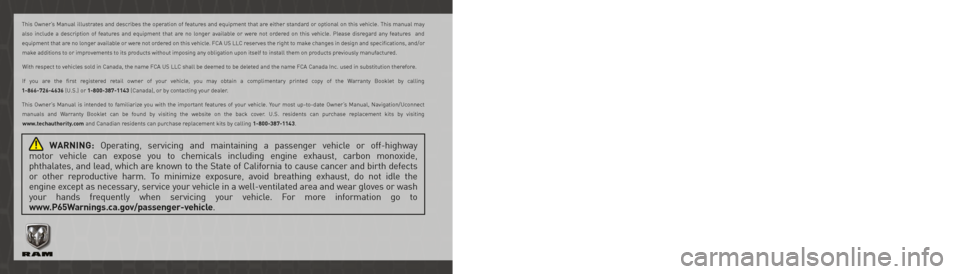
WARNING: Operating, servicing and maintaining a passenger vehicle or off-highway
motor vehicle can expose you to chemicals including engine exhaust, carbon monoxide,
phthalates, and lead, which are known to the State of California to cause cancer and birth defects
or other reproductive harm. To minimize exposure, avoid breathing exhaust, do not idle the
engine except as necessary, service your vehicle in a well-ventilated area and wear gloves or wash
your hands frequently when servicing your vehicle. For more information go to
www.P65Warnings.ca.gov/passenger-vehicle.
The driver’s primary responsibility is the safe operation of the vehicle. Driving while distracted can result in loss of vehicle control, resulting in an accident and
personal injury. FCA US LLC strongly recommends that the driver use extreme caution when using any device or feature that may take their attention off the
road. Use of any electrical devices, such as cellular telephones, computers, portable radios, vehicle navigation or other devices, by the driver while the vehicle is moving is dangerous and could lead to a serious accident. Texting while driving is also dangerous and should never be done while the vehicle is moving. If you
find yourself unable to devote your full attention to vehicle operation, pull off the road to a safe location and stop your vehicle. Some states or provinces prohibit the use of cellular telephones or texting while driving. It is always the driver’s responsibility to comply with all local laws.
This Owner’s Manual has been prepared to help you get acquainted with your new Ram brand vehicle and to provide a convenient reference for common questions.
Not all features shown in this manual may apply to your vehicle. For additional information on accessories to help personalize your vehicle, visit
www.mopar.com/en-us/care/owners-manual.html (U.S.), www.owners.mopar.ca (Canada) or your local Ram brand dealer.
DRIVING AND ALCOHOL
Drunk driving is one of the most frequent causes of accidents. Your driving ability can be seriously impaired with blood alcohol levels far below the legal minimum. If you are drinking, don’t drive. Ride with
a designated non-drinking driver, call a cab, a friend or use public transportation.
This Owner’s Manual illustrates and describes the operation of features and equipment that are either standard or optional on this vehicle. This manual may
also include a description of features and equipment that are no longer available or were not ordered on this vehicle. Please disregard any features and
equipment that are no longer available or were not ordered on this vehicle. FCA US LLC reserves the right to make changes in design and specifications, and/or make additions to or improvements to its products without imposing any obligation upon itself to install them on products previously manufactured.
With respect to vehicles sold in Canada, the name FCA US LLC shall be deemed to be deleted and the name FCA Canada Inc. used in substitution therefore.
If you are the first registered retail owner of your vehicle, you may obtain a complimentary printed copy of the Warranty Booklet by calling
1-866-726-4636 (U.S.) or 1-800-387-1143 (Canada), or by contacting your dealer.
This Owner’s Manual is intended to familiarize you with the important features of your vehicle. Your most up-to-date Owner’s Manual, Navigation/Uconnect manuals and Warranty Booklet can be found by visiting the website on the back cover. U.S. residents can purchase replacement kits by visiting
www.techauthority.com and Canadian residents can purchase replacement kits by calling 1-800-387-1143.
WARNING
Driving after drinking can lead to an accident. Your perceptions are less sharp, your reflexes are slower
and your judgment is impaired when you have been drinking. Never drink and then drive.
Page 13 of 553

11
INTRODUCTION
Dear Customer, congratulations on selecting
your new vehicle. Be assured that it represents
precision workmanship, distinctive styling, and
high quality.
This is a specialized utility vehicle. It can go
places and perform tasks that are not intended
for conventional passenger vehicles. It handles
and maneuvers differently from many
passenger vehicles both on-road and off-road,
so take time to become familiar with your
vehicle. If equipped, the two-wheel drive version
of this vehicle was designed for on-road use
only. It is not intended for off-road driving or use
in other severe conditions suited for a
four-wheel drive vehicle. Before you start to
drive this vehicle, read the Owner’s Manual. Be
sure you are familiar with all vehicle controls,
particularly those used for braking, steering,
transmission, and transfer case shifting. Learn
how your vehicle handles on different road
surfaces. Your driving skills will improve with
experience. When driving off-road, or working
the vehicle, don’t overload the vehicle or expect
the vehicle to overcome the natural laws of
physics. Always observe federal, state, provin-cial and local laws wherever you drive. As with
other vehicles of this type, failure to operate this
vehicle correctly may result in loss of control or
a collision. Refer to the “Driving Tips” in
“Starting and Operating” for further informa
-
tion.
This Owner's Manual has been prepared with
the assistance of service and engineering
specialists to acquaint you with the operation
and maintenance of your vehicle. It is supple -
mented by Warranty Information, and
customer-oriented documents. Within this infor -
mation, you will find a description of the
services that FCA US LLC offers to its
customers, the vehicle's warranty coverage,
and the details of the terms and conditions for
maintaining its validity. Please take the time to
read all of these publications carefully before
driving your vehicle for the first time. Following
the instructions, recommendations, tips, and
important warnings in this manual will help
assure safe and enjoyable operation of your
vehicle. This Owner's Manual describes all versions of
this vehicle. Options and equipment dedicated
to specific markets or versions are not expressly
indicated in the text. Therefore, you should only
consider the information which is related to the
trim level, engine, and version that you have
purchased. Any content introduced throughout
the Owner's Information, that may or may not be
applicable to your vehicle, will be identified with
the wording “If Equipped”. All data contained in
this publication are intended to help you use
your vehicle in the best possible way. FCA US
LLC aims at a constant improvement of the
vehicles produced. For this reason, it reserves
the right to make changes to the model
described for technical and/or commercial
reasons. For further information, contact an
authorized dealer.
When it comes to service, remember that an
authorized dealer knows your vehicle best, has
factory-trained technicians and genuine
MOPAR® parts, and cares about your satisfac
-
tion.1
20_DJD2_OM_EN_USC_t.book Page 11
Page 16 of 553

14GETTING TO KNOW YOUR VEHICLE
TIP:
When viewing a topic, tap the star icon to add it
to your Favorites, for easy access in the future.
KEYS
Key Fob
Your vehicle uses a keyless ignition system. The
ignition system consists of a key fob and a
START/STOP push button ignition system. The
Remote Keyless Entry (RKE) system consists of
a key fob and Keyless Enter-N-Go feature.
NOTE:
The key fob may not be found if it is located next
to a mobile phone, laptop or other electronic
device; these devices may block the key fob’s
wireless signal.
The key fob allows you to lock or unlock all
doors, tailgate, and the RamBox (if equipped),
as well as release the tailgate, and activate the
Panic Alarm from distances up to approximately
66 ft (20 m). The key fob does not need to be
pointed at the vehicle to activate the system. NOTE:
In the ON/RUN position, all key fob buttons
will work until the vehicle reaches 2 mph
(4 km/h).
The key fob should not be placed next to the
wireless charging pad (if equipped).
Key Fob
In case the ignition switch does not change with
the push of a button, the key fob may have a low
or fully depleted battery. A low key fob battery
can be verified by referring to the instrument
cluster, which will display directions to follow.
In a situation where the battery is low or fully
depleted, a back up method can be used to
operate the ignition switch. Put the nose side of
the key fob (side opposite of the emergency key)
against the START/STOP ignition button and
push to operate the ignition switch.
To Unlock The Doors And Tailgate
Push and release the unlock button on the key
fob once to unlock the driver’s door. Push the
unlock button twice within five seconds to
unlock all doors, the tailgate and the RamBox (if
equipped). The turn signal lights will flash to
acknowledge the unlock signal. The illuminated
entry system will also turn on.
NOTE:
All doors can be programmed to unlock on the
first push of the unlock button. Refer to “Ucon
-
nect Settings” in “Multimedia” for further infor -
mation.
1 — PANIC
2 — Remote Lowering (If Equipped)
3 — Unlock
4 — Lock
5 — Tailgate Release (If Equipped)
6 — Remote Start
7 — Emergency Key
20_DJD2_OM_EN_USC_t.book Page 14
Page 32 of 553

30GETTING TO KNOW YOUR VEHICLE
Do NOT grab the door handle when pushing the
door handle lock button. This could unlock the
door(s).
Do NOT Grab The Door Handle When Locking
NOTE:
After pushing the door handle lock button,
you must wait two seconds before you can
lock or unlock the doors, using either Passive
Entry door handle. This is done to allow you to
check if the vehicle is locked by pulling the
door handle, without the vehicle reacting and
unlocking.
The Passive Entry system depends on a key
fob that is not fully discharged of its coin
battery capacity.
When the key fob battery is low, the instru -
ment cluster will display a message indi -
cating that the key fob battery is low. Refer to
“Keys” in this chapter for further information.
The vehicle doors can also be locked by using
the key fob lock button or the lock button
located on the vehicle’s interior door panel.
General Information
The following regulatory statement applies to all
Radio Frequency (RF) devices equipped in this
vehicle:
This device complies with Part 15 of the FCC
Rules and with Innovation, Science and
Economic Development Canada license-exempt
RSS standard(s). Operation is subject to the
following two conditions:
1. This device may not cause harmful interfer -
ence, and
2. This device must accept any interference received, including interference that may
cause undesired operation.
Le présent appareil est conforme aux CNR
d`Innovation, Science and Economic Develop -
ment applicables aux appareils radio exempts de licence. L'exploitation est autorisée aux deux
conditions suivantes:
1. l'appareil ne doit pas produire de brouil
-
lage, et
2. l'utilisateur de l'appareil doit accepter tout brouillage radioélectrique subi, même si le
brouillage est susceptible d'en comprom -
ettre le fonctionnement.
La operación de este equipo está sujeta a las
siguientes dos condiciones:
1. es posible que este equipo o dispositivo no cause interferencia perjudicial y
2. este equipo o dispositivo debe aceptar cual -
quier interferencia, incluyendo la que
pueda causar su operación no deseada.
NOTE:
Changes or modifications not expressly
approved by the party responsible for compli -
ance could void the user’s authority to operate
the equipment.
20_DJD2_OM_EN_USC_t.book Page 30
Page 45 of 553

GETTING TO KNOW YOUR VEHICLE43
DRIVER ADJUSTABLE PEDALS — IF
EQUIPPED
The adjustable pedals system is designed to
allow a greater range of driver comfort for
steering wheel tilt and seat position. This
feature allows the brake and accelerator pedals
to move toward or away from the driver to
provide improved position with the steering
wheel.
The adjustable pedal switch is located to the left
side of the steering column.
Adjustable Pedals Switch
The pedals can be adjusted with the ignition
OFF.
The pedals
cannot be adjusted when the
vehicle is in REVERSE or when the Speed
Control System is on. The following messages
will appear on vehicles equipped with an instru -
ment cluster display if the pedals are attempted
to be adjusted when the system is locked out:
“Adjustable Pedal Disabled — Cruise Control
Engaged” or “Adjustable Pedal Disabled —
Vehicle In Reverse”.
NOTE:
Always adjust the pedals to a position that
allows full pedal travel.
Further small adjustments may be necessary
to find the best possible seat/pedal position.
For vehicles equipped with Driver Memory
Seat, you can use your remote keyless entry
key fob or the memory switch on the driver’s
door trim panel to return the adjustable
pedals to pre-programmed positions. Refer
to “Driver Memory Seat” in “Seats” in this
chapter for further information.
MIRRORS
Inside Day/Night Mirror — If Equipped
The mirror head can be adjusted up, down, left,
and right for various drivers. The mirror should
be adjusted to center on the view through the
rear window.
WARNING!
Do not adjust the pedals while the vehicle is
moving. You could lose control and have an
accident. Always adjust the pedals while the
vehicle is parked.
CAUTION!
Do not place any article under the adjustable
pedals or impede its ability to move, as it may
cause damage to the pedal controls. Pedal
travel may become limited if movement is
stopped by an obstruction in the adjustable
pedal's path.
2
20_DJD2_OM_EN_USC_t.book Page 43
Page 50 of 553

48GETTING TO KNOW YOUR VEHICLE
Resetting The Power Folding Outside Mirrors
You may need to reset the power folding mirrors
if the following occurs:
The mirrors are accidentally blocked while
folding.
The mirrors are accidentally manually
folded/unfolded.
The mirrors come out of the unfolded posi -
tion.
The mirrors shake and vibrate at normal
driving speeds.
To Reset The Power Folding Mirrors:
1. Using the power folding mirror switch, move the mirror to its normal driving
(home) position.
2. Using the power folding mirror switch, move the mirror to the full retract position (this
may require multiple button pushes). This
resets them to their normal position.
NOTE:
The power fold mirrors are designed to
operate while the vehicle is stationary or trav -
eling at moderate speeds. If you attempt to power fold the mirrors at high speeds they
may not fully open or close. You should slow
down to a moderate speed and complete the
operation.
When pushing the power fold button 10 or
more times in one minute the system shuts
down for one minute to protect the motors
from overheating.
Outside Mirrors Folding Feature
All outside mirrors are designed to be able to be
manually folded both forward and rearward to
prevent damage.
Folding Mirror
Illuminated Vanity Mirror — If Equipped
Illuminated vanity mirrors are located on each
sun visor. To use the mirror, rotate the sun visor
down and swing the mirror cover upward. The
lights will turn on automatically. Closing the
mirror cover turns off the light.
Lift Cover For Illuminated Mirror
CAUTION!
It is recommended to fold the mirrors into the
full rearward position to resist damage when
entering a car wash or a narrow location.
20_DJD2_OM_EN_USC_t.book Page 48
Page 52 of 553

50GETTING TO KNOW YOUR VEHICLE
Lights (DRLs) will turn off. Also, if a turn signal is
activated, the DRL lamp on the same side of the
vehicle may turn off for the duration of the turn
signal activation. Once the turn signal is no
longer active, the DRL lamp will illuminate.
NOTE:
If allowed by law in the country in which the
vehicle was purchased, the Daytime Running
Lights can be turned on and off using the Ucon -
nect System, refer to “Uconnect Settings” in
“Multimedia” for further information.
High/Low Beam Switch
Push the multifunction lever toward the instru-
ment panel to switch the headlights to high
beam. Pulling the multifunction lever back
toward the steering wheel will turn the low
beams back on, or shut the high beams off.
Automatic High Beam Headlamp Control —
If Equipped
The Automatic High Beam Headlamp Control
system provides increased forward lighting at
night by automating high beam control through
the use of a digital camera mounted on the
inside rearview mirror or forward facing camera.
This camera detects vehicle specific light and automatically switches from high beams to low
beams until the approaching vehicle is out of
view.
NOTE:
The Automatic High Beam Headlamp Control
can be turned on or off by selecting “ON”
under “Auto Dim High Beams” within your
Uconnect settings, as well as turning the
headlight switch to the AUTO position. Refer
to “Uconnect Settings” in “Multimedia” for
further information.
Broken, muddy, or obstructed headlights and
taillights of vehicles in the field of view will
cause headlights to remain on longer (closer
to the vehicle). Also, dirt, film, and other
obstructions on the windshield or camera
lens will cause the system to function improp
-
erly.
To opt out of the Advanced Auto High Beam
Sensitivity Control (default) and enter
Reduced High Beam Sensitivity Control (not
recommended), on vehicles equipped with
mirror controlled automatic high beams and
without the forward facing camera, toggle the
high beam lever six full on/off cycles within 10 seconds of placing the ignition in the ON
position. The system will return to the default
setting when the ignition is OFF.
If the windshield or Automatic High Beam Head -
lamp Control mirror is replaced, the mirror must
be re-aimed to ensure proper performance. See
a local authorized dealer.
To Activate
1. The Automatic High Beams are enabled through the Uconnect system. Refer to
“Uconnect Settings” in “Multimedia” for
further information.
2. Turn the headlight switch to the AUTO head -
light position.
3. Push the multifunction lever away from you (toward front of vehicle) to engage the high
beam mode.
NOTE:
The Automatic High Beams will not activate until
the vehicle is at or above 12 mph (20 km/h).
20_DJD2_OM_EN_USC_t.book Page 50
Page 71 of 553

GETTING TO KNOW YOUR VEHICLE69
NOTE:
It is not necessary to move the temperature
settings for cold or hot vehicles. The system
automatically adjusts the temperature,
mode, and blower speed to provide comfort
as quickly as possible.
The temperature can be displayed in U.S. or
Metric units by selecting the U.S./Metric
customer-programmable feature. Refer to
the “Uconnect Settings” in “Multimedia” for
further information.
To provide you with maximum comfort in the
Automatic mode during cold start-ups, the
blower fan will remain on low until the engine
warms up. The blower will increase in speed
and transition into Auto mode.
Manual Operation Override
This system offers a full complement of manual
override features. The AUTO symbol in the front
ATC display will be turned off when the system
is being used in the manual mode.
Operating Tips
NOTE:
Refer to the chart at the end of this section for
suggested control settings for various weather
conditions.
Summer Operation
The engine cooling system must be protected
with a high-quality antifreeze coolant to provide
proper corrosion protection and to protect
against engine overheating. OAT coolant
(conforming to MS.90032) is recommended.
Winter Operation
To ensure the best possible heater and
defroster performance, make sure the engine
cooling system is functioning properly and the
proper amount, type, and concentration of
coolant is used. Use of the Air Recirculation
mode during Winter months is not recom -
mended, because it may cause window fogging.
Vacation/Storage
Before you store your vehicle, or keep it out of
service (i.e., vacation) for two weeks or more,
run the air conditioning system at idle for about
five minutes, in fresh air with the blower setting
on high. This will ensure adequate system lubri -cation to minimize the possibility of compressor
damage when the system is started again.
Window Fogging
Vehicle windows tend to fog on the inside in
mild, rainy, and/or humid weather. To clear the
windows, select Defrost or Mix mode and
increase the front blower speed. Do not use the
Recirculation mode without A/C for long
periods, as fogging may occur.
CAUTION!
Failure to follow these cautions can cause
damage to the heating elements:
Use care when washing the inside of the
rear window. Do not use abrasive window
cleaners on the interior surface of the
window. Use a soft cloth and a mild
washing solution, wiping parallel to the
heating elements. Labels can be peeled off
after soaking with warm water.
Do not use scrapers, sharp instruments, or
abrasive window cleaners on the interior
surface of the window.
Keep all objects a safe distance from the
window.
2
20_DJD2_OM_EN_USC_t.book Page 69