2020 Peugeot Partner weight
[x] Cancel search: weightPage 89 of 260

87
Safety
5Group 0+: from birth to 13 kg
L1
"RÖMER Baby-Safe Plus"
Installed in the "rearward facing" position.
Groups 2 and 3: from 15 to 36 kg
L5
"RÖMER KIDFIX XP"
Can be fitted to the vehicle's ISOFIX mountings.
The child is restrained by the seat belt.
Only suitable for installation on the side rear seats.
The head restraint on the vehicle seat must be removed.
Groups 2 and 3: from 15 to 36 kg
L6
"GRACO Booster"
The child is restrained by the seat belt.
Only suitable for installation on the front
passenger seat or on the rear side seats.
Locations for child seats secured using the seat belt
In accordance with European regulations, the table indicates the options\
for installing child seats secured using a seat belt and universally ap\
proved (c)
according to the weight of the child and the seating position in the veh\
icle.
Page 90 of 260

88
Safety
Manual child lock
Mechanical system to prevent opening of the
sliding side door using its interior lever.
Locking/Unlocking
► Rotate the control located on the edge of the
side door up to lock it, or down to unlock it.
Electric child lock
Remote control system to prevent opening of the
rear doors (sliding side door(s), side-hinged rear
doors or tailgate) using their interior controls.
Child weight and age guide
Seats Under 13
kg
(groups
0 (b) and
0+)
Up to about 1 year
old From 9 to 18
kg
(group 1)
From about 1 to 3
years old 15-25 kg
(group
2)
From about 3 to 6
years old 22-36 kg
(group
3)
From about 6 to 10
years old
Cab/Row 1 (a) With individual seat, passenger seat
/
With bench seat,
outer or central
passenger seat
With passenger
airbag deactivated
"OFF" U
With passenger
airbag activated
"ON" X
UF
Key
(a) Refer to the current legislation in the country in which you are drivin\
g before placing a child in this seat position.
(b) Group 0: from birth to 10
kg. Carrycots and "car" infant carriers must not be installed on the fro\
nt passenger seat(s).
(c) Universal child seat: child seat suitable for installation in all vehic\
les using the seat belt.
U Seat position suitable for installing a child seat secured using the se\
at belt and universally approved for rearward-facing and/or forward-faci\
ng use.
UF Seat position suitable for installing a child seat secured using a seat\
belt and universally approved for forward-facing use.
X Seat position not suitable for installing a child seat for the stated w\
eight class.
Page 92 of 260

90
Driving
Driving recommendations
► Observe the driving regulations and remain
vigilant whatever the traffic conditions.
►
Monitor your environment and keep your
hands on the wheel to be able to react to
anything that may happen any time.
►
Drive smoothly
, anticipate the need for
braking and maintain a longer safety distance,
especially in bad weather.
►
Stop the vehicle to carry out operations that
require close attention (such as adjustments).
►
During long trips, take a break every two
hours.
Important!
Never leave the engine running in a
closed space without sufficient
ventilation. Internal combustion engines emit
toxic exhaust gases such as carbon
monoxide. Danger of poisoning and death!
In severe wintry conditions (temperature
below -23°C), let the engine run for 4
minutes before moving off, to ensure the
correct operation and durability of the
mechanical components of your vehicle
(engine and gearbox).
Never drive with the parking brake
applied . Risk of overheating and
damage to the braking system!
Do not park the vehicle or leave the
engine running on a flammable
surface (dry grass, dead leaves, etc.). The
exhaust system of your vehicle is very hot,
even several minutes after the engine stops.
Risk of fire!
Never leave a vehicle unattended with
the engine running. If you have to leave
your vehicle with the engine running, apply
the parking brake and put the gearbox into
neutral or position N or P (depending on the
type of gearbox).
Never leave children inside the vehicle
unsupervised.
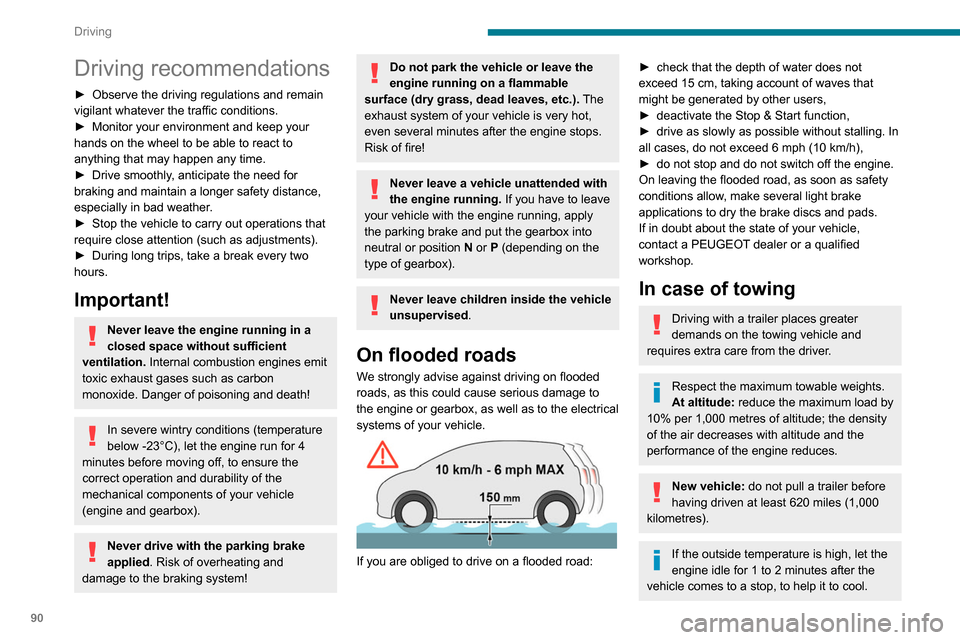
On flooded roads
We strongly advise against driving on flooded
roads, as this could cause serious damage to
the engine or gearbox, as well as to the electrical
systems of your vehicle.
If you are obliged to drive on a flooded road:
► check that the depth of water does not
exceed 15 cm, taking account of waves that
might be generated by other users,
►
deactivate the Stop & Start function,
►
drive as slowly as possible without stalling. In
all cases, do not exceed 6 mph (10
km/h),
►
do not stop and do not switch off the engine.
On leaving the flooded road, as soon as safety
conditions allow
, make several light brake
applications to dry the brake discs and pads.
If in doubt about the state of your vehicle,
contact a PEUGEOT dealer or a qualified
workshop.
In case of towing
Driving with a trailer places greater
demands on the towing vehicle and
requires extra care from the driver.
Respect the maximum towable weights.
At altitude: reduce the maximum load by
10% per 1,000 metres of altitude; the density
of the air decreases with altitude and the
performance of the engine reduces.
New vehicle: do not pull a trailer before
having driven at least 620 miles (1,000
kilometres).
If the outside temperature is high, let the
engine idle for 1 to 2 minutes after the
vehicle comes to a stop, to help it to cool.
Before setting off
Nose weight
► Distribute the load in the trailer so that the
heaviest items are as close as possible to the
axle and the nose weight (at the point where it
joins your vehicle) approaches the maximum
permitted without exceeding it.
Tyres
► Check the tyre pressures of the towing
vehicle and of the trailer, observing the
recommended pressures.
Lighting
► Check the electrical signalling on the trailer
and the headlamp beam height of your vehicle.
If a genuine PEUGEOT towing device is
used, the rear parking sensors will be
deactivated automatically to avoid the audible
signal.
When driving
Cooling
Towing a trailer uphill increases the temperature
of the coolant. The maximum towable load
depends on the gradient and the exterior
temperature. The cooling capacity of the fan
does not increase with engine speed.
► Reduce speed and lower the engine speed,
so as to limit the heating-up.
Page 93 of 260

91
Driving
6Before setting off
Nose weight
► Distribute the load in the trailer so that the
heaviest items are as close as possible to the
axle and the nose weight (at the point where it
joins your vehicle) approaches the maximum
permitted without exceeding it.
Tyres
► Check the tyre pressures of the towing
vehicle and of the trailer , observing the
recommended pressures.
Lighting
► Check the electrical signalling on the trailer
and the headlamp beam height of your vehicle.
If a genuine PEUGEOT towing device is
used, the rear parking sensors will be
deactivated automatically to avoid the audible
signal.
When driving
Cooling
Towing a trailer uphill increases the temperature
of the coolant. The maximum towable load
depends on the gradient and the exterior
temperature. The cooling capacity of the fan
does not increase with engine speed.
►
Reduce speed and lower the engine speed,
so as to limit the heating-up. In all cases, pay attention to the coolant
temperature.
If this warning lamp and the
STOP
warning lamp come on, stop the vehicle
and switch off the engine as soon as possible.
Brakes
Braking distances are increased when towing a
trailer. To avoid overheating of the brakes, the
use of engine braking is recommended.
Side wind
Bear in mind the increased susceptibility to the
wind that the vehicle will have.
Anti-theft protection
Electronic immobiliser
The remote control contains an electronic chip
which has a special code. When the ignition is
switched on, this code must be recognised in
order for starting to be possible.
A few seconds after switching off the ignition,
this system locks the engine control system,
therefore preventing the engine from being
started in the event of a break-in.
In the event of a fault, you are informed
by illumination of this warning lamp, an
audible signal and a message on the screen.
The vehicle will not start; contact a PEUGEOT
dealer as soon as possible.
Starting/switching off the
engine
Starting
The parking brake must be applied.
►
With a manual gearbox, shift the gear lever
into neutral, press the clutch pedal to the floor
and keep the pedal down until the engine runs.
►
With
an automatic gearbox, place the selector
in position P then depress the brake pedal.
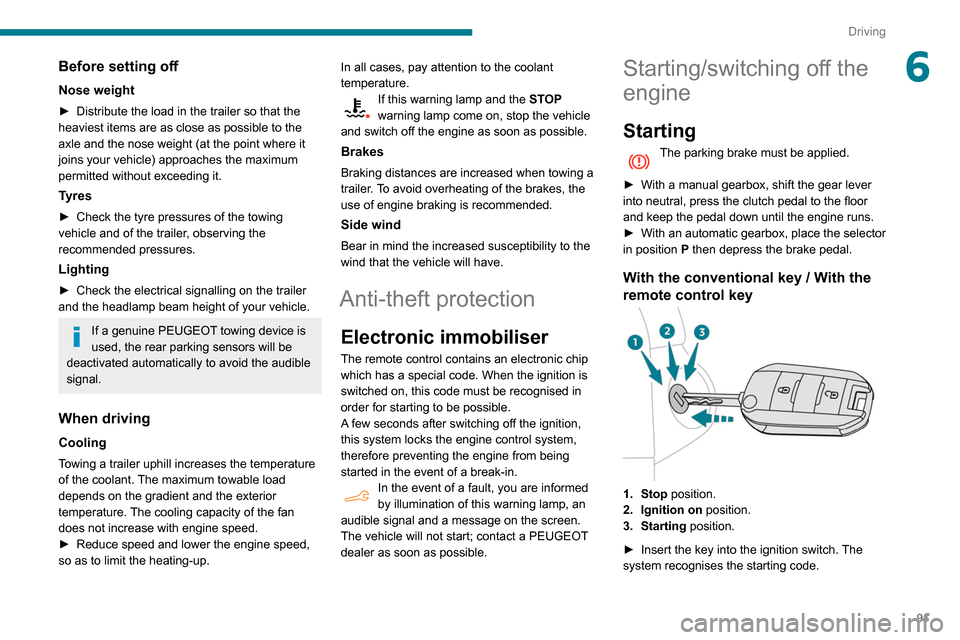
With the conventional key / With the
remote control key
1. Stop position.
2. Ignition on position.
3. Starting position.
►
Insert the key into the ignition switch.
The
system recognises the starting code.
Page 110 of 260

108
Driving
Qualifier plate detected Display of the
speed associated with the qualifier plate
Speed limit for
vehicles whose gross vehicle
weight or gross
train weight is less than 3.5 tonnes
56 mph (90 km/h)
(for example)
Speed limit in snow Example:
If the exterior
temperature is below 3°C:
19 mph (30
km/h)
(for example)
with a "snowflake" symbol
Speed limit at certain times Example:
19 mph (30 km/h)
(for example)
with a "clock" symbol
The units for the speed limit (mph or km/h) depend on the country you are
driving in.
This should be taken into account so that you
observe the speed limit.
For the system to work correctly when
changing country, the speed unit in the
instrument panel must correspond to that of
the country you are driving in.
The automatic reading of road signs is a driving aid system and does not always
display speed limits correctly.
The speed limit signs present on the road
always take priority over the display by the
system.
The system is designed to detect signs that
conform to the Vienna Convention on road
signs.
Specific speed limits, such as those for
heavy goods vehicles, are not displayed.
The display of the speed limit in the
instrument panel is updated when passing
a speed limit sign intended for cars (light
vehicles).
Activation / Deactivation
By default, the system is automatically activated
at every engine start.
It is set via the vehicle
configuration menu.
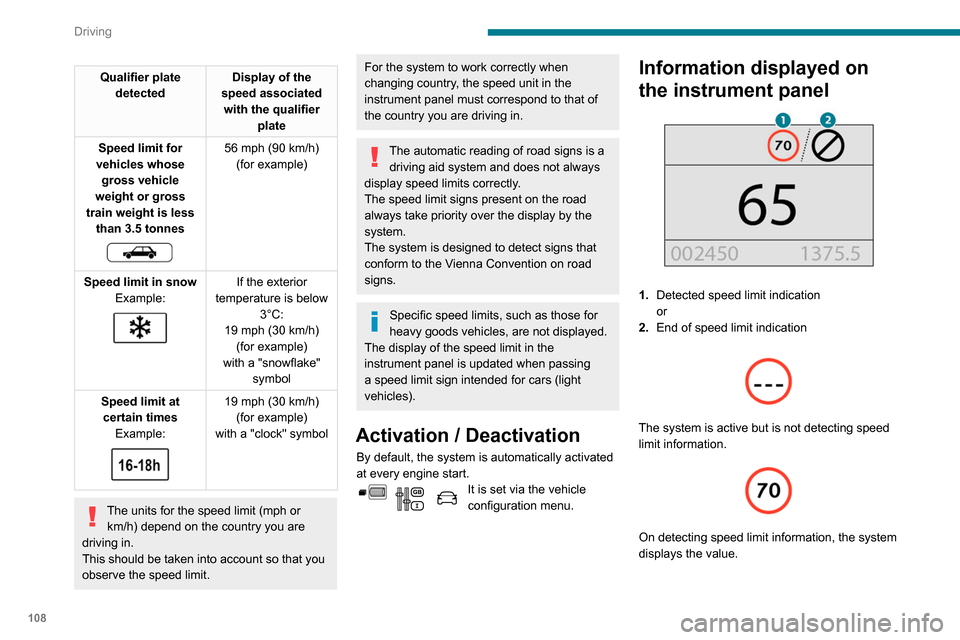
Information displayed on
the instrument panel
1. Detected speed limit indication
or
2. End of speed limit indication
The system is active but is not detecting speed
limit information.
On detecting speed limit information, the system
displays the value.
In the case of suggested maximum speeds, the
first time the vehicle exceeds the suggested
speed by more than 3 mph (5 km/h) (e.g. 59
mph (95 km/h)), the speed is displayed flashing
for 10 seconds.
Operating limits
The system does not take account of reduced
speed limits, especially those imposed in the
following cases:
– atmospheric pollution,
– when towing,
– driving with a space-saver type spare wheel or
snow chains fitted,
– Tyre repaired using the temporary puncture
repair kit,
– young drivers.
It is possible for the system to not display the
speed limit if it does not detect a speed limit
sign within a preset period and in the following
situations:
– road signs that are obstructed, do not comply
with the standard, are damaged or distorted,
– obsolete or incorrect maps.
Page 138 of 260

136
Practical information
Towing devices
Depending on equipment, the vehicle can be fitted with one of the following towing devices:
Approval No.: E1 R55 (reference 2)Mounting position then towing device reference
Type of towing device
Plate fixed at the bottom and
towing device fixed at the top
Plate fixed at the bottom and
towing device fixed at the bottom
Plate
+
G1 towball –
LCV std (standard) L1
– LCV std (standard) L2 –
LCV cross (worksite) L1
– LCV cross (heavy-duty) L2
Operation
When a petrol filler nozzle is inserted into the
fuel filler neck of a Diesel vehicle, it comes into
contact with the flap. The system remains closed
and prevents filling.
Do not persist but introduce a Diesel type
filler nozzle.
It remains possible to use a fuel jerrycan
to fill the tank.
Travelling abroad
As Diesel fuel pump nozzles may be
different in other countries, the presence
of the misfuel prevention device may make
refuelling impossible.
Before travelling abroad, it is advisable to
check with a PEUGEOT dealer if the vehicle
is suitable for the distribution equipment of the
countries visited.
Snow chains
In wintry conditions, snow chains improve
traction as well as the behaviour of the vehicle
when braking.
The snow chains must be fitted only to the front wheels. They must never be
fitted to "space-saver" type spare wheels.
Take account of the legislation specific to each country on the use of snow chains
and the maximum authorised speed.
Installation tips
► If you have to fit the chains during a journey ,
stop the vehicle on a flat surface on the side of
the road.
►
Apply the parking brake and position any
wheel chocks under the wheels to prevent
movement of your vehicle.
►
Fit the chains following the instructions
provided by the manufacturer
.
►
Move off gently and drive for a few moments,
without exceeding 31 mph (50 km/h).
►
Stop your vehicle and check that the snow
chains are correctly tightened.
It is strongly recommended that before
you leave, you practise fitting the snow
chains on a level and dry surface.
Avoid driving with snow chains on roads that have been cleared of snow to avoid
damaging your vehicle's tyres and the road
surface. If your vehicle is fitted with alloy
wheels, check that no part of the chain or its
fixings is in contact with the wheel rim.
Use only the chains designed to be fitted to the
type of wheel fitted to your vehicle:
Original tyre size Maximum link size (mm)
195/65 R15 9
205/60 R16
205/55 R17
215/65 R16
215/60 R17 cannot be fitted with
chains
You can also use snow socks.
For more information, contact a PEUGEOT
dealer or a qualified workshop.
Towing device
Load distribution
► Distribute the load in the trailer so that the
heaviest items are as close as possible to
the axle and the nose weight approaches the
maximum permitted without exceeding it.
Air density decreases with altitude, thus reducing
engine performance.
The maximum towed load
Page 139 of 260

137
Practical information
7must be reduced by 10 % for every 1,000 metres
of altitude.
Use towing devices and their unmodified
harnesses approved by PEUGEOT. It is
recommended that the installation be
performed by a PEUGEOT dealer or a
qualified workshop.
If the towing device is not fitted by a
PEUGEOT dealer, it must still be fitted in
accordance with the vehicle manufacturer's
instructions.
Certain driving assistance or manoeuvring
assistance functions are automatically
disabled if an approved towbar is used.
Observe the maximum authorised
towable weight, indicated on your
vehicle's registration certificate, the
manufacturer's label as well as in the
Technical data section of this guide.
Complying with the maximum authorised
nose weight (towball) also includes the
use of accessories (bicycle carriers, tow
boxes, etc.).
Observe the legislation in force in the
country in which you are driving.
Towing devices
Depending on equipment, the vehicle can be fitted with one of the following towing devices:
Approval No.: E1 R55 (reference 2)
Mounting position then towing device reference
Type of towing device
Plate fixed at the bottom and
towing device fixed at the top
Plate fixed at the bottom and
towing device fixed at the bottom
Plate
+
G1 towball –
LCV std (standard) L1
– LCV std (standard) L2 –
LCV cross (worksite) L1
– LCV cross (heavy-duty) L2
Page 140 of 260

138
Practical information
Operation
The measurement of the weight present on
board your vehicle is triggered:
► when starting the engine, automatically;
ON► when stationary, by pressing this
button located in the loading area. The
system is then active for 5 minutes.
Measurement display in the loading area
ON
If the mass on board the vehicle approaches
the maximum authorised weight , the indicator
lamps on these buttons come on.
ON
If the mass on board the vehicle exceeds the
maximum authorised weight , the indicator
lamps on these buttons come on.
Mounting position then towing device reference
Plate +
Simple hook CL –
LCV std (standard) L1
– LCV std (standard) L2
–
LCV cross (worksite) L1
–
LCV cross (worksite) L2 X
Plate
+
Combined hook CK
For more information on your towing device, refer to the user guide supp\
lied with it.
Remove the quickly detachable towball
when not towing a trailer.
Overload indicator
The overload indicator is a driving aid and
informs you that the maximum authorised
weight has been exceeded; this may be either
the gross vehicle weight (GVW) or the maximum
authorised weight on either axle (front and rear)
(GAWR).
The indicator does not relieve the user from their responsibility.
Even if you correctly measure the weight
of the vehicle's load, any factor that may
vary this weight (driver/additional passengers
seated or taking on additional fuel) after the
measurement may put the vehicle into the
overload condition.
The load includes the weight of the items stored in the loading area (including any
fittings such as shelves), but also the weight
of all persons on board the vehicle, the
amount of fuel and various equipment fitted
on the vehicle.
For optimal performance, the vehicle must
be parked and loaded on level ground (avoid
the following conditions: parking on a slope or
straddling a pavement).
Attaching a trailer to your vehicle may affect the operation of the system.