2020 PEUGEOT 3008 screenwash reservoir
[x] Cancel search: screenwash reservoirPage 86 of 308

84
Lighting and visibility
Front screenwash
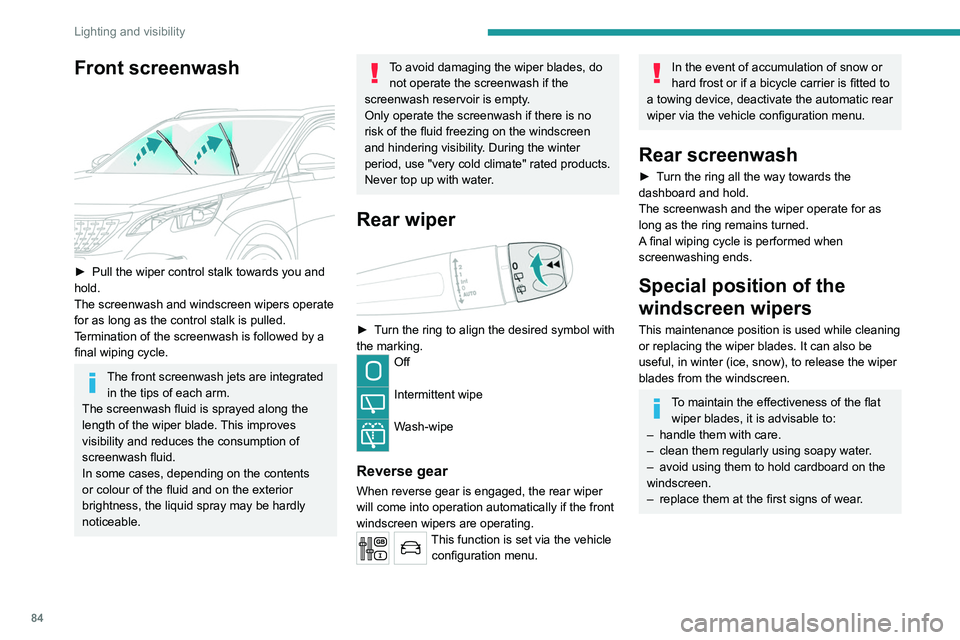
► Pull the wiper control stalk towards you and
hold.
The screenwash and windscreen wipers operate
for as long as the control stalk is pulled.
T
ermination of the screenwash is followed by a
final wiping cycle.
The front screenwash jets are integrated in the tips of each arm.
The screenwash fluid is sprayed along the
length of the wiper blade. This improves
visibility and reduces the consumption of
screenwash fluid.
In some cases, depending on the contents
or colour of the fluid and on the exterior
brightness, the liquid spray may be hardly
noticeable.
To avoid damaging the wiper blades, do not operate the screenwash if the
screenwash reservoir is empty.
Only operate the screenwash if there is no
risk of the fluid freezing on the windscreen
and hindering visibility. During the winter
period, use "very cold climate" rated products.
Never top up with water.
Rear wiper
► Turn the ring to align the desired symbol with
the marking.
Off
Intermittent wipe
Wash-wipe
Reverse gear
When reverse gear is engaged, the rear wiper
will come into operation automatically if the front
windscreen wipers are operating.
This function is set via the vehicle configuration menu.
In the event of accumulation of snow or
hard frost or if a bicycle carrier is fitted to
a towing device, deactivate the automatic rear
wiper via the vehicle configuration menu.
Rear screenwash
► Turn the ring all the way towards the
dashboard and hold.
The screenwash and the wiper operate for as
long as the ring remains turned.
A final wiping cycle is performed when
screenwashing ends.
Special position of the
windscreen wipers
This maintenance position is used while cleaning
or replacing the wiper blades. It can also be
useful, in winter (ice, snow), to release the wiper
blades from the windscreen.
To maintain the effectiveness of the flat wiper blades, it is advisable to:
–
handle them with care.
–
clean them regularly using soapy water
.
–
avoid using them to hold cardboard on the
windscreen.
–
replace them at the first signs of wear
.
Page 182 of 308

180
Practical information
8.Engine oil filler cap
9. Engine oil dipstick
10. Priming pump*
11 . Degassing screw*
The Diesel fuel system operates under
very high pressure.
All work on this circuit must be carried out
only by a PEUGEOT dealer or a qualified
workshop.
Checking levels
Check all of the following levels regularly in
accordance with the manufacturer's service
schedule. Top them up if required, unless
otherwise indicated.
If a level drops significantly, have the
corresponding system checked by a PEUGEOT
dealer or a qualified workshop.
The fluids must comply with the manufacturer's requirements and with
the vehicle's engine.
Take care when working under the bonnet, as certain areas of the engine
may be extremely hot (risk of burns) and the
cooling fan could start at any time (even with
the ignition off).
* Depending on engine.
Take care with objects or clothing that
could be caught in the blades of the fan!
Opening
► Open the left-hand front door .
► Pull the interior release lever , located at the
bottom of the door frame, towards you.
► Lift the exterior safety catch and raise the
bonnet.
► Unclip the stay from its housing and place it
in the support slot to hold the bonnet open.
Closing
► Hold the bonnet and pull out the stay from the
support slot.
►
Clip the stay in its housing.
►
Lower the bonnet and release it near the end
of its travel.
►
Pull on the bonnet to check that it is locked
correctly
.
Because of the presence of electrical
equipment under the bonnet, it is strongly
recommended that exposure to water (rain,
washing, etc.) be limited.
Engine compartment
The engine represented is an example given for
illustration purposes only. The locations of the following elements may
vary:
–
Air filter
.
–
Engine oil dipstick.
–
Engine oil filler cap.
–
Priming pump.
–
Degassing screw
.
Petrol engine
Diesel engine
1.
Screenwash fluid reservoir
2. Engine coolant reservoir
3. Brake fluid reservoir
4. Battery / Fuses
5. Remote earth point (-)
6. Fusebox
7. Air filter
Page 286 of 308

284
Alphabetical index
Remote control 28–32
Remote functions
26–27, 65, 172–173
Removing a wheel
199–200
Removing the mat
69
Replacing bulbs
201–202, 204–205
Replacing fuses
205–206
Replacing the air filter
183
Replacing the oil filter
183
Replacing the passenger compartment
filter
183
Reservoir, screenwash
182
Resetting the trip recorder
21
Reset trip
22
Rev counter
9
Reversing camera
131, 157–159
Reversing lamps
204
Roof bars
176–177
Running out of fuel (Diesel)
190
S
Safety, children 98, 100–103,
105, 107, 110–111
Saturation of the particle filter (Diesel)
183
Screen menu map
247
Screen, monochrome
23–24
Screen, multifunction (with audio system)
229
Screens, very cold conditions
178
Screenwash
84
Screenwash, front
84
Screenwash, rear
84
SCR (Selective Catalytic Reduction)
19, 185
Seat belts 94–97, 102
Seat belts, rear
95–96
Seat, rear bench
50–51
Seats, additional
55–57
Seats, electric
47–48
Seats, front
45, 47–48
Seats, heated
48
Seats, rear
50–57, 101
Selector, gear
121–124
Sensors (warnings)
131
Serial number, vehicle
227
Service indicator
17, 20
Servicing
17, 183, 184
Settings, equipment
23–25, 27
Settings, system
250, 274
Sidelamps
79, 202, 204
Ski flap
71
Smartphone
26–27, 65, 172–173
Snow chains
129, 177–178
Snow screen
178
Socket, 12 V accessory
66, 70, 77
Socket, 230 V
70
Socket, auxiliary
233, 246, 270
Socket, Jack
233, 270
Speakers
67
Speed limiter
132, 134–136
Speed limit recognition
132–133
Speedometer
9, 132
Sport mode
127
Spotlamps, side
81
Stability control (ESC)
90–92
Starting a Diesel engine
166
Starting the engine
114, 116Starting the vehicle 114–116, 121–124
Starting using another battery
117, 210
State of charge, battery
26, 168
Station, radio
230, 243–244, 268–269
Stay, bonnet
180
Steering mounted controls,
audio
229, 241, 255
Steering wheel, adjustment
49
Stickers, customising ~ Stickers,
expressive
188
Stopping the vehicle
114–117, 121–124
Stop & Start
23, 59, 64, 127–129,
166, 179, 183, 213
Storage
66, 68, 71–72
Storage box
76
Storage boxes
72
Storage compartments
66
Storage wells
76
Storing driving positions
47–48
Sunroof, panoramic
42–43
Sunshine sensor
58
Sun visor
66
Suspension
184
Switching off the engine
11 4
Synchronising the remote control
34
T
Table position 46
Tables, aircraft
71
Tables of engines
225
Tables of fuses
206, 208–209