2020 PEUGEOT 3008 USB port
[x] Cancel search: USB portPage 6 of 308

4
Overview
Instruments and controls
These illustrations and descriptions are provided
for information. The presence and location of
some elements vary depending on the version
or trim level.
1.Sunroof and blind controls
Front courtesy/map reading lamps
Warning lamp display for seat belts and front
passenger airbag
Emergency call/Assistance call
2. Interior rear view mirror/Driving in ELECTRIC
mode indicator LED
3. Head-up digital display
4. Fusebox
5. Bonnet release
6. Door mirror and electric window control panel
7. Front passenger airbag
8. Glove box
Deactivation of the front passenger airbag
1.Monochrome screen with Bluetooth audio
system
or
Touch screen with PEUGEOT Connect Radio
or PEUGEOT Connect Nav 2.
12 V socket/USB socket
Wireless smartphone charger
3. Advanced Grip Control
Driving mode selector
Hill Assist Descent Control
4. Key ignition switch
or
"START/STOP” button
5. Gearbox control
“SPORT" button
6. Electric parking brake
Steering-mounted controls
1.External lighting controls/Direction indicators
2. Wiper controls/Screenwash/Trip computer
3. Automatic gearbox control paddles
Page 68 of 308

66
Ease of use and comfort
sequences are performed without the vehicle
being used, the programming will be deactivated.
Front fittings
1.Grab handle
2. Sun visor
3. Card holder
4. Storage compartment below the steering
wheel
5. Illuminated glove box
6. Door pockets
7. USB socket
/ Front 12 V accessory socket
(120
W)
8. Storage compartment or Wireless
smartphone charger
9. Storage compartment
10. Cup holder 11 .
Front armrest with storage
12. Rear 12 V accessory socket (120 W)
13. Storage compartment or Rear blower
14. 230 V/50 Hz socket
Sun visor
► With the ignition on, raise the concealing
flap; depending on the version, the mirror is
illuminated automatically
.
This sun visor is also equipped with a ticket
holder.
Glove box
► To open the glove box, raise the handle.
With the ignition on, the glove box is lit when
open.
It houses the front passenger airbag deactivation
switch.
Never drive with the glove box open
when a passenger is at the front. It may
cause injury during sharp deceleration!
12 V accessory socket
► Plug in a 12 V accessory (with a maximum
rated power of 120 W) using a suitable adapter.
Observe the maximum power rating to
avoid damaging the accessory..
The connection of an electrical device not approved by PEUGEOT, such as a
USB charger, may adversely affect the
operation of vehicle electrical systems,
causing faults such as poor radio reception or
interference with displays in the screens.
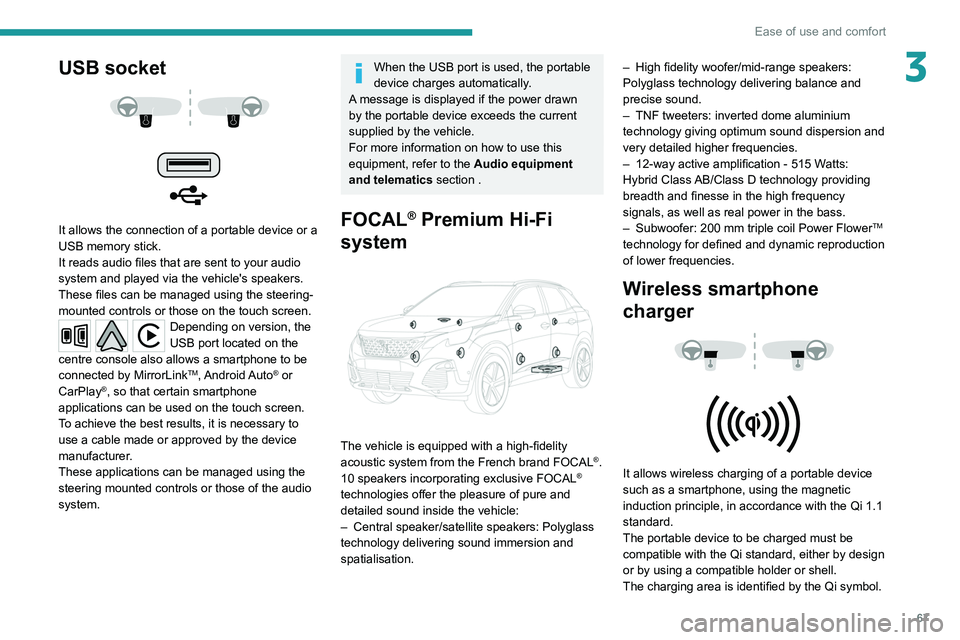
USB socket
It allows the connection of a portable device or a
USB memory stick.
It reads audio files that are sent to your audio
system and played via the vehicle's speakers.
These files can be managed using the steering-
mounted controls or those on the touch screen.
Depending on version, the
USB port located on the
centre console also allows a smartphone to be
connected by MirrorLink
TM, Android Auto® or
CarPlay®, so that certain smartphone
applications can be used on the touch screen.
To achieve the best results, it is necessary to
use a cable made or approved by the device
manufacturer.
These applications can be managed using the
steering mounted controls or those of the audio
system.
Page 69 of 308

67
Ease of use and comfort
3USB socket
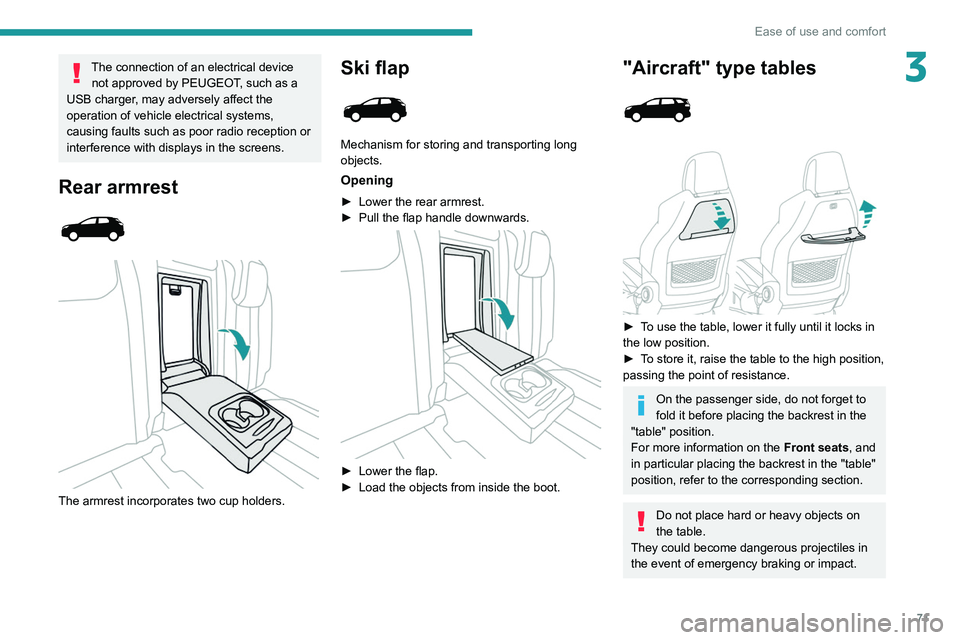
It allows the connection of a portable device or a
USB memory stick.
It reads audio files that are sent to your audio
system and played via the vehicle's speakers.
These files can be managed using the steering-
mounted controls or those on the touch screen.
Depending on version, the
USB port located on the
centre console also allows a smartphone to be
connected by MirrorLink
TM, Android Auto® or
CarPlay®, so that certain smartphone
applications can be used on the touch screen.
To achieve the best results, it is necessary to
use a cable made or approved by the device
manufacturer.
These applications can be managed using the
steering mounted controls or those of the audio
system.
When the USB port is used, the portable
device charges automatically.
A message is displayed if the power drawn
by the portable device exceeds the current
supplied by the vehicle.
For more information on how to use this
equipment, refer to the Audio equipment
and telematics section .
FOCAL® Premium Hi-Fi
system
The vehicle is equipped with a high-fidelity
acoustic system from the French brand FOCAL®.
10 speakers incorporating exclusive FOCAL®
technologies offer the pleasure of pure and
detailed sound inside the vehicle:
–
Central speaker/satellite speakers: Polyglass
technology delivering sound immersion and
spatialisation. –
High fidelity woofer/mid-range speakers:
Polyglass technology delivering balance and
precise sound.
–
TNF tweeters: inverted dome aluminium
technology giving optimum sound dispersion and
very detailed higher frequencies.
–
12-way active amplification - 515 W
atts:
Hybrid Class AB/Class D technology providing
breadth and finesse in the high frequency
signals, as well as real power in the bass.
–
Subwoofer: 200
mm triple coil Power Flower
TM
technology for defined and dynamic reproduction
of lower frequencies.
Wireless smartphone
charger
It allows wireless charging of a portable device
such as a smartphone, using the magnetic
induction principle, in accordance with the Qi 1.1
standard.
The portable device to be charged must be
compatible with the Qi standard, either by design
or by using a compatible holder or shell.
The charging area is identified by the Qi symbol.
Page 73 of 308

71
Ease of use and comfort
3The connection of an electrical device not approved by PEUGEOT, such as a
USB charger, may adversely affect the
operation of vehicle electrical systems,
causing faults such as poor radio reception or
interference with displays in the screens.
Rear armrest
The armrest incorporates two cup holders.
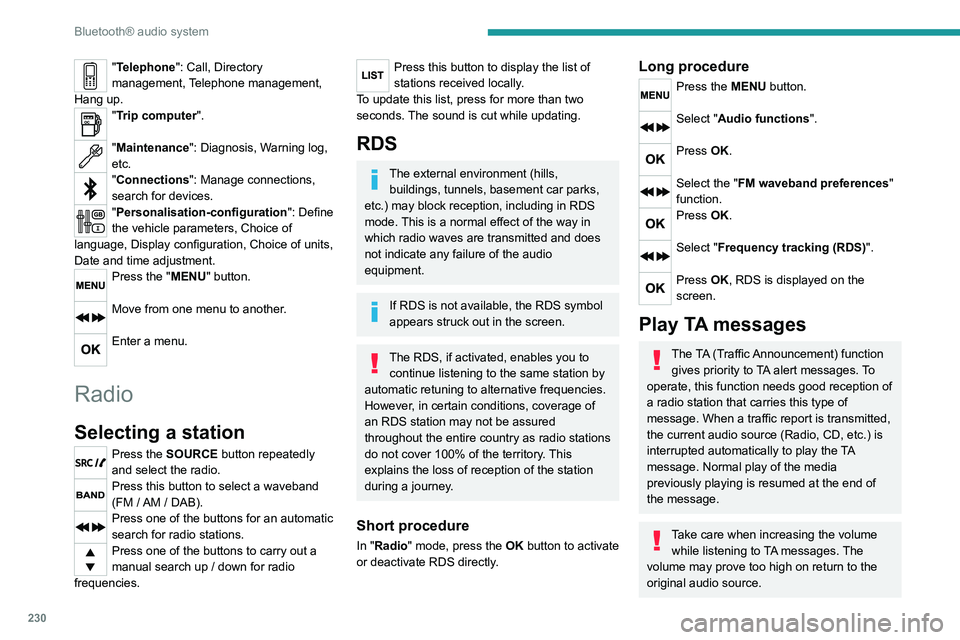
Ski flap
Mechanism for storing and transporting long
objects.
Opening
► Lower the rear armrest.
► Pull the flap handle downwards.
► Lower the flap.
► Load the objects from inside the boot.
"Aircraft" type tables
► To use the table, lower it fully until it locks in
the low position.
►
T
o store it, raise the table to the high position,
passing the point of resistance.
On the passenger side, do not forget to
fold it before placing the backrest in the
"table" position.
For more information on the Front seats, and
in particular placing the backrest in the "table"
position, refer to the corresponding section.
Do not place hard or heavy objects on
the table.
They could become dangerous projectiles in
the event of emergency braking or impact.
Page 232 of 308

230
Bluetooth® audio system
"Telephone": Call, Directory
management, Telephone management,
Hang up.
"Trip computer".
"Maintenance": Diagnosis, Warning log,
etc.
"Connections": Manage connections,
search for devices.
"Personalisation-configuration ": Define
the vehicle parameters, Choice of
language, Display configuration, Choice of units,
Date and time adjustment.
Press the "MENU" button.
Move from one menu to another.
Enter a menu.
Radio
Selecting a station
Press the SOURCE button repeatedly
and select the radio.
Press this button to select a waveband
(FM / AM / DAB).
Press one of the buttons for an automatic
search for radio stations.
Press one of the buttons to carry out a
manual search up / down for radio
frequencies.
Press this button to display the list of
stations received locally.
To update this list, press for more than two
seconds. The sound is cut while updating.
RDS
The external environment (hills, buildings, tunnels, basement car parks,
etc.) may block reception, including in RDS
mode. This is a normal effect of the way in
which radio waves are transmitted and does
not indicate any failure of the audio
equipment.
If RDS is not available, the RDS symbol
appears struck out in the screen.
The RDS, if activated, enables you to continue listening to the same station by
automatic retuning to alternative frequencies.
However, in certain conditions, coverage of
an RDS station may not be assured
throughout the entire country as radio stations
do not cover 100% of the territory. This
explains the loss of reception of the station
during a journey.
Short procedure
In "Radio" mode, press the OK button to activate
or deactivate RDS directly.
Long procedure
Press the MENU button.
Select "Audio functions ".
Press OK.
Select the "FM waveband preferences"
function.
Press OK.
Select "Frequency tracking (RDS)".
Press OK, RDS is displayed on the
screen.
Play TA messages
The TA (Traffic Announcement) function
gives priority to TA alert messages. To
operate, this function needs good reception of
a radio station that carries this type of
message. When a traffic report is transmitted,
the current audio source (Radio, CD, etc.) is
interrupted automatically to play the TA
message. Normal play of the media
previously playing is resumed at the end of
the message.
Take care when increasing the volume while listening to TA messages. The
volume may prove too high on return to the
original audio source.
Press the TA button to activate or
deactivate traffic messages.
Receiving INFO messages
The INFO function gives priority to TA alert messages. To be active, this
function needs good reception of a radio
station that transmits this type of message.
When a message is transmitted, the current
audio source (Radio, CD, USB, etc.) is
interrupted automatically to receive the INFO
message. Normal play of the media
previously playing is resumed at the end of
the message.
Make a long press on this button to
display the list of categories.
Select or deselect categories.
Activate or deactivate the reception of the corresponding messages.
Display TEXT INFOS
Radio text is information transmitted by
the radio station related to the station's
current programme or song.
When the radio station is displayed in the
screen, press OK to display the
contextual menu.
Select "RadioText (TXT) display" and
confirm OK to save.
Page 233 of 308

231
Bluetooth® audio system
10Press the TA button to activate or
deactivate traffic messages.
Receiving INFO messages
The INFO function gives priority to TA alert messages. To be active, this
function needs good reception of a radio
station that transmits this type of message.
When a message is transmitted, the current
audio source (Radio, CD, USB, etc.) is
interrupted automatically to receive the INFO
message. Normal play of the media
previously playing is resumed at the end of
the message.
Make a long press on this button to
display the list of categories.
Select or deselect categories.
Activate or deactivate the reception of the corresponding messages.
Display TEXT INFOS
Radio text is information transmitted by
the radio station related to the station's
current programme or song.
When the radio station is displayed in the
screen, press OK to display the
contextual menu.
Select "RadioText (TXT) display" and
confirm OK to save.
DAB (Digital Audio
Broadcasting) radio
Terrestrial Digital Radio
Depending on version
If the current DAB radio station is not
available on FM, "DAB FM" is struck out.
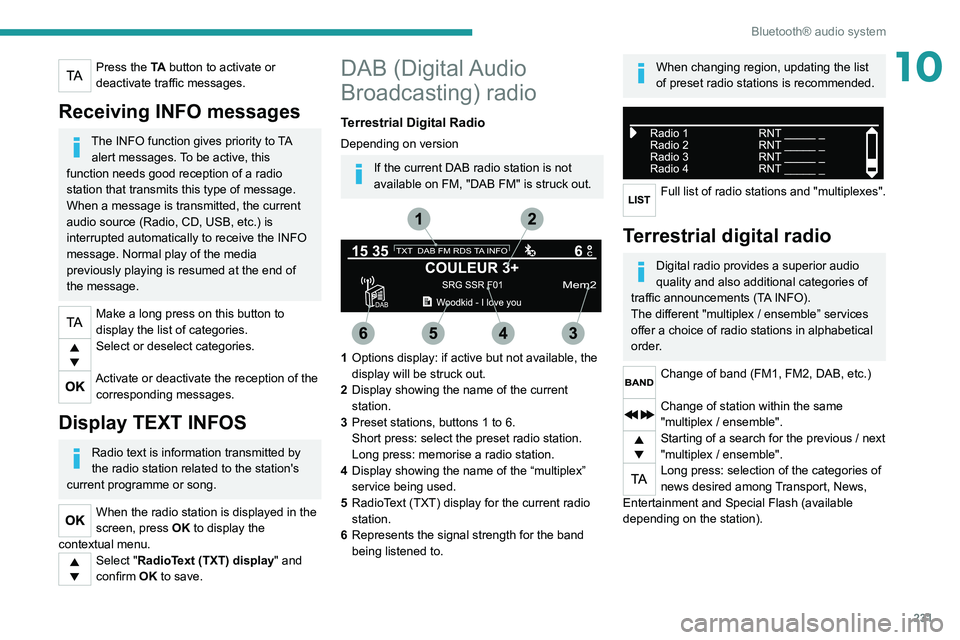
1 Options display: if active but not available, the
display will be struck out.
2 Display showing the name of the current
station.
3 Preset stations, buttons 1 to 6.
Short press: select the preset radio station.
Long press: memorise a radio station.
4 Display showing the name of the “multiplex”
service being used.
5 RadioText (TXT) display for the current radio
station.
6 Represents the signal strength for the band
being listened to.
When changing region, updating the list
of preset radio stations is recommended.
Full list of radio stations and "multiplexes".
Terrestrial digital radio
Digital radio provides a superior audio
quality and also additional categories of
traffic announcements (TA INFO).
The different "multiplex / ensemble” services
offer a choice of radio stations in alphabetical
order.
Change of band (FM1, FM2, DAB, etc.)
Change of station within the same
"multiplex / ensemble".
Starting of a search for the previous / next
"multiplex / ensemble".
Long press: selection of the categories of
news desired among Transport, News,
Entertainment and Special Flash (available
depending on the station).
Page 234 of 308

232
Bluetooth® audio system
When the radio station is displayed in the
screen , press "OK" to display the
contextual menu.
(Frequency search (RDS), DAB
/ FM auto
tracking, RadioText (TXT) display, Information
on the station, etc.)
DAB / FM station tracking
"DAB" does not have 100% coverage of
the country.
When the digital signal is weak, "DAB
/ FM
auto tracking" allows you to continue
listening to the same station, by automatically
switching to the corresponding analogue FM
station (if it exists).
When the "DAB
/ FM auto tracking" is active,
the DAB station will be selected automatically.
Press the MENU button.
Select "Multimedia" and confirm.
Select "DAB / FM auto tracking" and
confirm.
If "DAB / FM auto tracking" tracking is
enabled, there is a lag of a few seconds
when the system switches to the analogue
FM station sometimes with a change in
volume.
If the "DAB" station you are listening to is
not available on FM (" DAB/FM" option
struck out), or if "DAB
/ FM auto tracking" is
not on, the sound will be cut when the digital
signal is too weak.
Media
USB port
Insert the USB memory stick into the USB
port or connect the USB device to the
USB port using a suitable cable (not supplied).
The system changes automatically to "USB"
source.
To protect the system, do not use a USB hub.
Any additional devices connected to the system must comply with the standard
applicable to the product and/or the standard
IEC 60950-1.
The system builds playlists (in temporary
memory); this operation can take from a
few seconds to several minutes at the first
connection.
Reduce the number of non-music files and the
number of folders to reduce the waiting time.
Playlists are updated every time a new USB
memory stick is connected.
When the USB port is used, the portable
device charges automatically.
Play mode
The play modes available are:
– Normal : the tracks are played in order,
depending on the classification of the selected
files.
–
Random
: the tracks in an album or folder are
played in a random order.
–
Random on all media : all of the tracks saved
in the media are played in random order
.
–
Repeat
: the tracks played are only those from
the current album or folder.
Press this button to display the contextual
menu for the Media function.
Press this button to select the chosen
play mode.
Press this button to confirm.
The choice made is displayed at the top of the
screen.
Choosing a track to play
Press one of these buttons to go to the
previous / next track.
Press one of these buttons to go to the
previous / next folder.
File classification
Make a long press on this button to
display the different classifications.
Select by "Folder" / " Artist" / "Genre" /
"Playlist".
Depending on availability and type of device
used.
Press OK to select the desired
classification, then press OK again to
confirm.
Playing files
Make a short press on this button to
display the chosen classification.
Navigate in the list using the left / right
and up / down buttons.
Confirm the selection by pressing OK.
Press one of these buttons to go to the
previous / next track in the list.
Press and hold one of these buttons for fast
forward or rewind.
Press one of these buttons to go to the
previous / next "Folder" / " Artist" /
"Genre" / "Playlist"* in the list.
Input AUX socket (AUX)
Depending on equipmentConnect a portable device (MP3 player,
etc.) to the auxiliary jack socket using an
audio cable (not supplied).
Any additional devices connected to the system must comply with the standard
* Depending on availability and the type of device used.
Page 235 of 308

233
Bluetooth® audio system
10Select by "Folder" / "Artist" / "Genre" /
"Playlist".
Depending on availability and type of device
used.
Press OK to select the desired
classification, then press OK again to
confirm.
Playing files
Make a short press on this button to
display the chosen classification.
Navigate in the list using the left / right
and up / down buttons.
Confirm the selection by pressing OK.
Press one of these buttons to go to the
previous / next track in the list.
Press and hold one of these buttons for fast
forward or rewind.
Press one of these buttons to go to the
previous / next "Folder" / " Artist" /
"Genre" / "Playlist"* in the list.
Input AUX socket (AUX)
Depending on equipmentConnect a portable device (MP3 player,
etc.) to the auxiliary jack socket using an
audio cable (not supplied).
Any additional devices connected to the system must comply with the standard
* Depending on availability and the type of device used.
applicable to the product and/or the standard
IEC 60950-1.
Press the SOURCE button several times
in succession and select " AUX".
First adjust the volume on your portable device
(to a high level). Then adjust the volume on your
audio system. Controls are managed via the
portable device.
Do not connect the same device to both
the auxiliary jack socket and the USB
port at the same time.
CD player
Insert circular compact discs only.
Some anti-pirating systems, on original discs
or CDs copied using a personal recorder, may
cause faults which are no reflection on the
quality of the original player.
Insert a CD in the player, play begins
automatically.
External CD players connected via the
USB port are not recognised by the
system.
To play a disc which has already been inserted, press the SOURCE button
several times in succession and select " CD".
Press one of the buttons to select a track
on the CD.
Press the LIST button to display the list of
tracks on the CD.
Press and hold one of these buttons for
fast forward or rewind.
Playing an MP3 compilation
Insert an MP3 compilation in the CD player.
The audio equipment searches for all of the
music tracks, which may take anything between
a few seconds and several tens of seconds,
before play begins.
On a single disc, the CD player can read
up to 255 MP3 files spread over 8
directory levels.
However, it is advisable to keep to a limit of
two levels to reduce the access time before
the CD is played.
The folder structure is not observed during
playback.
All of the files are displayed on a single level.
To play a disc which has already been inserted, press the SOURCE button
several times in succession and select " CD".
Press one of the buttons to select a folder
on the CD.
Press one of the buttons to select a track
on the CD.
Press the LIST button to display the list of
directories of the MP3 compilation.