2020 PEUGEOT 3008 mirror
[x] Cancel search: mirrorPage 83 of 308
81
Lighting and visibility
4Guide-me-home and
welcome lighting
Guide-me-home lighting
Automatic
With the ring in the "AUTO" position, when the
light is poor, the dipped beam headlamps come
on automatically when the ignition is switched
off.
You can activate/deactivate this function and adjust the guide-me-
home lighting duration in the vehicle
configuration menu.
Manual
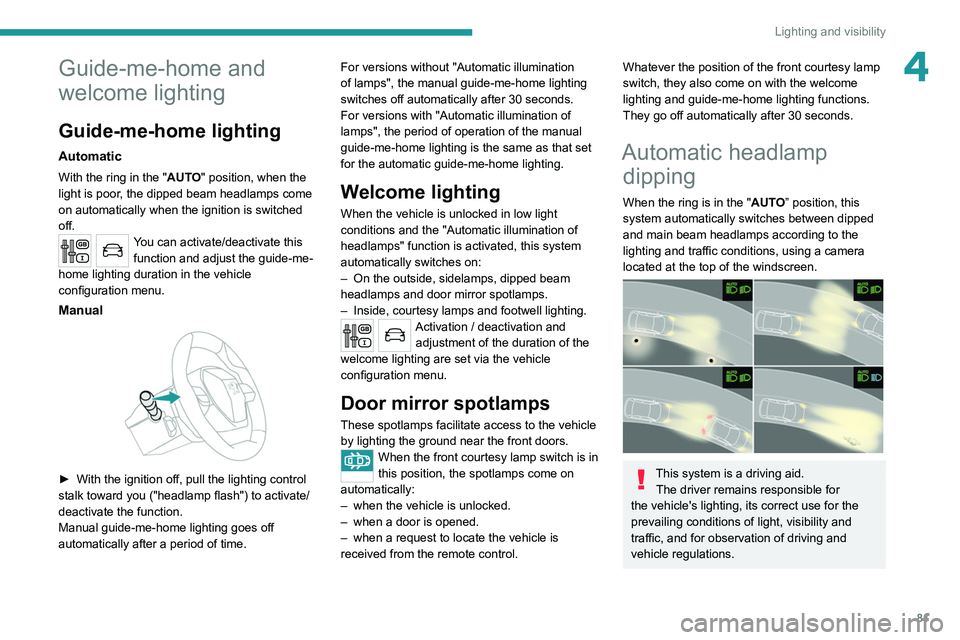
► With the ignition off, pull the lighting control
stalk toward you ("headlamp flash") to activate/
deactivate the function.
Manual guide-me-home lighting goes off
automatically after a period of time. For versions without "Automatic illumination
of lamps", the manual guide-me-home lighting
switches off automatically after 30 seconds.
For versions with "Automatic illumination of
lamps", the period of operation of the manual
guide-me-home lighting is the same as that set
for the automatic guide-me-home lighting.
Welcome lighting
When the vehicle is unlocked in low light
conditions and the "Automatic illumination of
headlamps" function is activated, this system
automatically switches on:
–
On the outside, sidelamps, dipped beam
headlamps and door mirror spotlamps.
–
Inside, courtesy lamps and footwell lighting.
Activation / deactivation and adjustment of the duration of the
welcome lighting are set via the vehicle
configuration menu.
Door mirror spotlamps
These spotlamps facilitate access to the vehicle
by lighting the ground near the front doors.
When the front courtesy lamp switch is in
this position, the spotlamps come on
automatically:
–
when the vehicle is unlocked.
–
when a door is opened.
–
when a request to locate the vehicle is
received from the remote control.
Whatever the position of the front courtesy lamp
switch, they also come on with the welcome
lighting and guide-me-home lighting functions.
They go off automatically after 30 seconds.
Automatic headlamp dipping
When the ring is in the "AUTO” position, this
system automatically switches between dipped
and main beam headlamps according to the
lighting and traffic conditions, using a camera
located at the top of the windscreen.
This system is a driving aid.
The driver remains responsible for
the vehicle's lighting, its correct use for the
prevailing conditions of light, visibility and
traffic, and for observation of driving and
vehicle regulations.
Page 87 of 308
85
Lighting and visibility
4Before removing a windscreen wiper blade
► Operating the wiper control stalk within one
minute after switching off the ignition will place
the wiper blades in a vertical position.
►
Proceed with the desired operation or replace
the wiper blades.
After refitting a windscreen wiper blade
► To return the wiper blades to their initial
position, switch on the ignition and operate the
wiper control stalk.
Changing a wiper blade
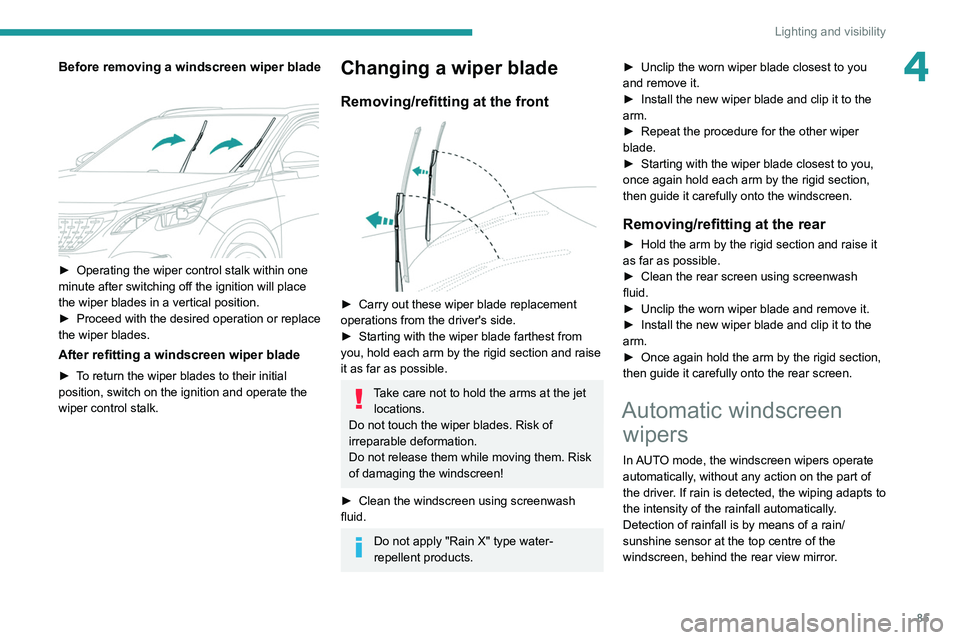
Removing/refitting at the front
► Carry out these wiper blade replacement
operations from the driver's side.
►
Starting with the wiper blade farthest from
you, hold each arm by the rigid section and raise
it as far as possible.
Take care not to hold the arms at the jet locations.
Do not touch the wiper blades. Risk of
irreparable deformation.
Do not release them while moving them. Risk
of damaging the windscreen!
►
Clean the windscreen using screenwash
fluid.
Do not apply "Rain X" type water-
repellent products. ►
Unclip the worn wiper blade closest to you
and remove it.
►
Install the new wiper blade and clip it to the
arm.
►
Repeat the procedure for the other wiper
blade.
►
Starting with the wiper blade closest to you,
once again hold each arm by the rigid section,
then guide it carefully onto the windscreen.
Removing/refitting at the rear
► Hold the arm by the rigid section and raise it
as far as possible.
►
Clean the rear screen using screenwash
fluid.
►
Unclip the worn wiper blade and remove it.
►
Install the new wiper blade and clip it to the
arm.
►
Once again hold the arm by the rigid section,
then guide it carefully onto the rear screen.
Automatic windscreen wipers
In AUTO mode, the windscreen wipers operate
automatically, without any action on the part of
the driver. If rain is detected, the wiping adapts to
the intensity of the rainfall automatically.
Detection of rainfall is by means of a rain/
sunshine sensor at the top centre of the
windscreen, behind the rear view mirror.
Page 128 of 308
126
Driving
is sufficient and acceleration requirements are
moderate.
When navigation is activated, the use
of HYBRID mode is advisable to optimise
electrical consumption.
SPORT
Allows more dynamic driving to take advantage
of the vehicle's maximum performance.
Electric power is used to supplement the petrol
engine as long as there is energy left in the
battery.
4WD (4-wheel drive)
Depending on equipment.
4WD mode ("4-wheel drive") improves the
vehicle's grip at low and moderate speeds by
driving all 4 wheels continuously.
This mode is especially suited to snow-covered
roads and difficult terrain (mud, sand, etc.) as
well as ford crossings, at moderate speed.
Depending on the driving conditions and the
battery charge level, 4WD mode may be 100%
electric.
This mode will be even more effective if the vehicle is fitted with suitable tyres,
such as winter tyres.
The grip can be improved up to 84 mph (135
km/h) using the electric motors; above this
speed, the vehicle is driven by the front wheels
only.
– Acceleration.
– Handling gear changes with the automatic
gearbox.
–
Display on the instrument panel of information
about the dynamic parameters of the vehicle
(
"PERSONAL" mode).
Activation/Deactivation
SPORT► Press this button; the orange indicator
lamp in the button comes on to confirm
activation of the function.
If the orange indicator lamp flashes,
activation is not available (e.g. if Park
Assist is selected).
If the indicator lamp continues flashing for a
long time, contact a PEUGEOT dealer or a
qualified workshop.
Displays
To show this information on the instrument panel,
select the “PERSONAL” mode and then the type
of information required.
This telemetry information (power output, turbocharger pressure, torque,
longitudinal and lateral acceleration, etc.) is
given for information purposes only.
Driving modes
The number and type of driving modes available depend on the vehicle’s engine and equipment.
Driving modes are selected using the following
control:
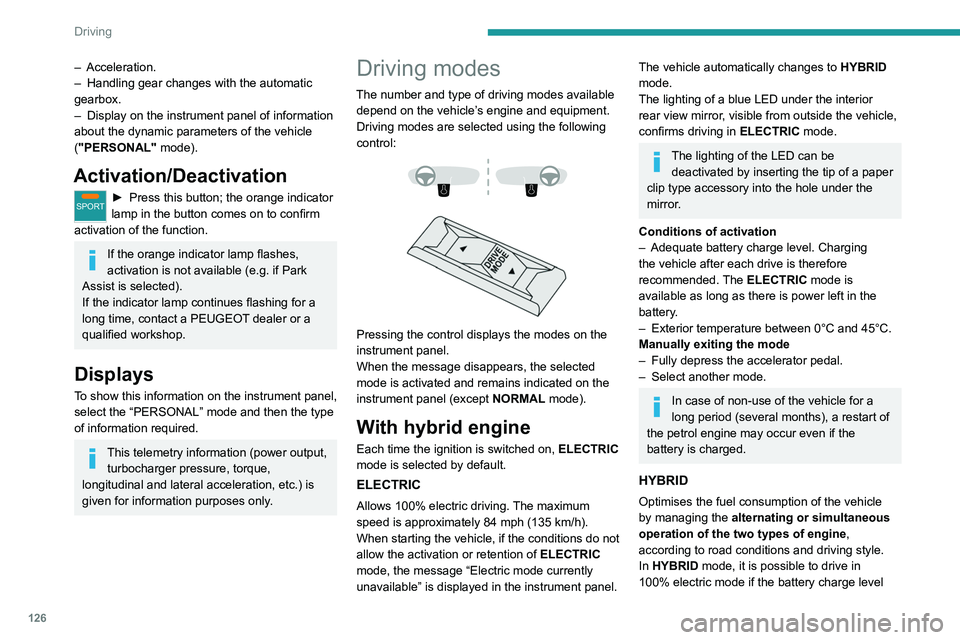
Pressing the control displays the modes on the
instrument panel.
When the message disappears, the selected
mode is activated and remains indicated on the
instrument panel (except NORMAL mode).
With hybrid engine
Each time the ignition is switched on, ELECTRIC
mode is selected by default.
ELECTRIC
Allows 100% electric driving. The maximum
speed is approximately 84 mph (135 km/h).
When starting the vehicle, if the conditions do not
allow the activation or retention of
ELECTRIC
mode, the message
“Electric mode currently
unavailable” is displayed in the instrument panel.
The vehicle automatically changes to HYBRID
mode.
The lighting of a blue LED under the interior
rear view mirror, visible from outside the vehicle,
confirms driving in ELECTRIC mode.
The lighting of the LED can be
deactivated by inserting the tip of a paper
clip type accessory into the hole under the
mirror
.
Conditions of activation
–
Adequate battery charge level. Charging
the vehicle after each drive is therefore
recommended.
The ELECTRIC mode is
available as long as there is power left in the
battery.
–
Exterior temperature between 0°C and 45°C.
Manually exiting the mode
–
Fully depress the accelerator pedal.
–
Select another mode.
In case of non-use of the vehicle for a
long period (several months), a restart of
the petrol engine may occur even if the
battery is charged.
HYBRID
Optimises the fuel consumption of the vehicle
by managing the alternating or simultaneous
operation of the two types of engine ,
according to road conditions and driving style.
In HYBRID mode, it is possible to drive in
100% electric mode if the battery charge level
Page 132 of 308
130
Driving
The systems cannot exceed the limits of the
laws of physics.
Driving aids
You should hold the steering wheel
with both hands, always use the interior and
exterior rear view mirrors, always keep the
feet close to the pedals and take a break
every two hours.
Manoeuvring aids
The driver must always check the
surroundings of the vehicle before and during
the whole manoeuvre, in particular using the
mirrors.
Radar
The operation of the radar as well as the
associated functions may be impaired through
the accumulation of dirt (mud, frost, etc.), in
certain difficult weather conditions (very heavy
rain, snow) or if the bumper is damaged.
If the front bumper is to be repainted, contact
a PEUGEOT dealer or a qualified workshop;
certain types of paint could interfere with the
operation of the radar.
audible signal and, depending on equipment, the
display of a message.
►
Reduce speed immediately
, avoid excessive
steering movements and avoid sudden braking.
►
Stop the vehicle as soon as it is safe to do
so.
The loss of pressure detected does not always cause visible bulging of the tyre.
Do not rely on just a visual check.
►
Using a compressor
, such as the one in
the temporary puncture repair kit, check the
pressures of the four tyres when cold.
►
If it is not possible to make this check
immediately
, drive carefully at reduced speed.
►
In the event of a puncture, use the
temporary puncture repair kit or the spare wheel
(depending on equipment).
The alert is kept active until the system is reinitialised.
Reinitialisation
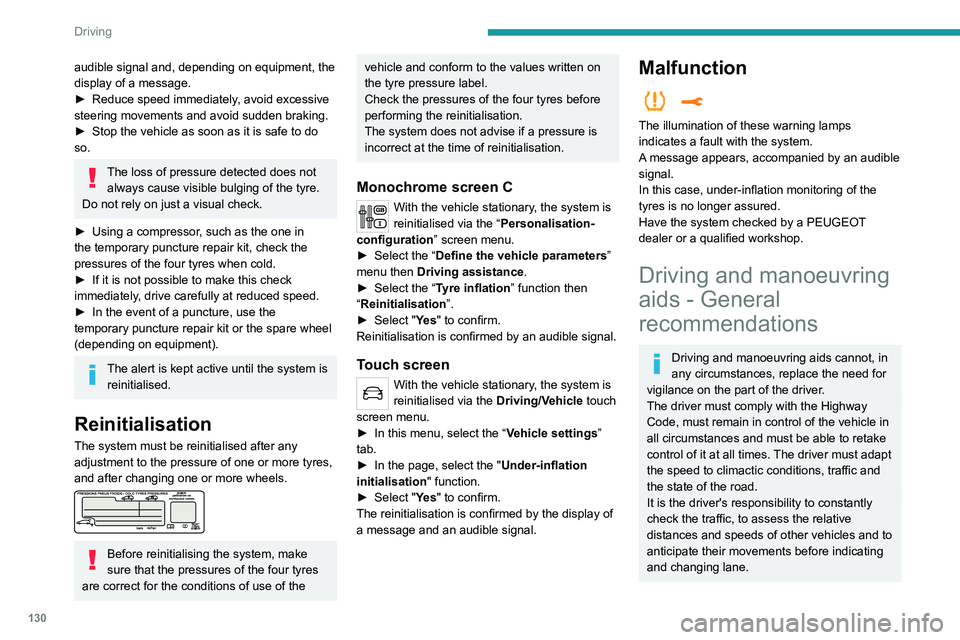
The system must be reinitialised after any
adjustment to the pressure of one or more tyres,
and after changing one or more wheels.
Before reinitialising the system, make
sure that the pressures of the four tyres
are correct for the conditions of use of the
vehicle and conform to the values written on
the tyre pressure label.
Check the pressures of the four tyres before
performing the reinitialisation.
The system does not advise if a pressure is
incorrect at the time of reinitialisation.
Monochrome screen C
With the vehicle stationary, the system is
reinitialised via the “Personalisation-
configuration ” screen menu.
►
Select the “
Define the vehicle parameters ”
menu then Driving assistance.
►
Select the “
Tyre inflation ” function then
“Reinitialisation ”.
►
Select "
Ye s" to confirm.
Reinitialisation is confirmed by an audible signal.
Touch screen
With the vehicle stationary, the system is
reinitialised via the Driving/V ehicle touch
screen menu.
►
In this menu, select the “
Vehicle settings”
tab.
►
In the page, select the "
Under-inflation
initialisation
" function.
►
Select "
Ye s" to confirm.
The reinitialisation is confirmed by the display of
a message and an audible signal.
Malfunction
The illumination of these warning lamps
indicates a fault with the system.
A message appears, accompanied by an audible
signal.
In this case, under-inflation monitoring of the
tyres is no longer assured.
Have the system checked by a PEUGEOT
dealer or a qualified workshop.
Driving and manoeuvring
aids - General
recommendations
Driving and manoeuvring aids cannot, in
any circumstances, replace the need for
vigilance on the part of the driver.
The driver must comply with the Highway
Code, must remain in control of the vehicle in
all circumstances and must be able to retake
control of it at all times. The driver must adapt
the speed to climactic conditions, traffic and
the state of the road.
It is the driver's responsibility to constantly
check the traffic, to assess the relative
distances and speeds of other vehicles and to
anticipate their movements before indicating
and changing lane.
Page 133 of 308
131
Driving
6The systems cannot exceed the limits of the
laws of physics.
Driving aids
You should hold the steering wheel
with both hands, always use the interior and
exterior rear view mirrors, always keep the
feet close to the pedals and take a break
every two hours.
Manoeuvring aids
The driver must always check the
surroundings of the vehicle before and during
the whole manoeuvre, in particular using the
mirrors.
Radar
The operation of the radar as well as the
associated functions may be impaired through
the accumulation of dirt (mud, frost, etc.), in
certain difficult weather conditions (very heavy
rain, snow) or if the bumper is damaged.
If the front bumper is to be repainted, contact
a PEUGEOT dealer or a qualified workshop;
certain types of paint could interfere with the
operation of the radar.
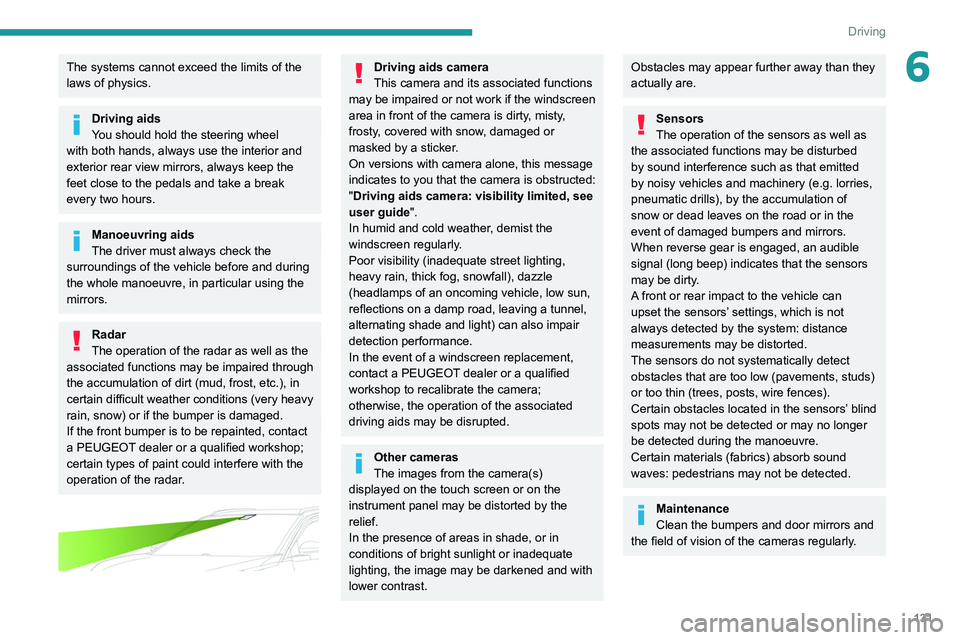
Driving aids camera
This camera and its associated functions
may be impaired or not work if the windscreen
area in front of the camera is dirty, misty,
frosty, covered with snow, damaged or
masked by a sticker.
On versions with camera alone, this message
indicates to you that the camera is obstructed:
"Driving aids camera: visibility limited, see
user guide".
In humid and cold weather, demist the
windscreen regularly.
Poor visibility (inadequate street lighting,
heavy rain, thick fog, snowfall), dazzle
(headlamps of an oncoming vehicle, low sun,
reflections on a damp road, leaving a tunnel,
alternating shade and light) can also impair
detection performance.
In the event of a windscreen replacement,
contact a PEUGEOT dealer or a qualified
workshop to recalibrate the camera;
otherwise, the operation of the associated
driving aids may be disrupted.
Other cameras
The images from the camera(s)
displayed on the touch screen or on the
instrument panel may be distorted by the
relief.
In the presence of areas in shade, or in
conditions of bright sunlight or inadequate
lighting, the image may be darkened and with
lower contrast.
Obstacles may appear further away than they
actually are.
Sensors
The operation of the sensors as well as
the associated functions may be disturbed
by sound interference such as that emitted
by noisy vehicles and machinery (e.g. lorries,
pneumatic drills), by the accumulation of
snow or dead leaves on the road or in the
event of damaged bumpers and mirrors.
When reverse gear is engaged, an audible
signal (long beep) indicates that the sensors
may be dirty.
A front or rear impact to the vehicle can
upset the sensors’ settings, which is not
always detected by the system: distance
measurements may be distorted.
The sensors do not systematically detect
obstacles that are too low (pavements, studs)
or too thin (trees, posts, wire fences).
Certain obstacles located in the sensors’ blind
spots may not be detected or may no longer
be detected during the manoeuvre.
Certain materials (fabrics) absorb sound
waves: pedestrians may not be detected.
Maintenance
Clean the bumpers and door mirrors and
the field of vision of the cameras regularly.
Page 156 of 308
154
Driving
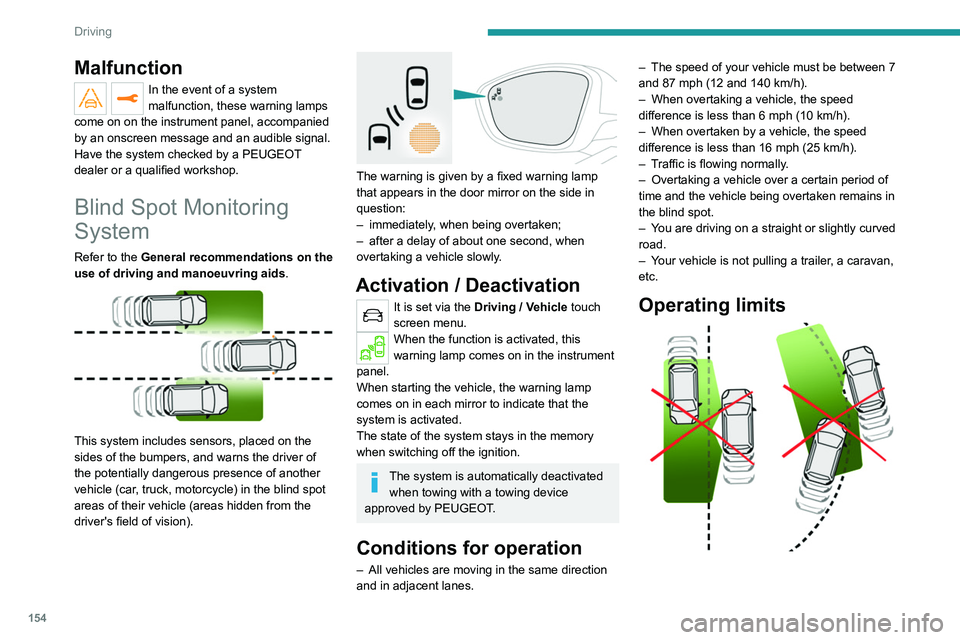
No alert is triggered in the following conditions:
– In the presence of non-moving objects (parked
vehicles, barriers, street lamps, road signs, etc.).
– Oncoming traffic.
– Driving on a winding road or a sharp corner.
– When overtaking or being overtaken by a very
long vehicle (lorry, bus, etc.) that is detected
in the rear blind spot but is also present in the
driver’s front field of vision.
– When overtaking quickly.
– In very heavy traffic: vehicles detected in
front and behind are confused with a lorry or a
stationary object.
– If the Park Assist function is activated.
Malfunction
In the event of a malfunction, this
warning lamp flashes for a few
moments in the instrument panel, accompanied
Malfunction
In the event of a system
malfunction, these warning lamps
come on on the instrument panel, accompanied
by an onscreen message and an audible signal.
Have the system checked by a PEUGEOT
dealer or a qualified workshop.
Blind Spot Monitoring
System
Refer to the General recommendations on the
use of driving and manoeuvring aids .
This system includes sensors, placed on the
sides of the bumpers, and warns the driver of
the potentially dangerous presence of another
vehicle (car, truck, motorcycle) in the blind spot
areas of their vehicle (areas hidden
from the
driver's field of vision).
The warning is given by a fixed warning lamp
that appears in the door mirror on the side in
question:
–
immediately
, when being overtaken;
–
after a delay of about one second, when
overtaking a vehicle slowly
.
Activation / Deactivation
It is set via the Driving / Vehicle touch
screen menu.
When the function is activated, this
warning lamp comes on in the instrument
panel.
When starting the vehicle, the warning lamp
comes on in each mirror to indicate that the
system is activated.
The state of the system stays in the memory
when switching off the ignition.
The system is automatically deactivated when towing with a towing device
approved by PEUGEOT.
Conditions for operation
– All vehicles are moving in the same direction
and in adjacent lanes. –
The speed of your vehicle must be between 7
and 87 mph (12 and 140
km/h).
–
When overtaking a vehicle, the speed
difference is less than 6
mph (10 km/h).
–
When overtaken by a vehicle, the speed
difference is less than 16
mph (25 km/h).
–
T
raffic is flowing normally.
–
Overtaking a vehicle over a certain period of
time and the vehicle being overtaken remains in
the blind spot.
–
Y
ou are driving on a straight or slightly curved
road.
–
Y
our vehicle is not pulling a trailer, a caravan,
etc.
Operating limits
Page 157 of 308
155
Driving
6
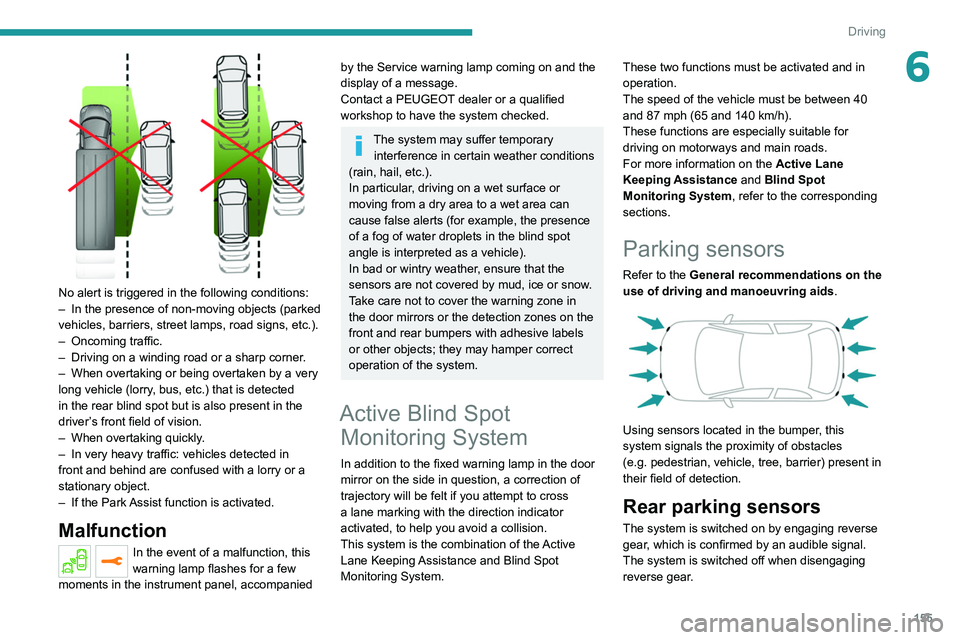
No alert is triggered in the following conditions:
– In the presence of non-moving objects (parked
vehicles, barriers, street lamps, road signs, etc.).
–
Oncoming traffic.
–
Driving on a winding road or a sharp corner
.
–
When overtaking or being overtaken by a very
long vehicle (lorry
, bus, etc.) that is detected
in the rear blind spot but is also present in the
driver’s front field of vision.
–
When overtaking quickly
.
–
In very heavy traffic: vehicles detected in
front and behind are confused with a lorry or a
stationary object.
–
If the Park
Assist function is activated.
Malfunction
In the event of a malfunction, this
warning lamp flashes for a few
moments in the instrument panel, accompanied
by the Service warning lamp coming on and the
display of a message.
Contact a PEUGEOT dealer or a qualified
workshop to have the system checked.
The system may suffer temporary interference in certain weather conditions
(rain, hail, etc.).
In particular, driving on a wet surface or
moving from a dry area to a wet area can
cause false alerts (for example, the presence
of a fog of water droplets in the blind spot
angle is interpreted as a vehicle).
In bad or wintry weather, ensure that the
sensors are not covered by mud, ice or snow.
Take care not to cover the warning zone in
the door mirrors or the detection zones on the
front and rear bumpers with adhesive labels
or other objects; they may hamper correct
operation of the system.
Active Blind Spot Monitoring System
In addition to the fixed warning lamp in the door
mirror on the side in question, a correction of
trajectory will be felt if you attempt to cross
a lane marking with the direction indicator
activated, to help you avoid a collision.
This system is the combination of the Active
Lane Keeping Assistance and Blind Spot
Monitoring System. These two functions must be activated and in
operation.
The speed of the vehicle must be between 40
and 87
mph (65 and 140 km/h).
These functions are especially suitable for
driving on motorways and main roads.
For more information on the Active Lane
Keeping Assistance and Blind Spot
Monitoring System , refer to the corresponding
sections.
Parking sensors
Refer to the General recommendations on the
use of driving and manoeuvring aids .
Using sensors located in the bumper, this
system signals the proximity of obstacles
(e.g.
pedestrian, vehicle, tree, barrier) present in
their field of detection.
Rear parking sensors
The system is switched on by engaging reverse
gear, which is confirmed by an audible signal.
The system is switched off when disengaging
reverse gear.
Page 160 of 308
158
Driving
Obstacles may appear further away than
they actually are.
It is important to monitor the sides of the
vehicle during the manoeuvre, using the
mirrors.
Parking sensors also provide additional
information about the area around the vehicle.
180° view
The 180° view facilitates reversing out of a
parking space, making it possible to see the
approach of vehicles, pedestrians and cyclists.
This view is not recommended for carrying out a
complete manoeuvre.
It features 3 areas: left A, centre B and right C.
the system is activated when the vehicle has
already moved, the view from above can be fully
displayed.
Visiopark 1
Rear vision
To activate the camera, located on the tailgate,
engage reverse and keep the speed of the
vehicle below 6 mph (10
km/h).
The system is deactivated:
–
Automatically
, at speeds above approximately
6 mph (10
km/h),
–
Automatically
, if the tailgate is opened.
–
Upon changing out of reverse gear (the image
remains displayed for 7
seconds).
–
By pressing the white arrow in the upper-left
corner of the touch screen.
AUTO mode
This mode is activated by default.
Using sensors in the rear bumper, the automatic
view changes from the rear view (standard) to
the view from above (zoom) as an obstacle is
approached at the level of the red line (less than
30
cm) during a manoeuvre.
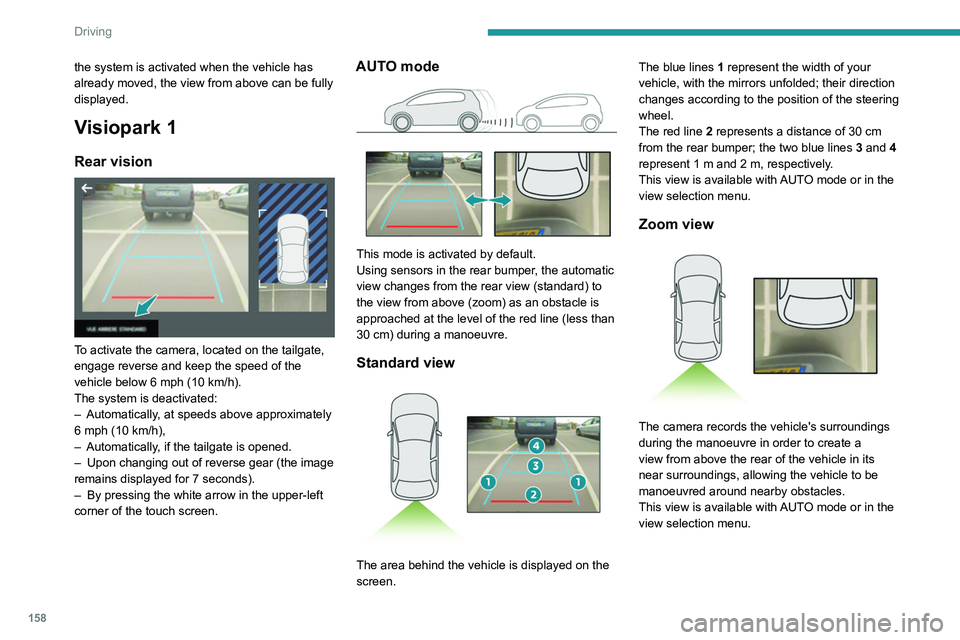
Standard view
The area behind the vehicle is displayed on the
screen. The blue lines
1 represent the width of your
vehicle, with the mirrors unfolded; their direction
changes according to the position of the steering
wheel.
The red line 2 represents a distance of 30 cm
from the rear bumper; the two blue lines 3 and 4
represent 1 m and 2 m, respectively.
This view is available with AUTO mode or in the
view selection menu.
Zoom view
The camera records the vehicle's surroundings
during the manoeuvre in order to create a
view from above the rear of the vehicle in its
near surroundings, allowing the vehicle to be
manoeuvred around nearby obstacles.
This view is available with AUTO mode or in the
view selection menu.