2020 PEUGEOT 3008 rear view mirror
[x] Cancel search: rear view mirrorPage 4 of 308

2
Contents
■
Overview
■
Eco-driving
1Instruments
Digital instrument panels 9
Warning and indicator lamps 11
Indicators 17
Manual test 20
Distance recorders 20
Lighting dimmer 21
Trip computer 22
Monochrome screen C 23
Touch screen 24
Remote features (Hybrid) 27
2Access
Remote control / Key 28
Keyless Entry and Starting 30
Central locking 32
Back-up procedures 32
Alarm 34
Doors 36
Boot 36
Hands-free tailgate 37
Electric windows 41
Panoramic sunroof 42
3Ease of use and comfort
Driving position 44
Front seats 45
Steering wheel adjustment 49
Mirrors 49
Rear bench seat 51
Rear seats 52
Seat modularity 57
Heating and Ventilation 58
Manual air conditioning 59
Semi-automatic mono-zone air conditioning 59
Dual-zone automatic air conditioning 61
Front demisting - defrosting 64
Heated windscreen 64
Rear screen demisting/defrosting 65
Thermal pre-conditioning (Hybrid) 65
Front fittings 66
Courtesy lamps 69
Interior ambience lighting 70
Rear fittings 70
Boot fittings 72
4Lighting and visibility
Exterior lighting control stalk 78
Direction indicators 79
Headlamp beam height adjustment 80
Automatic illumination of headlamps 80
Guide-me-home and welcome lighting 81
Automatic headlamp dipping 81
Cornering lighting 82
Wiper control stalk 83
Changing a wiper blade 85
Automatic wipers 85
5Safety
General safety recommendations 87
Hazard warning lamps 87
Horn 88
Pedestrian horn
(Hybrid) 88
Emergency or assistance call 88
Electronic stability control (ESC) 90
Advanced Grip Control 92
Hill Assist Descent Control 93
Seat belts 94
Airbags 97
Child seats 100
Deactivating the front passenger airbag 102
ISOFIX child seats 105
i-Size child seats 11 0
Child lock 11 2
6Driving
Driving recommendations 11 3
Starting / Switching off the engine
with the key
11 4
Starting / Switching off the engine
with Keyless Entry and Starting
11 6
Starting hybrid vehicles 11 6
Electric parking brake 11 8
6-speed manual gearbox 120
Automatic gearbox 121
Electric automatic gearbox (Hybrid) 124
Hill start assist 125
Dynamic pack 125
Driving modes 126
Gear efficiency indicator 127
Stop & Start 127
Under-inflation detection 129
Driving and manoeuvring aids -
General recommendations
130
Memorising speeds 132
Speed Limit Recognition and
Recommendation
132
Speed limiter 135
Cruise control 137
Drive Assist Plus 139
Adaptive Cruise Control 139
Page 6 of 308

4
Overview
Instruments and controls
These illustrations and descriptions are provided
for information. The presence and location of
some elements vary depending on the version
or trim level.
1.Sunroof and blind controls
Front courtesy/map reading lamps
Warning lamp display for seat belts and front
passenger airbag
Emergency call/Assistance call
2. Interior rear view mirror/Driving in ELECTRIC
mode indicator LED
3. Head-up digital display
4. Fusebox
5. Bonnet release
6. Door mirror and electric window control panel
7. Front passenger airbag
8. Glove box
Deactivation of the front passenger airbag
1.Monochrome screen with Bluetooth audio
system
or
Touch screen with PEUGEOT Connect Radio
or PEUGEOT Connect Nav 2.
12 V socket/USB socket
Wireless smartphone charger
3. Advanced Grip Control
Driving mode selector
Hill Assist Descent Control
4. Key ignition switch
or
"START/STOP” button
5. Gearbox control
“SPORT" button
6. Electric parking brake
Steering-mounted controls
1.External lighting controls/Direction indicators
2. Wiper controls/Screenwash/Trip computer
3. Automatic gearbox control paddles
Page 52 of 308
50
Ease of use and comfort
configured via the Driving / Vehicle touch
screen menu.
Otherwise, this setting can be carried out at a
PEUGEOT dealer or a qualified workshop.
Automatic tilting in reverse gear
Depending on version, this function allows to
automatically tilt the mirrors downwards to assist
with parking manoeuvres in reverse gear.
With the engine running, on engaging reverse
gear, the mirror glasses tilt downwards.
They return to their initial position:
–
A
few seconds after coming out of reverse
gear.
–
Once the vehicle speed exceeds 6 mph
(10
km/h).
–
When the engine is switched off.
This function is set via the Driving/Vehicle touch screen menu.
Interior rear view mirror
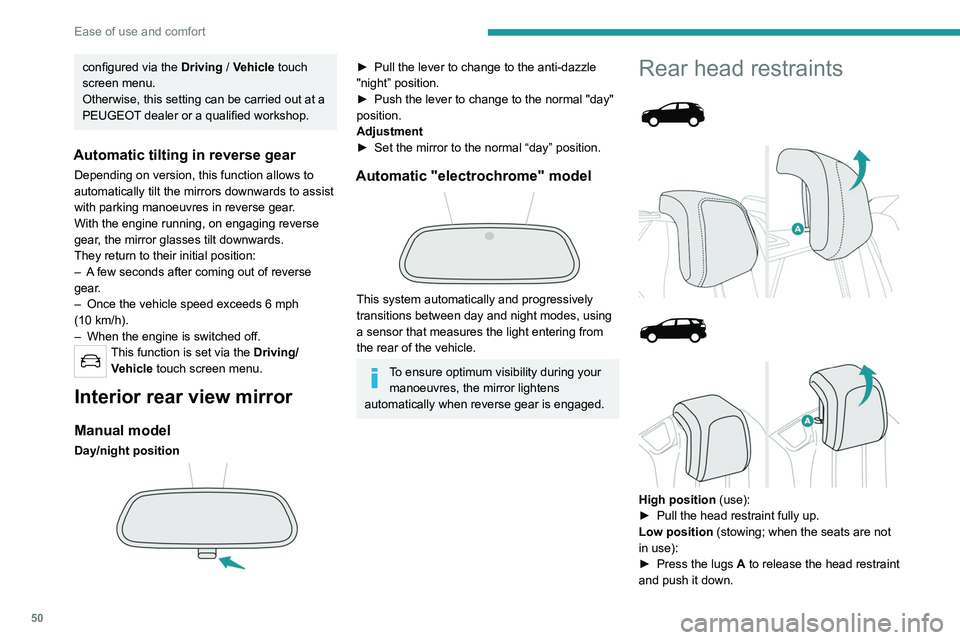
Manual model
Day/night position
► Pull the lever to change to the anti-dazzle
"night” position.
►
Push the lever to change to the normal "day"
position.
Adjustment
►
Set the mirror to the normal “day” position.
Automatic "electrochrome" model
This system automatically and progressively
transitions between day and night modes, using
a sensor that measures the light entering from
the rear of the vehicle.
To ensure optimum visibility during your manoeuvres, the mirror lightens
automatically when reverse gear is engaged.
Rear head restraints
High position (use):
► Pull the head restraint fully up.
Low position (stowing; when the seats are not
in use):
►
Press the lugs
A to release the head restraint
and push it down.
The rear head restraints can be removed.
Removing a head restraint
► Pull the head restraint fully up.
► Press the lugs A to release the head restraint
and remove it completely.
► Store the head restraint.
Refitting a head restraint
► Insert the head restraint rods into the guides
in the corresponding seat backrest.
► Push the head restraint down as far as it will
go.
► Press the lugs A to release the head restraint
and push it down.
Never drive with passengers seated at
the rear when the head restraints are
removed; the head restraints should be in
place and in the high position.
The head restraint for the central seat and those for the side seats
are not interchangeable.
Rear bench seat
Bench seat with fixed cushions and split folding
backrests (2/3-1/3) to adapt the boot load space.
Page 82 of 308
80
Lighting and visibility
Headlamp beam height
adjustment
Manual adjustment of the
halogen headlamps
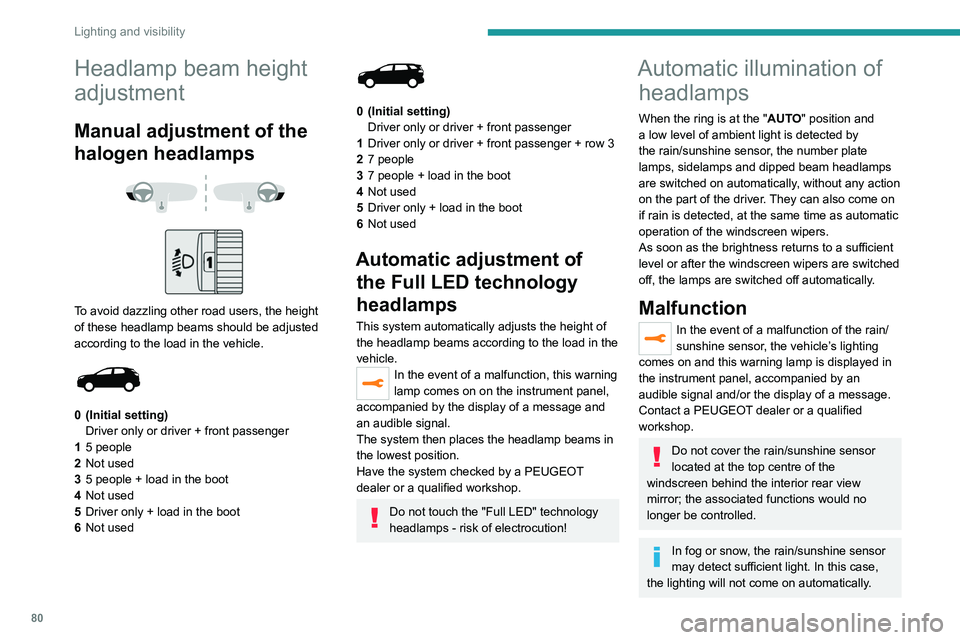
To avoid dazzling other road users, the height
of these headlamp beams should be adjusted
according to the load in the vehicle.
0 (Initial setting) Driver only or driver + front passenger
1 5 people
2 Not used
3 5 people + load in the boot
4 Not used
5 Driver only + load in the boot
6 Not used
0 (Initial setting)
Driver only or driver + front passenger
1 Driver only or driver + front passenger + row 3
2 7 people
3 7 people + load in the boot
4 Not used
5 Driver only + load in the boot
6 Not used
Automatic adjustment of
the Full LED technology
headlamps
This system automatically adjusts the height of
the headlamp beams according to the load in the
vehicle.
In the event of a malfunction, this warning
lamp comes on on the instrument panel,
accompanied by the display of a message and
an audible signal.
The system then places the headlamp beams in
the lowest position.
Have the system checked by a PEUGEOT
dealer or a qualified workshop.
Do not touch the "Full LED" technology
headlamps - risk of electrocution!
Automatic illumination of headlamps
When the ring is at the "AUTO" position and
a low level of ambient light is detected by
the rain/sunshine sensor
, the number plate
lamps,
sidelamps and dipped beam headlamps
are switched on automatically, without any action
on the part of the driver. They can also come on
if rain is detected, at the same time as automatic
operation of the windscreen wipers.
As soon as the brightness returns to a sufficient
level or after the windscreen wipers are switched
off, the lamps are switched off automatically.
Malfunction
In the event of a malfunction of the rain/
sunshine sensor, the vehicle’s lighting
comes on and this warning lamp is displayed in
the instrument panel, accompanied by an
audible signal and/or the display of a message.
Contact a PEUGEOT dealer or a qualified
workshop.
Do not cover the rain/sunshine sensor
located at the top centre of the
windscreen behind the interior rear view
mirror; the associated functions would no
longer be controlled.
In fog or snow, the rain/sunshine sensor
may detect sufficient light. In this case,
the lighting will not come on automatically.
Guide-me-home and
welcome lighting
Guide-me-home lighting
Automatic
With the ring in the "AUTO" position, when the
light is poor, the dipped beam headlamps come
on automatically when the ignition is switched
off.
You can activate/deactivate this function and adjust the guide-me-
home lighting duration in the vehicle
configuration menu.
Manual
► With the ignition off, pull the lighting control
stalk toward you ("headlamp flash") to activate/
deactivate the function.
Manual guide-me-home lighting goes off
automatically after a period of time.
Page 87 of 308
85
Lighting and visibility
4Before removing a windscreen wiper blade
► Operating the wiper control stalk within one
minute after switching off the ignition will place
the wiper blades in a vertical position.
►
Proceed with the desired operation or replace
the wiper blades.
After refitting a windscreen wiper blade
► To return the wiper blades to their initial
position, switch on the ignition and operate the
wiper control stalk.
Changing a wiper blade
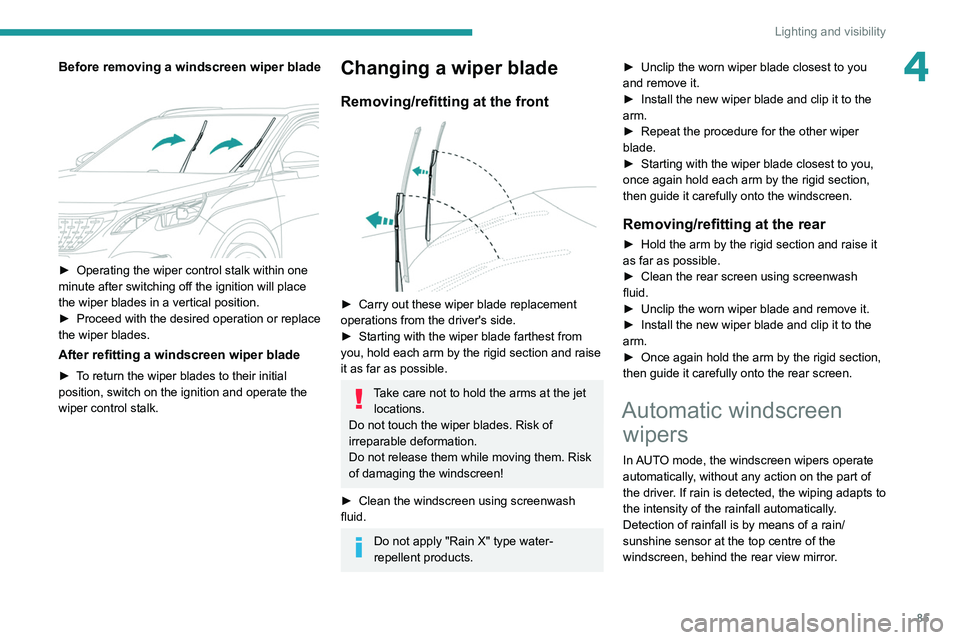
Removing/refitting at the front
► Carry out these wiper blade replacement
operations from the driver's side.
►
Starting with the wiper blade farthest from
you, hold each arm by the rigid section and raise
it as far as possible.
Take care not to hold the arms at the jet locations.
Do not touch the wiper blades. Risk of
irreparable deformation.
Do not release them while moving them. Risk
of damaging the windscreen!
►
Clean the windscreen using screenwash
fluid.
Do not apply "Rain X" type water-
repellent products. ►
Unclip the worn wiper blade closest to you
and remove it.
►
Install the new wiper blade and clip it to the
arm.
►
Repeat the procedure for the other wiper
blade.
►
Starting with the wiper blade closest to you,
once again hold each arm by the rigid section,
then guide it carefully onto the windscreen.
Removing/refitting at the rear
► Hold the arm by the rigid section and raise it
as far as possible.
►
Clean the rear screen using screenwash
fluid.
►
Unclip the worn wiper blade and remove it.
►
Install the new wiper blade and clip it to the
arm.
►
Once again hold the arm by the rigid section,
then guide it carefully onto the rear screen.
Automatic windscreen wipers
In AUTO mode, the windscreen wipers operate
automatically, without any action on the part of
the driver. If rain is detected, the wiping adapts to
the intensity of the rainfall automatically.
Detection of rainfall is by means of a rain/
sunshine sensor at the top centre of the
windscreen, behind the rear view mirror.
Page 128 of 308
126
Driving
is sufficient and acceleration requirements are
moderate.
When navigation is activated, the use
of HYBRID mode is advisable to optimise
electrical consumption.
SPORT
Allows more dynamic driving to take advantage
of the vehicle's maximum performance.
Electric power is used to supplement the petrol
engine as long as there is energy left in the
battery.
4WD (4-wheel drive)
Depending on equipment.
4WD mode ("4-wheel drive") improves the
vehicle's grip at low and moderate speeds by
driving all 4 wheels continuously.
This mode is especially suited to snow-covered
roads and difficult terrain (mud, sand, etc.) as
well as ford crossings, at moderate speed.
Depending on the driving conditions and the
battery charge level, 4WD mode may be 100%
electric.
This mode will be even more effective if the vehicle is fitted with suitable tyres,
such as winter tyres.
The grip can be improved up to 84 mph (135
km/h) using the electric motors; above this
speed, the vehicle is driven by the front wheels
only.
– Acceleration.
– Handling gear changes with the automatic
gearbox.
–
Display on the instrument panel of information
about the dynamic parameters of the vehicle
(
"PERSONAL" mode).
Activation/Deactivation
SPORT► Press this button; the orange indicator
lamp in the button comes on to confirm
activation of the function.
If the orange indicator lamp flashes,
activation is not available (e.g. if Park
Assist is selected).
If the indicator lamp continues flashing for a
long time, contact a PEUGEOT dealer or a
qualified workshop.
Displays
To show this information on the instrument panel,
select the “PERSONAL” mode and then the type
of information required.
This telemetry information (power output, turbocharger pressure, torque,
longitudinal and lateral acceleration, etc.) is
given for information purposes only.
Driving modes
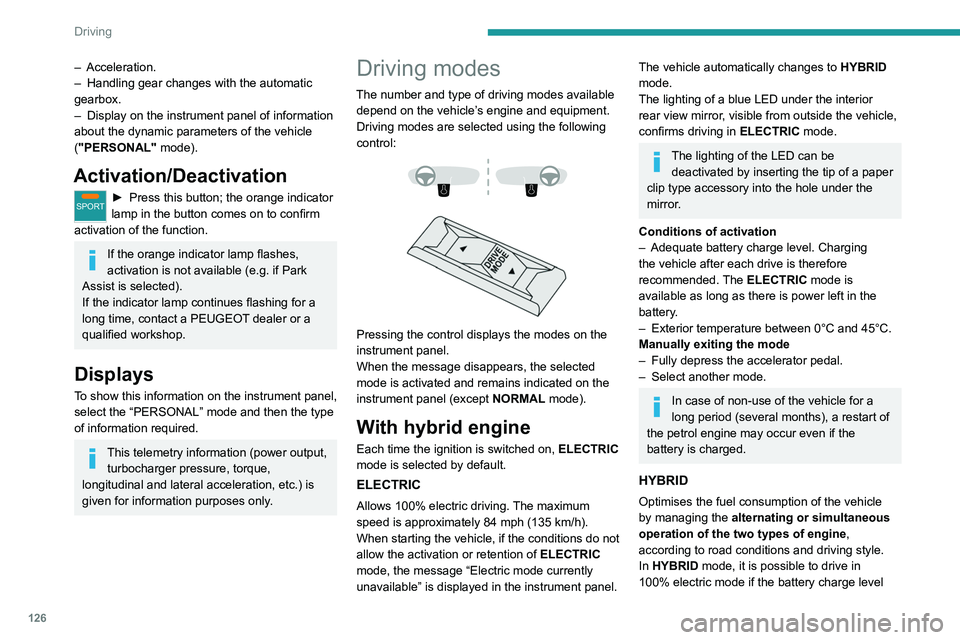
The number and type of driving modes available depend on the vehicle’s engine and equipment.
Driving modes are selected using the following
control:
Pressing the control displays the modes on the
instrument panel.
When the message disappears, the selected
mode is activated and remains indicated on the
instrument panel (except NORMAL mode).
With hybrid engine
Each time the ignition is switched on, ELECTRIC
mode is selected by default.
ELECTRIC
Allows 100% electric driving. The maximum
speed is approximately 84 mph (135 km/h).
When starting the vehicle, if the conditions do not
allow the activation or retention of
ELECTRIC
mode, the message
“Electric mode currently
unavailable” is displayed in the instrument panel.
The vehicle automatically changes to HYBRID
mode.
The lighting of a blue LED under the interior
rear view mirror, visible from outside the vehicle,
confirms driving in ELECTRIC mode.
The lighting of the LED can be
deactivated by inserting the tip of a paper
clip type accessory into the hole under the
mirror
.
Conditions of activation
–
Adequate battery charge level. Charging
the vehicle after each drive is therefore
recommended.
The ELECTRIC mode is
available as long as there is power left in the
battery.
–
Exterior temperature between 0°C and 45°C.
Manually exiting the mode
–
Fully depress the accelerator pedal.
–
Select another mode.
In case of non-use of the vehicle for a
long period (several months), a restart of
the petrol engine may occur even if the
battery is charged.
HYBRID
Optimises the fuel consumption of the vehicle
by managing the alternating or simultaneous
operation of the two types of engine ,
according to road conditions and driving style.
In HYBRID mode, it is possible to drive in
100% electric mode if the battery charge level
Page 132 of 308
130
Driving
The systems cannot exceed the limits of the
laws of physics.
Driving aids
You should hold the steering wheel
with both hands, always use the interior and
exterior rear view mirrors, always keep the
feet close to the pedals and take a break
every two hours.
Manoeuvring aids
The driver must always check the
surroundings of the vehicle before and during
the whole manoeuvre, in particular using the
mirrors.
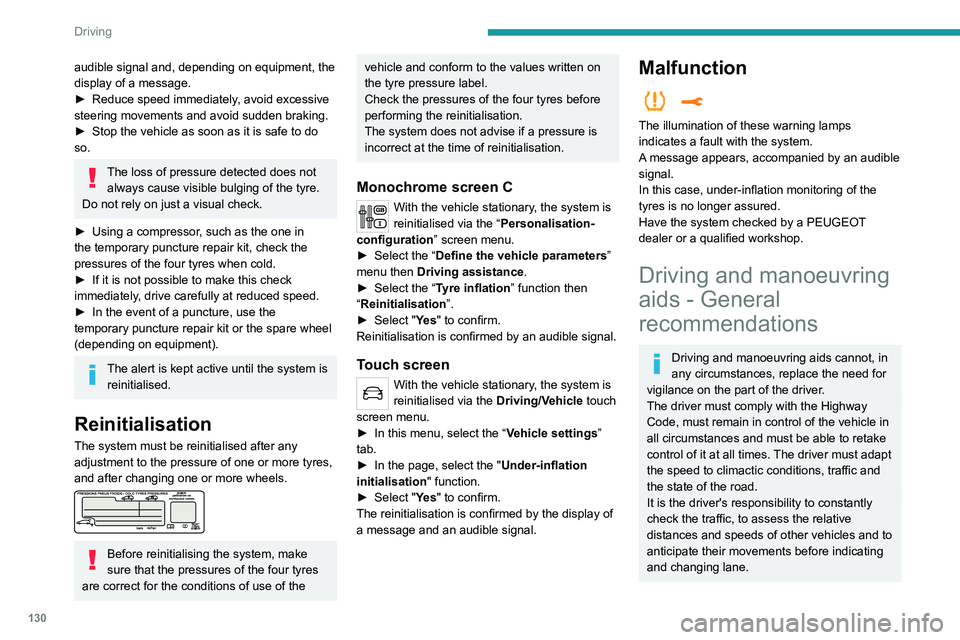
Radar
The operation of the radar as well as the
associated functions may be impaired through
the accumulation of dirt (mud, frost, etc.), in
certain difficult weather conditions (very heavy
rain, snow) or if the bumper is damaged.
If the front bumper is to be repainted, contact
a PEUGEOT dealer or a qualified workshop;
certain types of paint could interfere with the
operation of the radar.
audible signal and, depending on equipment, the
display of a message.
►
Reduce speed immediately
, avoid excessive
steering movements and avoid sudden braking.
►
Stop the vehicle as soon as it is safe to do
so.
The loss of pressure detected does not always cause visible bulging of the tyre.
Do not rely on just a visual check.
►
Using a compressor
, such as the one in
the temporary puncture repair kit, check the
pressures of the four tyres when cold.
►
If it is not possible to make this check
immediately
, drive carefully at reduced speed.
►
In the event of a puncture, use the
temporary puncture repair kit or the spare wheel
(depending on equipment).
The alert is kept active until the system is reinitialised.
Reinitialisation
The system must be reinitialised after any
adjustment to the pressure of one or more tyres,
and after changing one or more wheels.
Before reinitialising the system, make
sure that the pressures of the four tyres
are correct for the conditions of use of the
vehicle and conform to the values written on
the tyre pressure label.
Check the pressures of the four tyres before
performing the reinitialisation.
The system does not advise if a pressure is
incorrect at the time of reinitialisation.
Monochrome screen C
With the vehicle stationary, the system is
reinitialised via the “Personalisation-
configuration ” screen menu.
►
Select the “
Define the vehicle parameters ”
menu then Driving assistance.
►
Select the “
Tyre inflation ” function then
“Reinitialisation ”.
►
Select "
Ye s" to confirm.
Reinitialisation is confirmed by an audible signal.
Touch screen
With the vehicle stationary, the system is
reinitialised via the Driving/V ehicle touch
screen menu.
►
In this menu, select the “
Vehicle settings”
tab.
►
In the page, select the "
Under-inflation
initialisation
" function.
►
Select "
Ye s" to confirm.
The reinitialisation is confirmed by the display of
a message and an audible signal.
Malfunction
The illumination of these warning lamps
indicates a fault with the system.
A message appears, accompanied by an audible
signal.
In this case, under-inflation monitoring of the
tyres is no longer assured.
Have the system checked by a PEUGEOT
dealer or a qualified workshop.
Driving and manoeuvring
aids - General
recommendations
Driving and manoeuvring aids cannot, in
any circumstances, replace the need for
vigilance on the part of the driver.
The driver must comply with the Highway
Code, must remain in control of the vehicle in
all circumstances and must be able to retake
control of it at all times. The driver must adapt
the speed to climactic conditions, traffic and
the state of the road.
It is the driver's responsibility to constantly
check the traffic, to assess the relative
distances and speeds of other vehicles and to
anticipate their movements before indicating
and changing lane.
Page 133 of 308
131
Driving
6The systems cannot exceed the limits of the
laws of physics.
Driving aids
You should hold the steering wheel
with both hands, always use the interior and
exterior rear view mirrors, always keep the
feet close to the pedals and take a break
every two hours.
Manoeuvring aids
The driver must always check the
surroundings of the vehicle before and during
the whole manoeuvre, in particular using the
mirrors.
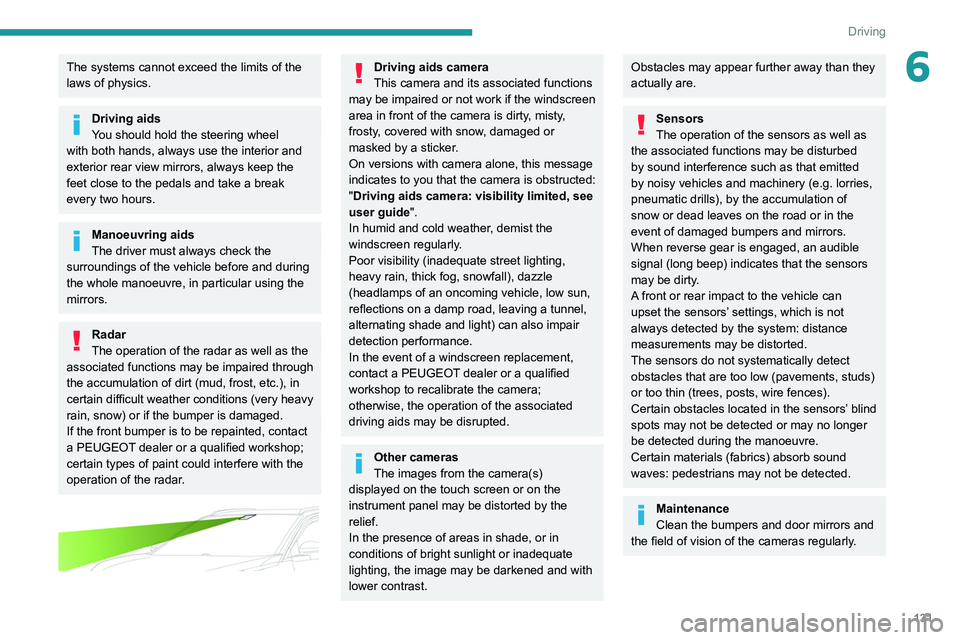
Radar
The operation of the radar as well as the
associated functions may be impaired through
the accumulation of dirt (mud, frost, etc.), in
certain difficult weather conditions (very heavy
rain, snow) or if the bumper is damaged.
If the front bumper is to be repainted, contact
a PEUGEOT dealer or a qualified workshop;
certain types of paint could interfere with the
operation of the radar.
Driving aids camera
This camera and its associated functions
may be impaired or not work if the windscreen
area in front of the camera is dirty, misty,
frosty, covered with snow, damaged or
masked by a sticker.
On versions with camera alone, this message
indicates to you that the camera is obstructed:
"Driving aids camera: visibility limited, see
user guide".
In humid and cold weather, demist the
windscreen regularly.
Poor visibility (inadequate street lighting,
heavy rain, thick fog, snowfall), dazzle
(headlamps of an oncoming vehicle, low sun,
reflections on a damp road, leaving a tunnel,
alternating shade and light) can also impair
detection performance.
In the event of a windscreen replacement,
contact a PEUGEOT dealer or a qualified
workshop to recalibrate the camera;
otherwise, the operation of the associated
driving aids may be disrupted.
Other cameras
The images from the camera(s)
displayed on the touch screen or on the
instrument panel may be distorted by the
relief.
In the presence of areas in shade, or in
conditions of bright sunlight or inadequate
lighting, the image may be darkened and with
lower contrast.
Obstacles may appear further away than they
actually are.
Sensors
The operation of the sensors as well as
the associated functions may be disturbed
by sound interference such as that emitted
by noisy vehicles and machinery (e.g. lorries,
pneumatic drills), by the accumulation of
snow or dead leaves on the road or in the
event of damaged bumpers and mirrors.
When reverse gear is engaged, an audible
signal (long beep) indicates that the sensors
may be dirty.
A front or rear impact to the vehicle can
upset the sensors’ settings, which is not
always detected by the system: distance
measurements may be distorted.
The sensors do not systematically detect
obstacles that are too low (pavements, studs)
or too thin (trees, posts, wire fences).
Certain obstacles located in the sensors’ blind
spots may not be detected or may no longer
be detected during the manoeuvre.
Certain materials (fabrics) absorb sound
waves: pedestrians may not be detected.
Maintenance
Clean the bumpers and door mirrors and
the field of vision of the cameras regularly.