2020 NISSAN ROGUE SPORT ECU
[x] Cancel search: ECUPage 129 of 492

cannot prevent it, nor can it prevent the
theft of interior or exterior vehicle com-
ponents in all situations. Always secure
your vehicle even if parking for a brief
period. Never leave your keys in the
vehicle, and always lock it when unat-
tended. Be aware of your surroundings,
and park in secure, well-lit areas when-
ever possible.
Many devices offering additional protec-
tion, such as component locks, identifica-
tion markers, and tracking systems, are
available at auto supply stores and speci-
alty shops. Your NISSAN dealer may also
offer such equipment. Check with your
insurance company to see if you may be
eligible for discounts for various theft
protection features.
SIC2045
How to arm the vehicle security
system
1. Close all windows.The system can be
armed even if the windows are open.
2. Remove the keys from the vehicle.
3. Close all doors, hood (if so equipped) and liftgate. Lock all doors. The doors
can be locked with the key fob (if so
equipped), Intelligent Key (if so
equipped), door handle request switch
(if so equipped), power door lock
switch, or mechanical key.
4. Confirm that the security indicator light stays on for about 30 seconds.
The vehicle security system is now pre-armed. The vehicle security sys-
tem will automatically shift into the
armed phase. The security light begins
to flash once every three seconds. If
during the pre-armed phase one of
the following occurs, the system will
not arm:
.Any door is unlocked with the key
fob (if so equipped), the Intelligent
Key (if so equipped), mechanical
key, or door request switch.
.Ignition switch is placed in the ONposition.
Even when the driver and/or passen-
gers are in the vehicle, the system will
activate with all the doors, hood (if so
equipped) and liftgate locked with the
ignition switch placed in the LOCK posi-
tion. When placing the ignition switch in
the ON position, the system will be
released.
Vehicle security system activation
The vehicle security system will give the
following alarm:
. The headlights blink and the horn
sounds intermittently.
. The alarm automatically turns off
after approximately 50 seconds. How-
ever, the alarm reactivates if the
vehicle is tampered with again.
The alarm is activated by:
Instruments and controls2-47
Page 131 of 492

SIC2045
Security indicator light
The security indicator light blinks when-
ever the ignition switch is placed in the
OFF or LOCK position.
This function indicates the NISSAN Vehi-
cle Immobilizer System is operational.
If the NISSAN Vehicle Immobilizer System
is malfunctioning, the light will remain on
while the ignition switch is placed in the
ON position.
If the light still remains on and/or the
engine will not start, seek service for
the NISSAN Vehicle Immobilizer System
as soon as possible. Please bring all
registered keys that you have. It isrecommended you visit a NISSAN dealer
for this service.
WARNING
In freezing temperatures the washer
solution may freeze on the wind-
shield and obscure your vision which
may lead to an accident. Warm wind-
shield with the defroster before you
wash the windshield.
CAUTION
.
Do not operate the washer con-
tinuously for more than 30 sec-
onds.
. Do not operate the washer if the
reservoir tank is empty.
. Do not fill the window washer
reservoir tank with washer fluid
concentrates at full strength.
Some methyl alcohol based
washer fluid concentrates may
permanently stain the grille if
spilled while filling the window
washer reservoir tank.
. Pre-mix washer fluid concen-
trates with water to the manu-
facturer’s recommended levels
before pouring the fluid into the
window washer reservoir tank. Do
Instruments and controls2-49
WIPER AND WASHER SWITCH
Page 150 of 492

2-68Instruments and controls
may cause the luggage board to
be tilted, resulting in personal
injury.
. Do not handle the luggage board
forcibly as this may deform it.
. While in the upper position, do
not recline the seatbacks.
. Do not place cargo higher than
the seatbacks. In a sudden stop
or collision, unsecured cargo
could cause personal injury.
NOTE:
The diversity of the cargo area may be
restricted depending on the equipment
of each vehicle.
JVI1620X
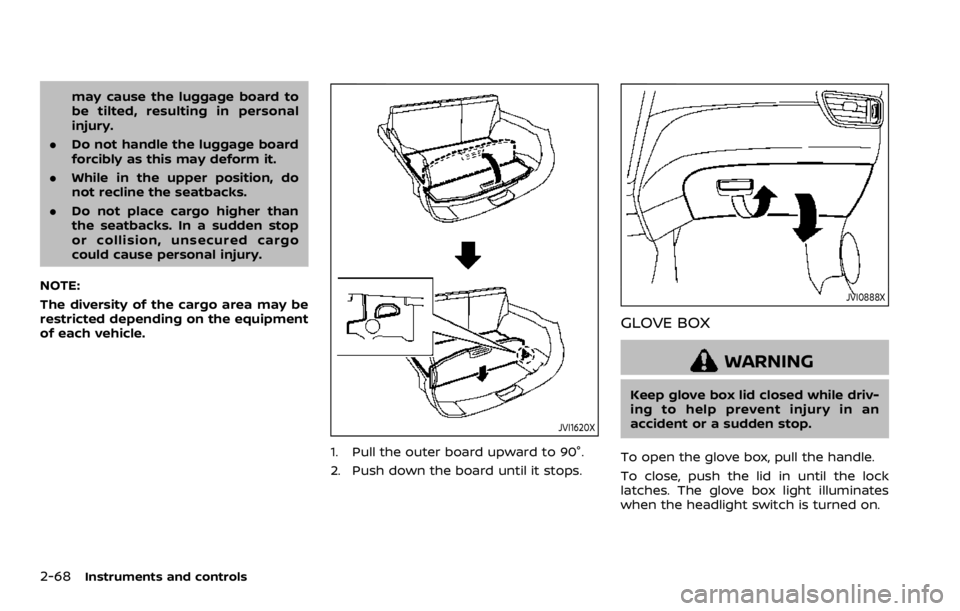
1. Pull the outer board upward to 90°.
2. Push down the board until it stops.
JVI0888X
GLOVE BOX
WARNING
Keep glove box lid closed while driv-
ing to help prevent injury in an
accident or a sudden stop.
To open the glove box, pull the handle.
To close, push the lid in until the lock
latches. The glove box light illuminates
when the headlight switch is turned on.
Page 152 of 492

2-70Instruments and controls
SIC4348
CARD HOLDER (driver’s side)
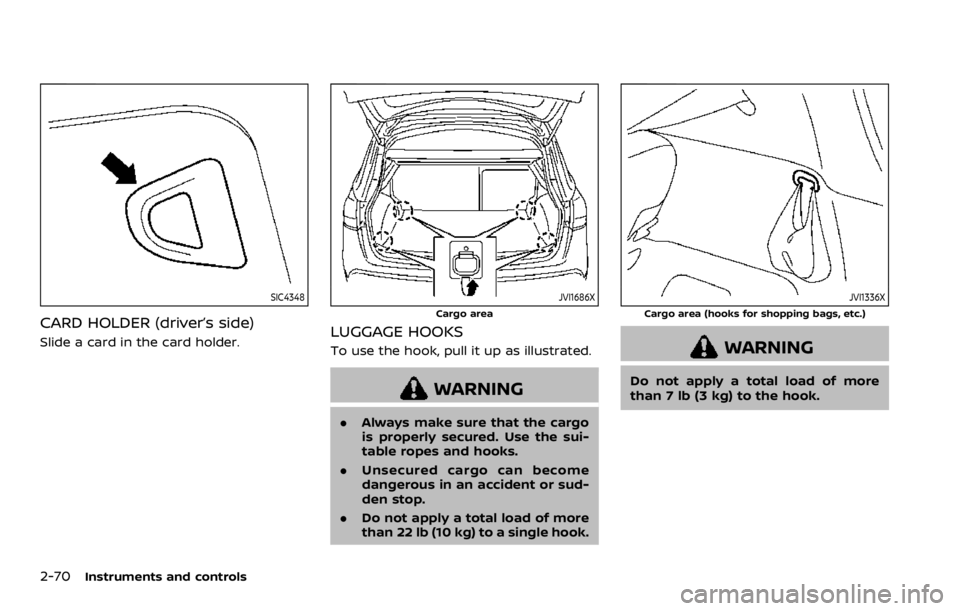
Slide a card in the card holder.
JVI1686X
Cargo area
LUGGAGE HOOKS
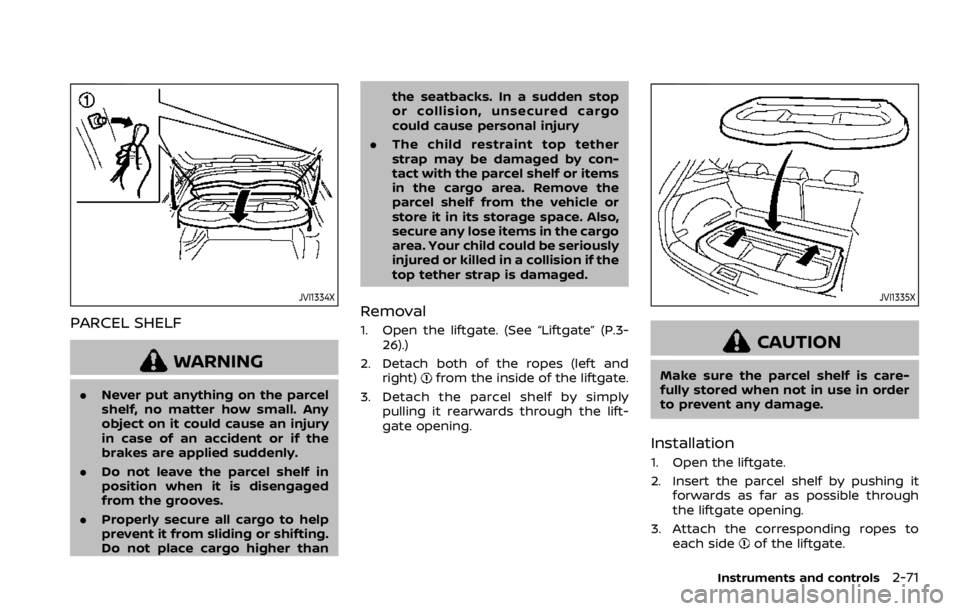
To use the hook, pull it up as illustrated.
WARNING
.Always make sure that the cargo
is properly secured. Use the sui-
table ropes and hooks.
. Unsecured cargo can become
dangerous in an accident or sud-
den stop.
. Do not apply a total load of more
than 22 lb (10 kg) to a single hook.
JVI1336X
Cargo area (hooks for shopping bags, etc.)
WARNING
Do not apply a total load of more
than 7 lb (3 kg) to the hook.
Page 153 of 492

JVI1334X
PARCEL SHELF
WARNING
.Never put anything on the parcel
shelf, no matter how small. Any
object on it could cause an injury
in case of an accident or if the
brakes are applied suddenly.
. Do not leave the parcel shelf in
position when it is disengaged
from the grooves.
. Properly secure all cargo to help
prevent it from sliding or shifting.
Do not place cargo higher than the seatbacks. In a sudden stop
or collision, unsecured cargo
could cause personal injury
. The child restraint top tether
strap may be damaged by con-
tact with the parcel shelf or items
in the cargo area. Remove the
parcel shelf from the vehicle or
store it in its storage space. Also,
secure any lose items in the cargo
area. Your child could be seriously
injured or killed in a collision if the
top tether strap is damaged.
Removal
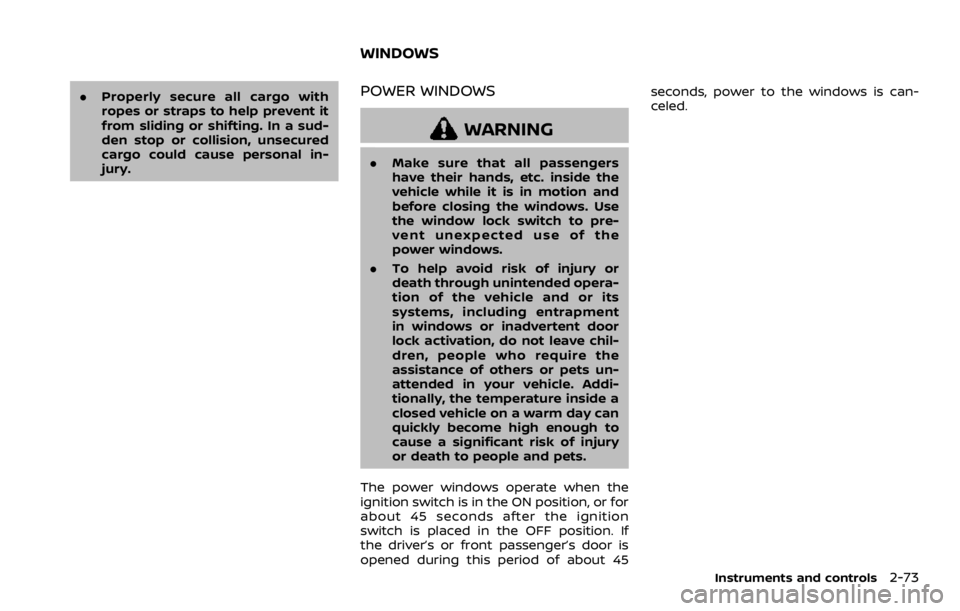
1. Open the liftgate. (See “Liftgate” (P.3-
26).)
2. Detach both of the ropes (left and right)
from the inside of the liftgate.
3. Detach the parcel shelf by simply pulling it rearwards through the lift-
gate opening.
JVI1335X
CAUTION
Make sure the parcel shelf is care-
fully stored when not in use in order
to prevent any damage.
Installation
1. Open the liftgate.
2. Insert the parcel shelf by pushing itforwards as far as possible through
the liftgate opening.
3. Attach the corresponding ropes to each side
of the liftgate.
Instruments and controls2-71
Page 155 of 492

.Properly secure all cargo with
ropes or straps to help prevent it
from sliding or shifting. In a sud-
den stop or collision, unsecured
cargo could cause personal in-
jury.POWER WINDOWS
WARNING
.Make sure that all passengers
have their hands, etc. inside the
vehicle while it is in motion and
before closing the windows. Use
the window lock switch to pre-
vent unexpected use of the
power windows.
. To help avoid risk of injury or
death through unintended opera-
tion of the vehicle and or its
systems, including entrapment
in windows or inadvertent door
lock activation, do not leave chil-
dren, people who require the
assistance of others or pets un-
attended in your vehicle. Addi-
tionally, the temperature inside a
closed vehicle on a warm day can
quickly become high enough to
cause a significant risk of injury
or death to people and pets.
The power windows operate when the
ignition switch is in the ON position, or for
about 45 seconds after the ignition
switch is placed in the OFF position. If
the driver’s or front passenger’s door is
opened during this period of about 45 seconds, power to the windows is can-
celed.
Instruments and controls2-73
WINDOWS
Page 162 of 492

2-80Instruments and controls
SIC3869
VANITY MIRROR LIGHT (if so
equipped)
The light on the vanity mirror will turn on
when the cover on the vanity mirror is
opened.
When the cover is closed, the light will
turn off.
The lights will also turn off after a
period of time when the lights remain
illuminated to prevent the battery from
becoming discharged.
CARGO LIGHT
The cargo lights illuminate when the
liftgate is opened. When the liftgate is
closed, the lights will turn off.
The light will also turn off after a period
of time when the light remains illumi-
nated after the ignition switch has been
pushed to the OFF position to prevent
the battery from becoming discharged.
The HomeLink® Universal Transceiver
provides a convenient way to consolidate
the functions of up to three individual
hand-held transmitters into one built-in
device.
HomeLink® Universal Transceiver:
.Will operate most Radio Frequency
(RF) devices such as garage doors,
gates, home and office lighting, entry
door locks and security systems.
. Is powered by your vehicle’s battery.
No separate batteries are required. If
the vehicle’s battery is discharged or is
disconnected, HomeLink® will retain
all programming.
When the HomeLink® Universal Trans-
ceiver is programmed, retain the origi-
nal transmitter for future programming
procedures (Example: new vehicle pur-
chases). Upon sale of the vehicle, the
programmed HomeLink® Universal
Transceiver buttons should be erased
for security purposes. For additional
information, refer to “Programming
HomeLink®” (P.2-81).
WARNING
. Do not use the HomeLink® Uni-
versal Transceiver with any gar-
age door opener that lacks safety
HomeLink® UNIVERSAL
TRANSCEIVER (if so equipped)
Page 163 of 492

stop and reverse features as re-
quired by federal safety stan-
dards. (These standards became
effective for opener models man-
ufactured after April 1, 1982.) A
garage door opener which cannot
detect an object in the path of a
closing garage door and then
automatically stop and reverse,
does not meet current federal
safety standards. Using a garage
door opener without these fea-
tures increases the risk of serious
injury or death.
. During the programming proce-
dure your garage door or security
gate will open and close (if the
transmitter is within range). Make
sure that people or objects are
clear of the garage door, gate,
etc. that you are programming.
. Your vehicle’s engine should be
turned off while programming
the HomeLink® Universal Trans-
ceiver. Do not breathe exhaust
gases; they contain colorless
and odorless carbon monoxide.
Carbon monoxide is dangerous. It
can cause unconsciousness or
death.PROGRAMMING HomeLink®
The following steps show generic instruc-
tions how to program a HomeLink®
button. If you have any questions or are
having difficulty programming your
HomeLink® buttons, refer to the
HomeLink® web site at: www.homelink.
com/nissan or call 1-800-355-3515.
NOTE:
It is also recommended that a new
battery be placed in the hand-held
transmitter of the device being pro-
grammed to HomeLink® for quicker
programming and accurate transmis-
sion of the radio-frequency.
1. Position the end of your hand-held
transmitter 1-3 in (26-76 mm) away
from the HomeLink® surface, keeping
the HomeLink® indicator light
in
view.
JVI0428X
2. Using both hands, simultaneously
press and hold the desired HomeLink®
button and handheld transmitter but-
ton. DO NOT release until the
HomeLink® indicator light
flashes
slowly and then rapidly. When the
indicator light flashes rapidly, both
buttons may be released. (The rapid
flashing indicates successful pro-
gramming.)
NOTE:
Some devices to be programmed
may require you to replace Step 2
with the cycling procedure noted in
the “Programming HomeLink® for
Canadian customers and gate open-
ers” (P.2-82).
Instruments and controls2-81