2020 NISSAN ROGUE SPORT warning light
[x] Cancel search: warning lightPage 378 of 492
6-2In case of emergency
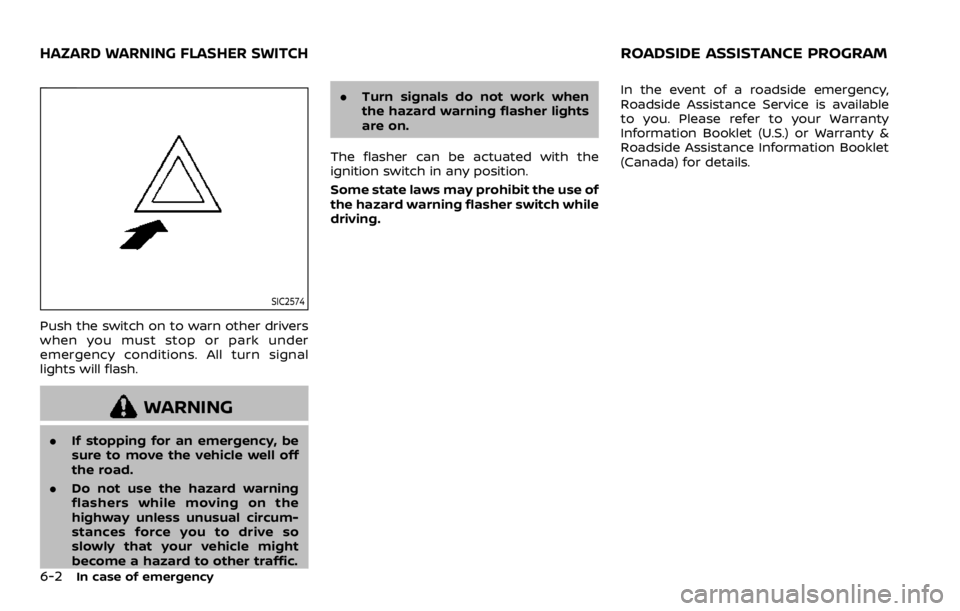
SIC2574
Push the switch on to warn other drivers
when you must stop or park under
emergency conditions. All turn signal
lights will flash.
WARNING
.If stopping for an emergency, be
sure to move the vehicle well off
the road.
. Do not use the hazard warning
flashers while moving on the
highway unless unusual circum-
stances force you to drive so
slowly that your vehicle might
become a hazard to other traffic. .
Turn signals do not work when
the hazard warning flasher lights
are on.
The flasher can be actuated with the
ignition switch in any position.
Some state laws may prohibit the use of
the hazard warning flasher switch while
driving. In the event of a roadside emergency,
Roadside Assistance Service is available
to you. Please refer to your Warranty
Information Booklet (U.S.) or Warranty &
Roadside Assistance Information Booklet
(Canada) for details.
HAZARD WARNING FLASHER SWITCHROADSIDE ASSISTANCE PROGRAM
Page 379 of 492
To shut off the engine in an emergency
situation while driving, perform the fol-
lowing procedure:
.Rapidly push the push-button ignition
switch 3 consecutive times in less
than 1.5 seconds, or
. Push and hold the push-button igni-
tion switch for more than 2 seconds.TIRE PRESSURE MONITORING SYS-
TEM (TPMS)
This vehicle is equipped with the Tire
Pressure Monitoring System (TPMS). It
monitors tire pressure of all tires except
the spare (if so equipped). When the low
tire pressure warning light is lit, and the
“Tire Pressure Low - Add Air” warning
message is displayed in the vehicle in-
formation display, one or more of your
tires is significantly under-inflated. If the
vehicle is being driven with low tire
pressure, the TPMS will activate and warn
you of it by the low tire pressure warning
light. This system will activate only when
the vehicle is driven at speeds above 16
MPH (25 km/h). For more details, see
“Warning lights, indicator lights and audi-
ble reminders” (P.2-10) and “Tire Pressure
Monitoring System (TPMS)” (P.5-5).
WARNING
.If the low tire pressure warning
light illuminates while driving,
avoid sudden steering maneu-
vers or abrupt braking, reduce
vehicle speed, pull off the road
to a safe location and stop the
vehicle as soon as possible. Driv-
ing with under-inflated tires may
permanently damage the tires and increase the likelihood of tire
failure. Serious vehicle damage
could occur and may lead to an
accident and could result in ser-
ious personal injury. Check the
tire pressure for all four tires.
Adjust the tire pressure to the
recommended COLD tire pressure
shown on the Tire and Loading
Information label to turn the low
tire pressure warning light OFF. If
the light still illuminates while
driving after adjusting the tire
pressure, a tire may be flat. If
you have a flat tire, replace it with
a spare tire (if so equipped) or
repair it using the emergency tire
puncture repair kit (if so
equipped) as soon as possible.
. Since the spare tire (if so
equipped) is not equipped with
the TPMS, when a spare tire is
mounted or a wheel is replaced,
the TPMS will not function and
the low tire pressure warning
light will flash for approximately
1 minute. The light will remain on
after 1 minute. Have your tires
replaced and/or TPMS system
reset as soon as possible. It is
recommended you visit a NISSAN
dealer for these services.
In case of emergency6-3
EMERGENCY ENGINE SHUT OFF (models
with push-button ignition switch)FLAT TIRE
Page 387 of 492
contact a NISSAN dealer about obtain-
ing these parts. See “Changing a flat tire
(models with spare tire)” (P.6-4) for
usage of jacking tools and tire replace-
ment.
Before using emergency tire punc-
ture repair kit
.If any foreign object (for example, a
screw or nail) is embedded in the tire,
do not remove it.
. Check the expiration date of the
sealant (shown on the label attached
to the bottle). Never use a sealant
whose expiration date has passed.
Repairing tire
WARNING
Observe the following precautions
when using the emergency tire
puncture repair kit.
.Swallowing the compound is
dangerous. Immediately drink as
much water as possible and seek
prompt medical assistance.
. Rinse well with lots of water if the
compound comes into contact
with skin or eyes. If irritation
persists, seek prompt medical
attention.
. Keep the repair compound out of
the reach of children.
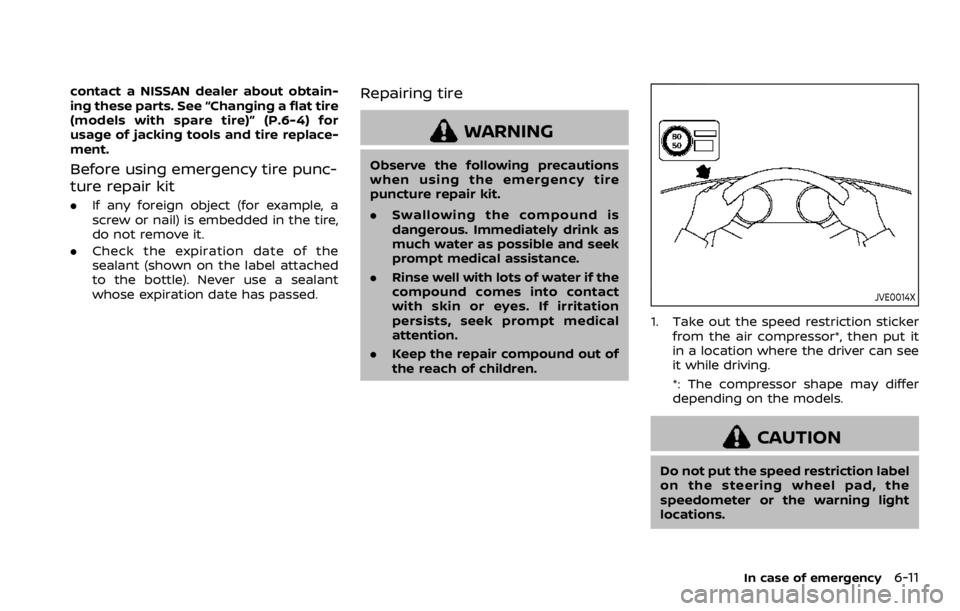
JVE0014X
1. Take out the speed restriction sticker
from the air compressor*, then put it
in a location where the driver can see
it while driving.
*: The compressor shape may differ
depending on the models.
CAUTION
Do not put the speed restriction label
on the steering wheel pad, the
speedometer or the warning light
locations.
In case of emergency6-11
Page 391 of 492
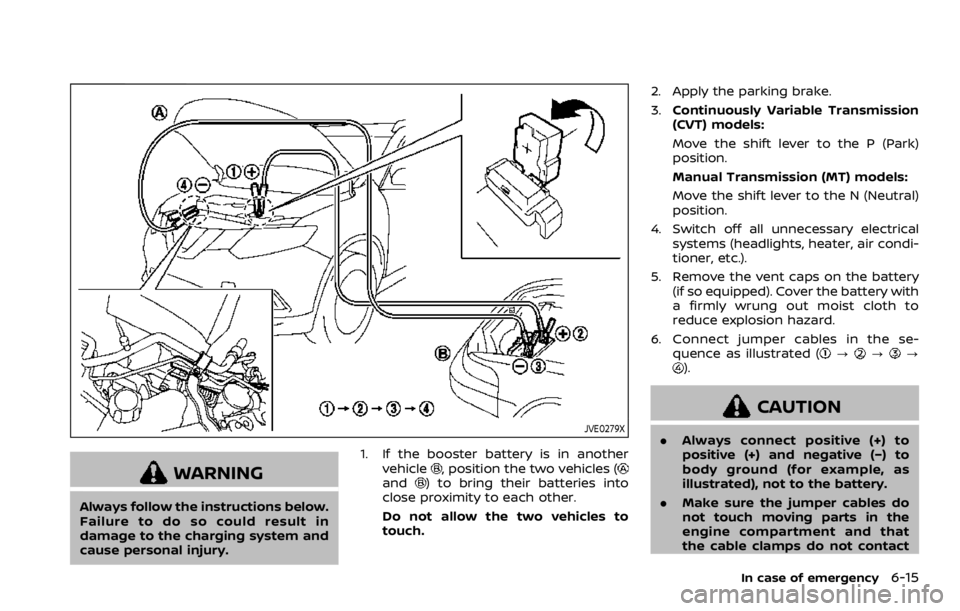
JVE0279X
WARNING
Always follow the instructions below.
Failure to do so could result in
damage to the charging system and
cause personal injury.1. If the booster battery is in another
vehicle
, position the two vehicles (and) to bring their batteries into
close proximity to each other.
Do not allow the two vehicles to
touch. 2. Apply the parking brake.
3.
Continuously Variable Transmission
(CVT) models:
Move the shift lever to the P (Park)
position.
Manual Transmission (MT) models:
Move the shift lever to the N (Neutral)
position.
4. Switch off all unnecessary electrical systems (headlights, heater, air condi-
tioner, etc.).
5. Remove the vent caps on the battery (if so equipped). Cover the battery with
a firmly wrung out moist cloth to
reduce explosion hazard.
6. Connect jumper cables in the se- quence as illustrated (
???).
CAUTION
.Always connect positive (+) to
positive (+) and negative (−) to
body ground (for example, as
illustrated), not to the battery.
. Make sure the jumper cables do
not touch moving parts in the
engine compartment and that
the cable clamps do not contact
In case of emergency6-15
Page 402 of 492
7-4Appearance and care
CHROME PARTS
Clean chrome parts regularly with a non-
abrasive chrome polish to maintain the
finish.
TIRE DRESSING
NISSAN does not recommend the use of
tire dressings. Tire manufacturers apply a
coating to the tires to help reduce dis-
coloration of the rubber. If a tire dressing
is applied to the tires, it may react with
the coating and form a compound. This
compound may come off the tire while
driving and stain the vehicle paint.
If you choose to use a tire dressing, take
the following precautions:
.Use a water-based tire dressing. The
coating on the tire dissolves more
easily with an oil-based tire dressing.
. Apply a light coat of tire dressing to
help prevent it from entering the tire
tread/grooves (where it would be
difficult to remove).
. Wipe off excess tire dressing using a
dry towel. Make sure the tire dressing
is completely removed from the tire
tread/grooves.
. Allow the tire dressing to dry as
recommended by tire dressing manu-
facturer.
Occasionally remove loose dust from the
interior trim, plastic parts and seats using
a vacuum cleaner or soft bristled brush.
Wipe the vinyl and leather surfaces with a
clean, soft cloth dampened in mild soap
solution, then wipe clean with a dry soft
cloth.
Regular care and cleaning is required in
order to maintain the appearance of the
leather.
Before using any fabric protector, read
the manufacturer’s recommendations.
Some fabric protectors contain chemicals
that may stain or bleach the seat materi-
al.
Use a cloth dampened only with water, to
clean the meter and gauge lens.
WARNING
Do not use water or acidic cleaners
(hot steam cleaners) on the seat. This
can damage the seat or occupant
classification sensors. This can also
affect the operation of the air bag
system and result in serious perso-
nal injury.
CAUTION
.Never use benzine, thinner, or any
similar material.
. For cleaning, use a soft cloth,
dampened with water. Never use
a rough cloth, alcohol, benzine,
thinner or any kind of solvent or
paper towel with a chemical
cleaning agent. They will scratch
or cause discoloration to the lens.
. Do not spray any liquid such as
water on the meter lens. Spraying
liquid may cause the system to
malfunction.
. Small dirt particles can be abra-
sive and damaging to the leather
surfaces and should be removed
promptly. Do not use saddle soap,
car waxes, polishes, oils, cleaning
fluids, solvents, detergents or
ammonia-based cleaners as they
may damage the leather’s natural
finish.
. Never use fabric protectors un-
less recommended by the manu-
facturer.
. Do not use glass or plastic cleaner
on meter or gauge lens covers. It
CLEANING INTERIOR
Page 407 of 492

8 Do-it-yourself
Maintenance precautions ...................................................... 8-2
Engine compartment check locations ........................ 8-3MR20DD engine model ..................................................... 8-4
Engine cooling system ............................................................. 8-4 Checking engine coolant level .................................... 8-5
Changing engine coolant ................................................ 8-6
Engine oil ........................................................................\
..................... 8-6 Checking engine oil level ................................................. 8-6
Changing engine oil and filter ..................................... 8-6
Continuously Variable Transmission (CVT)
fluid ........................................................................\
.................................. 8-9
Brake and clutch (if so equipped) fluid ....................... 8-9
Window washer fluid .............................................................. 8-10
Battery ........................................................................\
........................ 8-11 Jump starting ........................................................................\
. 8-12
Variable voltage control system ................................... 8-13
Drive belt ........................................................................\
.................. 8-13
Spark plugs ........................................................................\
............. 8-14 Replacing spark plugs ..................................................... 8-14
Air cleaner ........................................................................\
............... 8-15
Air duct removal .................................................................. 8-15
Air cleaner filter replacement ................................... 8-15 Windshield wiper blades ..................................................... 8-16
Cleaning ........................................................................\
........... 8-16
Replacing ........................................................................\
........ 8-16
Rear window wiper blade .................................................. 8-17
Brakes ........................................................................\
........................ 8-17 Self-adjusting brakes ..................................................... 8-17
Brake pad wear warning ............................................ 8-17
Fuses ........................................................................\
........................... 8-18 Engine compartment .................................................... 8-18
Passenger compartment ........................................... 8-20
Key fob battery replacement .......................................... 8-21
Intelligent Key battery replacement .......................... 8-23
Lights ........................................................................\
.......................... 8-25 Headlights ........................................................................\
...... 8-25
Exterior and interior lights ........................................ 8-27
Wheels and tires ........................................................................\
8-29
Tire pressure ........................................................................\
8-29
Tire labeling ........................................................................\
.. 8-33
Types of tires ....................................................................... 8-35
Tire chains ........................................................................\
...... 8-36
Changing wheels and tires ...................................... 8-37
Page 416 of 492
8-10Do-it-yourself
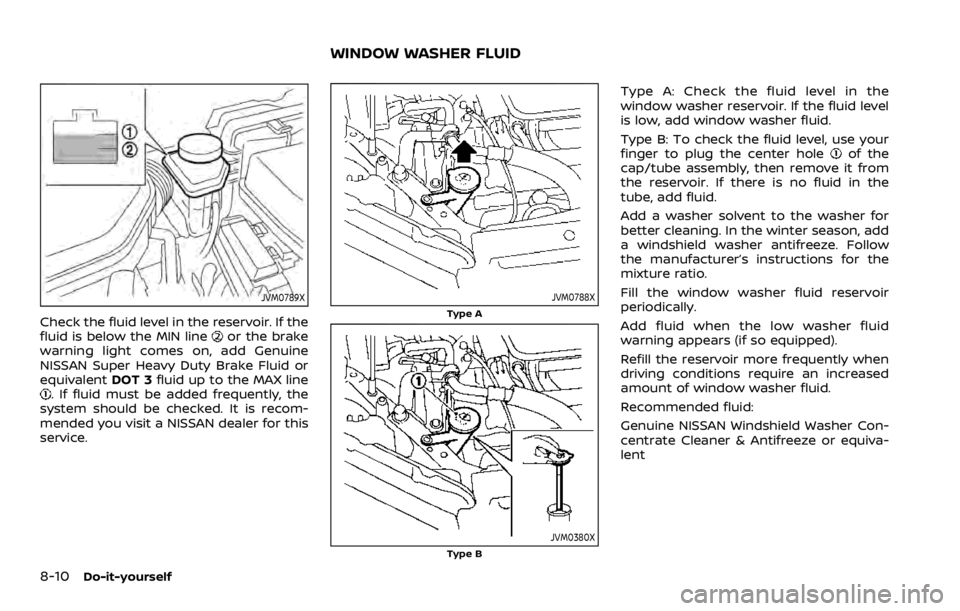
JVM0789X
Check the fluid level in the reservoir. If the
fluid is below the MIN lineor the brake
warning light comes on, add Genuine
NISSAN Super Heavy Duty Brake Fluid or
equivalent DOT 3fluid up to the MAX line
. If fluid must be added frequently, the
system should be checked. It is recom-
mended you visit a NISSAN dealer for this
service.
JVM0788X
Type A
JVM0380XType B
Type A: Check the fluid level in the
window washer reservoir. If the fluid level
is low, add window washer fluid.
Type B: To check the fluid level, use your
finger to plug the center hole
of the
cap/tube assembly, then remove it from
the reservoir. If there is no fluid in the
tube, add fluid.
Add a washer solvent to the washer for
better cleaning. In the winter season, add
a windshield washer antifreeze. Follow
the manufacturer’s instructions for the
mixture ratio.
Fill the window washer fluid reservoir
periodically.
Add fluid when the low washer fluid
warning appears (if so equipped).
Refill the reservoir more frequently when
driving conditions require an increased
amount of window washer fluid.
Recommended fluid:
Genuine NISSAN Windshield Washer Con-
centrate Cleaner & Antifreeze or equiva-
lent
WINDOW WASHER FLUID
Page 424 of 492
8-18Do-it-yourself
occasional brake squeak, squeal or other
noise may be heard. Occasional brake
noise during light to moderate stops is
normal and does not affect the function
or performance of the brake system.
Proper brake inspection intervals
should be followed.For additional infor-
mation, see the maintenance schedule
shown in the “9. Maintenance and sche-
dules” section.
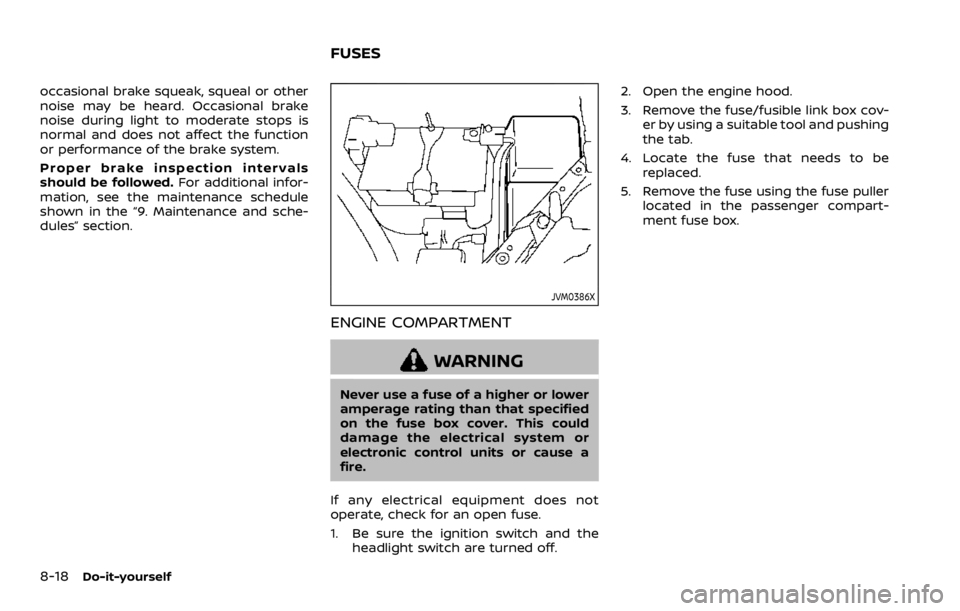
JVM0386X
ENGINE COMPARTMENT
WARNING
Never use a fuse of a higher or lower
amperage rating than that specified
on the fuse box cover. This could
damage the electrical system or
electronic control units or cause a
fire.
If any electrical equipment does not
operate, check for an open fuse.
1. Be sure the ignition switch and the headlight switch are turned off. 2. Open the engine hood.
3. Remove the fuse/fusible link box cov-
er by using a suitable tool and pushing
the tab.
4. Locate the fuse that needs to be replaced.
5. Remove the fuse using the fuse puller located in the passenger compart-
ment fuse box.
FUSES